2016 VOLVO S80 service
[x] Cancel search: servicePage 259 of 380
08 Starting and driving
08
257
Parking brake – symbols and messages
A text message can be erased by pressing briefly on the OK button on the turn signal
lever.
Symbol and messages in the instrument panel
SymbolMessageDescription/action
"Message"Read the message in the information display
A flashing symbol indicates that the parking brake is being applied. If the symbol flashes in any other situation then this means that a fault has arisen. Read the message on the information display.
-Park brake not fully releasedA fault is preventing the parking brake from being released. Try to apply the parking brake and release it sev- eral times. If the problem persists, contact an authorized Volvo workshop. If you drive off with this error mes-sage showing, a warning signal sounds.
-Parking brake not appliedA fault is preventing the parking brake from being applied. Try to apply the parking brake and release it several times. If the problem persists, contact an authorized Volvo workshop. If you drive off with this error messageshowing, a warning signal sounds.
-Parking brake Service requiredA fault has occurred. Try to apply and release. Contact a Volvo workshop if the fault remains
WARNING
If the vehicle must be parked before the fault has been corrected, always put thegear selector in P and turn the wheels so
that they point away from the curb if thevehicle is pointing uphill or toward the curbif it is pointing downhill.
Related information
• Parking brake – general information (p. 254)
• Parking brake – applying (p. 254)
• Parking brake – releasing (p. 255)
• Brakes – general (p. 250)
Page 260 of 380

08 Starting and driving
08
258
Driving through water
The vehicle should be driven with extreme caution if it is necessary to drive throughstanding water. The vehicle can be driven through water up to a depth of approximately 10 in. (25 cm) atwalking speed to help prevent water fromentering the differential and the transmission.This reduces the oil's lubricating capacity andmay shorten the service life of these compo-nents.
• Take particular care when driving through flowing water.
• Clean the electrical connections for trailerwiring after driving in mud or water.
• When driving through water, maintain lowspeed and do not stop in the water.WARNING
• Avoid driving through standing or rushing water. Doing so can be dan-gerous and it may also be difficult todetermine the actual depth of thewater.
• If water cannot be avoided, after driv-ing through the water, press lightly onthe brake pedal to ensure that thebrakes are functioning normally. Wateror mud can make the brake liningsslippery, resulting in delayed brakingeffect.
CAUTION
•
Engine damage will occur if water is drawn into the air cleaner.
• If the vehicle is driven through waterdeeper than 10 in (25 cm), water mayenter the differential and the transmis-sion. This reduces the oil's lubricatingcapacity and may shorten the servicelife of these components.
• Damage to any components, theengine, transmission, turbo-charger,differential or its internal componentscaused by flooding, vapor lock orinsufficient oil is not covered underwarranty.
• Do not allow the vehicle to stand inwater up to the door sills longer thanabsolutely necessary. This could resultin electrical malfunctions.
• If the engine has been stopped whilethe vehicle is in water, do not attemptto restart it. Have the vehicle towedout of the water.
Related information
•
Towing the vehicle (p. 269)
• Towing by tow truck (p. 271)
Page 261 of 380

08 Starting and driving
08
}}
259
Engine and cooling system
Under special conditions, for example when driving in hilly terrain, extreme heat or withheavy loads, there is a risk that the engine andcooling system will overheat. Proceed as follows to avoid overheating the engine. •Maintain a low speed when driving with a trailer up long, steep hills. For informa-tion, see Towing a trailer (p. 267)
• Do not turn the engine off immediatelywhen stopping after a hard drive.
WARNING
The cooling fan may start or continue to operate (for up to 6 minutes) after theengine has been switched off.
•
Remove any auxiliary lights from in front of the grille when driving in hot weatherconditions.
• Do not exceed engine speeds of4500 rpm if driving with a trailer in hillyterrain. The oil temperature could becometoo high.
Conserving electrical current
Keep the following in mind to help minimize battery drain:
• When the engine is not running, avoid using ignition mode
II. Many electrical
systems (the audio system, the optionalnavigation system, power windows, etc)will function in ignition modes 0 and I.
These modes reduce drain on the battery.
• Please keep in mind that using systems,accessories, etc., that consume a greatdeal of current when the engine is notrunning could result in the battery beingcompletely drained. Driving or having theengine running for approximately15 minutes will help keep the batterycharged.
• The optional 12-volt socket in thetrunk (p. 135) area provides electrical cur-rent even with the ignition switched off,which drains the battery.
Before a long distance trip
It is always worthwhile to have your vehicle checked by a trained and qualified Volvo serv-ice technician before driving long distances.Your retailer will also be able to supply youwith bulbs, fuses, spark plugs and wiperblades for your use in the event that problemsoccur. As a minimum, the following items should be checked before any long trip:
• Check that engine runs smoothly and that fuel consumption is normal.
• Check for fuel, oil, and fluid leakage.
• Have the transmission oil level (p. 362)checked.
• Check condition of drive belts.
• Check state of the battery's charge.
• Examine tires carefully (the spare tire aswell), and replace those that areworn (p. 275). Check tire pres-sure (p. 282).
• The brakes, front wheel alignment, andsteering gear should be checked by atrained and qualified Volvo service techni-cian only.
• Check all lights, including high beams.
• Reflective warning triangles are legallyrequired in some states/provinces.
• Have a word with a trained and qualifiedVolvo service technician if you intend to
Page 263 of 380

08 Starting and driving
08
261
Refueling – fuel requirements
Volvo recommends the use of detergent gas- oline to control engine deposits.
Deposit control gasoline (detergentadditives)
Detergent gasoline is effective in keepinginjectors and intake valves clean. Consistentuse of deposit control gasolines will helpensure good drivability and fuel economy. Ifyou are not sure whether the gasoline con-tains deposit control additives, check with theservice station operator.
NOTE
Volvo does not recommend the use of external fuel injector cleaning systems.
Unleaded fuelEach Volvo has a three-way catalytic con- verter and must use only unleaded gasoline.U.S. and Canadian regulations require thatpumps delivering unleaded gasoline belabeled "UNLEADED". Only these pumpshave nozzles which fit your vehicle's fillerinlet. It is unlawful to dispense leaded fuelinto a vehicle labeled "unleaded gasolineonly". Leaded gasoline damages the three-way catalytic converter and the heated oxy-gen sensor system. Repeated use of leadedgasoline will lessen the effectiveness of theemission control system (p. 265) and could result in loss of emission warranty coverage.State and local vehicle inspection programswill make detection of misfueling easier, pos-sibly resulting in emission test failure for mis-fueled vehicles.
NOTE
Some U.S. and Canadian gasolines con- tain an octane enhancing additive calledmethyl-cyclopentadienyl manganese tri-carbonyl (MMT). If such fuels are used,your Emission Control System perform-ance may be affected, and the CheckEngine Light (malfunction indicator light)located on your instrument panel maylight. If this occurs, please return yourvehicle to a trained and qualified Volvoservice technician for service.
Gasoline containing alcohol and ethers, "Oxygenated fuels"
Some fuel suppliers sell gasoline containing "oxygenates" which are usually alcohols orethers. In some areas, state or local lawsrequire that the service pump be marked indi-cating use of alcohols or ethers. However,there are areas in which the pumps areunmarked. If you are not sure whether there isalcohol or ethers in the gasoline you buy,check with the service station operator. Tomeet seasonal air quality standards, someareas require the use of "oxygenated" fuel.
Volvo allows the use of the following "oxy-genated" fuels; however, the octane rat-ings (p. 262) listed must still be met.
Alcohol – EthanolFuels containing up to 10% ethanol by vol- ume may be used. Ethanol may also be refer-red to as Ethyl alcohol, or "Gasohol". Ethers – MTBE: Fuels containing up to 15% MTBE may be used.
MethanolDo not use gasolines containing methanol(methyl alcohol, wood alcohol). This practicecan result in vehicle performance deteriora-tion and can damage critical parts in the fuelsystem. Such damage may not be coveredunder the New Vehicle Limited Warranty.
Page 265 of 380
08 Starting and driving
08
}}
263
WARNING
Never carry a cell phone that is switched
on while refueling your vehicle. If the
phone rings, this may cause a spark that could ignite gasoline fumes, resulting infire and injury.
WARNING
Carbon monoxide is a poisonous, color- less, and odorless gas. It is present in allexhaust gases. If you ever smell exhaustfumes inside the vehicle, make sure thepassenger compartment is ventilated, andimmediately return the vehicle to a trainedand qualified Volvo service technician forcorrection.
Related information
• Refueling – fuel requirements (p. 261)
Refueling – opening/closing fuel filler door
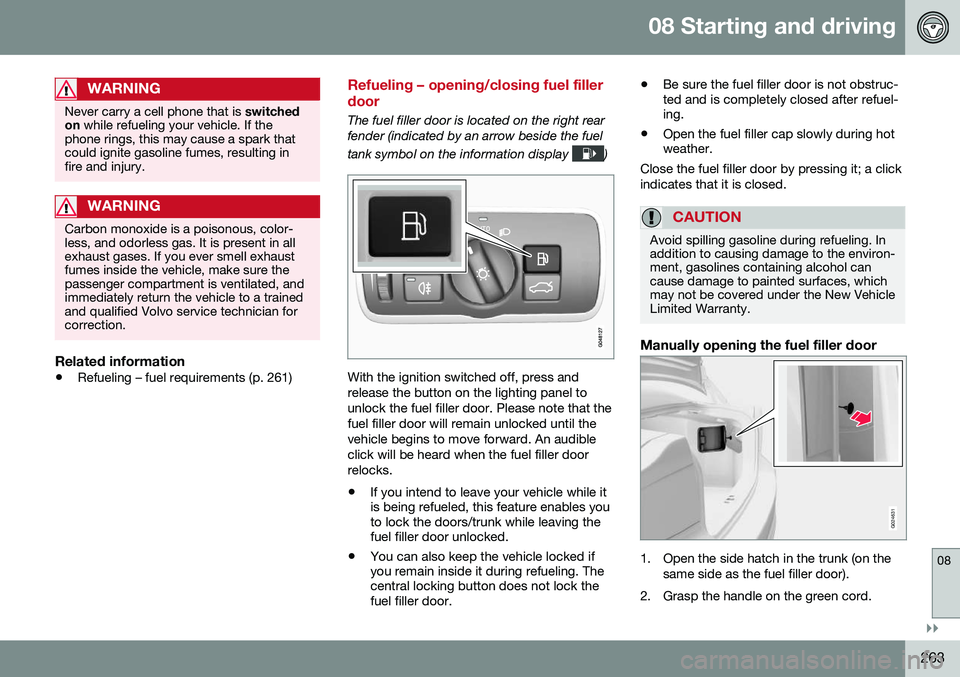
The fuel filler door is located on the right rear fender (indicated by an arrow beside the fuel tank symbol on the information display
)
With the ignition switched off, press and release the button on the lighting panel tounlock the fuel filler door. Please note that thefuel filler door will remain unlocked until thevehicle begins to move forward. An audibleclick will be heard when the fuel filler doorrelocks. •If you intend to leave your vehicle while it is being refueled, this feature enables youto lock the doors/trunk while leaving thefuel filler door unlocked.
• You can also keep the vehicle locked ifyou remain inside it during refueling. Thecentral locking button does not lock thefuel filler door. •
Be sure the fuel filler door is not obstruc-ted and is completely closed after refuel-ing.
• Open the fuel filler cap slowly during hotweather.
Close the fuel filler door by pressing it; a click indicates that it is closed.
CAUTION
Avoid spilling gasoline during refueling. In addition to causing damage to the environ-ment, gasolines containing alcohol cancause damage to painted surfaces, whichmay not be covered under the New VehicleLimited Warranty.
Manually opening the fuel filler door
G024631
1. Open the side hatch in the trunk (on the same side as the fuel filler door).
2. Grasp the handle on the green cord.
Page 276 of 380
09 Wheels and tires
09
274
Tires – storage and age
When storing complete wheels (tires mounted on rims), they should be suspended off thefloor or placed on their sides on the floor.
New Tires
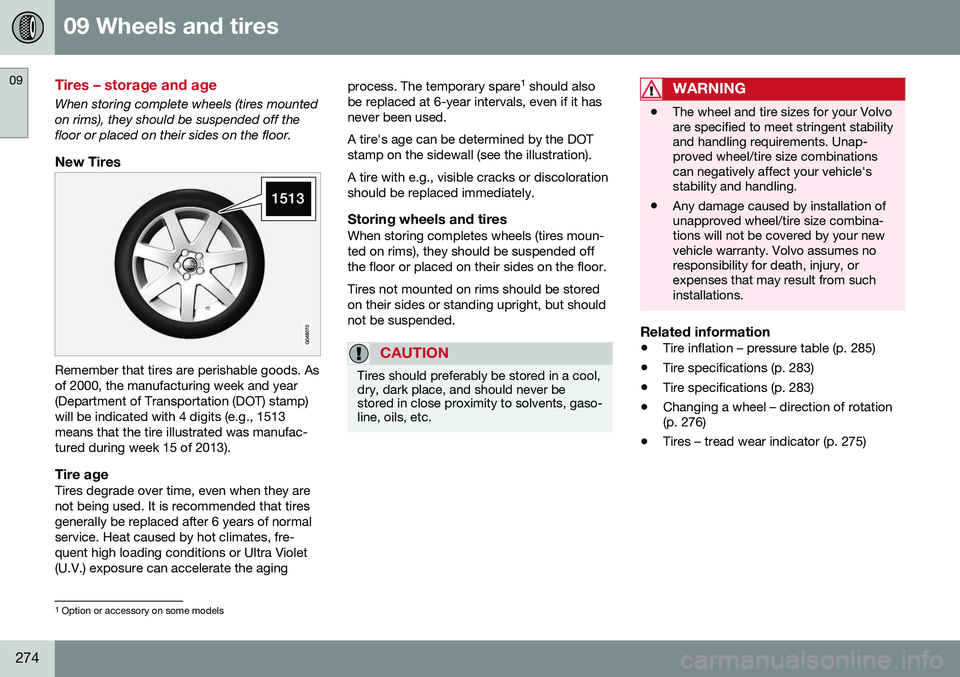
Remember that tires are perishable goods. Asof 2000, the manufacturing week and year(Department of Transportation (DOT) stamp)will be indicated with 4 digits (e.g., 1513means that the tire illustrated was manufac-tured during week 15 of 2013).
Tire ageTires degrade over time, even when they are not being used. It is recommended that tiresgenerally be replaced after 6 years of normalservice. Heat caused by hot climates, fre-quent high loading conditions or Ultra Violet(U.V.) exposure can accelerate the agingprocess. The temporary spare
1
should also
be replaced at 6-year intervals, even if it hasnever been used. A tire's age can be determined by the DOT stamp on the sidewall (see the illustration). A tire with e.g., visible cracks or discoloration should be replaced immediately.
Storing wheels and tiresWhen storing completes wheels (tires moun-ted on rims), they should be suspended offthe floor or placed on their sides on the floor. Tires not mounted on rims should be stored on their sides or standing upright, but shouldnot be suspended.
CAUTION
Tires should preferably be stored in a cool, dry, dark place, and should never bestored in close proximity to solvents, gaso-line, oils, etc.
WARNING
• The wheel and tire sizes for your Volvo are specified to meet stringent stabilityand handling requirements. Unap-proved wheel/tire size combinationscan negatively affect your vehicle'sstability and handling.
• Any damage caused by installation ofunapproved wheel/tire size combina-tions will not be covered by your newvehicle warranty. Volvo assumes noresponsibility for death, injury, orexpenses that may result from suchinstallations.
Related information
•
Tire inflation – pressure table (p. 285)
• Tire specifications (p. 283)
• Tire specifications (p. 283)
• Changing a wheel – direction of rotation (p. 276)
• Tires – tread wear indicator (p. 275)
1
Option or accessory on some models
Page 277 of 380
09 Wheels and tires
09
275
Tires – tread wear indicator
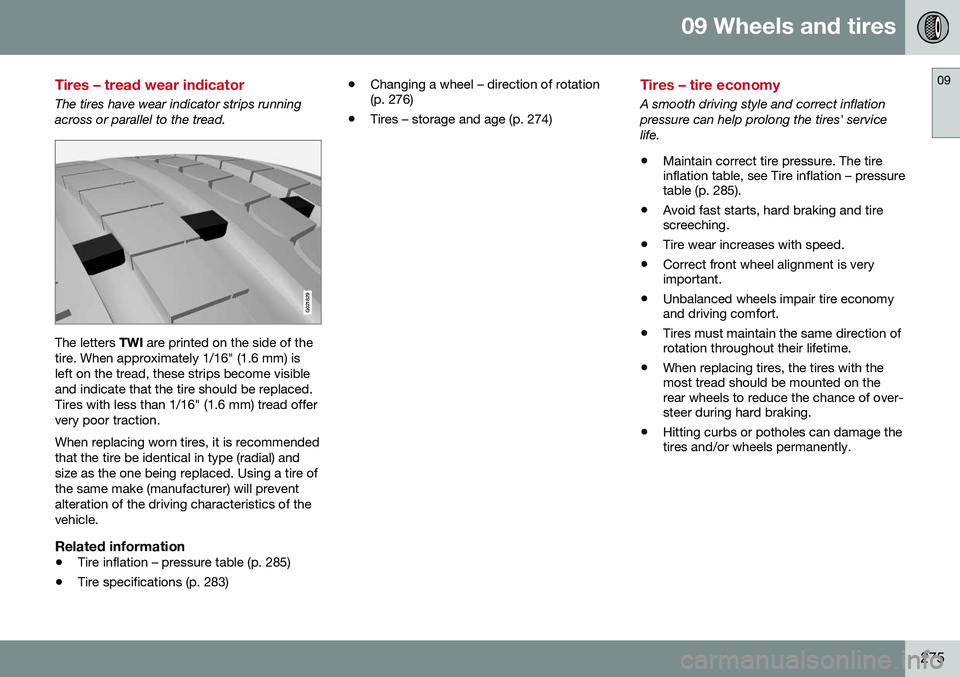
The tires have wear indicator strips running across or parallel to the tread.
G021829
The letters TWI are printed on the side of the
tire. When approximately 1/16" (1.6 mm) is left on the tread, these strips become visibleand indicate that the tire should be replaced.Tires with less than 1/16" (1.6 mm) tread offervery poor traction. When replacing worn tires, it is recommended that the tire be identical in type (radial) andsize as the one being replaced. Using a tire ofthe same make (manufacturer) will preventalteration of the driving characteristics of thevehicle.
Related information
• Tire inflation – pressure table (p. 285)
• Tire specifications (p. 283) •
Changing a wheel – direction of rotation (p. 276)
• Tires – storage and age (p. 274)
Tires – tire economy
A smooth driving style and correct inflation pressure can help prolong the tires' servicelife. • Maintain correct tire pressure. The tire inflation table, see Tire inflation – pressuretable (p. 285).
• Avoid fast starts, hard braking and tirescreeching.
• Tire wear increases with speed.
• Correct front wheel alignment is veryimportant.
• Unbalanced wheels impair tire economyand driving comfort.
• Tires must maintain the same direction ofrotation throughout their lifetime.
• When replacing tires, the tires with themost tread should be mounted on therear wheels to reduce the chance of over-steer during hard braking.
• Hitting curbs or potholes can damage thetires and/or wheels permanently.
Page 283 of 380
09 Wheels and tires
09
281
Tire inflation – general information
Check tire inflation pressure regularly.
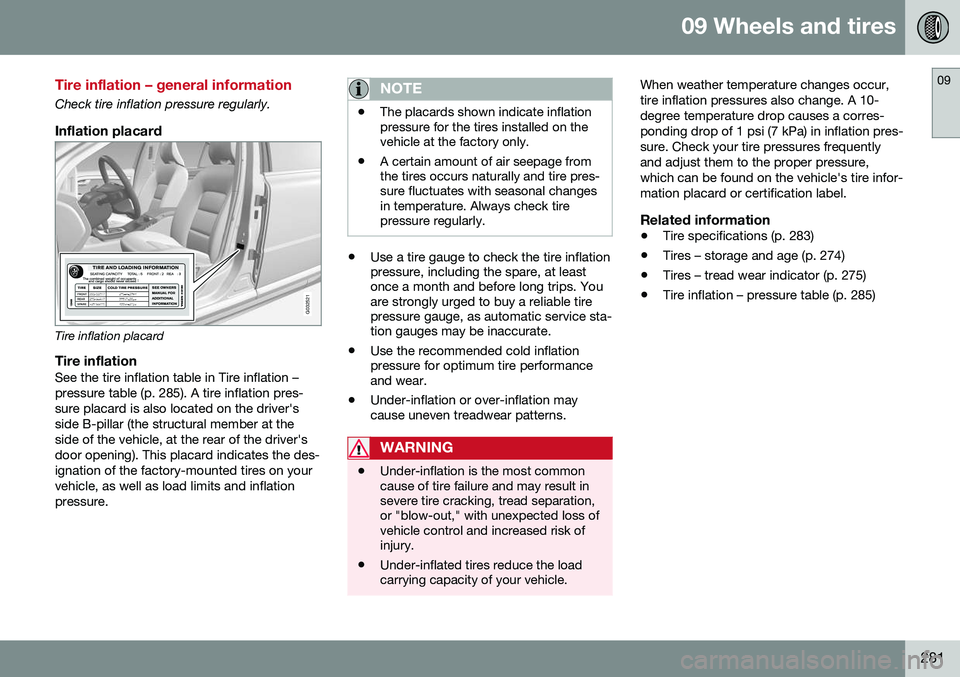
Inflation placard
G032521
Tire inflation placard
Tire inflationSee the tire inflation table in Tire inflation – pressure table (p. 285). A tire inflation pres-sure placard is also located on the driver'sside B-pillar (the structural member at theside of the vehicle, at the rear of the driver'sdoor opening). This placard indicates the des-ignation of the factory-mounted tires on yourvehicle, as well as load limits and inflationpressure.
NOTE
•The placards shown indicate inflation pressure for the tires installed on thevehicle at the factory only.
• A certain amount of air seepage fromthe tires occurs naturally and tire pres-sure fluctuates with seasonal changesin temperature. Always check tirepressure regularly.
•
Use a tire gauge to check the tire inflation pressure, including the spare, at leastonce a month and before long trips. Youare strongly urged to buy a reliable tirepressure gauge, as automatic service sta-tion gauges may be inaccurate.
• Use the recommended cold inflationpressure for optimum tire performanceand wear.
• Under-inflation or over-inflation maycause uneven treadwear patterns.
WARNING
•Under-inflation is the most common cause of tire failure and may result insevere tire cracking, tread separation,or "blow-out," with unexpected loss ofvehicle control and increased risk ofinjury.
• Under-inflated tires reduce the loadcarrying capacity of your vehicle.
When weather temperature changes occur, tire inflation pressures also change. A 10-degree temperature drop causes a corres-ponding drop of 1 psi (7 kPa) in inflation pres-sure. Check your tire pressures frequentlyand adjust them to the proper pressure,which can be found on the vehicle's tire infor-mation placard or certification label.
Related information
•
Tire specifications (p. 283)
• Tires – storage and age (p. 274)
• Tires – tread wear indicator (p. 275)
• Tire inflation – pressure table (p. 285)