2016 VOLVO S80 ESP
[x] Cancel search: ESPPage 199 of 380
07 Driver support
07
* Option/accessory, for more information, see Introduction.197
WARNING
• Pedestrian and Cyclist Detection with Full Auto Brake does not work in alldriving, traffic, weather and road con-ditions. It does not react to vehiclesnot traveling in the same direction asyour vehicle.
• Pedestrian and Cyclist Detection withFull Auto Brake does not react to ani-mals.
• Warnings are only provided when therisk of collision is high. The "Function"section provides information aboutlimitations that the driver must beaware of before using Collision Warn-ing.
• Pedestrian and Cyclist Detection withFull Auto Brake will not provide awarning or brake the vehicle forpedestrians or cyclists at speedsabove 50 mph (80 km/h).
WARNING
•
Pedestrian and Cyclist Detection with Full Auto Brake will not provide awarning or brake the vehicle forpedestrians in darkness or in tunnels,even if there is street lighting in thearea.
• The auto-brake function can help pre-vent a collision or reduce the speed atimpact but the driver should alwaysapply the brakes for the best possiblebraking effect, even if auto-brake isactively applying the brakes.
• Never wait for a collision warning. Thissystem is designed to be a supple-mentary driving aid. It is not, however,intended to replace the driver's atten-tion and judgement. The driver isresponsible for maintaining a safe dis-tance and speed, even when the colli-sion warning system is in use.
• Maintenance of the Pedestrian andCyclist Detection with Full Auto Brakesystem's components must only beperformed by a trained and qualifiedVolvo technician.
Related information
•
Collision warning* – function (p. 198)
• Collision warning* – operation (p. 199)
• Collision warning* – Pedestrian detection (p. 201) •
Collision warning* – Cyclist detection(p. 200)
• Collision warning* – limitations (p. 202)
• The camera’s limitations (p. 204)
• The camera’s limitations (p. 204)
• Collision warning – troubleshooting(p. 205)
• Collision warning – symbols and mes-sages (p. 207)
Page 203 of 380
07 Driver support
07
}}
* Option/accessory, for more information, see Introduction.201
tunnels, even if there is street lighting in the area.
• For optimal cyclist detection, CitySafety™ must be activated.
WARNING
Pedestrian and Cyclist Detection with Full Auto Brake is designed to be a supple-mentary driving aid. It is not, however,intended to replace the driver's attentionand judgement. The driver is alwaysresponsible for operating the vehicle in asafe manner. The system cannot detect a bike/cyclist if: •He/she is wearing loose-fitting clothing that may obscure body contours
• The bike is approaching your vehiclefrom the side
• The bike is not equipped with a rear-facing red reflector
• The bike is carrying large objects
• Most of the cyclist's body or the bikeitself cannot be "seen" by the system'scamera
Related information
•
Collision warning – introduction (p. 196)
• Collision warning* – function (p. 198)
• Collision warning* – operation (p. 199)
• Collision warning* – Pedestrian detection (p. 201) •
Collision warning* – limitations (p. 202)
• Collision warning – troubleshooting(p. 205)
• Collision warning – symbols and mes-sages (p. 207)
Collision warning* – Pedestrian detection
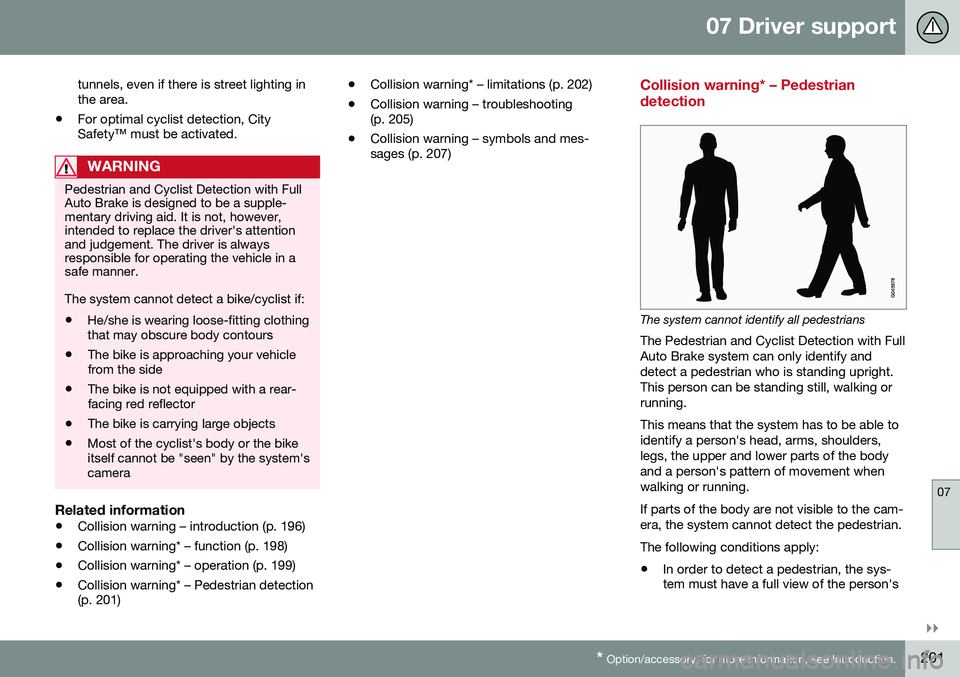
The system cannot identify all pedestrians
The Pedestrian and Cyclist Detection with Full Auto Brake system can only identify anddetect a pedestrian who is standing upright.This person can be standing still, walking orrunning. This means that the system has to be able to identify a person's head, arms, shoulders,legs, the upper and lower parts of the bodyand a person's pattern of movement whenwalking or running. If parts of the body are not visible to the cam- era, the system cannot detect the pedestrian. The following conditions apply:
• In order to detect a pedestrian, the sys- tem must have a full view of the person's
Page 204 of 380
||
07 Driver support
07
202* Option/accessory, for more information, see Introduction.
entire body and the person must be at least 32 in. (80 cm) tall.
• The system cannot detect a pedestriancarrying a large object.
• The camera's capacity to see a pedes-trian at dawn or dusk is limited, much asit is for the human eye.
• The camera's function is deactivated andwill not detect a pedestrian in darkness orin tunnels, even if there is street lighting inthe area.
WARNING
•Pedestrian and Cyclist Detection with Full Auto Brake is designed to be asupplementary driving aid. It is not,however, intended to replace the driv-er's attention and judgement. Thedriver is always responsible for operat-ing the vehicle in a safe manner.
• The system cannot detect all pedes-trians in all situations, such as in dark-ness/at night and cannot detect parti-ally hidden pedestrians, people whoare less than approx. 32 in. (80 cm)tall, or people wearing clothing thatobscures the contours of their bodies.
Related information
•
Collision warning – introduction (p. 196)
• Collision warning* – function (p. 198)
• Collision warning* – operation (p. 199) •
Collision warning* – Cyclist detection (p. 200)
• Collision warning* – limitations (p. 202)
• Collision warning – troubleshooting(p. 205)
• Collision warning – symbols and mes-sages (p. 207)
Collision warning* – limitations
Strong sunlight, reflections, extreme light contrasts, the use of sunglasses, or if thedriver is not looking straight ahead may makethe visual warning signal in the windshield dif-ficult to see. For this reason, always activatethe audible warning signal. Slippery driving conditions increase braking distance, which can reduce the system'scapacity to avoid a collision. In these condi-tions, the ABS and stability systems providethe best possible braking effect while helpingto maintain stability.
NOTE
The visual warning signal may be tempo- rarily disengaged in the event of high pas-senger compartment temperature due tostrong sunlight, etc. If this occurs, theaudible warning signal will be used, even ifit has been deactivated in the menu sys-tem.
Page 216 of 380
07 Driver support
07
214
Lane Departure Warning (LDW) – introduction
The LDW function is designed to help reduce the risk of accidents in situations where thevehicle unintentionally leaves its lane andthere is a risk of driving off the road or into theopposite lane.
Lane Departure Warning (LDW)
The illustration is genericLDW uses the camera located at the center, upper edge of the windshield to monitor theroad's/lane’s side marker lines. If the vehiclecrosses a side marker line or the road’s cen-ter dividing line, the driver will be alerted byan audible signal.
WARNING
This feature is only intended to assist the driver and does not function in all driving,weather, traffic or road conditions. As the driver, you have full responsibility for operating the vehicle in a safe manner.
Related information
• Driver Alert System (p. 209)
• Lane Departure Warning (LDW) – symbols and messages (p. 217)
• Lane Departure Warning (LDW) – opera-tion (p. 214)
• Lane Departure Warning (LDW) - limita-tions (p. 216)
Lane Departure Warning (LDW) – operation
Operation and function
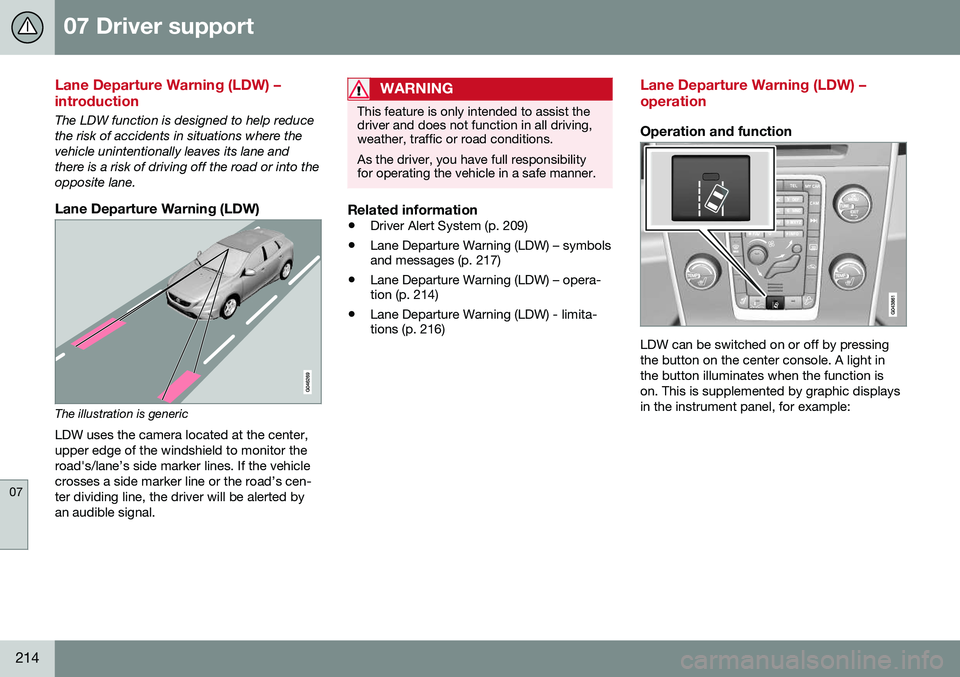
LDW can be switched on or off by pressing the button on the center console. A light inthe button illuminates when the function ison. This is supplemented by graphic displaysin the instrument panel, for example:
Page 229 of 380
07 Driver support
07
}}
* Option/accessory, for more information, see Introduction.227
Rear Park Assist Camera (PAC) – limitations
LimitationsEven if a fairly small section of the screen image appears to be obstructed, this maymean that a relatively large area behind thevehicle is hidden and objects there may notbe detected until they are very near the vehi-cle.
NOTE
Bicycle carriers or other accessories mounted on the trunk may obstruct thecamera's field of view.
Keep in mind
• Keep the camera's lens free of dirt, ice and snow. Remove ice and snow care-fully to avoid scratching the lens.
• Clean the lens regularly with warm waterand a suitable car washing detergent.
Related information
•Rear Park Assist Camera (PAC) – intro-duction (p. 223)
• Rear Park Assist Camera (PAC) – opera-tion (p. 224)
• Park assist – introduction (p. 219)
BLIS* – introduction
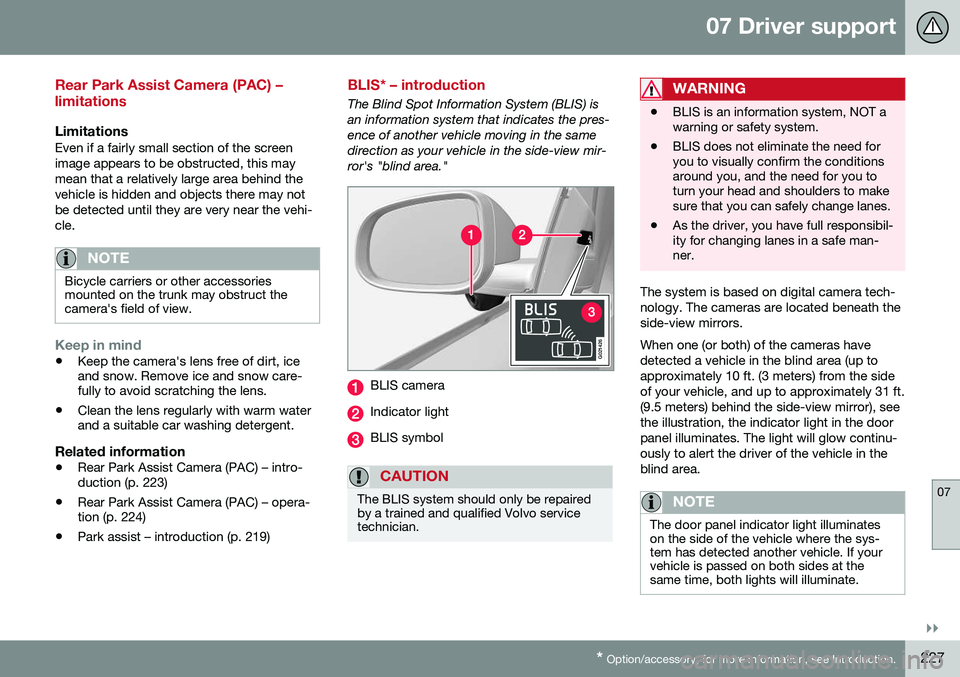
The Blind Spot Information System (BLIS) is an information system that indicates the pres-ence of another vehicle moving in the samedirection as your vehicle in the side-view mir-ror's "blind area."
G021426
BLIS camera
Indicator light
BLIS symbol
CAUTION
The BLIS system should only be repaired by a trained and qualified Volvo servicetechnician.
WARNING
• BLIS is an information system, NOT a warning or safety system.
• BLIS does not eliminate the need foryou to visually confirm the conditionsaround you, and the need for you toturn your head and shoulders to makesure that you can safely change lanes.
• As the driver, you have full responsibil-ity for changing lanes in a safe man-ner.
The system is based on digital camera tech- nology. The cameras are located beneath theside-view mirrors. When one (or both) of the cameras have detected a vehicle in the blind area (up toapproximately 10 ft. (3 meters) from the sideof your vehicle, and up to approximately 31 ft.(9.5 meters) behind the side-view mirror), seethe illustration, the indicator light in the doorpanel illuminates. The light will glow continu-ously to alert the driver of the vehicle in theblind area.
NOTE
The door panel indicator light illuminates on the side of the vehicle where the sys-tem has detected another vehicle. If yourvehicle is passed on both sides at thesame time, both lights will illuminate.
Page 242 of 380
08 Starting and driving
08
240* Option/accessory, for more information, see Introduction.
Transmission – Geartronic
Geartronic allows you to manually shift among your vehicle's forward gears. The manualposition ( +S–) can be selected at any time.
Geartronic: manual shifting (+S–)To shift gears manually, move thegear selector to the side from D
toward +S–. The +S– symbol in the
instrument panel will change from
white to orange and the number of the gear
currently being used (
1, 2, 3, etc.) will be dis-
played (see the following illustration) 5
.
• To return to automatic shifting mode from +S–
, move the gear selector to the side
toward D.
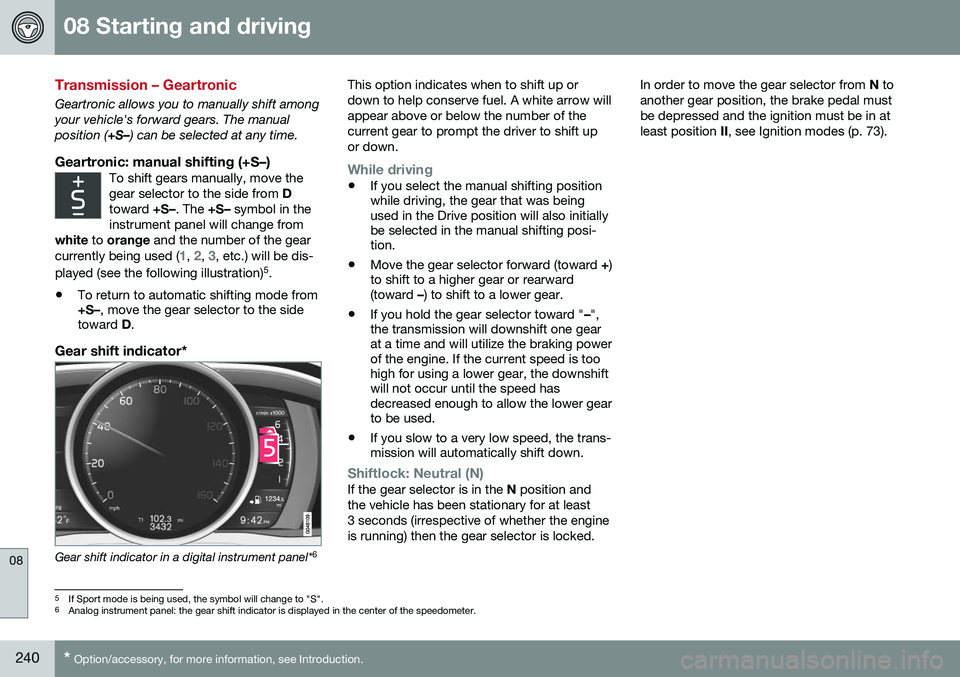
Gear shift indicator*
Gear shift indicator in a digital instrument panel* 6This option indicates when to shift up or down to help conserve fuel. A white arrow willappear above or below the number of thecurrent gear to prompt the driver to shift upor down.
While driving
•
If you select the manual shifting position while driving, the gear that was beingused in the Drive position will also initiallybe selected in the manual shifting posi-tion.
• Move the gear selector forward (toward
+)
to shift to a higher gear or rearward(toward –) to shift to a lower gear.
• If you hold the gear selector toward "
–",
the transmission will downshift one gearat a time and will utilize the braking powerof the engine. If the current speed is toohigh for using a lower gear, the downshiftwill not occur until the speed hasdecreased enough to allow the lower gearto be used.
• If you slow to a very low speed, the trans-mission will automatically shift down.
Shiftlock: Neutral (N)If the gear selector is in the
N position and
the vehicle has been stationary for at least 3 seconds (irrespective of whether the engineis running) then the gear selector is locked. In order to move the gear selector from
N to
another gear position, the brake pedal mustbe depressed and the ignition must be in atleast position II, see Ignition modes (p. 73).
5
If Sport mode is being used, the symbol will change to "S".
6 Analog instrument panel: the gear shift indicator is displayed in the center of the speedometer.
Page 243 of 380
08 Starting and driving
08
}}
* Option/accessory, for more information, see Introduction.241
Geartronic: steering wheel paddles*In addition to the manual gearshift function using the gear selector, this option makes itpossible to manually shift gears from thesteering wheel.
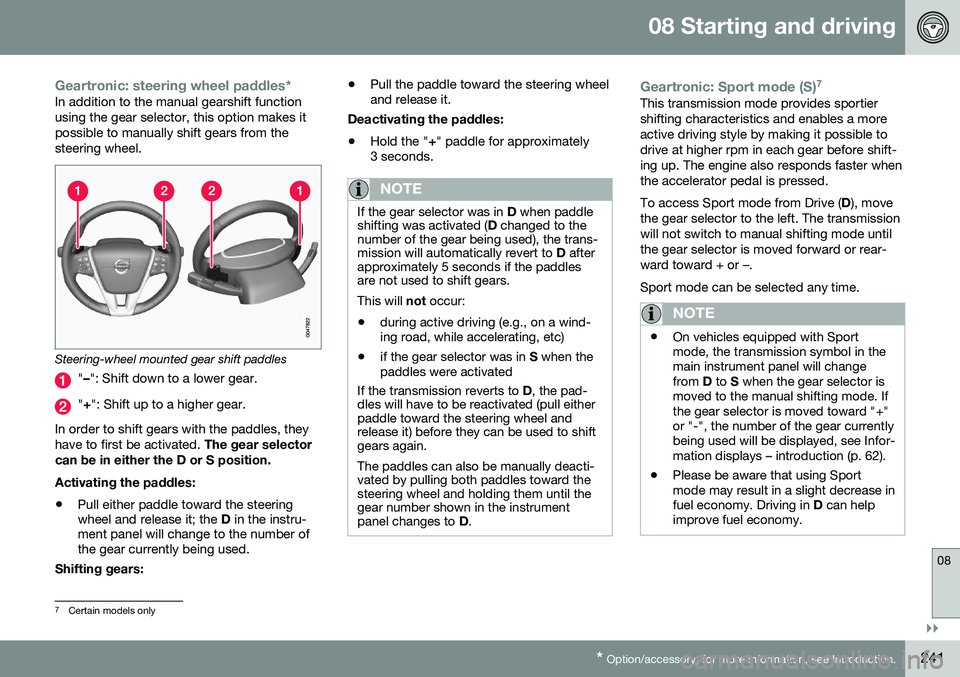
Steering-wheel mounted gear shift paddles
" – ": Shift down to a lower gear.
"+ ": Shift up to a higher gear.
In order to shift gears with the paddles, they have to first be activated. The gear selector
can be in either the D or S position. Activating the paddles:
• Pull either paddle toward the steering wheel and release it; the
D in the instru-
ment panel will change to the number ofthe gear currently being used.
Shifting gears: •
Pull the paddle toward the steering wheeland release it.
Deactivating the paddles: • Hold the "
+" paddle for approximately
3 seconds.
NOTE
If the gear selector was in D when paddle
shifting was activated ( D changed to the
number of the gear being used), the trans- mission will automatically revert to D after
approximately 5 seconds if the paddlesare not used to shift gears. This will not occur:
• during active driving (e.g., on a wind- ing road, while accelerating, etc)
• if the gear selector was in
S when the
paddles were activated
If the transmission reverts to D, the pad-
dles will have to be reactivated (pull either paddle toward the steering wheel andrelease it) before they can be used to shiftgears again. The paddles can also be manually deacti- vated by pulling both paddles toward thesteering wheel and holding them until thegear number shown in the instrumentpanel changes to D.
Geartronic: Sport mode (S) 7This transmission mode provides sportier shifting characteristics and enables a moreactive driving style by making it possible todrive at higher rpm in each gear before shift-ing up. The engine also responds faster whenthe accelerator pedal is pressed. To access Sport mode from Drive (
D), move
the gear selector to the left. The transmission will not switch to manual shifting mode untilthe gear selector is moved forward or rear-ward toward + or –. Sport mode can be selected any time.
NOTE
• On vehicles equipped with Sport mode, the transmission symbol in themain instrument panel will changefrom
D to S when the gear selector is
moved to the manual shifting mode. Ifthe gear selector is moved toward "+"or "-", the number of the gear currentlybeing used will be displayed, see Infor-mation displays – introduction (p. 62).
• Please be aware that using Sportmode may result in a slight decrease infuel economy. Driving in
D can help
improve fuel economy.
7 Certain models only
Page 250 of 380

08 Starting and driving
08
248* Option/accessory, for more information, see Introduction.
ECO*
Eco is a function 10
developed by Volvo to give
the driver the opportunity to actively drive more economically and to help reduce fuelconsumption.
IntroductionWhen Eco is activated, thefollowing functions are modi-fied:
• The automatic transmission's shifting points
• The engine management system andaccelerator pedal response
• Stop/stop function (Start/Stop – introduc-tion (p. 243)): the engine can auto-stopbefore the vehicle has come to a full stop
• Eco Coast functionality is activated:engine braking is disabled
• Climate system settings: certain functions(e.g., air conditioning) will be temporarilyreduced or deactivated
NOTE
When Eco is activated, several climate system parameters are changed and thefunction of certain current-consuming sys-tems will be reduced. Some of these functions can be restarted manually but full functionality will not berestored until Eco is deactivated.
Function
ECO On/Off button in the center console
ECO symbol in the instrument panel
When the engine is switched off, ECO is deactivated and must be reactivated eachtime the engine is started (with the exceptionof certain engines). The
ECO symbol will be displayed in the
instrument panel and the indicator light in the ECO button will be on when Eco is activated.
Eco on or offWhen ECO is deactivated, the ECO symbol will not be
displayed in the instrument panel and the indicator lightin the ECO button will be off.
The function will remaindeactivated until the buttonis pressed again.
Eco CoastEco Coast is an integral part of the Eco func- tion and essentially deactivates engine brak-ing, allowing the vehicle to roll freely.
NOTE
To function optimally, Eco Coast should primarily be used when the vehicle cancoast as far as possible.
When the driver releases the accelerator pedal, the transmission is automatically dis-engaged from the engine and engine rpm willbe reduced to the idle level(approx. 700-800 rpm), which helps reducefuel consumption.
10 Option on models equipped with certain 4-cylinder engines