Page 39 of 275

LC200_Navi_OM60N15U_(U)
15.07.08 16:48
Basic function
2
392. Bluetooth® settings
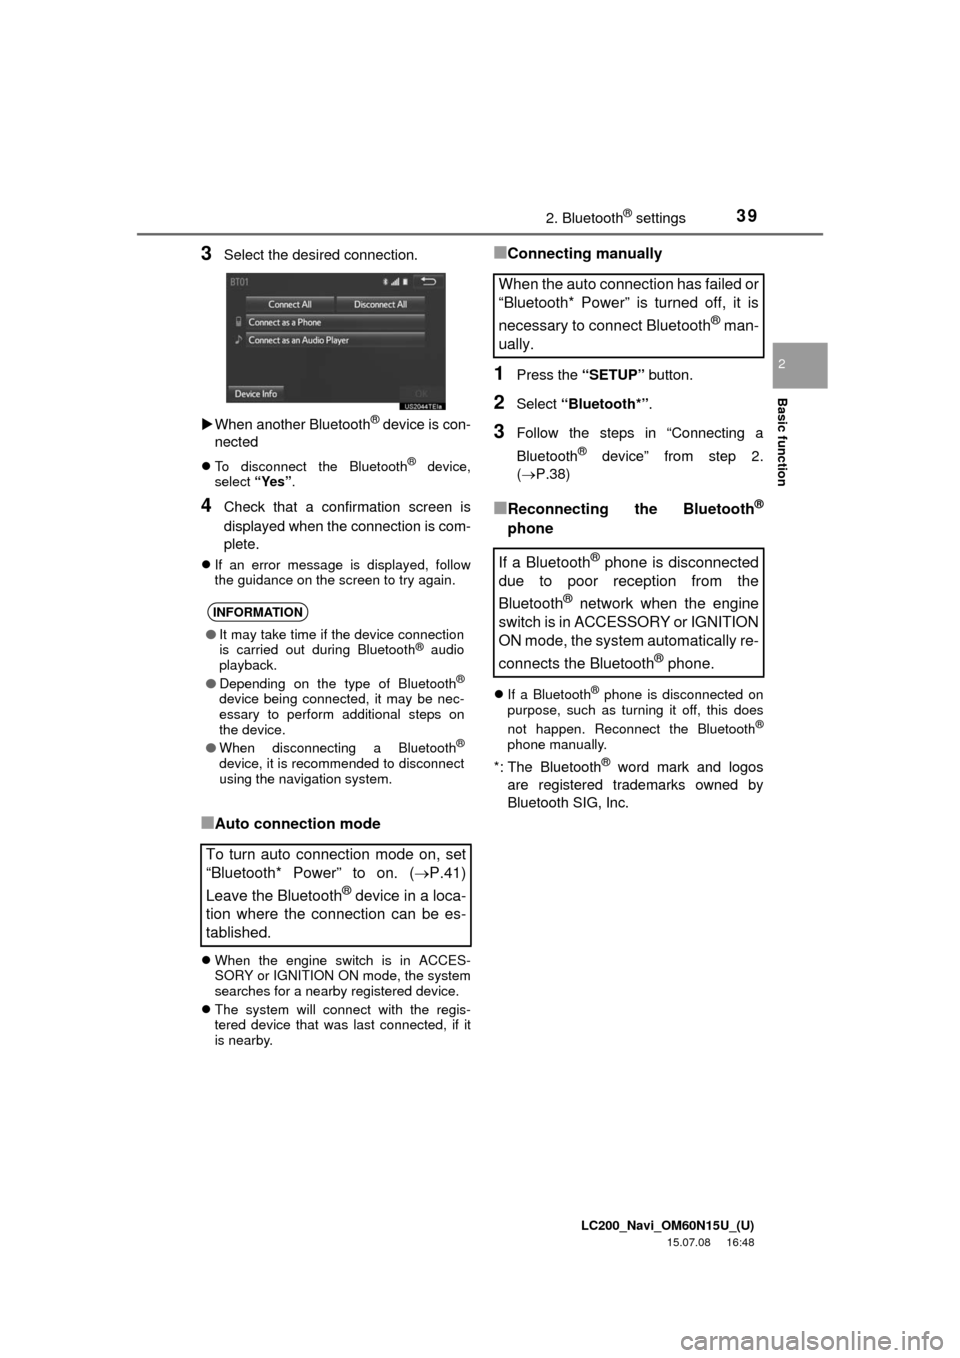
3Select the desired connection.
When another Bluetooth
® device is con-
nected
To disconnect the Bluetooth® device,
select “Yes”.
4Check that a confirmation screen is
displayed when the connection is com-
plete.
If an error message is displayed, follow
the guidance on the screen to try again.
■Auto connection mode
When the engine switch is in ACCES-
SORY or IGNITION ON mode, the system
searches for a nearby registered device.
The system will connect with the regis-
tered device that was last connected, if it
is nearby.
■Connecting manually
1Press the “SETUP” button.
2Select “Bluetooth*”.
3Follow the steps in “Connecting a
Bluetooth
® device” from step 2.
(P.38)
■Reconnecting the Bluetooth®
phone
If a Bluetooth® phone is disconnected on
purpose, such as turning it off, this does
not happen. Reconnect the Bluetooth
®
phone manually.
*: The Bluetooth® word mark and logos
are registered trademarks owned by
Bluetooth SIG, Inc.
INFORMATION
●It may take time if the device connection
is carried out during Bluetooth® audio
playback.
●Depending on the type of Bluetooth
®
device being connected, it may be nec-
essary to perform additional steps on
the device.
●When disconnecting a Bluetooth
®
device, it is recommended to disconnect
using the navigation system.
To turn auto connection mode on, set
“Bluetooth* Power” to on. (P.41)
Leave the Bluetooth
® device in a loca-
tion where the connection can be es-
tablished.
When the auto connection has failed or
“Bluetooth* Power” is turned off, it is
necessary to connect Bluetooth
® man-
ually.
If a Bluetooth
® phone is disconnected
due to poor reception from the
Bluetooth
® network when the engine
switch is in ACCESSORY or IGNITION
ON mode, the system automatically re-
connects the Bluetooth
® phone.
Page 40 of 275

LC200_Navi_OM60N15U_(U)
15.07.08 16:48
402. Bluetooth® settings
1Display the “Bluetooth* Setup” screen.
(P.36)
2Select the desired device to be edited.
3Select “Device Info”.
4Confirm and change the Bluetooth®
device information.
*: The Bluetooth
® word mark and logos
are registered trademarks owned by
Bluetooth SIG, Inc.
1Select “Device Name”.
2Enter the name and select “OK”.
Editing the Bluetooth® device
information
The Bluetooth
® device’s information
can be displayed on the screen. The
displayed information can be edited.
No.Information
The name of the Bluetooth® device
can be changed to a desired name.
(P.40)
Select to set the Bluetooth® audio
player connection method. (P.41)
Device address is unique to the de-
vice and cannot be changed.
Phone number of the Bluetooth®
phone.
Compatibility profile of the
Bluetooth® device.
Select to reset all setup items.
INFORMATION
●If 2 Bluetooth® devices have been regis-
tered with the same device name, the
devices can be distinguished referring to
the device’s address.
●Depending on the type of phone, some
information may not be displayed.
Changing a device name
INFORMATION
●Even if the device name is changed, the
name registered in your Bluetooth®
device does not change.
Page 42 of 275

LC200_Navi_OM60N15U_(U)
15.07.08 16:48
422. Bluetooth® settings
1Select “Bluetooth* Power”.
When “Bluetooth* Power” is on:
The Bluetooth
® device is automatically
connected when the engine switch is in
ACCESSORY or IGNITION ON mode.
When “Bluetooth* Power” is off:
The Bluetooth
® device is disconnected,
and the system will not connect to it next
time.
1Select “Bluetooth* Name”.
2Enter a name and select “OK”.
1Select “Bluetooth* PIN”.
2Enter a PIN-code and select “OK”.
*: The Bluetooth
® word mark and logos
are registered trademarks owned by
Bluetooth SIG, Inc.
No.InformationPage
Select to set Bluetooth®
connection on/off.42
Displayed system name
can be changed to a de-
sired name.
42
PIN-code used when the
Bluetooth® device was reg-
istered. It can be changed
to a desired code.42
Device address is unique
to the device and cannot be
changed.
Select to set the phone
connection status display
on/off.
Select to set the connec-
tion status display of the
audio player on/off.
Compatibility profile of the
system
Select to reset all setup
items.
Changing “Bluetooth* Power”
INFORMATION
●While driving, the auto connection state
can be changed from off to on, but can-
not be changed from on to off.
Editing the system name
Editing the PIN-code
Page 48 of 275
LC200_Navi_OM60N15U_(U)
15.07.15 16:26
483. Other settings
■Deleting transferred images
1Select “Delete Images”.
2Select the images to be deleted and
select “Delete”.
3Select “Yes” when the confirmation
screen appears.
1Display the “General Settings” screen.
(P.43)
2Select “Delete Personal Data”.
3Select “Delete”.
4Select “Yes” when the confirmation
screen appears.
Registered or changed personal settings
will be deleted or returned to their default
conditions.
For example:
• General settings
• Navigation settings
• Audio settings
• Phone settings
• Entune App Suite settings
1Press the “SETUP” button.
2Select “Voice”.
3Select the items to be set.
Deleting personal data
Voice settings
Voice guidance etc. can be set.
INFORMATION
●“Voice Settings” screen can also be dis-
played from the voice recognition top
screen. (P.194)
Page 51 of 275

LC200_Navi_OM60N15U_(U)
15.07.15 16:26
Basic function
2
513. Other settings
1Select “Set Dealer”.
2Select the desired item to search for
the location. (P.68)
The editing dealer screen appears after
setting the location.
3Select the items to be edited.
■Editing dealer or contact name
1Select “Edit” next to “Dealer” or
“Contact”.
2Enter the name and select “OK”.
■Editing the location
1Select “Edit” next to “Location”.
2Scroll the map to the desired point
(P.60) and select “OK”.
■Editing phone number
1Select “Edit” next to “Phone #”.
2Enter the phone number and select
“OK”.
Dealer setting
Dealer information can be registered in
the system. With dealer information
registered, route guidance to the deal-
er is available.
No.FunctionPage
Select to enter the name of
a dealer.51
Select to enter the name of
a dealer member.51
Select to set the location.51
Select to enter the phone
number.51
Select to delete the dealer
information displayed on
the screen.
Select to set the displayed
dealer as a destination.78
Page 71 of 275

LC200_Navi_OM60N15U_(U)
15.07.08 16:48
Navigation system
3
712. Destination search
3Select the desired city name.
4Enter a street name and select “OK”.
5Select the desired street name.
6Enter a house number and select
“OK”.
If the same address exists in more than
one town, the address list screen will be
displayed. Select the desired address.
1Select “Street Address”.
2Enter a house number and select
“OK”.
3Enter a street name and select “OK”.
4Select the desired street name.
5Enter a city name and select “OK”.
6Select the desired city name.
If the same address exists in more than
one town, the address list screen will be
displayed. Select the desired address.
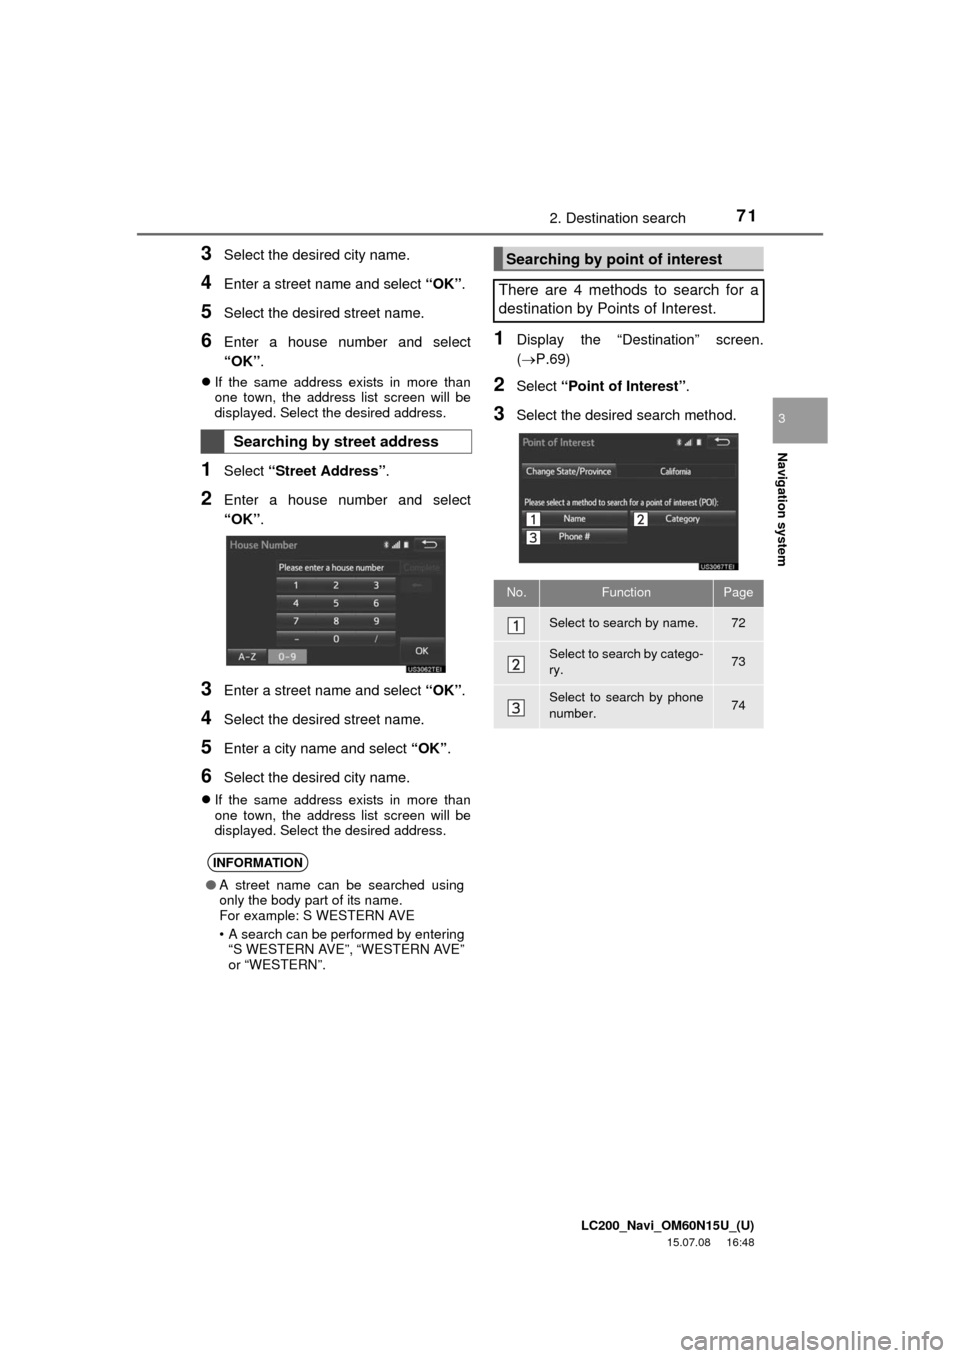
1Display the “Destination” screen.
(P.69)
2Select “Point of Interest”.
3Select the desired search method.
Searching by street address
INFORMATION
●A street name can be searched using
only the body part of its name.
For example: S WESTERN AVE
• A search can be performed by entering
“S WESTERN AVE”, “WESTERN AVE”
or “WESTERN”.
Searching by point of interest
There are 4 methods to search for a
destination by Points of Interest.
No.FunctionPage
Select to search by name.72
Select to search by catego-
ry.73
Select to search by phone
number.74
Page 74 of 275

LC200_Navi_OM60N15U_(U)
15.07.08 16:48
742. Destination search
4Select the desired POI.
“Web Search”: Select to search for POI
using online database. (P.73)
When “Near a City Center in XX*” is se-
lected
1Select “Near a City Center in XX”.
2Enter a city name and select “OK”.
“Last 5 Cities”: Select the city name from
the list of the last 5 cities.
3Select the desired city name.
4Select “OK” when the city center map
screen is displayed.
5Follow the steps from 3 onward in
“Searching by category”. (P.73)
*: XX represents the selected search area
name.
1Select “Phone #”.
2Enter a phone number and select
“OK”.
If there is more than 1 site with the same
number, the list screen will be displayed.
1Display the “Destination” screen.
(P.69)
2Select “Previous Destinations”.
3Select the desired destination.
“Previous Start Point”: Select to display
the start point map of the previous guided
route.
“Delete”: Select to delete the previous
destination. (P.96)
INFORMATION
●The names of POIs located within
approximately 200 miles (320 km) from
the selected search point can be dis-
played.
INFORMATION
●If the navigation system has never been
used, selecting the city name from “Last
5 Cities” will not be available.
Searching by phone number
INFORMATION
●If there is no match for the entered
phone number, a list of identical num-
bers with different area codes will be dis-
played.
Searching from previous
destinations
INFORMATION
●The previous start point and up to 100
previously set destinations are displayed
on the screen.
Page 91 of 275

LC200_Navi_OM60N15U_(U)
15.07.08 16:48
Navigation system
3
914. Memory points
1Select “Set Home Location”.
2Select the desired item to search for
the location. (P.68)
3Select “OK” when the editing home
screen appears.
1Select “Edit”.
2Select the desired item to be edited.
3Select “OK”.
1Select “Delete”.
2Select “Yes” when the confirmation
screen appears.
1Display the “Navigation Settings”
screen. (P.90)
2Select “Preset Destinations”.
3Select the desired item.
1Select “Set”.
2Select the desired item to search for
the location. (P.68)
3Select a position for this preset desti-
nation.
Registering home
Editing home
No.FunctionPage
Select to edit the home
name.94
Select to set display of the
home name on/off.
Select to edit location infor-
mation.94
Select to edit the phone
number.94
Select to change the icon
to be displayed on the map
screen.93
Deleting home
Setting up preset destinations
If a preset destination has been regis-
tered, that information can be recalled
by using preset destinations on the
“Destination” screen. (P.70)
No.FunctionPage
Select to register a preset
destination.91
Select to edit a preset des-
tination.92
Select to delete a preset
destination.92
Registering preset destinations