2016 TESLA MODEL X instrument panel
[x] Cancel search: instrument panelPage 137 of 179

correct tire pressure, even if under- orover-inflation has not reached the level
for the TPMS to trigger the Tire Pressure
Warning on the instrument panel.
Resetting the TPMS Sensors
After replacing one or more wheels, the TPMS
sensors must be reset to ensure tire pressure
warnings are accurate. However, note that the
TPMS sensors do not need to be reset after
replacing a tire or rotating wheels.
Note: Do not reset the TPMS sensors in an attempt to clear tire pressure warnings.
To reset TPMS sensors:
1.
Inflate all tires to their recommended
pressures, as indicated on the Tire and
Loading Information label located on the
driver
Page 143 of 179

Cleaning the Interior
Frequently inspect and clean the interior to maintain its appearance and to prevent
premature wear. If possible, immediately wipe up spills and remove marks. For general
cleaning, wipe interior surfaces using a soft
cloth (such as micro
fiber) dampened with a
mixture of warm water and mild non-
detergent cleaner (test all cleaners on a
concealed area before use). To avoid streaks,
dry immediately with a soft lint-free cloth.
Interior Glass
Do not scrape, or use any abrasive cleaning
fluid on glass or mirrored surfaces. This can
damage the reflective surface of the mirror
and the heating elements in the rear window.
Airbags
Do not allow any substance to enter an airbag
cover. This could
affect correct operation.
Dashboard and Plastic Surfaces
Do not polish the upper surfaces of the
dashboard. Polished surfaces are
reflectiveand could interfere with your driving view.
Leather Seats
Leather is prone to dye-transfer which can
cause discoloration, particularly on light colored leather. White and tan leather iscoated with an anti-soiling treatment. Wipespills as soon as possible using a soft cloth
moistened with warm water and non-
detergent soap. Wipe gently in a circular
motion. Then wipe dry using a soft, lint-free
cloth. Using detergents or commercially
available leather cleaners and conditioners is
not recommended because they can discolor or dry out the leather.
Cloth Seats
Wipe spills as soon as possible using a soft
cloth moistened with warm water and non-
detergent soap. Wipe gently in a circular
motion. Then wipe dry using a soft, lint-free
cloth. Vacuum the seats as needed to remove
any loose dirt.
Carpets
Avoid over-wetting carpets. For heavily soiled
areas, use a diluted upholstery cleaner.
Seat Belts
Extend the belts to wipe. Do not use any type of detergent or chemical cleaning agent.
Allow the belts to dry naturally while
extended, preferably away from direct
sunlight.
Tesla Built-In Rear Facing Child Seats
Vacuum the seats to remove any loose dirt.
Wipe the seats with a soft cloth dampened
with warm water. You can also use an upholstery cleaner designed for automotive
use. Extend the belts to wipe. Allow the belts
to dry naturally, preferably away from direct
sunlight.
Touchscreen and Instrument Panel
Clean the touchscreen and instrument panel
using a soft lint-free cloth
specificallydesigned to clean monitors and displays. Do not use cleaners (such as a glass cleaner) and
do not use a wet wipe or a dry statically- charged cloth (such as a recently washed
microfiber). To wipe the touchscreen without
activating buttons and changing settings, you
can enable clean mode. Touch Controls > Displays > Clean Mode. The display darkens to
make it easy to see dust and smudges.
Chrome and Metal Surfaces
Polish, abrasive cleaners or hard cloths can
damage the
finish on chrome and metal
surfaces.
Cautions for Interior Cleaning
Warning: If you notice any damage on an
airbag or seat belt, contact Tesla
immediately.Warning: Do not allow any water,
cleaners, or fabric to enter a seat belt
mechanism.Caution: Using solvents (including alcohol), bleach, citrus, naphtha, orsilicone-based products or additives on
interior components can cause damage.
Cleaning
Maintenance143
Page 146 of 179

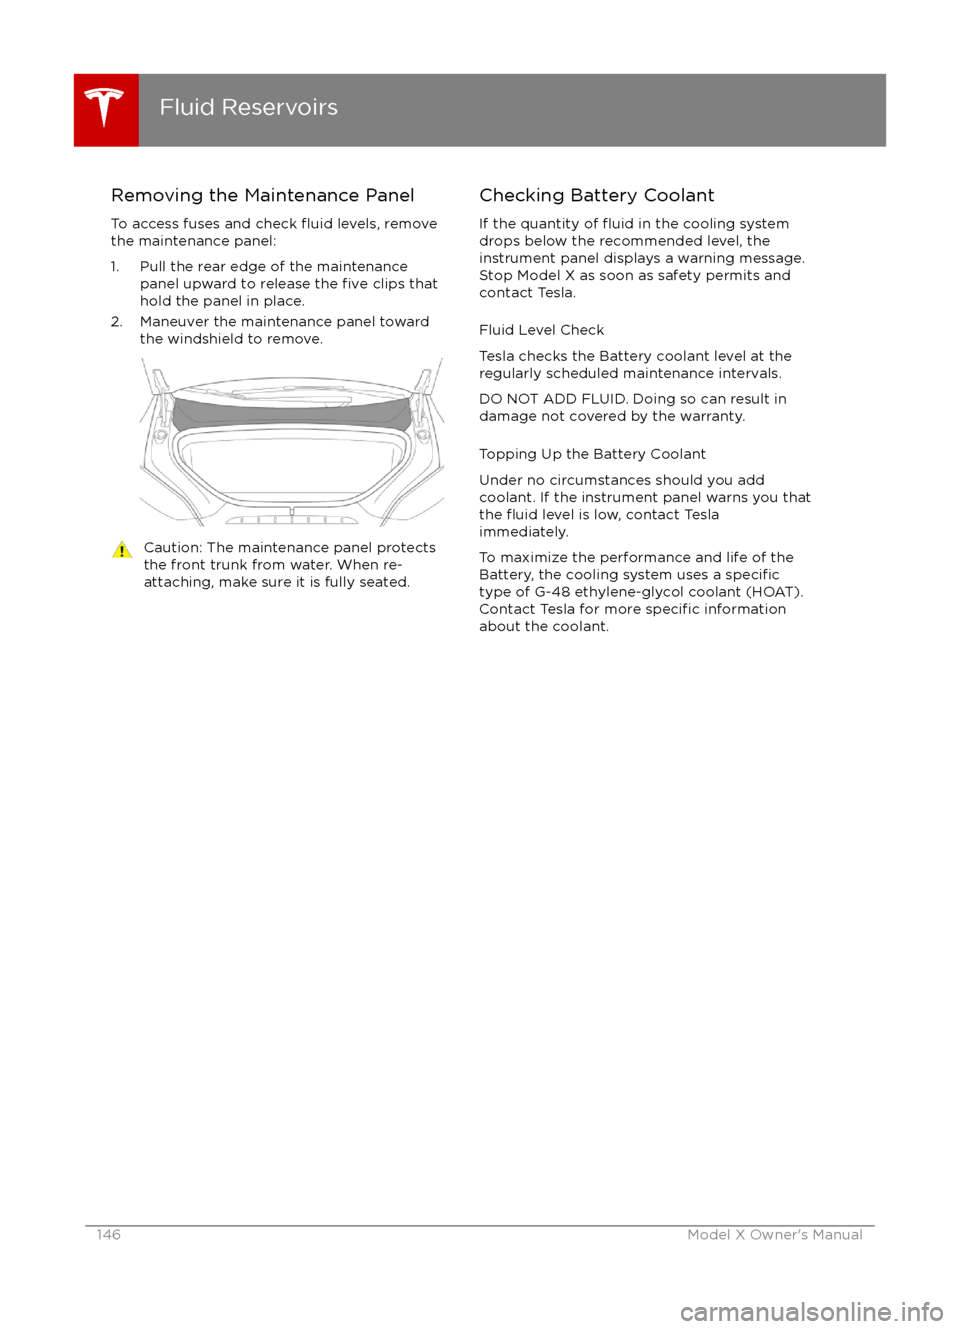
Removing the Maintenance Panel
To access fuses and check
fluid levels, remove
the maintenance panel:
1. Pull the rear edge of the maintenance panel upward to release the
five clips that
hold the panel in place.
2. Maneuver the maintenance panel toward the windshield to remove.
Caution: The maintenance panel protects
the front trunk from water. When re-
attaching, make sure it is fully seated.Checking Battery Coolant
If the quantity of
fluid in the cooling system
drops below the recommended level, the
instrument panel displays a warning message.
Stop Model X as soon as safety permits and
contact Tesla.
Fluid Level Check
Tesla checks the Battery coolant level at the
regularly scheduled maintenance intervals.
DO NOT ADD FLUID. Doing so can result in
damage not covered by the warranty.
Topping Up the Battery Coolant
Under no circumstances should you add
coolant. If the instrument panel warns you that
the
fluid level is low, contact Tesla
immediately.
To maximize the performance and life of the
Battery, the cooling system uses a
specifictype of G-48 ethylene-glycol coolant (HOAT).
Contact Tesla for more specific information
about the coolant.
Fluid Reservoirs
146Model X Owner
Page 147 of 179

Checking Brake FluidWarning: Contact Tesla immediately if you
notice increased movement of the brake
pedal or a
significant loss of brake fluid.Driving under these conditions can result in extended stopping distances or
complete brake failure.
The Brake indicator on the
instrument panel alerts you if the
quantity of
fluid in the brake
reservoir drops below the
recommended level. If it displays
while driving, stop as soon as safety
permits by gently applying the
brakes. Do not continue driving.
Contact Tesla immediately.
Fluid Level Check
Tesla checks the brake
fluid level at the
regularly scheduled maintenance intervals.
Topping Up the Brake Fluid
Do not top up your brake
fluid. Tesla service
does this when you bring Model X in for
regular servicing. The following instructions
are provided for information purposes and future reference only:
1. Clean the
filler cap before removing to
prevent dirt from entering the reservoir.
2. Unscrew the cap and remove.
3. Top up the reservoir to the MAX mark using brake
fluid meeting DOT3specifications.4. Replace the filler cap.
Warning: Only use new fluid from a sealed
air-tight container. Never use previously
used
fluid or fluid from a previously
opened container
Page 164 of 179

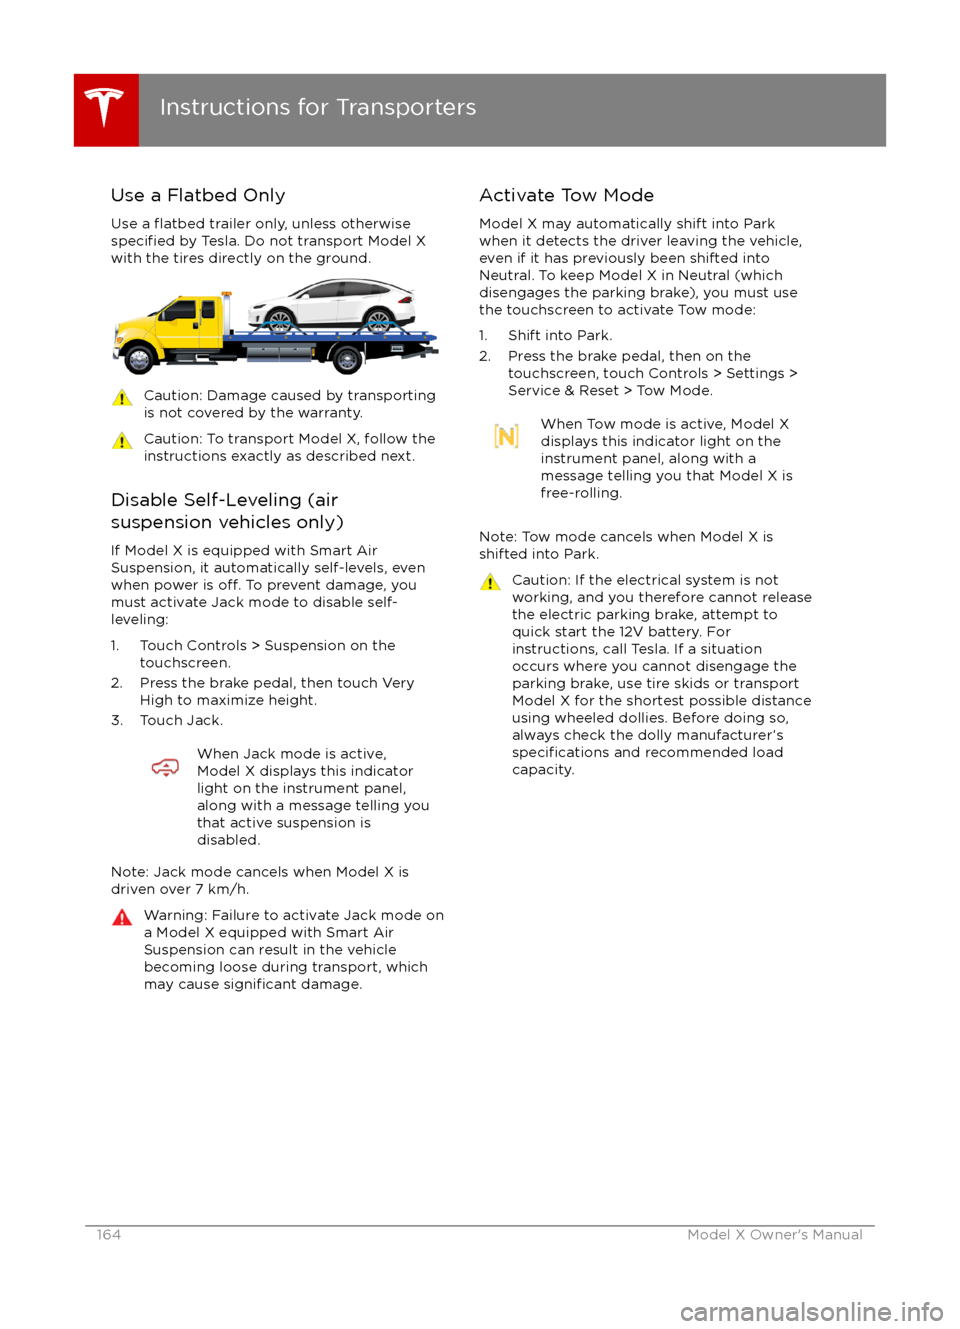
Use a Flatbed OnlyUse a
flatbed trailer only, unless otherwisespecified by Tesla. Do not transport Model X
with the tires directly on the ground.
Caution: Damage caused by transporting is not covered by the warranty.Caution: To transport Model X, follow the
instructions exactly as described next.
Disable Self-Leveling (air
suspension vehicles only)
If Model X is equipped with Smart Air
Suspension, it automatically self-levels, even
when power is
off. To prevent damage, you
must activate Jack mode to disable self-
leveling:
1. Touch Controls > Suspension on the touchscreen.
2. Press the brake pedal, then touch Very High to maximize height.
3. Touch Jack.
When Jack mode is active,
Model X displays this indicator
light on the instrument panel,
along with a message telling you
that active suspension is
disabled.
Note: Jack mode cancels when Model X is
driven over 7 km/h.
Warning: Failure to activate Jack mode on
a Model X equipped with Smart Air
Suspension can result in the vehicle
becoming loose during transport, which
may cause
significant damage.
Activate Tow Mode
Model X may automatically shift into Park
when it detects the driver leaving the vehicle,
even if it has previously been shifted into Neutral. To keep Model X in Neutral (which
disengages the parking brake), you must use
the touchscreen to activate Tow mode:
1. Shift into Park.
2. Press the brake pedal, then on the touchscreen, touch Controls > Settings >
Service & Reset > Tow Mode.When Tow mode is active, Model X
displays this indicator light on the
instrument panel, along with a
message telling you that Model X is
free-rolling.
Note: Tow mode cancels when Model X is
shifted into Park.
Caution: If the electrical system is not
working, and you therefore cannot release
the electric parking brake, attempt to
quick start the 12V battery. For
instructions, call Tesla. If a situation
occurs where you cannot disengage the
parking brake, use tire skids or transport Model X for the shortest possible distance
using wheeled dollies. Before doing so,
always check the dolly manufacturer
Page 177 of 179

high voltage (continued)components 125
safety 132
hills, stopping on 59
hood 14
horn 39
I IC
certifications 173identification labels 151
Insane setting (dual motor) 97
instrument panelcharging status 131
cleaning 143
overview of 43, 46interiorcleaning 143
dimensions 156
lights 48
overview 2
temperature control 105
Internet radio
112
intrusion detection 121
ionizer 101
ISOFIX child seats, installing 28
J
J1772 126
Jack mode 111
jacking 149
K
keyFCC and IC certifications 173
how to use 4
key not inside 41
ordering extras 6
replacing battery 5
keyless entry 4
L
labelStatutory Plate 153
Tire and Loading Information 153
lane assist 86
lane change flash 52
lane change, automatic 82
lane departure warning 86
language setting 101
Launch Mode 60
liftgateliftgate (continued)adjust opening height 12
opening 12
lifting 149
lightsadaptive headlights 51
hazard warning 52
headlights after exit 51
turn signals 51
load limits 152
location-based suspension 110
locking and unlocking doors 4
lumbar support 18
M
maintenancebrake fluid, checking 147
cleaning 142
daily and monthly checks 132
fluid replacement intervals 132
panel, removing 146
replacing wipers 145
service intervals 132
tires 133
washer
fluid, topping up 147
map data, proprietary notice 169
maps 117
mats 144
media 112
mileage upon delivery 168
mirrors 40
mobile app 124
Mobile Connectordescription 126
using 128
modifications 150
motor specifications 157
N
naming 104
navigation 117
NCC
certifications 173
Neutral gear 42
night mode 101
nose cone, removing 165
O
odometerresetting trip odometer 62
outside temperature 37
overhang dimensions 155
overtake acceleration 75
Owner Information, about 166, 167
Index
Index177
Page 178 of 179

Ppacemaker considerations 9
Park Assist 57
Park gear 42
parking brake 55
parking, automatic 84
parts replacement 150
pedestrian protection 61
personal data, erasing 104phonesteering wheel controls for 38
using 115
PIN 36
power management 63
power socket 114
power windows 11
powering on and
off 41
Preconditioning 101
preferences, setting 101
public charging stations 126
R
radar 72
radio 112
Radio Frequency information 173
radio frequency, FCC information 174
radio wave interference 9
rain sensor 53
rangedisplayed on instrument panel 43, 46
driving tips to maximize 63
regenerative braking 55
range assurance 63
range mode 63
Range Mode 97
Rated range 101
rear seats, accessing 19
rear seats, folding and raising 20
rear view camera 65
rear window switches, disabling 11
regenerative braking 55
region format 101
release notes 123
Reverse gear 42
RF antennas 9
roadside assistance 163
rotating tires 134
route overview 117
S
safety informationairbags 35
child seats 30
seat belts 22seat beltscleaning 143
in a collision 22
overview of 21
pre-tensioners 22
wearing when pregnant 21
seat covers 20
seat heaters 105
seating capacity 153
seatsadjusting 18
heaters 105
seats, second row 19
security settings 121
sensors 72
service data recording 168
service intervals 132
Settings 101
Settings, erasing 104
shifting gears 42
side collision avoidance 86
side collision warning 86
slip start 56
Smart Preconditioning 101
software reset 104
software updates 123
specificationsdimensions 155
exterior 155
interior 156
motor 157
subsystems 157
tires 160
weights 156
wheels 160
spoiler 66
stability control 56
starting 41
Statutory Plate 153
steering
specifications 157
steering wheel 37
steering, automatic 80
summer tires 135
suspension 111
suspension
specifications 158
T
telematics 168
telephonesteering wheel controls for 38
using 115temperatureBattery (high voltage), limits 127
cabin, controls for 105
outside 37, 43
tie-down straps 165
tilt detection 121
Index
178Model X Owner