Page 45 of 179
IndicatorDescriptionTire pressure warning. The pressure of a tire is out of range. If a fault with the
Tire Pressure Monitoring System (TPMS) is detected, the indicator flashes.For a TPMS fault, contact Tesla. See Tire Care and Maintenance on page 133.A door or trunk is open. See Front doors.A seat belt for an occupied seat is not fastened. See Seat Belts on page 21.The front passenger
Page 49 of 179

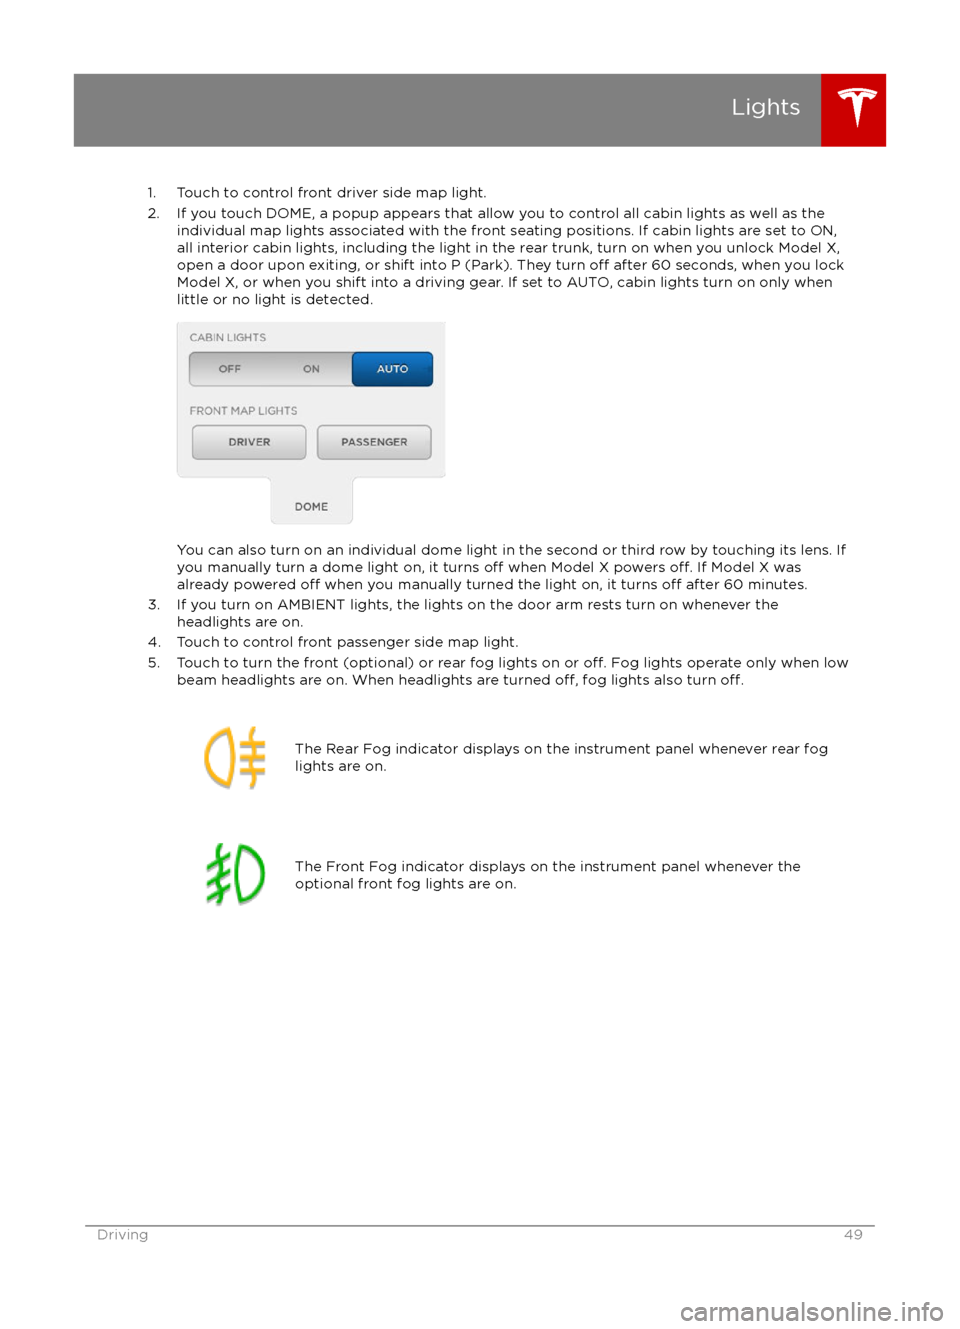
1. Touch to control front driver side map light.
2. If you touch DOME, a popup appears that allow you to control all cabin lights as well as the individual map lights associated with the front seating positions. If cabin lights are set to ON,all interior cabin lights, including the light in the rear trunk, turn on when you unlock Model X,open a door upon exiting, or shift into P (Park). They turn
off after 60 seconds, when you lock
Model X, or when you shift into a driving gear. If set to AUTO, cabin lights turn on only when
little or no light is detected.
You can also turn on an individual dome light in the second or third row by touching its lens. If
you manually turn a dome light on, it turns off when Model X powers off. If Model X was
already powered off when you manually turned the light on, it turns off after 60 minutes.
3. If you turn on AMBIENT lights, the lights on the door arm rests turn on whenever the headlights are on.
4. Touch to control front passenger side map light.
5. Touch to turn the front (optional) or rear fog lights on or
off. Fog lights operate only when low
beam headlights are on. When headlights are turned off, fog lights also turn off.
The Rear Fog indicator displays on the instrument panel whenever rear fog
lights are on.The Front Fog indicator displays on the instrument panel whenever the
optional front fog lights are on.Lights
Driving49
Page 71 of 179

Supported Bicycle Carriers
To support the installation of a carrier (such as
a bicycle rack) on the rear of Model X, the
optional towing package is required. Do not
attempt to install a carrier on a Model X that is
not equipped with the towing package. Doing
so can cause damage.
Model X is designed to support a bicycle
carrier of up to 120 lbs (55 kg). When carry
bicycles on Model X, always check to ensure
that the maximum weight is not exceeded. For
example, this weight threshold is
sufficient for
carrying two bicycles weighing approximately
40 lbs (18 kg) each, or four bicycles weighting
approximately 20 lbs (9 kg) each, assuming
the carrier weighs approximately 33 lbs (15
kg).
Warning: The accessory hitch is designed
to attach a 1.25“ hitch accessory only. Do
not use the accessory hitch for trailer
towing, transportation or vehicle recovery.
Installing a Bicycle Carrier
1. Carefully follow the instructions provided by the manufacturer of the bicycle carrier.
2. Connect the electrical connector (if equipped). When Model X detects the
electrical connector, the touchscreen may
prompt you to enter Trailer Mode. To
ensure availability of Autopilot features, it
is recommended that you do not activate
Trailer Mode.
3. Check that the lights are functioning properly (if equipped).
Note: Bicycle carriers or other accessories
mounted on the rear trunk are likely to
obscure the rear view camera
Page 114 of 179

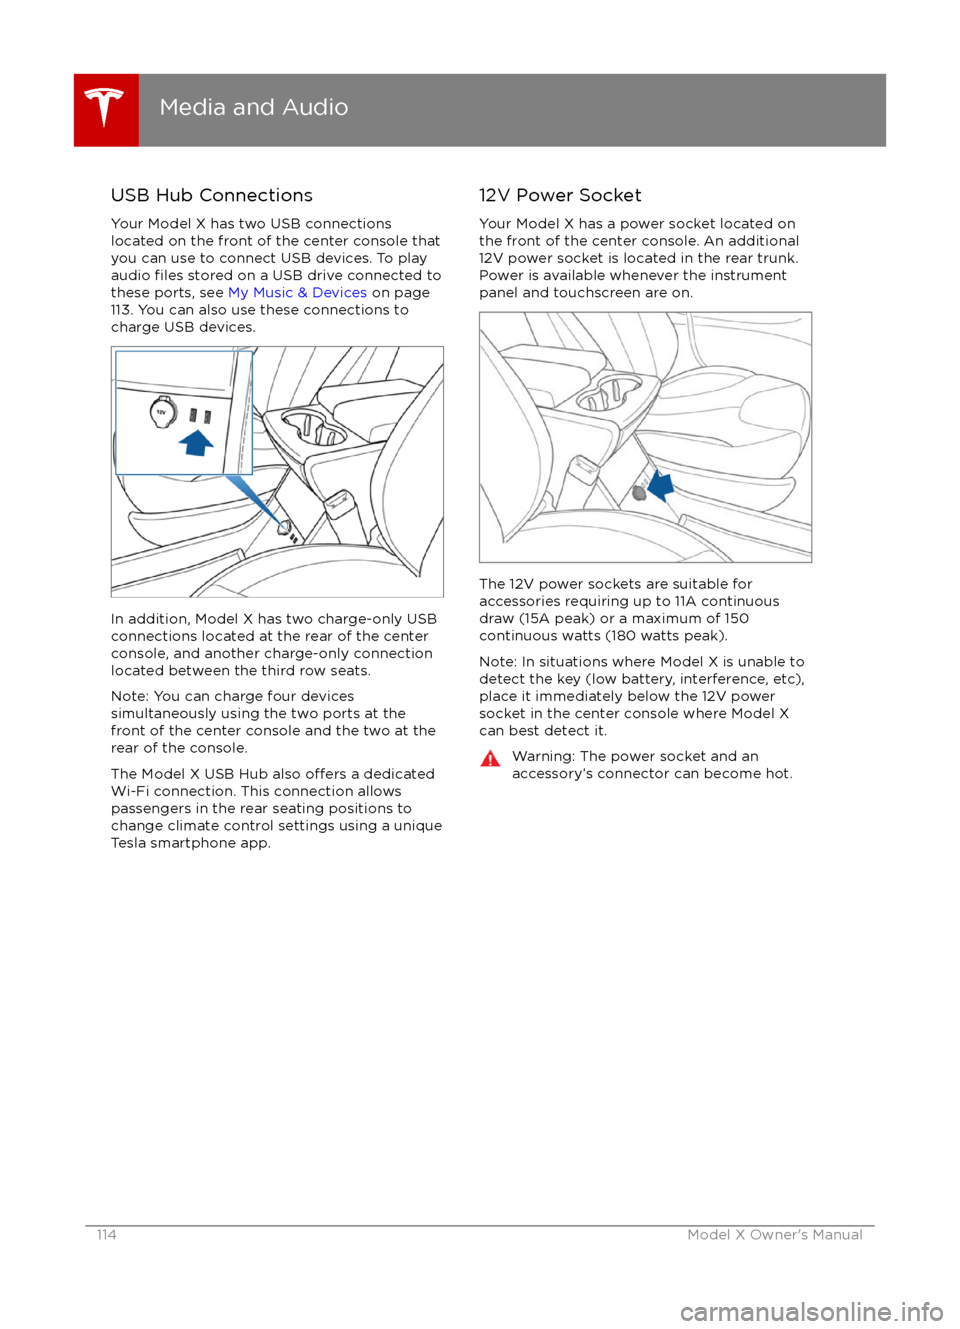
USB Hub Connections
Your Model X has two USB connections
located on the front of the center console that
you can use to connect USB devices. To play
audio
files stored on a USB drive connected to
these ports, see My Music & Devices on page
113. You can also use these connections to
charge USB devices.
In addition, Model X has two charge-only USB
connections located at the rear of the center
console, and another charge-only connection located between the third row seats.
Note: You can charge four devices
simultaneously using the two ports at the
front of the center console and the two at the
rear of the console.
The Model X USB Hub also
offers a dedicated
Wi-Fi connection. This connection allows passengers in the rear seating positions tochange climate control settings using a unique
Tesla smartphone app.
12V Power Socket
Your Model X has a power socket located on
the front of the center console. An additional
12V power socket is located in the rear trunk.
Power is available whenever the instrument
panel and touchscreen are on.
The 12V power sockets are suitable for
accessories requiring up to 11A continuous
draw (15A peak) or a maximum of 150
continuous watts (180 watts peak).
Note: In situations where Model X is unable to detect the key (low battery, interference, etc),
place it immediately below the 12V power
socket in the center console where Model X
can best detect it.
Warning: The power socket and an
accessory
Page 121 of 179
About the Security System
If Model X does not detect a key nearby and a
locked door or trunk is opened, an alarm sounds and headlights and turn signals
flash.To deactivate the alarm, press any button on the key.
To manually enable or disable the alarm system, touch Controls > Settings > Safety &
Security > Alarm. When set to on, Model X activates its alarm one minute after the doors
lock and a recognized key is no longer
detected nearby.
Security Settings
Using the Touchscreen121
Page 146 of 179

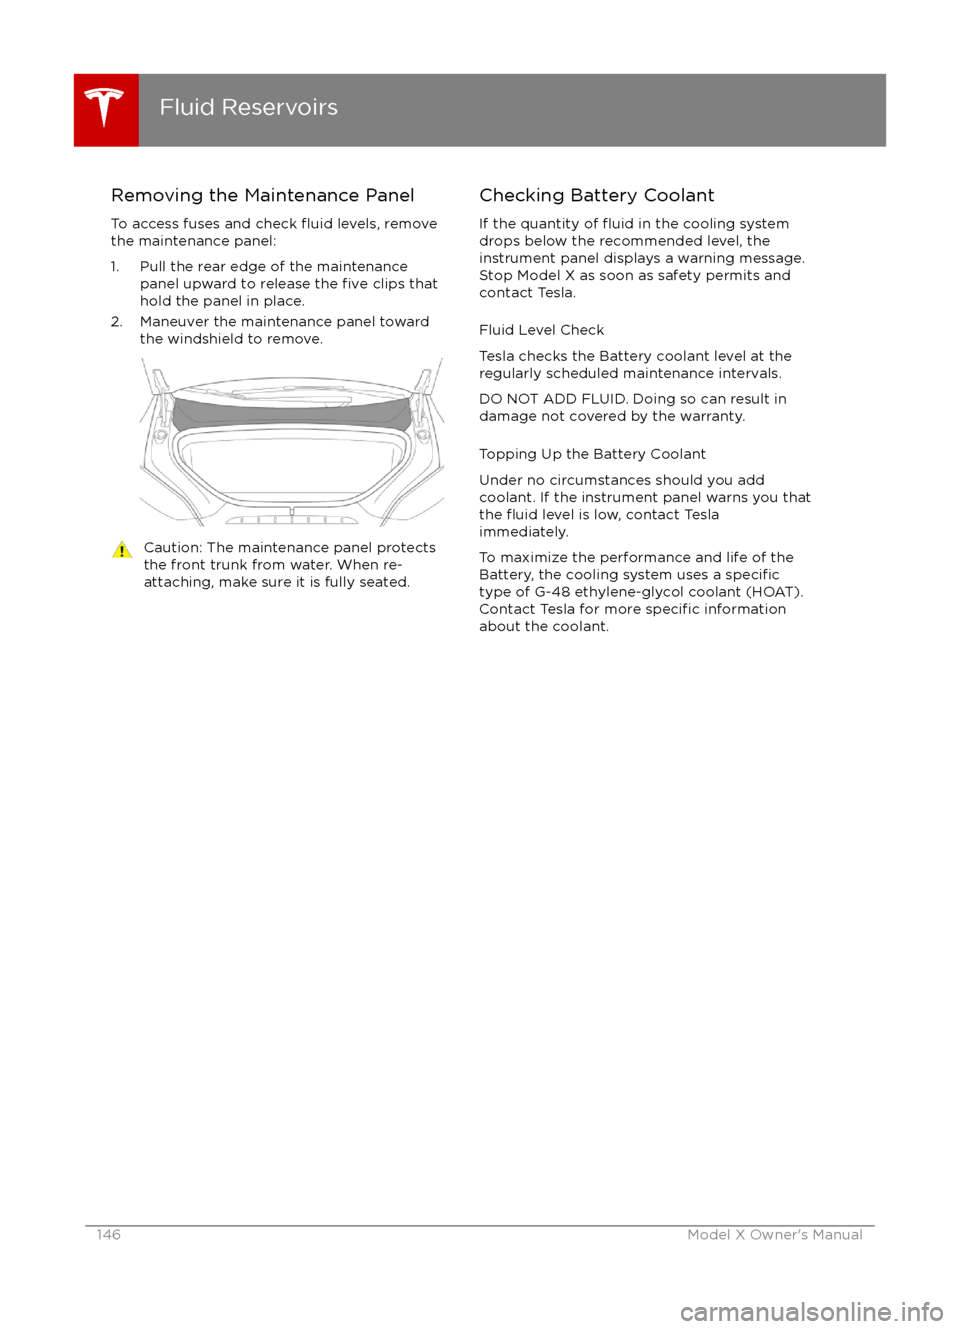
Removing the Maintenance Panel
To access fuses and check
fluid levels, remove
the maintenance panel:
1. Pull the rear edge of the maintenance panel upward to release the
five clips that
hold the panel in place.
2. Maneuver the maintenance panel toward the windshield to remove.
Caution: The maintenance panel protects
the front trunk from water. When re-
attaching, make sure it is fully seated.Checking Battery Coolant
If the quantity of
fluid in the cooling system
drops below the recommended level, the
instrument panel displays a warning message.
Stop Model X as soon as safety permits and
contact Tesla.
Fluid Level Check
Tesla checks the Battery coolant level at the
regularly scheduled maintenance intervals.
DO NOT ADD FLUID. Doing so can result in
damage not covered by the warranty.
Topping Up the Battery Coolant
Under no circumstances should you add
coolant. If the instrument panel warns you that
the
fluid level is low, contact Tesla
immediately.
To maximize the performance and life of the
Battery, the cooling system uses a
specifictype of G-48 ethylene-glycol coolant (HOAT).
Contact Tesla for more specific information
about the coolant.
Fluid Reservoirs
146Model X Owner
Page 154 of 179
Driver and four passengersDescriptionTotalVehicle capacity weight954 lbs
(433 kg)Subtract occupant weight (5 x
150 lbs/68 kg)750 lbs
(340 kg)Available cargo weight204 lbs
(93 kg)
The available cargo or luggage weight should
then be distributed between the front and rear
trunks.
Vehicle Loading
154Model X Owner
Page 165 of 179
Connect the Towing Eye1. Locate the towing eye in the front trunk.
2. Remove the tow hook cover. To do so, insert a small
flat screwdriver into the slot
located along the top of the cover, then
pry gently to release the cover from the
top snap.
3. Insert the towing eye.
Fully insert the towing eye into the
opening on the right side, then turn it
counter-clockwise until securely fastened.
4. Attach the winch cable to the towing eye.
Caution: Before pulling, make sure the
towing eye is securely tightened.Pull Onto the Trailer and Secure the
Wheels
Secure wheels using the eight-point tie-downmethod with basket straps or tie-down straps: