Page 10 of 179
1. Center of the rear bumper.
2. Left side door pillar between first and
second row seating positions.
3. Right side door pillar between
first and
second row seating positions.
4. Center console.
5. Center for front trunk.
Warning: Radio waves can adverselyaffect electric medical equipment. People
with implanted pacemakers should
contact the electric medical equipment
manufacturer for the possible
influencesbefore use.
Doors
10Model X Owner
Page 17 of 179
Opening and Closing
To expose a front cup holder, slide back the armrest.
To expose rear cup holders, press and release
the cup holder face plate located at the back
of the center console.
Cup Holders
Opening and Closing17
Page 114 of 179

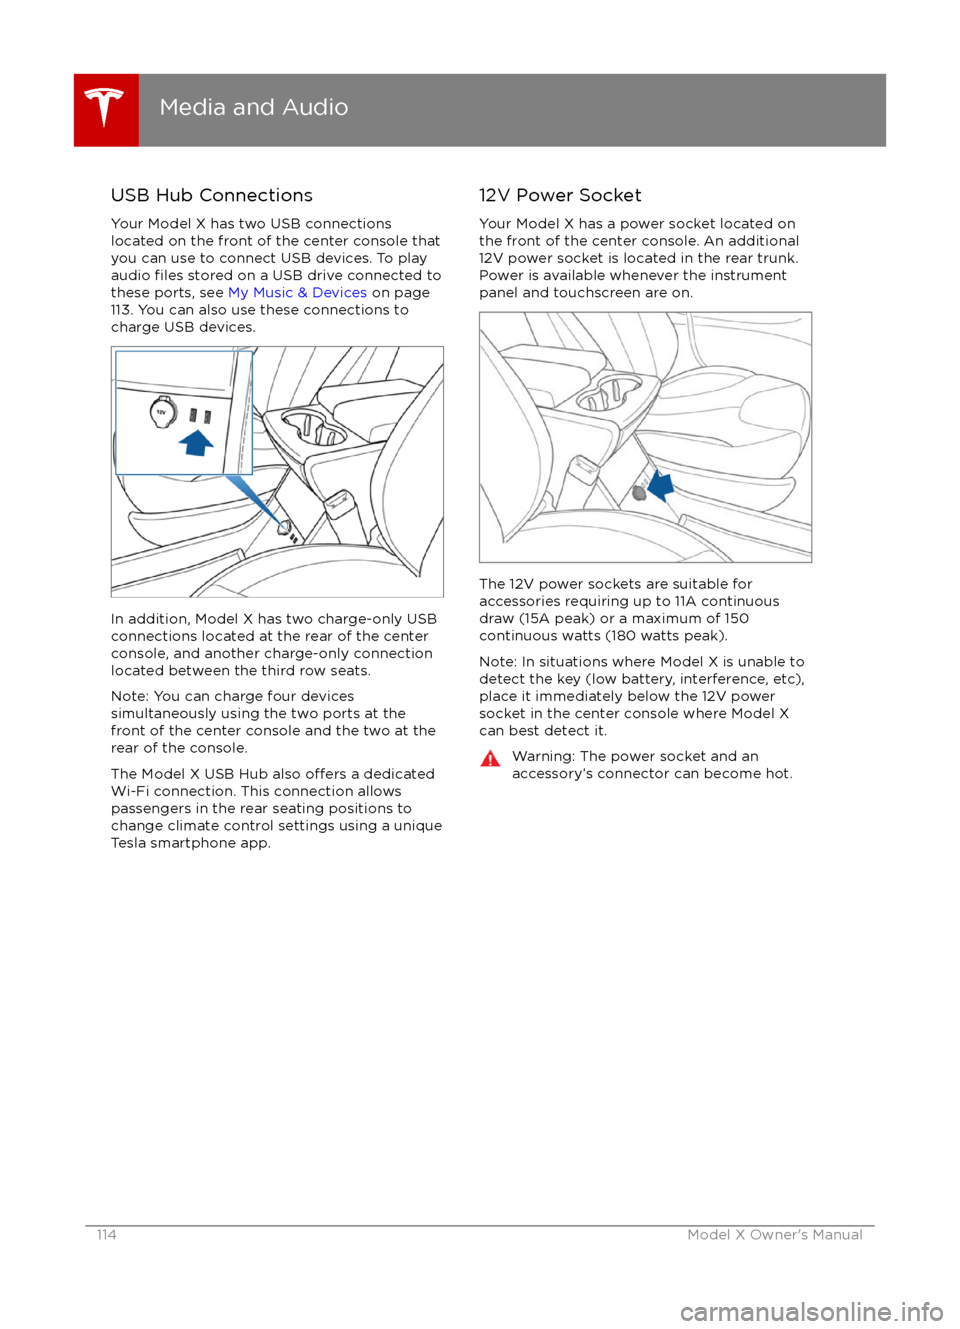
USB Hub Connections
Your Model X has two USB connections
located on the front of the center console that
you can use to connect USB devices. To play
audio
files stored on a USB drive connected to
these ports, see My Music & Devices on page
113. You can also use these connections to
charge USB devices.
In addition, Model X has two charge-only USB
connections located at the rear of the center
console, and another charge-only connection located between the third row seats.
Note: You can charge four devices
simultaneously using the two ports at the
front of the center console and the two at the
rear of the console.
The Model X USB Hub also
offers a dedicated
Wi-Fi connection. This connection allows passengers in the rear seating positions tochange climate control settings using a unique
Tesla smartphone app.
12V Power Socket
Your Model X has a power socket located on
the front of the center console. An additional
12V power socket is located in the rear trunk.
Power is available whenever the instrument
panel and touchscreen are on.
The 12V power sockets are suitable for
accessories requiring up to 11A continuous
draw (15A peak) or a maximum of 150
continuous watts (180 watts peak).
Note: In situations where Model X is unable to detect the key (low battery, interference, etc),
place it immediately below the 12V power
socket in the center console where Model X
can best detect it.
Warning: The power socket and an
accessory
Page 139 of 179
Inflating with Sealant and Air
If you have a Tesla tire repair kit, follow these
steps to temporarily repair a small tire
puncture (less than 6 mm).
1. Stop Model X in a safe place away from
traffic and ask passengers to wait in a safe
area.
2. Turn on the hazard warning
flashers to
alert other road users.
3. If possible, position the wheel with the puncture at the bottom.
4. Detach the power supply connector from
the back of the compressor and plug it
into the 12V power socket located on the
front of center console.
5. Release the clear plastic hose from the tire compressor.
6. Remove the red cap and screw the end of the hose onto the tire
Page 140 of 179

Inflating with Air Only
If you have a Tesla tire repair kit, follow these
steps to
inflate a tire with air:
1. Detach the power supply connector from the rear of the compressor and plug it into
the 12V power socket located in Model X
on the front of center console.
2. Release the black air hose from the compressor.
3. Attach the air hose to the valve and press the lever down to secure it in place.
4. Ensure the compressor is lying on a level
surface with the pressure gauge facing tothe side where you can read it.
5. To add air, turn on the compressor and
inflate until the desired pressure is
reached.
6. To release air, turn
off the compressor,
then press and hold the red button until
the desired pressure is reached.
Note: For your convenience, the tire repair kit
includes a selection of adapters that allow you to
inflate other items. These adapters are
located in a compartment on the back of the
compressor.
Caution: To avoid overheating, do not use
the compressor continuously for more
than eight minutes. Allow the compressor
to cool for 15 minutes between uses.Caution: The compressor runs slowly
when overheated from excessive use. Turn
it
off and allow it to cool.Temporary Tire Repair
140Model X Owner