Page 96 of 190
1. CloseTouch the circled X in the top left corner of a window to close it (or you can touch anywhere
outside the window).
2. Sunroof
If Model S is equipped with a sunroof, touch to adjust its position (see Sunroof on page 15).
3. Suspension
If Model S is equipped with Smart Air Suspension, touch to manually raise or lower Model S, orto remove a previously saved auto-raising location (see Smart Air Suspension on page 108).
Model S must be powered on and you must press the brake pedal before you can change
suspension settings. Smart Air Suspension causes Model S to self-level, even when powered
off. Therefore, when towing or lifting, you must disable self-leveling (see Instructions for
Transporters on page 175 and Jacking and Lifting on page 158).
Controls
96Model S Owner
Page 98 of 190
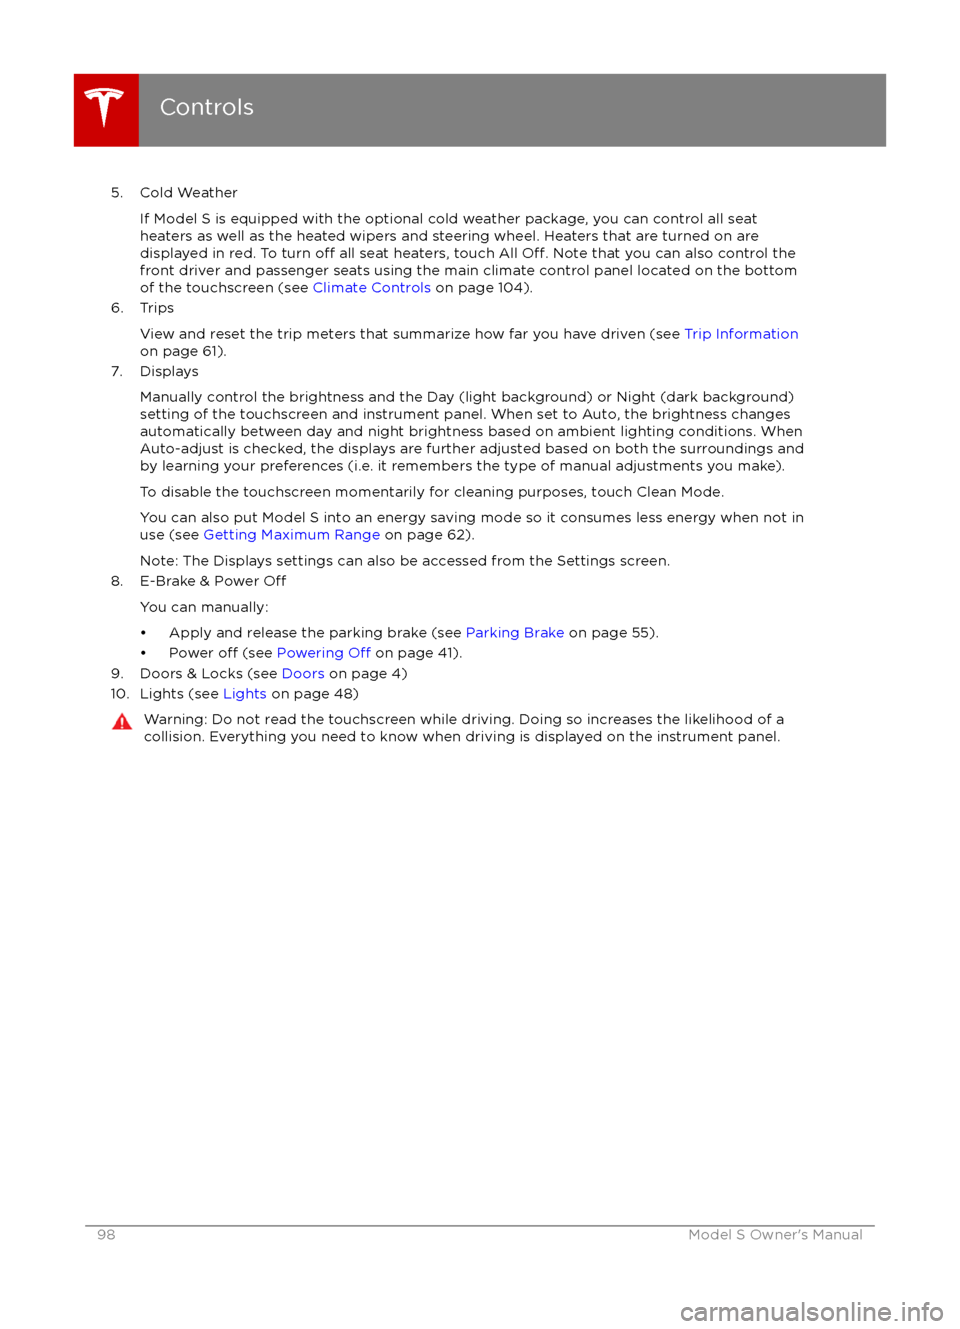
5. Cold WeatherIf Model S is equipped with the optional cold weather package, you can control all seat
heaters as well as the heated wipers and steering wheel. Heaters that are turned on are displayed in red. To turn
off all seat heaters, touch All Off. Note that you can also control the
front driver and passenger seats using the main climate control panel located on the bottom
of the touchscreen (see Climate Controls on page 104).
6. Trips
View and reset the trip meters that summarize how far you have driven (see Trip Information
on page 61).
7. Displays
Manually control the brightness and the Day (light background) or Night (dark background)setting of the touchscreen and instrument panel. When set to Auto, the brightness changes
automatically between day and night brightness based on ambient lighting conditions. When
Auto-adjust is checked, the displays are further adjusted based on both the surroundings and
by learning your preferences (i.e. it remembers the type of manual adjustments you make).
To disable the touchscreen momentarily for cleaning purposes, touch Clean Mode.You can also put Model S into an energy saving mode so it consumes less energy when not inuse (see Getting Maximum Range on page 62).
Note: The Displays settings can also be accessed from the Settings screen.
8. E-Brake & Power
Off
You can manually:
Page 104 of 190
Overview of Climate Controls
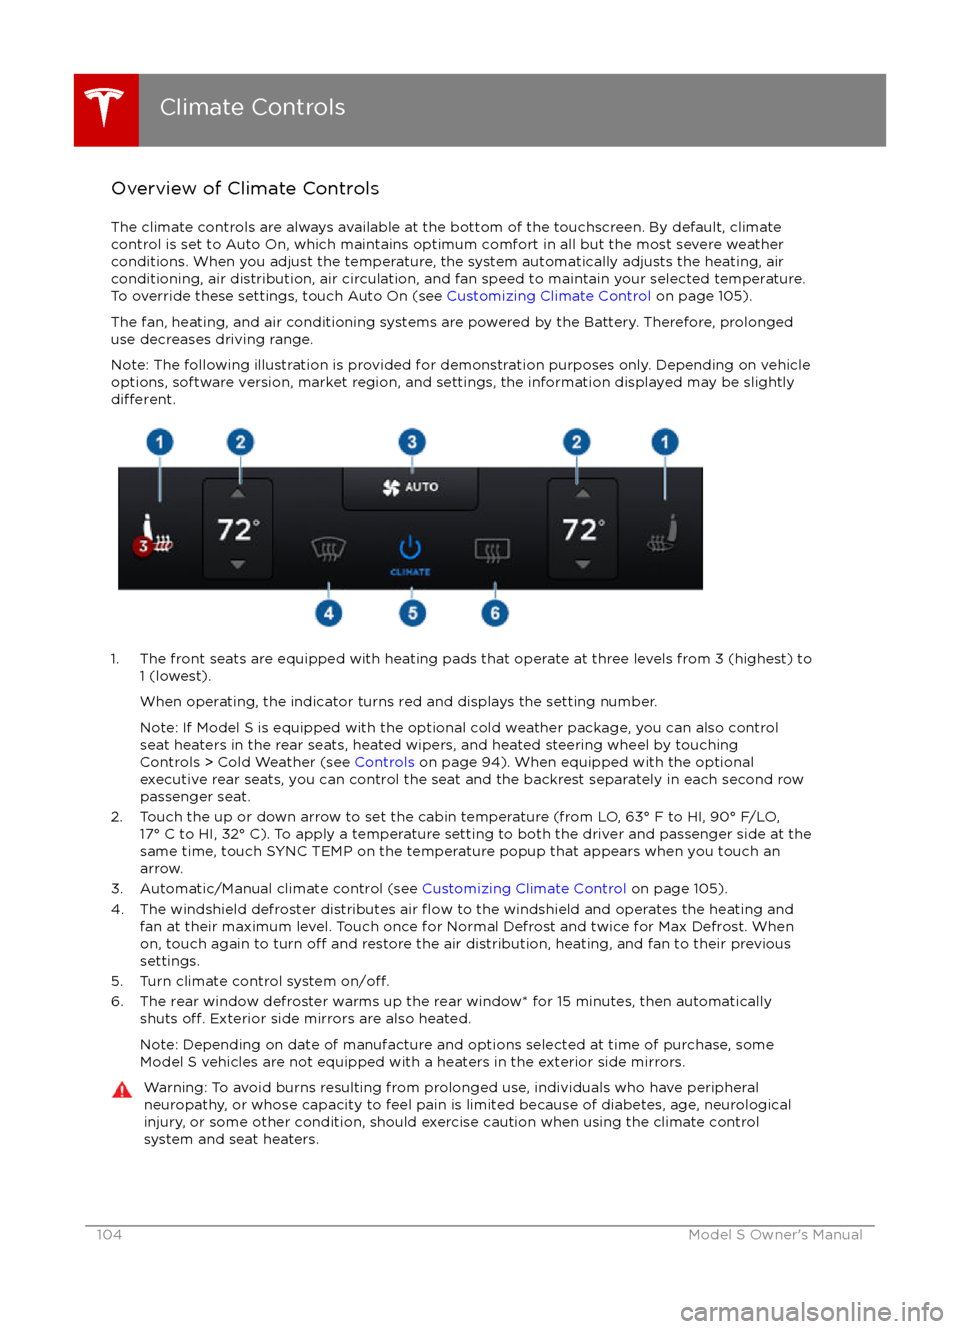
The climate controls are always available at the bottom of the touchscreen. By default, climate control is set to Auto On, which maintains optimum comfort in all but the most severe weather conditions. When you adjust the temperature, the system automatically adjusts the heating, air
conditioning, air distribution, air circulation, and fan speed to maintain your selected temperature. To override these settings, touch Auto On (see Customizing Climate Control on page 105).
The fan, heating, and air conditioning systems are powered by the Battery. Therefore, prolonged use decreases driving range.
Note: The following illustration is provided for demonstration purposes only. Depending on vehicle
options, software version, market region, and settings, the information displayed may be slightly
different.
1. The front seats are equipped with heating pads that operate at three levels from 3 (highest) to 1 (lowest).
When operating, the indicator turns red and displays the setting number.
Note: If Model S is equipped with the optional cold weather package, you can also control seat heaters in the rear seats, heated wipers, and heated steering wheel by touchingControls > Cold Weather (see Controls on page 94). When equipped with the optional
executive rear seats, you can control the seat and the backrest separately in each second row
passenger seat.
2. Touch the up or down arrow to set the cabin temperature (from LO, 63
Page 105 of 190
Customizing Climate ControlThe climate control system is designed to automatically provide optimum comfort in most
situations. All you need to do is set the desired temperature, and the air conditioning, air
recirculation, air distribution, and fan speed automatically maintain your selected temperature.
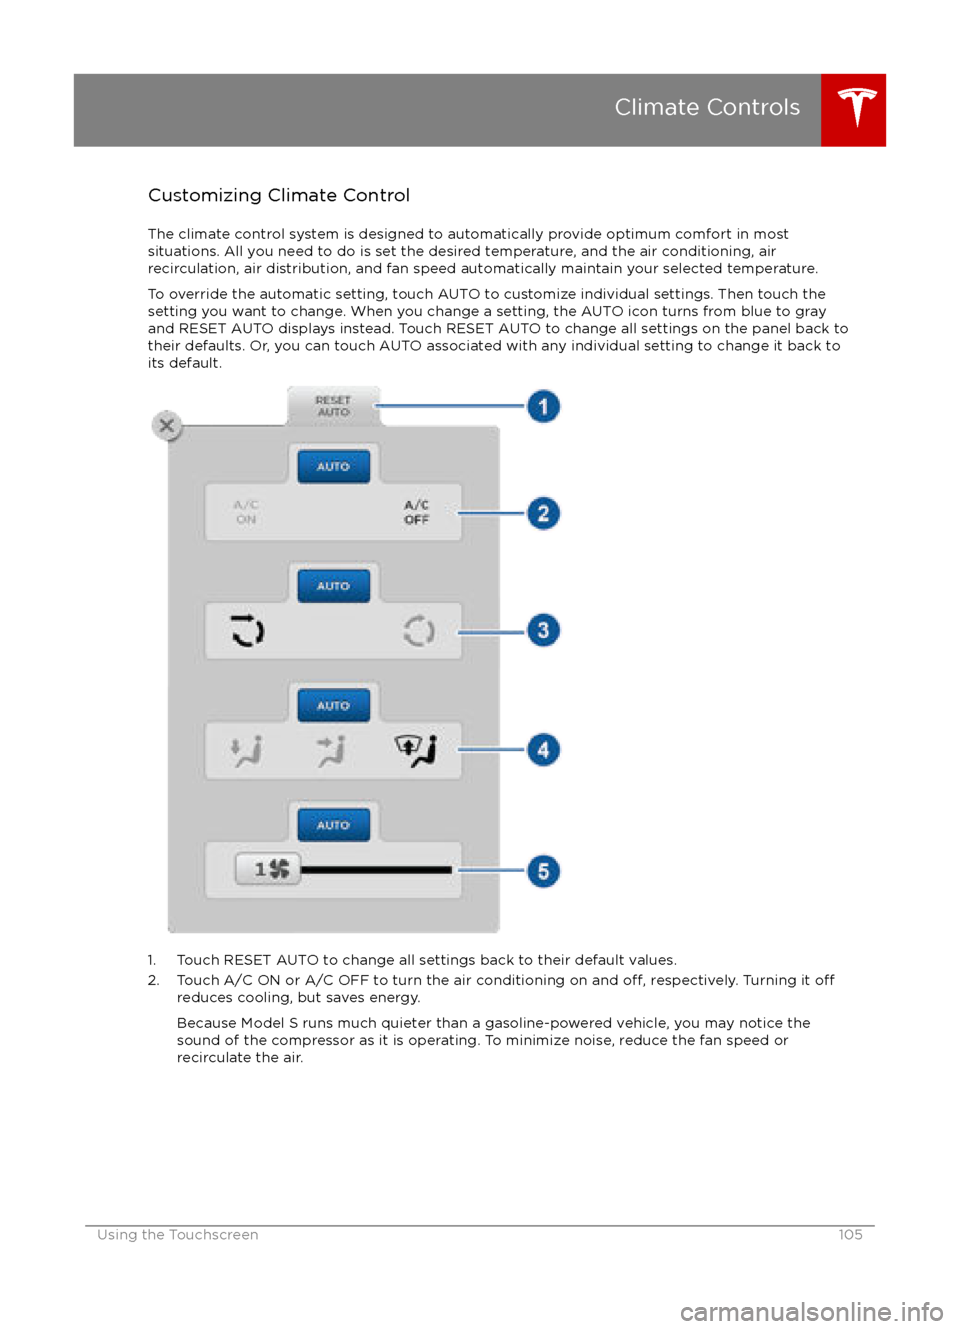
To override the automatic setting, touch AUTO to customize individual settings. Then touch the
setting you want to change. When you change a setting, the AUTO icon turns from blue to gray
and RESET AUTO displays instead. Touch RESET AUTO to change all settings on the panel back to
their defaults. Or, you can touch AUTO associated with any individual setting to change it back to its default.
1. Touch RESET AUTO to change all settings back to their default values.
2. Touch A/C ON or A/C OFF to turn the air conditioning on and off, respectively. Turning it offreduces cooling, but saves energy.
Because Model S runs much quieter than a gasoline-powered vehicle, you may notice the
sound of the compressor as it is operating. To minimize noise, reduce the fan speed or
recirculate the air.
Climate Controls
Using the Touchscreen105
Page 113 of 190
USB Hub Connections
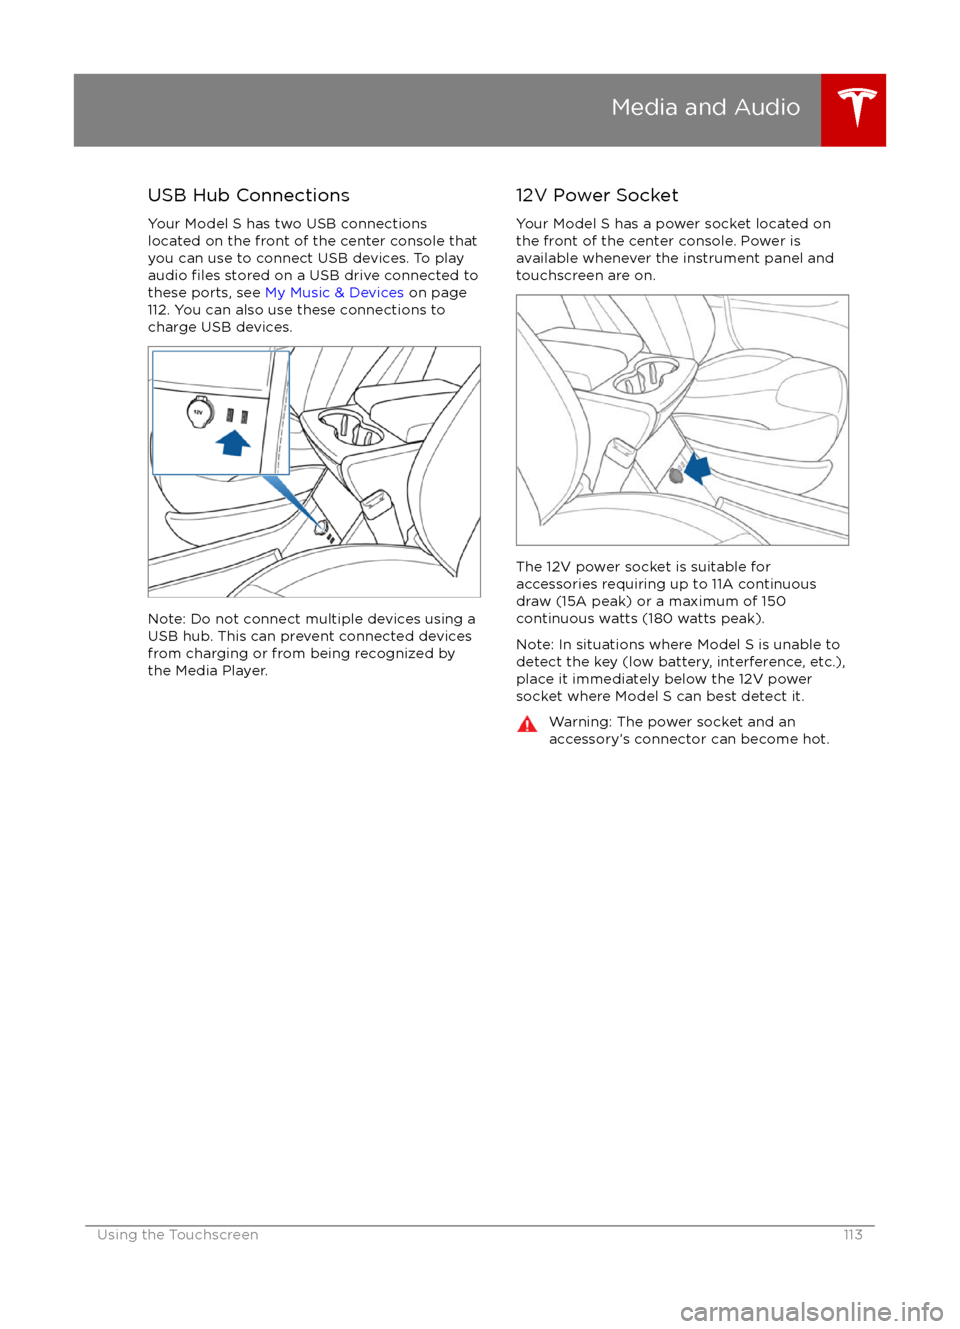
Your Model S has two USB connections
located on the front of the center console that
you can use to connect USB devices. To play
audio
files stored on a USB drive connected to
these ports, see My Music & Devices on page
112. You can also use these connections to charge USB devices.
Note: Do not connect multiple devices using a
USB hub. This can prevent connected devices
from charging or from being recognized by
the Media Player.
12V Power Socket
Your Model S has a power socket located on
the front of the center console. Power is
available whenever the instrument panel and
touchscreen are on.
The 12V power socket is suitable for
accessories requiring up to 11A continuous
draw (15A peak) or a maximum of 150
continuous watts (180 watts peak).
Note: In situations where Model S is unable to detect the key (low battery, interference, etc.),
place it immediately below the 12V power
socket where Model S can best detect it.
Warning: The power socket and an
accessory
Page 128 of 190
Warning: The high voltage system has no user serviceable parts. Do not disassemble, removeor replace high voltage components, cables or connectors. High voltage cables are coloredorange for easy
identification.
Warning: Read and follow all instructions provided on the labels that are attached to Model S.
These labels are there for your safety.Warning: In the unlikely event that a fire occurs, immediately contact your local fireemergency responders.Charging Equipment
Charging equipment designed
specifically to
charge your Model S is available from Tesla. A
Tesla Wall Connector, which installs in your
garage, is the fastest way to charge Model S at home.
In several market regions, Model S is equipped
with a Mobile Connector and the adapter(s)
you need to plug into commonly used power
outlets. When using the Mobile Connector,
first plug the Mobile Connector into the power
outlet, then plug in Model S. For more
information about your Mobile Connector, see
the Mobile Connector Owner
Page 133 of 190

Charging StatusThe following illustration is provided for demonstration purposes only and may vary slightly
depending on the software version and market region of your Model S.1. Charging rate per hour.
2. Total estimated driving distance (or energy) available. Instead of drivingdistance as shown here, you can display
the percentage of battery energy
remaining. To do so, touch Controls > Settings > Units & Format > Energy &
Charging.
Note: A portion of the battery image may
appear blue. This indicates that a small
portion of the energy stored in the battery
is not available on your drive because the
battery is cold. This is normal and no
reason for concern. When the battery warms up, the blue portion is no longer
displayed.
3. Current being supplied/Total current available from the connected power
supply (see Changing Charge Settings on
page 132).
4. Estimated increase in driving distance (or energy) achieved so far in this chargingsession. Instead of driving distance as
illustrated above, you can change settings
to display the amount of energy achieved.
To do so, touch Controls > Settings > Units
& Format > Energy & Charging.5. Charging status information displays here.
For example, if Model S is charging, it
displays the time remaining until fully
charged at the currently selected charge
level. When scheduled charging is set for a
location, it displays when charging will
start.
6. Voltage being supplied by the charge cable.
Note: If Model S is charging and detects
unexpected
Page 141 of 190
Inflating with Sealant and Air
If you have a Tesla tire repair kit, follow these
steps to temporarily repair a small tire
puncture (less than 1/4”/6 mm)).
1. Stop Model S in a safe place away from
traffic and ask passengers to wait in a safe
area.
2. Turn on the hazard warning
flashers to
alert other road users.
3. If possible, position the wheel with the puncture at the bottom.
4. Detach the power supply connector from the back of the compressor and plug it
into the 12V power socket located on the
front of center console.
5. Release the clear plastic hose from the tire
compressor.
6. Remove the red cap and screw the end of the hose onto the tire