2016 SUBARU IMPREZA light
[x] Cancel search: lightPage 46 of 594
WARNING
When wearing the seatbelts, make
sure the shoulder portion of the
webbing does not pass over your
neck. If it does, adjust the seatbelt
anchor to a lower position. Placing
the shoulder belt over the neck may
result in neck injury during sudden
braking or in a collision.! Unfastening the seatbelt
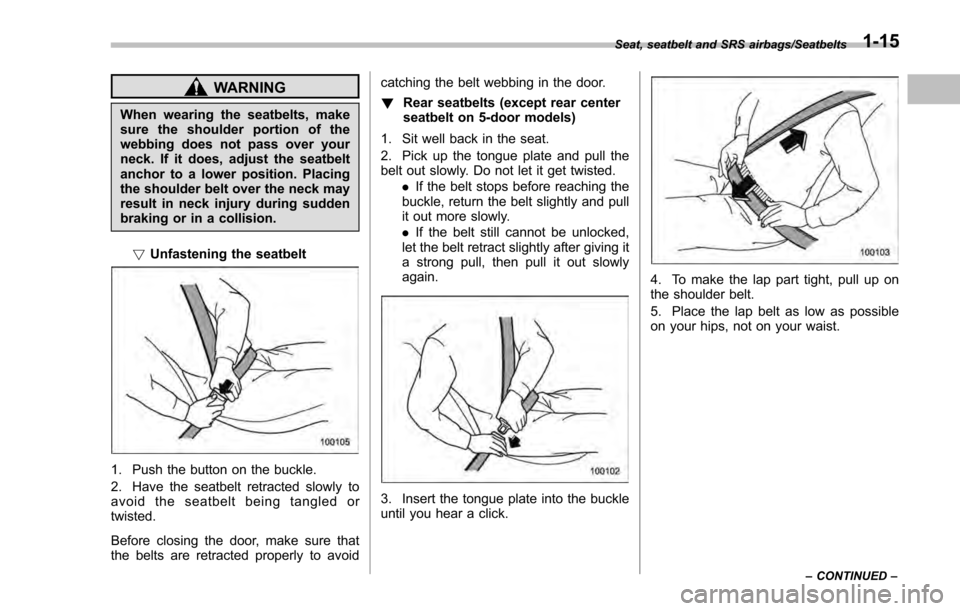
1. Push the button on the buckle.
2. Have the seatbelt retracted slowly to
avoid the seatbelt being tangled or
twisted.
Before closing the door, make sure that
the belts are retracted properly to avoid catching the belt webbing in the door.
!
Rear seatbelts (except rear center
seatbelt on 5-door models)
1. Sit well back in the seat.
2. Pick up the tongue plate and pull the
belt out slowly. Do not let it get twisted. .If the belt stops before reaching the
buckle, return the belt slightly and pull
it out more slowly.
. If the belt still cannot be unlocked,
let the belt retract slightly after giving it
a strong pull, then pull it out slowly
again.
3. Insert the tongue plate into the buckle
until you hear a click.
4. To make the lap part tight, pull up on
the shoulder belt.
5. Place the lap belt as low as possible
on your hips, not on your waist.
Seat, seatbelt and SRS airbags/Seatbelts
–CONTINUED –1-15
Page 49 of 594
Seat, seatbelt and SRS airbags/Seatbelts
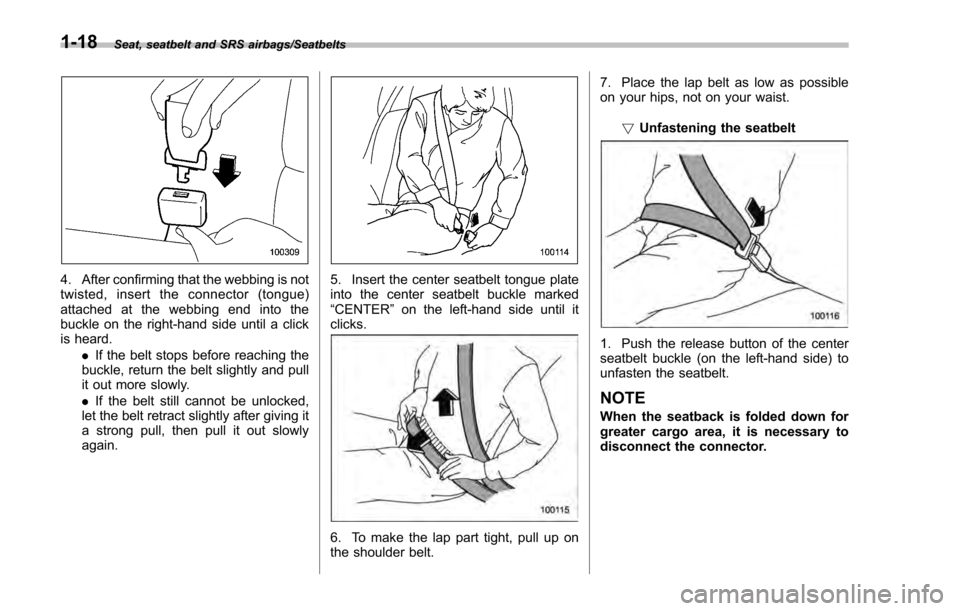
4. After confirming that the webbing is not
twisted, insert the connector (tongue)
attached at the webbing end into the
buckle on the right-hand side until a click
is heard..If the belt stops before reaching the
buckle, return the belt slightly and pull
it out more slowly.
. If the belt still cannot be unlocked,
let the belt retract slightly after giving it
a strong pull, then pull it out slowly
again.5. Insert the center seatbelt tongue plate
into the center seatbelt buckle marked
“CENTER ”on the left-hand side until it
clicks.
6. To make the lap part tight, pull up on
the shoulder belt. 7. Place the lap belt as low as possible
on your hips, not on your waist.
!Unfastening the seatbelt
1. Push the release button of the center
seatbelt buckle (on the left-hand side) to
unfasten the seatbelt.
NOTE
When the seatback is folded down for
greater cargo area, it is necessary to
disconnect the connector.
1-18
Page 55 of 594
Seat, seatbelt and SRS airbags/Front seatbelt pretensioners
&System monitors
A diagnostic system continually monitors
the readiness of the seatbelt pretensioner
while the vehicle is being driven. The
seatbelt pretensioners share the control
modulewiththeSRSairbagsystem.
Therefore, if any malfunction occurs in a
seatbelt pretensioner, the SRS airbag
system warning light will illuminate. For
details, refer to “SRS airbag system
monitors ”F 1-67.
& System servicing
WARNING
. When discarding a seatbelt re-
tractor assembly or scrapping
the entire vehicle damaged by a
collision, consult your SUBARU
dealer.
. Tampering with or disconnecting
the system’ s wiring could result
in accidental activation of the
seatbelt pretensioner and/or
SRS airbag or could make the
system inoperative, which may
result in serious injury. Do not
use electrical test equipment on
any circuit related to the seatbelt
pretensioner and SRS airbag
systems. For required servicing of the seatbelt pretensioner, con-
sult your nearest SUBARU deal-
er.
CAUTION
The sensors and SRS airbag control
modules are located in the following
locations.
.
Front sub sensors: on both the
right and left side at the front of
the vehicle
. Front door impact sensors: on
both front doors
. Satellite safing sensor: under the
rear center seat
. SRS airbag control module (in-
cluding the impact sensors): un-
der the center of the instrument
panel
If you need service or repair in those
areas or near the front seatbelt
retractors, have the work performed
by your authorized SUBARU dealer.
NOTE
If the front or side part of the vehicle is
damaged in an accident to the extent
that the seatbelt pretensioner does not operate, contact your SUBARU dealer
as soon as possible.
&
Precautions against vehicle
modification
Always consult your SUBARU dealer if
you want to install any accessory parts to
your vehicle.
CAUTION
Do not perform any of the following
modifications. Such modifications
can interfere with proper operation
of the seatbelt pretensioners.
. Attachment of any equipment
(bush bar, winches, snow plow,
skid plate, etc.) other than genu-
ine SUBARU accessory parts to
the front end.
. Modification of the suspension
system or front end structure.
. Installation of a tire of different
size and construction from the
tires specified on the vehicle
placard attached to the driver ’s
door pillar or specified for indivi-
dual vehicle models in this Own-
er ’s Manual.
1-24
Page 58 of 594
and force and can injure or even
kill children, especially if they are
not restrained or improperly re-
strained. Because children are
lighter and weaker than adults,
their risk of being injured from
deployment is greater.
For that reason, be sure to se-
cure ALL types of child restraint
devices (including forward facing
child seats) in the REAR seats at
all times. You should choose a
restraint device which is appro-
priate for the child’s age, height
and weight. According to acci-
dent statistics, children are safer
when properly restrained in the
rear seating positions than in the
front seating positions.
. Do not use lower anchorages
(bars) for a seat in the center
seating position unless a child
restraint system manufacturer ’s
instructions permit and specify
using anchors spaced as far
apart as those in this vehicle.
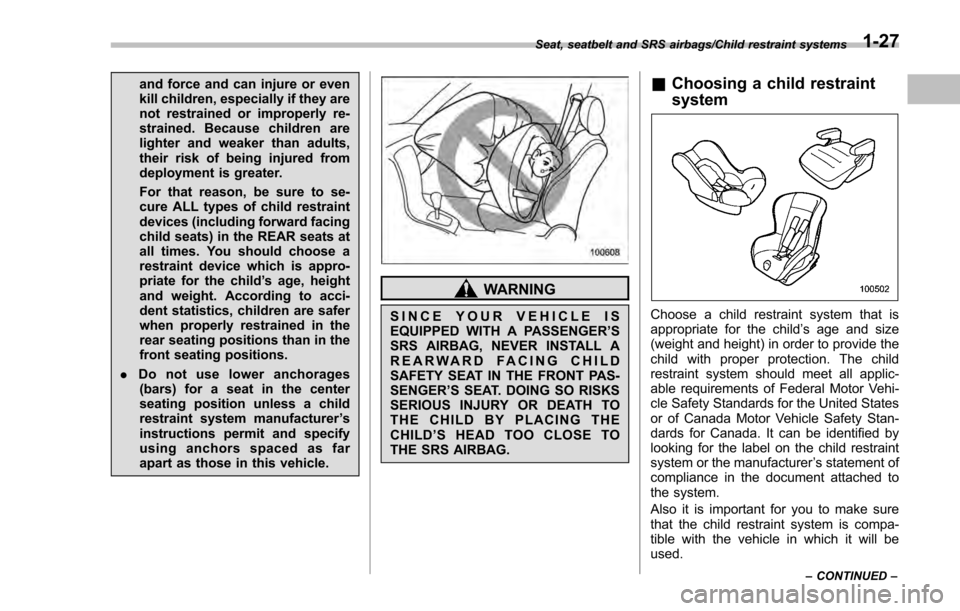
WARNING
SINCE YOUR VEHICLE IS
EQUIPPED WITH A PASSENGER ’S
SRS AIRBAG, NEVER INSTALL A
REARWARD FACING CHILD
SAFETY SEAT IN THE FRONT PAS-
SENGER ’S SEAT. DOING SO RISKS
SERIOUS INJURY OR DEATH TO
THE CHILD BY PLACING THE
CHILD’ SHEADTOOCLOSETO
THE SRS AIRBAG.
& Choosing a child restraint
system
Choose a child restraint system that is
appropriate for the child ’s age and size
(weight and height) in order to provide the
child with proper protection. The child
restraint system should meet all applic-
able requirements of Federal Motor Vehi-
cle Safety Standards for the United States
or of Canada Motor Vehicle Safety Stan-
dards for Canada. It can be identified by
looking for the label on the child restraint
system or the manufacturer ’s statement of
compliance in the document attached to
the system.
Also it is important for you to make sure
that the child restraint system is compa-
tible with the vehicle in which it will be
used.
Seat, seatbelt and SRS airbags/Child restraint systems
–CONTINUED –1-27
Page 60 of 594
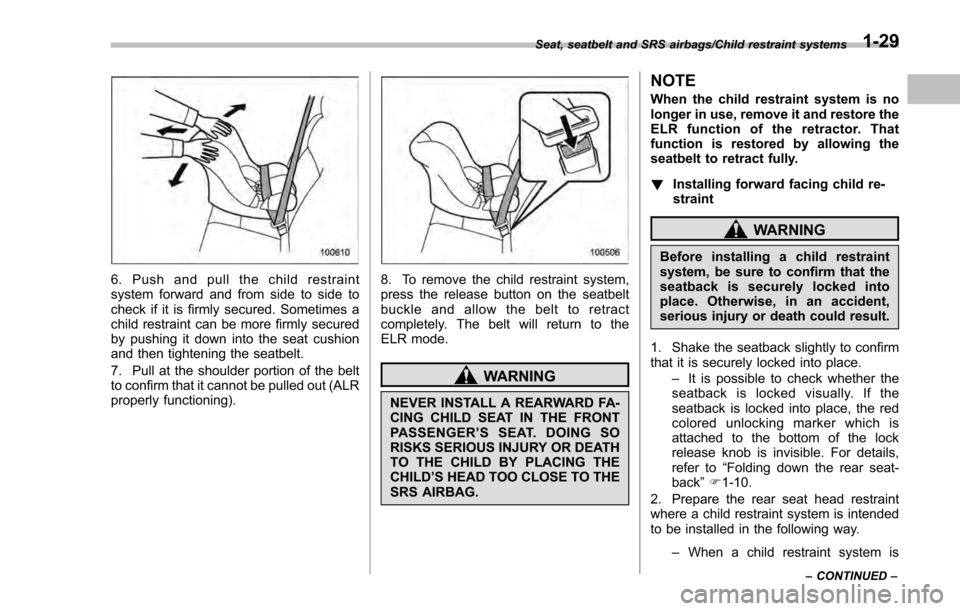
6. Push and pull the child restraint
system forward and from side to side to
check if it is firmly secured. Sometimes a
child restraint can be more firmly secured
by pushing it down into the seat cushion
and then tightening the seatbelt.
7. Pull at the shoulder portion of the belt
to confirm that it cannot be pulled out (ALR
properly functioning).8. To remove the child restraint system,
press the release button on the seatbelt
buckle and allow the belt to retract
completely. The belt will return to the
ELR mode.
WARNING
NEVER INSTALL A REARWARD FA-
CING CHILD SEAT IN THE FRONT
PASSENGER’SSEAT.DOINGSO
RISKS SERIOUS INJURY OR DEATH
TO THE CHILD BY PLACING THE
CHILD ’S HEAD TOO CLOSE TO THE
SRS AIRBAG.
NOTE
When the child restraint system is no
longer in use, remove it and restore the
ELR function of the retractor. That
function is restored by allowing the
seatbelt to retract fully.
! Installing forward facing child re-
straint
WARNING
Before installing a child restraint
system, be sure to confirm that the
seatback is securely locked into
place. Otherwise, in an accident,
serious injury or death could result.
1. Shake the seatback slightly to confirm
that it is securely locked into place. –It is possible to check whether the
seatback is locked visually. If the
seatback is locked into place, the red
colored unlocking marker which is
attached to the bottom of the lock
release knob is invisible. For details,
refer to “Folding down the rear seat-
back ”F 1-10.
2. Prepare the rear seat head restraint
where a child restraint system is intended
to be installed in the following way.
–When a child restraint system is
Seat, seatbelt and SRS airbags/Child restraint systems
–CONTINUED –1-29
Page 66 of 594
!To install a child restraint system
using lower and tether an-
chorages
To install a child restraint system using
lower and tether anchorages, perform the
following procedure.
WARNING
Before installing a child restraint
system, be sure to confirm that the
seatback is securely locked into
place. Otherwise, in an accident,
serious injury or death could result.
1. Shake the seatback slightly to confirm
that it is securely locked into place. –It is possible to check whether the
seatback is locked visually. If the
seatback is locked into place, the red
colored unlocking marker which is
attached to the bottom of the lock
release knob is invisible. For details,
refer to “Folding down the rear seat-
back ”F 1-10.
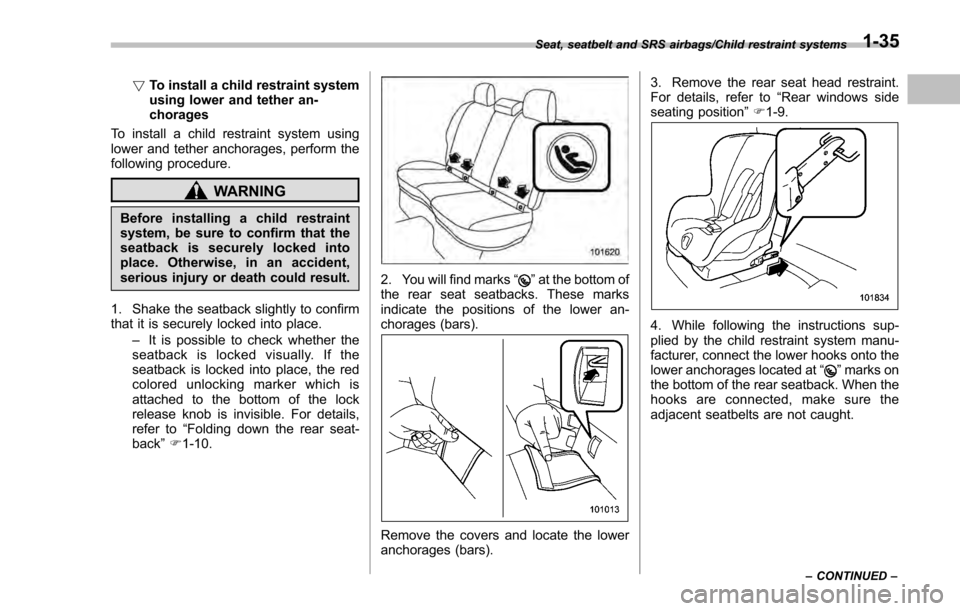
2. You will find marks “”at the bottom of
the rear seat seatbacks. These marks
indicate the positions of the lower an-
chorages (bars).
Remove the covers and locate the lower
anchorages (bars). 3. Remove the rear seat head restraint.
For details, refer to
“Rear windows side
seating position” F1-9.
4. While following the instructions sup-
plied by the child restraint system manu-
facturer, connect the lower hooks onto the
lower anchorages located at “
”marks on
the bottom of the rear seatback. When the
hooks are connected, make sure the
adjacent seatbelts are not caught.
Seat, seatbelt and SRS airbags/Child restraint systems
–CONTINUED –1-35
Page 74 of 594
or even kill children, especially if
they are not restrained or impro-
perly restrained. Because children
are lighter and weaker than adults,
their risk of being injured from
deployment is greater.
For that reason, we strongly recom-
mend that ALL children (including
those in child seats and those that
have outgrown child restraint de-
vices) sit in the REAR seat properly
restrained at all times in a child
restraint device or in a seatbelt,
whichever is appropriate for the
child’s age, height and weight.
Secure ALL types of child restraint
devices (including forward facing
child seats) in the REAR seats at
all times.
According to accident statistics,
children are safer when properly
restrained in the rear seating posi-
tions than in the front seating posi-
tions.
For instructions and precautions
concerning the child restraint sys-
tem, refer to “Child restraint sys-
tems ”F 1-25.
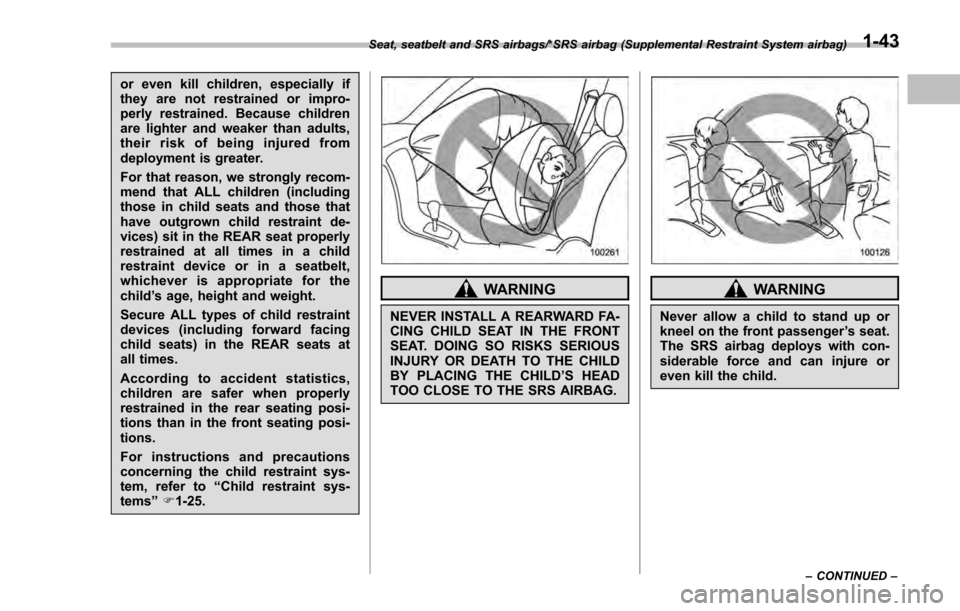
WARNING
NEVER INSTALL A REARWARD FA-
CING CHILD SEAT IN THE FRONT
SEAT. DOING SO RISKS SERIOUS
INJURY OR DEATH TO THE CHILD
BY PLACING THE CHILD ’S HEAD
TOO CLOSE TO THE SRS AIRBAG.
WARNING
Never allow a child to stand up or
kneel on the front passenger ’s seat.
The SRS airbag deploys with con-
siderable force and can injure or
even kill the child.
Seat, seatbelt and SRS airbags/*SRS airbag (Supplemental Restraint System airbag)
–CONTINUED –1-43
Page 78 of 594
![SUBARU IMPREZA 2016 5.G Owners Manual 1) Airbag control module (including impactsensor [all models] and rollover sensor
[Crosstrek models])
2) Frontal airbag module (driver ’s side)
3) Frontal airbag module (front passenger ’s
side)
4 SUBARU IMPREZA 2016 5.G Owners Manual 1) Airbag control module (including impactsensor [all models] and rollover sensor
[Crosstrek models])
2) Frontal airbag module (driver ’s side)
3) Frontal airbag module (front passenger ’s
side)
4](/manual-img/17/7248/w960_7248-77.png)
1) Airbag control module (including impactsensor [all models] and rollover sensor
[Crosstrek models])
2) Frontal airbag module (driver ’s side)
3) Frontal airbag module (front passenger ’s
side)
4) Front sub sensor (left-hand side)
5) Front sub sensor (right-hand side) 6) Side airbag module (driver
’s side)
7) Side airbag module (front passenger ’s
side)
8) Side airbag sensor (center pillar left-hand side)
9) Side airbag sensor (center pillar right- hand side)
10) Airbag wiring 11) Seatbelt pretensioner (driver
’s side)
12) Seatbelt pretensioner (front passenger ’s
side)
13) Curtain airbag sensor (rear wheel house right-hand side)
14) Curtain airbag sensor (rear wheel house left-hand side)
15) Curtain airbag module (right-hand side)
16) Curtain airbag module (left-hand side)
17) Seatbelt buckle switch (front passenger ’s
side)
18) Knee airbag module (driver ’s side)
19) Front passenger ’s occupant detection
system sensor
20) Front passenger ’s occupant detection
control module
21) Front passenger ’s frontal airbag ON and
OFF indicator
22) SRS airbag system warning light
23) Satellite safing sensor (under the rear center seat)
24) Front door impact sensor (left-hand side)
25) Front door impact sensor (right-hand side)
26) Lap belt pretensioner (front passenger ’s
side in Crosstrek models)
Seat, seatbelt and SRS airbags/*SRS airbag (Supplemental Restraint System airbag)
–CONTINUED –
1-47