2016 SUBARU IMPREZA steering
[x] Cancel search: steeringPage 100 of 594
&SRS airbag system servicing
WARNING
. When discarding an airbag mod-
ule or scrapping the entire vehi-
cle damaged by a collision, con-
sult your SUBARU dealer.
. The SRS airbag has no user-
serviceable parts. Do not use
electrical test equipment on any
circuit related to the SRS airbag
system. For required servicing of
the SRS airbag, consult your
nearest SUBARU dealer. Tamper-
ing with or disconnecting the
system ’s wiring could result in
accidental inflation of the SRS
airbag or could make the system
inoperative, which may result in
serious injury.
CAUTION
If you need service or repair in areas
indicated in the following list, have
the work performed by an author-
ized SUBARU dealer. The SRS air-
bag control module, impact sensors
and airbag modules are stored in
these areas. .
Under the center of the instru-
ment panel
. On both the right and left sides at
the front of the vehicle
. Steering wheel and column and
nearby areas
. Bottom of the steering column
and nearby areas
. Top of the dashboard on front
passenger ’s side and nearby
areas
. Each front seat and nearby area
. Inside each center pillar
. Inside each front door
. In each roof side (from the front
pillar to a point over the rear seat)
. Between the rear seat cushion
and rear wheel house on each
side
. Under the rear center seat
In the event that the SRS airbag is
deployed, replacement of the system
should be performed only by an author-
ized SUBARU dealer. When the compo-
nents of the SRS airbag system are
replaced, use only genuine SUBARU
parts.
NOTE
In the following cases, contact your
SUBARU dealer as soon as possible.
. The front part of the vehicle was
involved in an accident in which only
the driver ’s SRS frontal airbag or both
driver ’s and front passenger ’sSRS
frontal airbags did not deploy.
. The pad of the steering wheel, the
cover over the front passenger ’s SRS
frontal airbag, or either roof side (from
the front pillar to a point over the rear
seat) is scratched, cracked, or other-
wise damaged.
. The center pillar, front door, rear
wheel house or rear sub frame, or an
area near these parts, was involved in
an accident in which the SRS side
airbag and SRS curtain airbag did not
deploy.
. The fabric or leather of either front
seatback is cut, frayed, or otherwise
damaged.
. The rear part of the vehicle was
involved in an accident in which no
SRS airbag was deployed.
Seat, seatbelt and SRS airbags/*SRS airbag (Supplemental Restraint System airbag)
–CONTINUED –1-69
Page 101 of 594
Seat, seatbelt and SRS airbags/*SRS airbag (Supplemental Restraint System airbag)
&Precautions against vehicle
modification
WARNING
To avoid accidental activation of the
system or rendering the system
inoperative, which may result in
serious injury, no modifications
should be made to any components
or wiring of the SRS airbag system.
This includes following modifica-
tions.
. Installation of custom steering
wheels
. Attachment of additional trim
materials to the dashboard
. Installation of custom seats
. Replacement of seat fabric or
leather
. Installation of additional fabric or
leather on the front seat
. Attachment of a hands-free mi-
crophone or any other accessory
to a front pillar, a center pillar, a
rear pillar, the windshield, a side
window, an assist grip, or any
other cabin surface that would be
near a deploying SRS curtain
airbag. .
Installation of additional electri-
cal/electronic equipment such as
a mobile two-way radio on or
near the SRS airbag system
components and/or wiring is not
advisable. This could interfere
with proper operation of the
SRS airbag system.
CAUTION
Do not perform any of the following
modifications. Such modifications
can interfere with proper operation
of the SRS airbag system.
. Attachment of any equipment
(bush bar, winches, snow plow,
skid plate, etc.) other than genu-
ine SUBARU accessory parts to
the front end.
. Modification of the suspension
system or front end structure.
. Installation of a tire of different
size and construction from the
tires specified on the vehicle
placard attached to the driver ’s
door pillar or specified for indivi-
dual vehicle models in this Own-
er ’s Manual.
. Attachment of any equipment
(side steps or side sill protectors, etc.) other than genuine SUBARU
accessory parts to the side body.
Always consult your SUBARU dealer if
you want to install any accessory parts on
your vehicle.
1-70
Page 114 of 594
.Carefully store the key number plate
supplied with the access key. It is
necessary for vehicle repair.
. Do not leave the access key in the
storage spaces inside the vehicle, such
as the door pocket, dashboard and the
corner of the cargo area. Vibrations
may damage the key or turn on the
switch, possibly resulting in a lockout.
. After the vehicle battery is dis-
charged or replaced, initialization of
the steering lock system may be re-
quired to start the engine. In this case,
perform the following procedure to
initialize the steering lock.
(1) Turn the push-button ignition
switch to the “OFF”position. For
details, refer to “Switching power ”
F 3-7.
(2) Open and close the driver ’s
door.
(3) Wait for approximately 10 sec-
onds.
When the steering is locked, the initi-
alization is completed.
. Do not leave the access key in the
following places.
–On the instrument panel
– On the floor
– Inside the glove box
– Inside the door trim pocket –
On the rear seat
– On the rear shelf (4-door)
– Inside the trunk (4-door)
– In the cargo area (5-door)
If you do, the following situations
may occur. – The access key is mistakenly
locked inside the vehicle.
– A false warning issues although
no malfunction actually occurs.
– No warning issues even when
any malfunction occurs.& Locking and unlocking with
“keyless access ”entry func-
tion
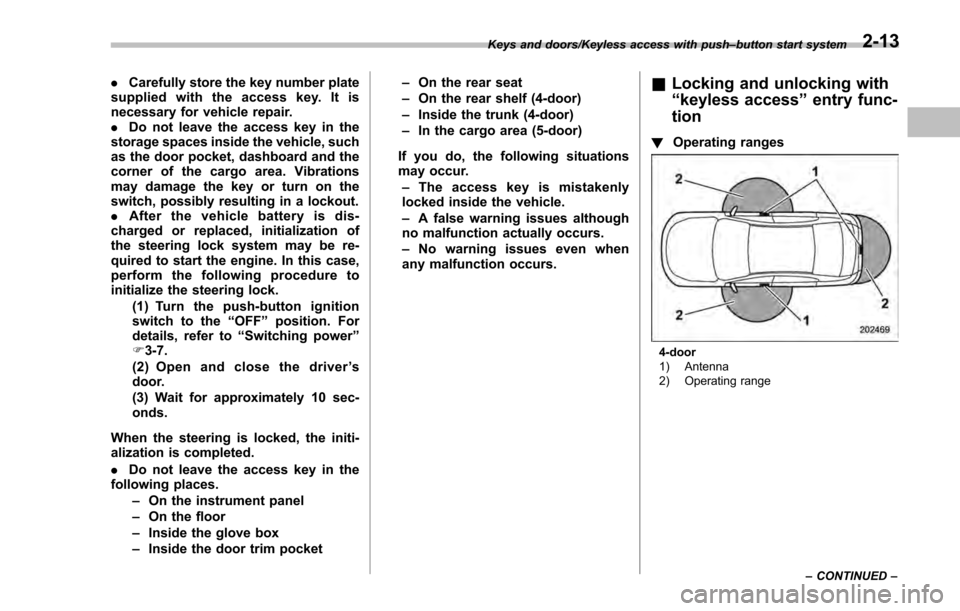
! Operating ranges
4-door
1) Antenna
2) Operating range
Keys and doors/Keyless access with push
–button start system
–CONTINUED –
2-13
Page 146 of 594

Ignition switch (models without“keyless
access with push-button start system ”)......... 3-4
LOCK .................................................................. 3-4
ACC.................................................................... 3-5
ON...................................................................... 3-5
START ................................................................ 3-5
Key reminder chime ............................................ 3-5
Ignition switch light (if equipped) ......................... 3-6
Push-button ignition switch (models with
push-button start system) ............................... 3-6
Safety precautions.............................................. 3-6
Operating range for push-button start system ...... 3-6
Switching power ................................................. 3-7
When access key does not operate properly ........ 3-8
Hazard warning flasher....................................... 3-8
Meters and gauges. ............................................. 3-9
Combination meter illumination ........................... 3-9
Canceling the function for meter/gauge needle movement upon turning on the ignition
switch ............................................................... 3-9
Speedometer ...................................................... 3-10
Odometer ........................................................... 3-10
Double trip meter ............................................... 3-11
Tachometer ........................................................ 3-11
Fuel gauge ......................................................... 3-12
ECO gauge (if equipped) .................................... 3-12
Warning and indicator lights ............................. 3-13Initial illumination for system check .................... 3-13
Seatbelt warning light and chime ........................ 3-14
SRS airbag system warning light ........................ 3-15Front passenger
’s frontal airbag ON and OFF
indicators ........................................................ 3-16
CHECK ENGINE warning light/Malfunction indicator light .................................................. 3-16
Coolant temperature low indicator light/Coolant temperature high warning light ......................... 3-17
Charge warning light .......................................... 3-18
Oil pressure warning light .................................. 3-18
Engine low oil level warning light ....................... 3-18
Windshield washer fluid warning light ................ 3-19
AT OIL TEMP warning light (CVT models) ........... 3-19
Low tire pressure warning light (U.S.-spec. models) ........................................................... 3-19
ABS warning light .............................................. 3-21
Brake system warning light (red) ........................ 3-21
Low fuel warning light ....................................... 3-22
Hill start assist warning light/Hill start assist OFF indicator light .................................................. 3-22
Door open warning light .................................... 3-23
All-Wheel Drive warning light (CVT models) ... ..... 3-23
Power steering warning light .............................. 3-23
Vehicle Dynamics Control warning light/Vehicle Dynamics Control operation indicator light .. ..... 3-24
Vehicle Dynamics Control OFF indicator light ..... 3-25
Warning chimes and warning indicator of the keyless access with push-button start system (if
equipped) ........................................................ 3-25
Security indicator light ....................................... 3-30
Select lever/gear position indicator (CVT models) ........................................................... 3-30
Turn signal indicator lights ................................. 3-31
High beam indicator light ................................... 3-31
Instruments and controls
3
Page 147 of 594

Instruments and controls
Cruise control indicator light (if equipped).......... 3-31
Cruise control set indicator light (if equipped) ......................................................... 3-31
Automatic headlight beam leveler warning light (models with HID headlights) ............................ 3-31
Front fog light indicator light (if equipped) .......... 3-31
Headlight indicator light (if equipped) ................. 3-32
Steering responsive fog lights warning indicator/ Steering responsive fog lights OFF indicator
(models with EyeSight system) ......................... 3-32
BSD/RCTA warning indicator (if equipped) .......... 3-32
BSD/RCTA OFF indicator (if equipped) ................ 3-32
Information display (if equipped)...................... 3-32Outside temperature indicator............................ 3-33
Driving information display ................................. 3-33
Clock ................................................................. 3-37
Multi information display (models with type
B combination meter) ..................................... 3-38
Basic operation.................................................. 3-39
Welcome screen and Good-bye screen ............... 3-39
Warning screen .................................................. 3-40
Basic screens .................................................... 3-40
Menu screens .................................................... 3-40
Multi function display ........................................ 3-42Models without multi function display ................. 3-42
Safety precautions ............................................. 3-43
Features ............................................................ 3-43
Locations ........................................................... 3-43
Basic operation .................................................. 3-44
Welcome screen ................................................. 3-44
Date screen ........................................................ 3-44 Ending screen
................................................... 3-45
Self-check screen .............................................. 3-45
Interruption screen ............................................ 3-46
Basic screens .................................................... 3-47
Selection screen ................................................ 3-54
Date and time settings ....................................... 3-57
Image quality and volume settings ..................... 3-64
Screen settings. ................................................. 3-66
Maintenance settings ......................................... 3-74
Driving history registration ................................. 3-77
Car settings ....................................................... 3-78
Initialize ............................................................. 3-86
Light control switch ........................................... 3-89Precautions and tips .......................................... 3-89
Headlights ......................................................... 3-89
High/low beam change (dimmer) ... ..................... 3-91
Headlight flasher ............................................... 3-91
Daytime running light system ............................. 3-92
Turn signal lever................................................ 3-92One-touch lane changer ..................................... 3-93
Illumination brightness control ......................... 3-93
Headlight beam leveler (if equipped) ............... 3-94
Automatic headlight beam leveler (models with
HID headlights) ................................................ 3-94
Fog light switch (if equipped) ........................... 3-94Steering responsive fog lights system (models
with EyeSight system) ..................................... 3-95
Wiper and washer.............................................. 3-96Windshield wiper and washer switches .............. 3-97
Rear window wiper and washer switch –
5-door ............................................................. 3-99
Page 148 of 594

Instruments and controls
Mirrors............................................................... 3-100Inside mirror .................................................... 3-100
Auto-dimming mirror/compass (if equipped) ...... 3-100
Auto-dimming mirror/compass with HomeLink
®(if equipped) ................................................... 3-102
Outside mirrors ................................................ 3-108
Defogger and deicer ........................................ 3-108
Tilt/telescopic steering wheel ......................... 3-110
Horn .................................................................. 3-111
Page 149 of 594
Instruments and controls/Ignition switch (models without“keyless access with push –button start system ”)
Ignition switch (models with-
out “keyless access with
push-button start system ”)
WARNING
. Never turn the ignition switch to
the “LOCK ”position while the
vehicle is being driven or towed
because that will lock the steer-
ing wheel, preventing steering
control. And when the engine is
turned off, it takes a much great-
er effort than usual to steer.
. Before leaving the vehicle, al-
ways remove the key from the
ignition switch for safety and
never allow an unattended child
to remain in the vehicle. Failure
to follow this procedure could
result in injury to a child or
others. Children could operate
the power windows, the moon-
roof or other controls or even
make the vehicle move.
CAUTION
Do not attach a large key holder or
key case to either key. If it banged
against your knees or hands while
you are driving, it could turn the
ignition switch from the “ON”posi-
tion to the “ACC”or “LOCK ”posi-
tion, thereby stopping the engine.
Also, if the key is attached to a key
holder or to a large bunch of other
keys, centrifugal force may act on it
as the vehicle moves, resulting in
unwanted turning of the ignition
switch.
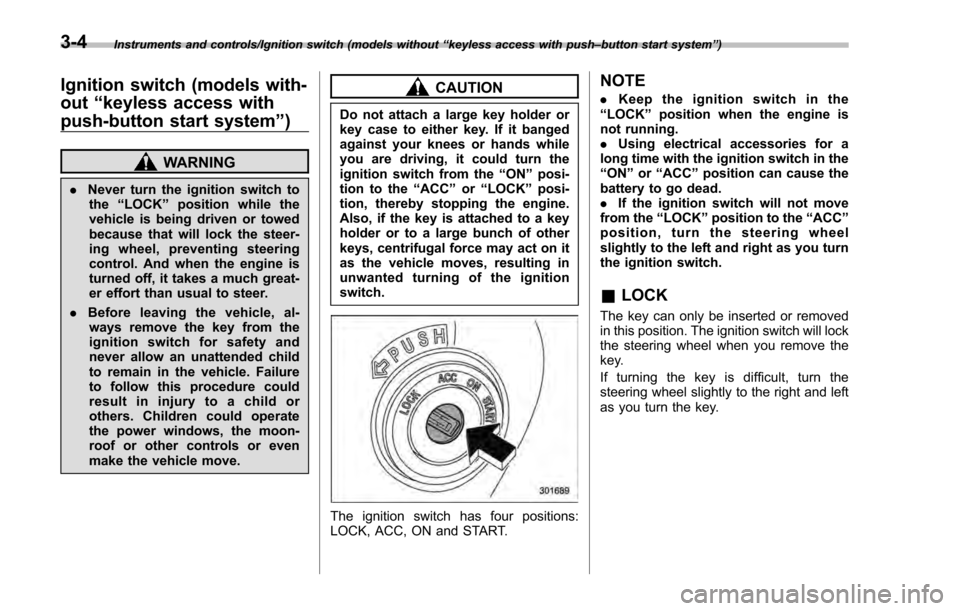
The ignition switch has four positions:
LOCK, ACC, ON and START.
NOTE
. Keep the ignition switch in the
“LOCK ”position when the engine is
not running.
. Using electrical accessories for a
long time with the ignition switch in the
“ON ”or “ACC ”position can cause the
battery to go dead.
. If the ignition switch will not move
from the “LOCK”position to the “ACC”
position, turn the steering wheel
slightly to the left and right as you turn
the ignition switch.
& LOCK
The key can only be inserted or removed
in this position. The ignition switch will lock
the steering wheel when you remove the
key.
If turning the key is difficult, turn the
steering wheel slightly to the right and left
as you turn the key.
3-4
Page 153 of 594
Instruments and controls/Hazard warning flasher
does not operate smoothly, stop
the operation. Contact a
SUBARU dealer immediately.
. If the push-button ignition switch
does not illuminate even when
the instrument panel illumination
is turned on, have the vehicle
inspected at a SUBARU dealer.
. If the vehicle was left in the hot
sun for a long time, the surface of
the push-button ignition switch
may get hot. Be careful not to
burn yourself.
NOTE
. The push-button ignition switch can-
not be switched to “OFF”when the
select lever is in a position other than
“P ”.
. When operating the push-button
ignition switch, firmly press it all the
way.
. If the push-button ignition switch is
pressed quickly, the power may not
turn on or off.
. If the indicator light on the push-
button ignition switch flashes in green
when the push-button ignition switch is
pressed, steering is locked. When this
occurs, press the push-button ignition
switch while turning the steering wheel left and right.
!
Battery drainage prevention func-
tion
When the push-button ignition switch is
left in the “ACC ”or “ON ”position for
approximately 1 hour, the push-button
ignition switch will be automatically
switched to “OFF”to prevent the battery
from going dead. This function is activated
when the select lever is in the “P”position.
& When access key does not
operate properly
Refer to “Access key –if access key does
not operate properly ”F 9-18.
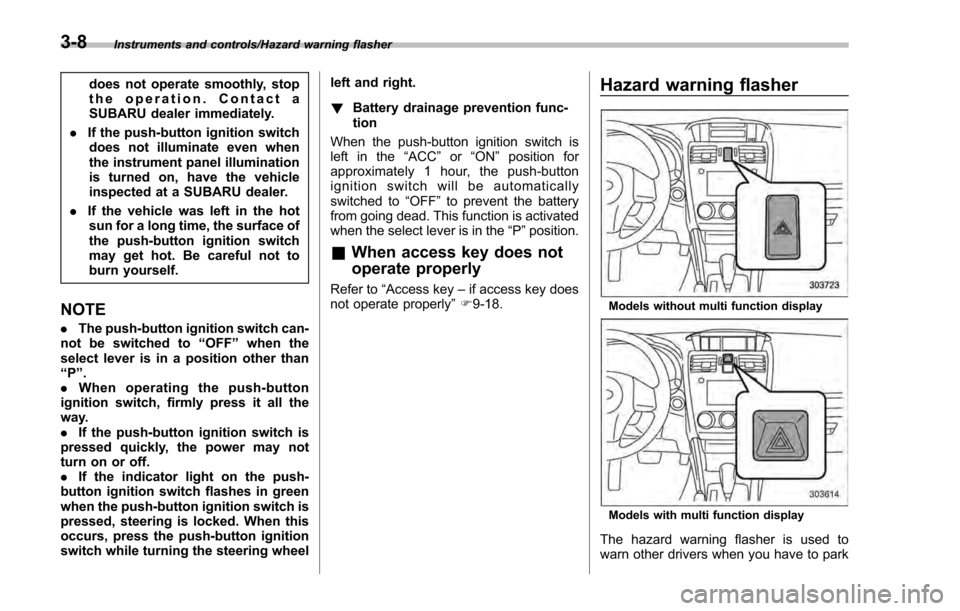
Hazard warning flasher
Models without multi function display
Models with multi function display
The hazard warning flasher is used to
warn other drivers when you have to park
3-8