2016 SUBARU IMPREZA light
[x] Cancel search: lightPage 397 of 594
Starting and operating/Starting and stopping engine (models with push–button start system)
Starting and stopping engine
(models with push-button
start system)
& Safety precautions
Refer to “Safety precautions ”F 2-10.
& Operating range for push-
button start system
Refer to “Operating range for push-button
start system ”F 3-6.
& Starting engine
WARNING
. There are some general precau-
tions when starting the engine.
Carefully read the precautions
described in “Starting engine ”
F 7-9.
. If the indicator on the push-
button ignition switch flashes in
green after the engine has
started, never drive the vehicle.
The steering is still locked, and it
may result in an accident.
CAUTION
. When the operation indicator on
the push-button ignition switch is
flashing in orange, there may be
a malfunction with the vehicle.
Contact a SUBARU dealer imme-
diately.
. If the indicator on the push-
button ignition switch is flashing
in green after the engine has
started, it means that the steering
is still locked. Depress the brake
pedal while moving the steering
wheel to the right and left, and
press the push-button ignition
switch.
. Do not continue pushing the
push-button ignition switch for
more than 10 seconds. Doing so
could cause a malfunction. If the
engine does not start, stop push-
ing the push-button ignition
switch and turn off the engine.
Wait 10 seconds, and then push
the push-button ignition switch
to start the engine.
NOTE
. When the push-button ignition
switch is pressed while depressing the brake pedal, the engine starter
operates for a maximum of 10 seconds
and after starting the engine, the starter
stops automatically.
.
When the push-button ignition
switch is pressed while depressing
the brake pedal, the engine can be
started regardless of the status of the
push-button ignition switch.
. If the security indicator light illumi-
nates when you attempt to start the
engine but the engine does not start,
press the push-button ignition switch
to switch the power to “OFF”and then
try to start the engine again.
. If the engine does not start, press
the push-button ignition switch without
depressing the brake pedal to switch
the power to “OFF”. Then, while de-
pressing the brake pedal more force-
fully, press the push-button ignition
switch.
. The engine start procedures may
not function depending on the radio
wave conditions around the vehicle. In
such a case, refer to “Starting engine”
F 9-19.
. If the vehicle battery is discharged,
the steering cannot be unlocked.
Charge the battery.
7-12
Page 401 of 594
Starting and operating/Remote engine start system (dealer option)
&Models without “keyless ac-
cess with push-button start
system ”
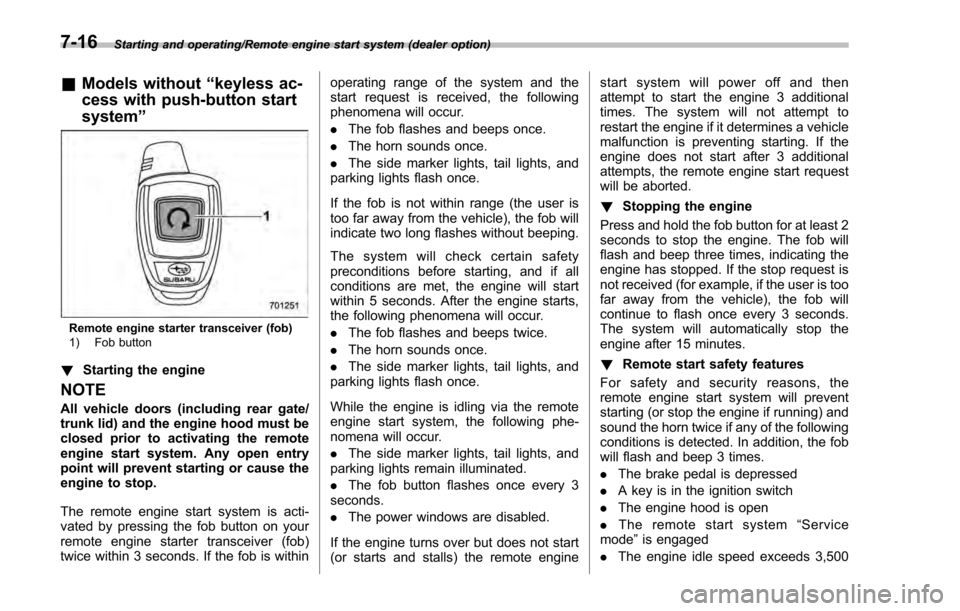
Remote engine starter transceiver (fob)
1) Fob button
!Starting the engine
NOTE
All vehicle doors (including rear gate/
trunk lid) and the engine hood must be
closed prior to activating the remote
engine start system. Any open entry
point will prevent starting or cause the
engine to stop.
The remote engine start system is acti-
vated by pressing the fob button on your
remote engine starter transceiver (fob)
twice within 3 seconds. If the fob is within operating range of the system and the
start request is received, the following
phenomena will occur.
.
The fob flashes and beeps once.
. The horn sounds once.
. The side marker lights, tail lights, and
parking lights flash once.
If the fob is not within range (the user is
too far away from the vehicle), the fob will
indicate two long flashes without beeping.
The system will check certain safety
preconditions before starting, and if all
conditions are met, the engine will start
within 5 seconds. After the engine starts,
the following phenomena will occur.
. The fob flashes and beeps twice.
. The horn sounds once.
. The side marker lights, tail lights, and
parking lights flash once.
While the engine is idling via the remote
engine start system, the following phe-
nomena will occur.
. The side marker lights, tail lights, and
parking lights remain illuminated.
. The fob button flashes once every 3
seconds.
. The power windows are disabled.
If the engine turns over but does not start
(or starts and stalls) the remote engine start system will power off and then
attempt to start the engine 3 additional
times. The system will not attempt to
restart the engine if it determines a vehicle
malfunction is preventing starting. If the
engine does not start after 3 additional
attempts, the remote engine start request
will be aborted.
!
Stopping the engine
Press and hold the fob button for at least 2
seconds to stop the engine. The fob will
flash and beep three times, indicating the
engine has stopped. If the stop request is
not received (for example, if the user is too
far away from the vehicle), the fob will
continue to flash once every 3 seconds.
The system will automatically stop the
engine after 15 minutes.
! Remote start safety features
For safety and security reasons, the
remote engine start system will prevent
starting (or stop the engine if running) and
sound the horn twice if any of the following
conditions is detected. In addition, the fob
will flash and beep 3 times.
. The brake pedal is depressed
. A key is in the ignition switch
. The engine hood is open
. The remote start system “Service
mode ”is engaged
. The engine idle speed exceeds 3,500
7-16
Page 402 of 594

RPM
.The security alarm is triggered
. The select lever is not in the “P ”
position (CVT models)
If the system detects any door (including
the rear gate/trunk lid) open during opera-
tion, it will prevent starting or stop the
engine, and sound the horn and flash side
marker lights, tail lights, and parking lights
6 times.
In addition to the items above, if the
vehicle ’s engine management system
determines there is a safety risk due to a
vehicle-related problem, the vehicle will
power down and the horn will sound 3
times.
NOTE
. If the alarm system is armed at the
time of remote engine starter activation
(the security indicator light on the
combination meter is flashing), the
alarm system will remain armed
throughout the remote start run cycle.
. If the alarm system is disarmed at
the time of remote engine starter
activation (the security indicator light
on the combination meter is not flash-
ing), the alarm system will remain
disarmed throughout the remote start
run cycle. !
Remote start operation - fob con-
firmation
Your remote engine starter fob is a
bidirectional transceiver that can confirm
system operation with several different
visual and audible indications. The fob ’s
LED-backlit button and internal piezo
buzzer will indicate status of the system
using the following flash and beep se-
quences, provided the fob is within opera-
tional range of the system.
Starting and operating/Remote engine start system (dealer option)
–CONTINUED –7-17
Page 405 of 594

Starting and operating/Remote engine start system (dealer option)
ing to the following procedure.
1. Open the driver’s door (the driver ’s
door must remain opened throughout the
entire process).
2. Depress and hold the brake pedal.
3. Turn the ignition switch to “ON”then
“LOCK” /“OFF ”, back to “ON”then “LOCK”/
“OFF ”, back to “ON”then “LOCK” /“OFF ”,
then back to “ON”again and leave the
ignition “ON”throughout the programming
process.
4. The system will flash the side marker
lights, tail lights and parking lights and
honk the horn three times, indicating that
the system has entered the transmitter
learn mode.
5. Press and release the “
”button on
the transmitter that you want to program.
6. The system will flash the side marker
lights, tail lights and parking lights and
honk the horn one time, indicating that the
system has learned the transmitter. Upon
successful programming, the remote start
confirmation transmitter button will flash
one time.
7. Repeat step 5 for any additional
transmitters (the system will accept up to
eight transmitters).
8. The system will exit the transmitter
learn mode if the key is turned to the
“LOCK”/ “OFF ”position, the door is closed or after 2 minutes.
&
System maintenance
NOTE
For models without “keyless access
with push-button start system”:
In the event that the vehicle ’s battery is
replaced, discharged or disconnected,
it will be necessary to start the vehicle
a minimum of one time using the key
prior to activating the remote engine
start system. This is required to allow
the vehicle electronic systems to re-
synchronize.
! Changing the batteries
CAUTION
.Do not let dust, oil or water get on
or in the remote engine start
transmitter when replacing the
battery.
. Be careful not to damage the
printed circuit board in the re-
mote engine start transmitter
when replacing the battery.
. Be careful not to allow children to
touch the battery and any re-
moved parts; children could
swallow them. .
There is a danger of explosion if
an incorrect replacement battery
is used. Replace only with the
same or equivalent type of bat-
tery.
. Batteries should not be exposed
to excessive heat such as sun-
shine, fire or the like.
For models with “keyless access with
push-button start system ”:
Perform the procedure described in “Re-
placing battery of access key ”F 11-44.
For models without “keyless access
with push-button start system”:
The two 3-volt lithium batteries (model
CR-2032) supplied in your remote engine
start transmitter should last approximately
one year, depending on usage. When the
batteries begin to weaken, you will notice
a decrease in range (distance from the
vehicle that your remote control operates).
Follow the instructions below to change
the remote engine start transmitter bat-
teries.
7-20
Page 410 of 594
1) Models with“L ” position
2) Models with manual mode
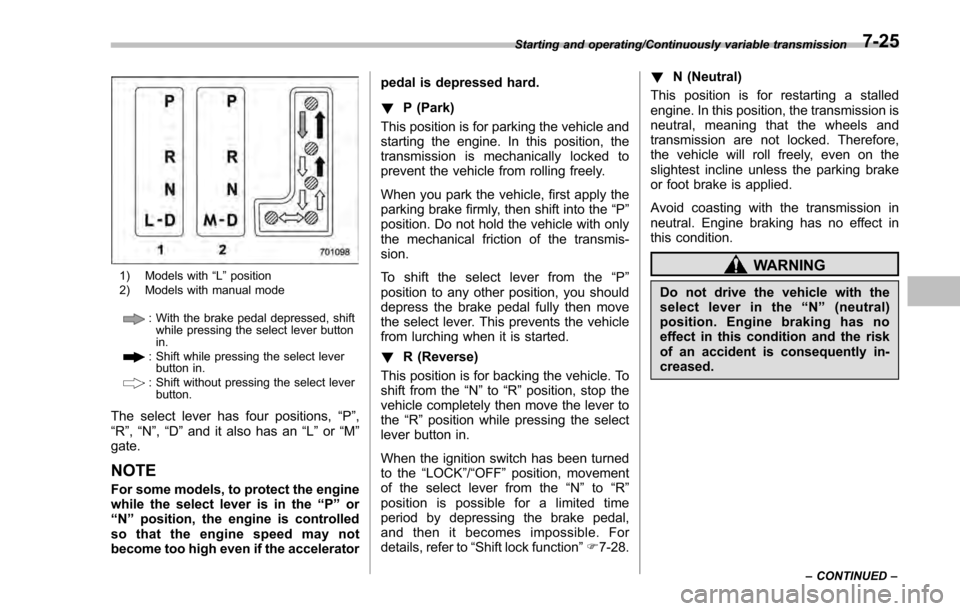
: With the brake pedal depressed, shift while pressing the select lever button
in.
: Shift while pressing the select leverbutton in.
: Shift without pressing the select lever
button.
The select lever has four positions, “P”,
“R ”, “N ”,“D ”and it also has an “L”or “M”
gate.
NOTE
For some models, to protect the engine
while the select lever is in the “P ” or
“N ”position, the engine is controlled
so that the engine speed may not
become too high even if the accelerator pedal is depressed hard.
!
P (Park)
This position is for parking the vehicle and
starting the engine. In this position, the
transmission is mechanically locked to
prevent the vehicle from rolling freely.
When you park the vehicle, first apply the
parking brake firmly, then shift into the “P”
position. Do not hold the vehicle with only
the mechanical friction of the transmis-
sion.
To shift the select lever from the “P”
position to any other position, you should
depress the brake pedal fully then move
the select lever. This prevents the vehicle
from lurching when it is started.
! R (Reverse)
This position is for backing the vehicle. To
shift from the “N”to “R”position, stop the
vehicle completely then move the lever to
the “R”position while pressing the select
lever button in.
When the ignition switch has been turned
to the “LOCK”/“OFF ”position, movement
of the select lever from the “N ” to “R ”
position is possible for a limited time
period by depressing the brake pedal,
and then it becomes impossible. For
details, refer to “Shift lock function ”F 7-28. !
N (Neutral)
This position is for restarting a stalled
engine. In this position, the transmission is
neutral, meaning that the wheels and
transmission are not locked. Therefore,
the vehicle will roll freely, even on the
slightest incline unless the parking brake
or foot brake is applied.
Avoid coasting with the transmission in
neutral. Engine braking has no effect in
this condition.
WARNING
Do not drive the vehicle with the
select lever in the “N ” (neutral)
position. Engine braking has no
effect in this condition and the risk
of an accident is consequently in-
creased.
Starting and operating/Continuously variable transmission
–CONTINUED –7-25
Page 413 of 594
Starting and operating/Continuously variable transmission
sion.
.The transmission automatically se-
lects 1st gear when the vehicle stops
moving.
. If the temperature of the transmis-
sion fluid becomes too high, the “AT
OIL TEMP ”warning light on the combi-
nation meter will illuminate. Immedi-
ately stop the vehicle in a safe location
and let the engine idle until the warning
light turns off.
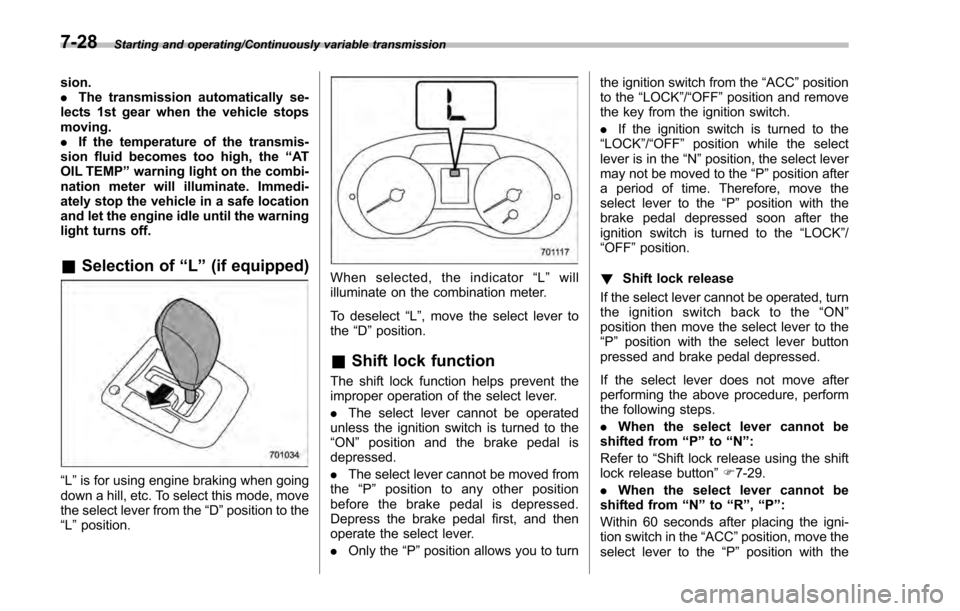
& Selection of “L ” (if equipped)
“L ”is for using engine braking when going
down a hill, etc. To select this mode, move
the select lever from the “D”position to the
“L ”position.
When selected, the indicator “L ” will
illuminate on the combination meter.
To deselect “L”, move the select lever to
the “D ”position.
& Shift lock function
The shift lock function helps prevent the
improper operation of the select lever.
. The select lever cannot be operated
unless the ignition switch is turned to the
“ ON ”position and the brake pedal is
depressed.
. The select lever cannot be moved from
the “P ” position to any other position
before the brake pedal is depressed.
Depress the brake pedal first, and then
operate the select lever.
. Only the “P”position allows you to turn the ignition switch from the
“ACC ”position
to the “LOCK”/ “OFF”position and remove
the key from the ignition switch.
. If the ignition switch is turned to the
“LOCK ”/“OFF ”position while the select
lever is in the “N”position, the select lever
may not be moved to the “P ”position after
a period of time. Therefore, move the
select lever to the “P ” position with the
brake pedal depressed soon after the
ignition switch is turned to the “LOCK”/
“OFF ”position.
! Shift lock release
If the select lever cannot be operated, turn
the ignition switch back to the “ON ”
position then move the select lever to the
“P ”position with the select lever button
pressed and brake pedal depressed.
If the select lever does not move after
performing the above procedure, perform
the following steps.
. When the select lever cannot be
shifted from “P”to “N ”:
Refer to “Shift lock release using the shift
lock release button ”F 7-29.
. When
the
select lever cannot be
shifted from “N”to “R”,“P ”:
Within 60 seconds after placing the igni-
tion switch in the “ACC”position, move the
select lever to the “P”position with the
7-28
Page 415 of 594
Starting and operating/Power steering
Power steering
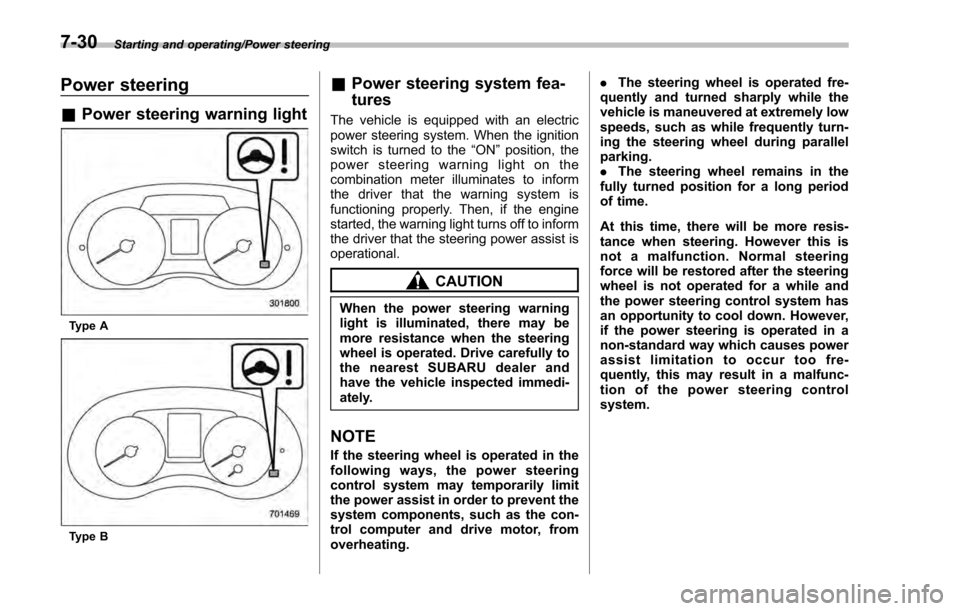
&Power steering warning light
Type A
Type B
&Power steering system fea-
tures
The vehicle is equipped with an electric
power steering system. When the ignition
switch is turned to the “ON”position, the
power steering warning light on the
combination meter illuminates to inform
the driver that the warning system is
functioning properly. Then, if the engine
started, the warning light turns off to inform
the driver that the steering power assist is
operational.
CAUTION
When the power steering warning
light is illuminated, there may be
more resistance when the steering
wheel is operated. Drive carefully to
the nearest SUBARU dealer and
have the vehicle inspected immedi-
ately.
NOTE
If the steering wheel is operated in the
following ways, the power steering
control system may temporarily limit
the power assist in order to prevent the
system components, such as the con-
trol computer and drive motor, from
overheating. .
The steering wheel is operated fre-
quently and turned sharply while the
vehicle is maneuvered at extremely low
speeds, such as while frequently turn-
ing the steering wheel during parallel
parking.
. The steering wheel remains in the
fully turned position for a long period
of time.
At this time, there will be more resis-
tance when steering. However this is
not a malfunction. Normal steering
force will be restored after the steering
wheel is not operated for a while and
the power steering control system has
an opportunity to cool down. However,
if the power steering is operated in a
non-standard way which causes power
assist limitation to occur too fre-
quently, this may result in a malfunc-
tion of the power steering control
system.
7-30
Page 416 of 594
Braking
&Braking tips
WARNING
Never rest your foot on the brake
pedal while driving. This can cause
dangerous overheating of the
brakes and needless wear on the
brake pads and linings.
! When the brakes get wet
When driving in rain or after washing the
vehicle, the brakes may get wet. As a
result, brake stopping distance will be
longer. To dry the brakes, drive the vehicle
at a safe speed while lightly depressing
the brake pedal to heat up the brakes.
! Use of engine braking
Remember to make use of engine braking
in addition to foot braking. When descend-
ing a grade, if only the foot brake is used,
the brakes may start working improperly
because of brake fluid overheating,
caused by overheated brake pads. To
help prevent this, shift into a lower gear to
get stronger engine braking.
! Braking when a tire is punctured
Do not depress the brake pedal suddenly
when a tire is punctured. This could cause a loss of control of the vehicle. Keep
driving straight ahead while gradually
reducing speed. Then slowly pull off the
road to a safe location.&
Brake system
! Two separate circuits
Your vehicle has two separate circuit
brake systems. Each circuit works diag-
onally across the vehicle. If one circuit of
the brake system should fail, the other half
of the system still works. If one circuit fails,
the brake pedal will go down much closer
to the floor than usual and you will need to
press it down much harder. And a much
longer distance will be needed to stop the
vehicle.
! Brake booster
The brake booster uses engine manifold
vacuum to assist braking force. Do not
turn the ignition switch to the “LOCK”/
“OFF ”position while driving because that
will turn off the brake booster, resulting in
poor braking power.
The brakes will continue to work even
when the brake booster completely stops
functioning. If this happens, however, you
will have to depress the pedal much
harder than normal and the braking dis-
tance will increase. !
Brake assist system
WARNING
Do not be overconfident about the
brake assist. It is not a system that
brings more braking ability to the
vehicle beyond its braking capabil-
ity. Always use the utmost care
when driving regarding vehicle
speed and safe distance.
CAUTION
When you need to brake suddenly,
continue depressing the brake pedal
strongly to bring the effect of the
brake assist.
Brake assist is a driver assistance system.
It assists the brake power when the driver
cannot depress the brake pedal strongly
and the brake power is insufficient.
Brake assist generates the brake power
according to the speed at which the driver
depresses the brake pedal.
NOTE
When you depress the brake pedal
strongly or suddenly, the following
phenomena occur. However, even
though these occur, they do not indi-
Starting and operating/Braking
–CONTINUED –7-31