2016 SUBARU IMPREZA warning light
[x] Cancel search: warning lightPage 419 of 594
Starting and operating/Vehicle Dynamics Control system
system warning light and ABS warning
light illuminate simultaneously.
The EBD system may be malfunctioning if
the brake system warning light and ABS
warning light illuminate simultaneously
during driving.
Even if the EBD system malfunctions, the
conventional braking system will still func-
tion. However, the rear wheels will be
more prone to locking when the brakes
are applied harder than usual and the
vehicle’s motion may therefore become
somewhat harder to control.
If the brake system warning light and ABS
warning light illuminate simultaneously,
take the following steps.
1. Stop the vehicle in the nearest safe,
flat location.
2. Apply the parking brake and turn off
the engine.
3. Restart the engine.
4. Release the parking brake.
Even if both warning lights turn off:
The EBD system may be malfunctioning.
Drive carefully to the nearest SUBARU
dealer and have the system inspected.
If both warning lights illuminate again
and remain illuminated after restarting
the engine:
1. Turn off the engine again. 2. Apply the parking brake.
3. Check the brake fluid level. For details
about checking the brake fluid level, refer
to
“Checking the fluid level ”F 11-16.
. If the brake fluid level is not below the
“MIN ”mark, the EBD system may be
malfunctioning. Drive carefully to the
nearest SUBARU dealer and have the
system inspected.
. If the brake fluid level is below the
“MIN ”mark, DO NOT drive the vehicle.
Instead, have the vehicle towed to the
nearest SUBARU dealer for repair.
WARNING
. Driving with the brake system
warning light illuminated is dan-
gerous. This indicates your brake
system may not be working
properly. If the light remains
illuminated, have the brakes in-
spected by a SUBARU dealer
immediately.
. If at all in doubt about whether
the brakes are operating prop-
erly, do not drive the vehicle.
Have your vehicle towed to the
nearest SUBARU dealer for re-
pair.
Vehicle Dynamics Control
system
& Safety precautions
WARNING
Always use the utmost care in
driving –overconfidence because
you are driving a vehicle with the
Vehicle Dynamics Control system
could easily lead to a serious acci-
dent.
CAUTION
. Even if your vehicle is equipped
with Vehicle Dynamics Control
system, winter tires should be
used when driving on snow-cov-
ered or icy roads; in addition,
vehicle speed should be reduced
considerably. Simply having a
Vehicle Dynamics Control sys-
tem does not guarantee that the
vehicle will be able to avoid
accidents in any situation.
. Activation of the Vehicle Dy-
namics Control system is an
indication that the road being
travelled on has a slippery sur-
7-34
Page 423 of 594
Starting and operating/Tire pressure monitoring system (TPMS) (U.S.–spec. models)
Tire pressure monitoring
system (TPMS) (U.S.-spec.
models)
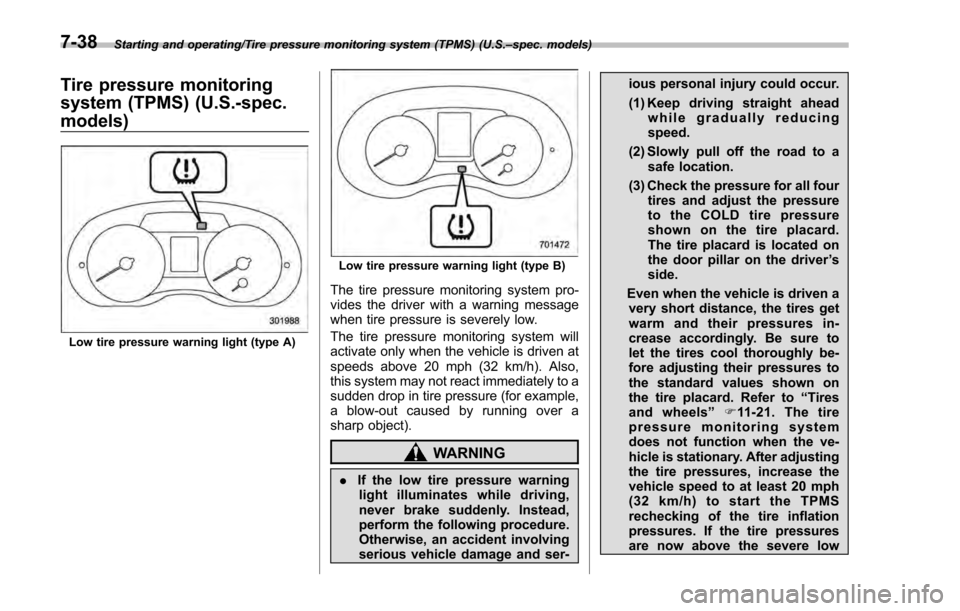
Low tire pressure warning light (type A)
Low tire pressure warning light (type B)
The tire pressure monitoring system pro-
vides the driver with a warning message
when tire pressure is severely low.
The tire pressure monitoring system will
activate only when the vehicle is driven at
speeds above 20 mph (32 km/h). Also,
this system may not react immediately to a
sudden drop in tire pressure (for example,
a blow-out caused by running over a
sharp object).
WARNING
. If the low tire pressure warning
light illuminates while driving,
never brake suddenly. Instead,
perform the following procedure.
Otherwise, an accident involving
serious vehicle damage and ser- ious personal injury could occur.
(1) Keep driving straight ahead
while gradually reducing
speed.
(2) Slowly pull off the road to a safe location.
(3) Check the pressure for all four tires and adjust the pressure
to the COLD tire pressure
shown on the tire placard.
The tire placard is located on
the door pillar on the driver ’s
side.
Even when the vehicle is driven a very short distance, the tires get
warm and their pressures in-
crease accordingly. Be sure to
let the tires cool thoroughly be-
fore adjusting their pressures to
the standard values shown on
the tire placard. Refer to “Tires
and wheels” F11-21. The tire
pressure monitoring system
does not function when the ve-
hicle is stationary. After adjusting
the tire pressures, increase the
vehicle speed to at least 20 mph
(32 km/h) to start the TPMS
rechecking of the tire inflation
pressures. If the tire pressures
are now above the severe low
7-38
Page 424 of 594
pressure threshold, the low tire
pressure warning light should
turn off a few minutes later.
If this light still illuminates while
driving after adjusting the tire
pressure, a tire may have signifi-
cant damage and a fast leak that
causes the tire to lose air rapidly.
If you have a flat tire, replace it
with a spare tire as soon as
possible.
. When a spare tire is mounted or a
wheel rim is replaced without the
original pressure sensor/trans-
mitter being transferred, the low
tire pressure warning light will
illuminate steadily after blinking
for approximately one minute.
This indicates the TPMS is un-
able to monitor all four road
wheels. Contact your SUBARU
dealer as soon as possible for
tire and sensor replacement and/
or system resetting.
. When a tire is repaired with liquid
sealant, the tire pressure warning
valve and transmitter may not
operate properly. If a liquid sea-
lant is used, contact your nearest
SUBARU dealer or other qualified
service shop as soon as possi-
ble. Make sure to replace the tire pressure warning valve and
transmitter when replacing the
tire. You may reuse the wheel if
there is no damage to it and if the
sealant residue is properly
cleaned off. Do not inject any tire
liquid or aerosol tire sealant into
the tires, as this may cause a
malfunction of the tire pressure
sensors. If the light illuminates
steadily after blinking for ap-
proximately one minute,
promptly contact a SUBARU
dealer to have the system in-
spected.
CAUTION
Do not place metal film or any metal
parts in the trunk. This may cause
poor reception of the signals from
the tire pressure sensors, and the
tire pressure monitoring system will
not function properly.
FCC ID: CWTWD1U781
NOTE
This device complies with part 15 of the
FCC Rules. Operation is subject to the
following two conditions: (1) This de-
vice may not cause harmful interfer- ence, and (2) this device must accept
any interference received, including
interference that may cause undesired
operation.
FCC CAUTION
Changes or modifications not ex-
pressly approved by the party respon-
sible for compliance could void the
user
’s authority to operate the equip-
ment.
Starting and operating/Tire pressure monitoring system (TPMS) (U.S. –spec. models)7-39
Page 425 of 594
Starting and operating/Parking your vehicle
Parking your vehicle
&Parking brake
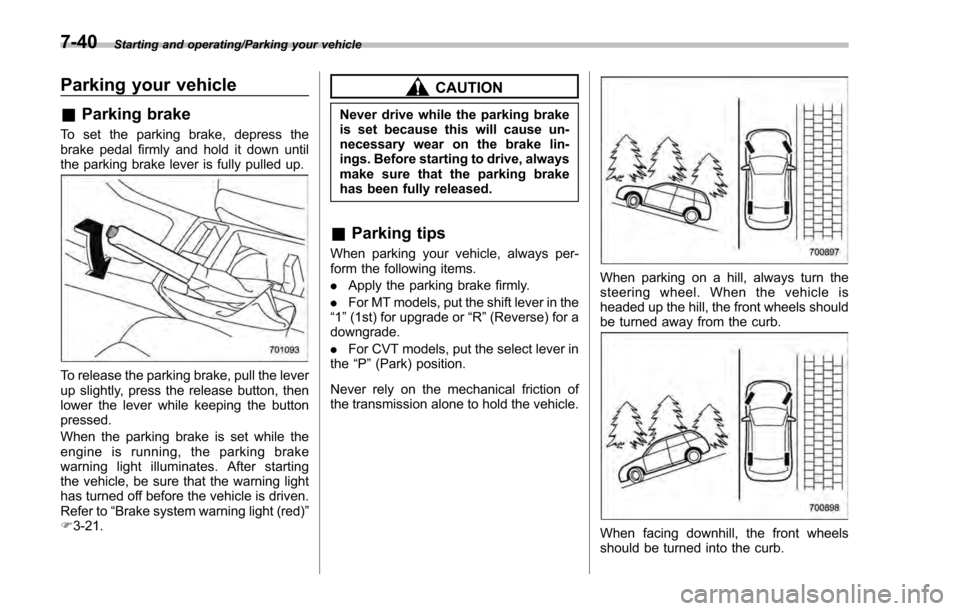
To set the parking brake, depress the
brake pedal firmly and hold it down until
the parking brake lever is fully pulled up.
To release the parking brake, pull the lever
up slightly, press the release button, then
lower the lever while keeping the button
pressed.
When the parking brake is set while the
engine is running, the parking brake
warning light illuminates. After starting
the vehicle, be sure that the warning light
has turned off before the vehicle is driven.
Refer to “Brake system warning light (red) ”
F 3-21.
CAUTION
Never drive while the parking brake
is set because this will cause un-
necessary wear on the brake lin-
ings. Before starting to drive, always
make sure that the parking brake
has been fully released.
& Parking tips
When parking your vehicle, always per-
form the following items.
. Apply the parking brake firmly.
. For MT models, put the shift lever in the
“1 ”(1st) for upgrade or “R”(Reverse) for a
downgrade.
. For CVT models, put the select lever in
the “P ”(Park) position.
Never rely on the mechanical friction of
the transmission alone to hold the vehicle.
When parking on a hill, always turn the
steering wheel. When the vehicle is
headed up the hill, the front wheels should
be turned away from the curb.
When facing downhill, the front wheels
should be turned into the curb.
7-40
Page 427 of 594
Starting and operating/Hill start assist system
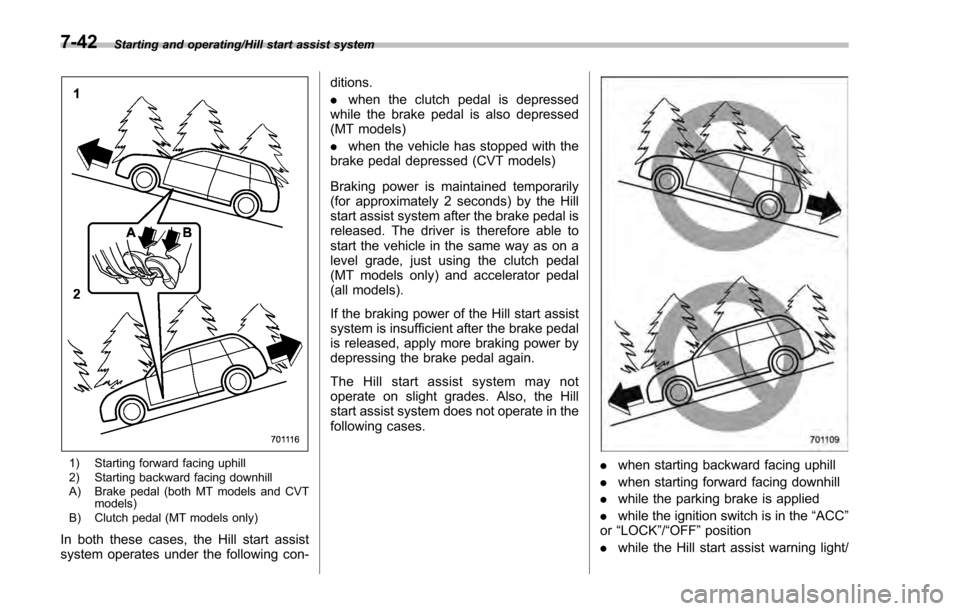
1) Starting forward facing uphill
2) Starting backward facing downhill
A) Brake pedal (both MT models and CVTmodels)
B) Clutch pedal (MT models only)
In both these cases, the Hill start assist
system operates under the following con- ditions.
.
when the clutch pedal is depressed
while the brake pedal is also depressed
(MT models)
. when the vehicle has stopped with the
brake pedal depressed (CVT models)
Braking power is maintained temporarily
(for approximately 2 seconds) by the Hill
start assist system after the brake pedal is
released. The driver is therefore able to
start the vehicle in the same way as on a
level grade, just using the clutch pedal
(MT models only) and accelerator pedal
(all models).
If the braking power of the Hill start assist
system is insufficient after the brake pedal
is released, apply more braking power by
depressing the brake pedal again.
The Hill start assist system may not
operate on slight grades. Also, the Hill
start assist system does not operate in the
following cases.
. when starting backward facing uphill
. when starting forward facing downhill
. while the parking brake is applied
. while the ignition switch is in the “ACC”
or “LOCK ”/“OFF ”position
. while the Hill start assist warning light/
7-42
Page 428 of 594
Hill start assist OFF indicator light is
illuminated
When using the Hill start assist system, a
braking effect may be felt even after the
brake pedal has been released. However,
for MT models, this braking effect should
disappear once the clutch pedal is re-
leased.
NOTE
A slight jolt may be felt when the
vehicle begins to move forward after
being reversed.
&To activate/deactivate the Hill
start assist system
CAUTION
While the Hill start assist system is
deactivated, when starting on an
uphill grade, braking power is not
maintained if the brake pedal is
released. Start on an uphill grade
by using the parking brake.
You can activate/deactivate the Hill start
assist system according to the following
procedure.
NOTE
If you make an error when performing
any steps in the following procedure,
place the ignition switch in the
“LOCK ”/“OFF ”position once and then
start over again.
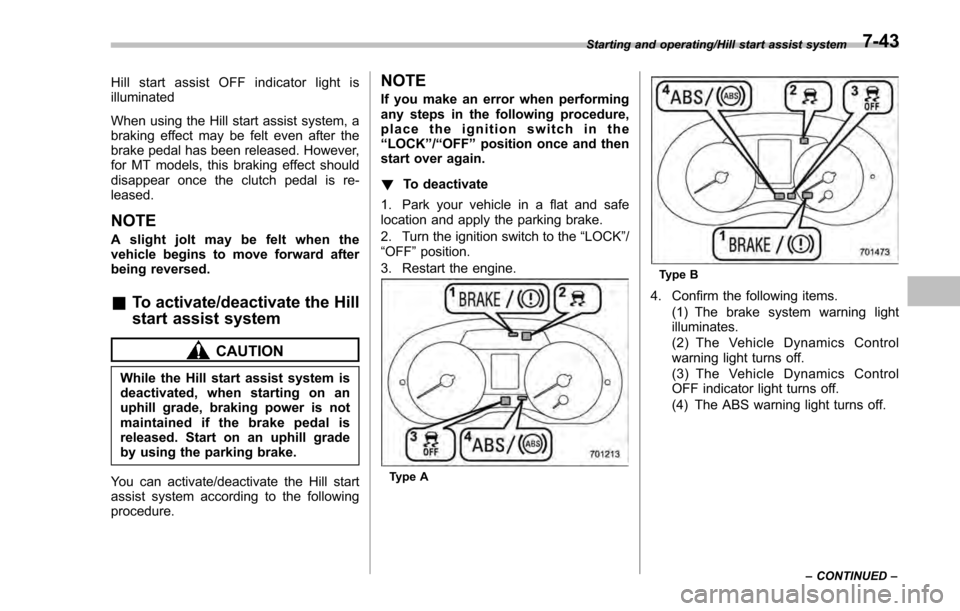
! To deactivate
1. Park your vehicle in a flat and safe
location and apply the parking brake.
2. Turn the ignition switch to the “LOCK”/
“OFF ”position.
3. Restart the engine.
Type A
Type B
4. Confirm the following items. (1) The brake system warning light
illuminates.
(2) The Vehicle Dynamics Control
warning light turns off.
(3) The Vehicle Dynamics Control
OFF indicator light turns off.
(4) The ABS warning light turns off.
Starting and operating/Hill start assist system
–CONTINUED –7-43
Page 429 of 594
Starting and operating/Hill start assist system
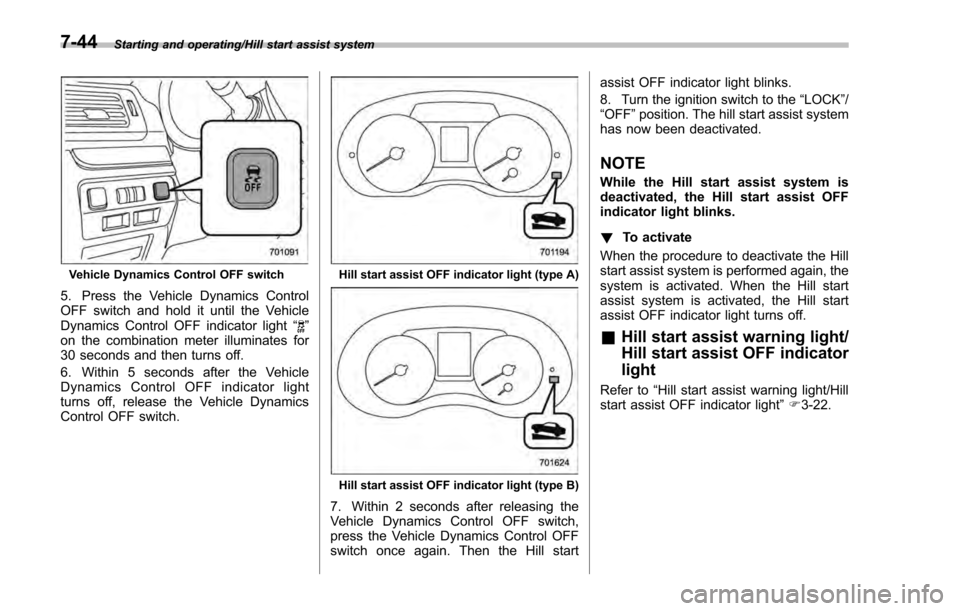
Vehicle Dynamics Control OFF switch
5. Press the Vehicle Dynamics Control
OFF switch and hold it until the Vehicle
Dynamics Control OFF indicator light“
”
on the combination meter illuminates for
30 seconds and then turns off.
6. Within 5 seconds after the Vehicle
Dynamics Control OFF indicator light
turns off, release the Vehicle Dynamics
Control OFF switch.
Hill start assist OFF indicator light (type A)
Hill start assist OFF indicator light (type B)
7. Within 2 seconds after releasing the
Vehicle Dynamics Control OFF switch,
press the Vehicle Dynamics Control OFF
switch once again. Then the Hill start assist OFF indicator light blinks.
8. Turn the ignition switch to the
“LOCK”/
“ OFF ”position. The hill start assist system
has now been deactivated.
NOTE
While the Hill start assist system is
deactivated, the Hill start assist OFF
indicator light blinks.
! To activate
When the procedure to deactivate the Hill
start assist system is performed again, the
system is activated. When the Hill start
assist system is activated, the Hill start
assist OFF indicator light turns off.
& Hill start assist warning light/
Hill start assist OFF indicator
light
Refer to “Hill start assist warning light/Hill
start assist OFF indicator light ”F 3-22.
7-44
Page 430 of 594
Cruise control (if equipped)
NOTE
For models with EyeSight system:
Refer to the Owner’s Manual supple-
ment for the EyeSight system.
Cruise control enables you to maintain a
constant vehicle speed without holding
your foot on the accelerator pedal and it is
operative when the vehicle speed is 25
mph (40 km/h) or more.
WARNING
Do not use the cruise control under
any of the following conditions.
These may cause loss of vehicle
control.
. driving up or down a steep grade
. driving on slippery or winding
roads
. driving in heavy traffic
. towing a trailer
NOTE
Make sure the cruise control system is
turned off when the cruise control is
not in use to avoid unintentionally
setting of the cruise control.
&To set cruise control
Cruise control main button (except Cross-
trek models)
Cruise control main button (Crosstrek
models)
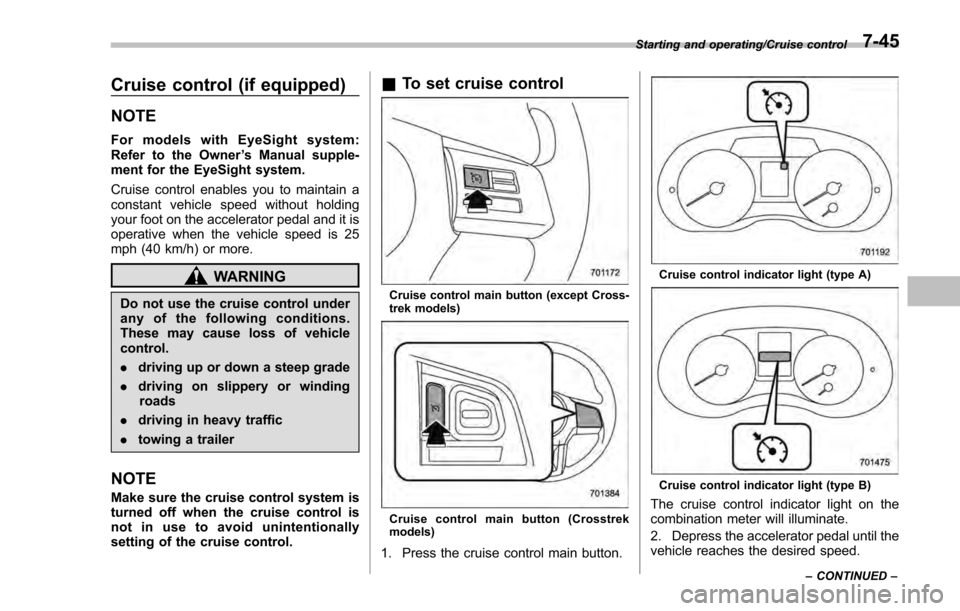
1. Press the cruise control main button.
Cruise control indicator light (type A)
Cruise control indicator light (type B)
The cruise control indicator light on the
combination meter will illuminate.
2. Depress the accelerator pedal until the
vehicle reaches the desired speed.
Starting and operating/Cruise control
–CONTINUED –7-45