2016 Seat Ibiza ST technical data
[x] Cancel search: technical dataPage 103 of 252

Introduction to the Easy Connect system*
Priority 2 warning messages will not be
sho wn u nti
l all Priority 1 warning messages
have been dealt with!
Examples of priority 2 warning reports (yel-
low):*
● Fuel warning light with the information text
PLEASE REFUEL .WARNING
If the warning lamps and messages are ignor-
ed, the vehic l
e may stall in traffic, or may
cause accidents and severe injuries.
● Never ignore the warning lamps or text
messag
es.
● Stop the vehicle safely as soon as possible.
● Park the vehicle away from traffic and en-
sure that
there are no highly flammable ma-
terials under the vehicle that could come into
contact with the exhaust system (e.g. dry
grass, fuel).
● A faulty vehicle represents a risk of acci-
dent for the driver and f
or other road users. If
necessary, switch on the hazard warning
lamps and put out the warning triangle to ad-
vise other drivers.
● Before opening the bonnet, switch off the
engine and allo
w it to cool.
● In any vehicle, the engine compartment is a
hazardou
s area and could cause severe inju-
ries ››› page 201. CAUTION
Failure to heed the control lamps and text
mess ag
es when they appear may result in
faults in the vehicle. Introduction to the Easy
C
onnect
sys
tem*
System settings (CAR)* CAR menu (Setup) Read the additional information carefully
›››
p
age 24
To select the settings menus, press the Easy
Connect button and the
Set
up function
b utt
on.
The act ual
number of menus available and
the name of the various options in these me-
nus will depend on the vehicle’s electronics
and equipment.
Pressing the menu button will always take
you to the last menu used.
When the function button check box is activa-
ted , the function is active.
Pressing the menu button will always take
y ou t
o the l a
st menu used.
Any changes made using the settings menus
are automatically saved on closing those me-
nus. »
101
Technical data
Advice
Operation
Emergencies
Safety
Page 105 of 252

Communications and multimedia
Communications and multi-
medi a
St eerin g wheel
controls*
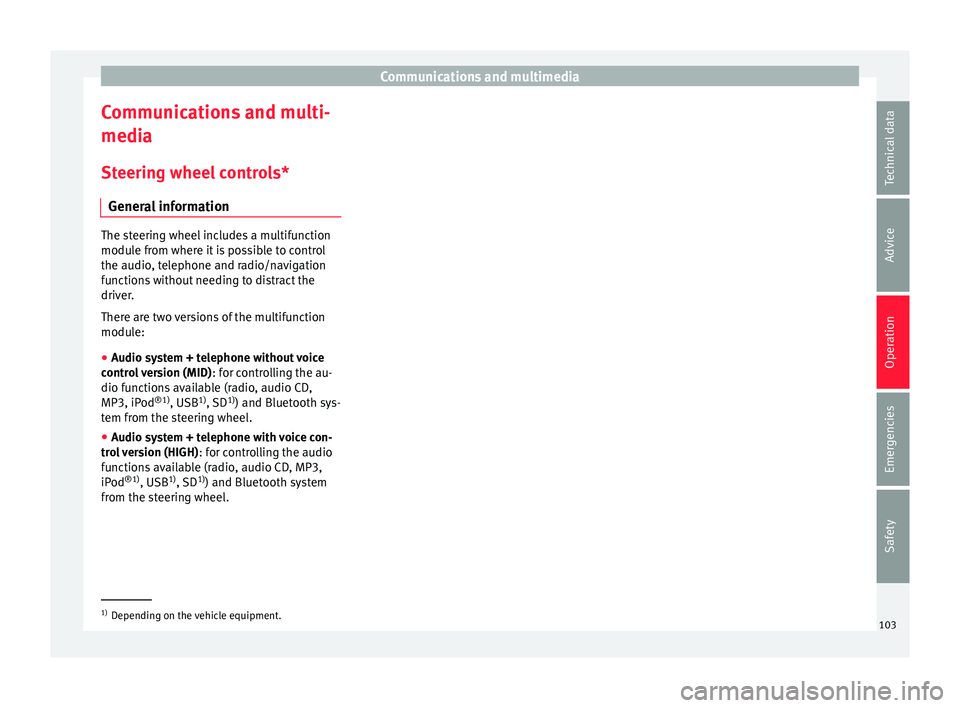
General information The steering wheel includes a multifunction
module fr
om wher
e it is possible to control
the audio, telephone and radio/navigation
functions without needing to distract the
driver.
There are two versions of the multifunction
module:
● Audio system + telephone without voice
contro l
version (MID) : for controlling the au-
dio functions available (radio, audio CD,
MP3, iPod ®1)
, USB 1)
, SD 1)
) and Bluetooth sys-
tem from the steering wheel.
● Audio system + telephone with voice con-
trol
version (HIGH) : for controlling the audio
functions available (radio, audio CD, MP3,
iPod ®1)
, USB 1)
, SD 1)
) and Bluetooth system
from the steering wheel. 1)
Depending on the vehicle equipment.
103
Technical data
Advice
Operation
Emergencies
Safety
Page 107 of 252

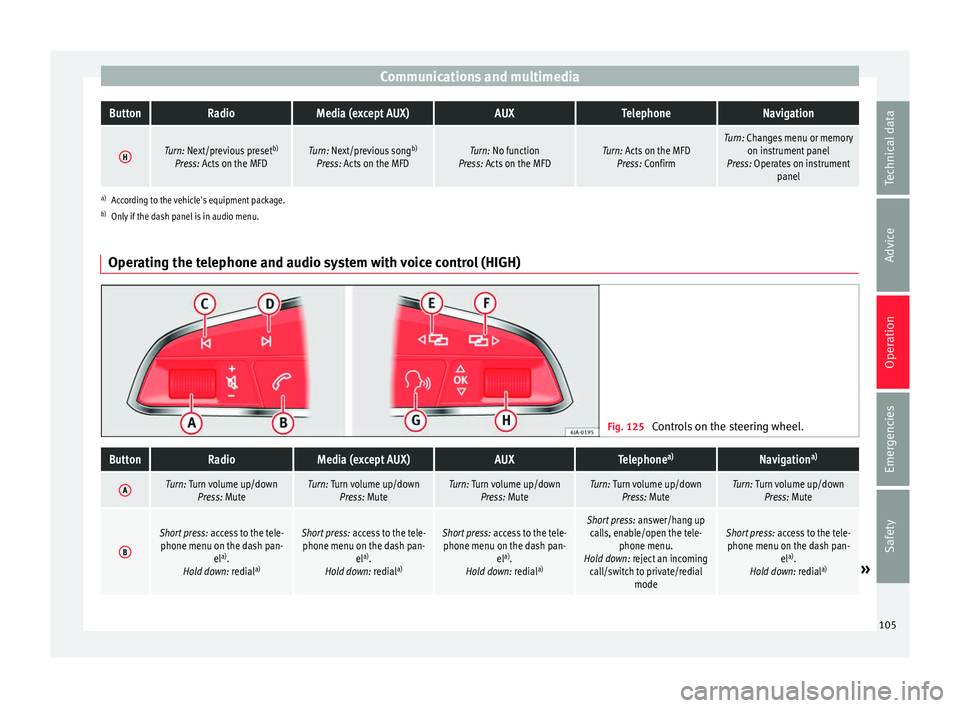
Communications and multimediaButtonRadioMedia (except AUX)AUXTelephoneNavigation
HTurn: Next/previous preset
b)
Press: Acts on the MFDTurn: Next/previous song b)
Press: Acts on the MFDTurn: No function
Press: Acts on the MFDTurn: Acts on the MFD Press: ConfirmTurn: Changes menu or memory on instrument panel
Press: Operates on instrument panel
a)According to the vehicle's equipment package.
b) Only if the dash panel is in audio menu.
Operating the telephone and audio system with voice control (HIGH) Fig. 125
Controls on the steering wheel.
ButtonRadioMedia (except AUX)AUXTelephone a)Navigation a)
ATurn: Turn volume up/down
Press: MuteTurn: Turn volume up/downPress: MuteTurn: Turn volume up/downPress: MuteTurn: Turn volume up/downPress: MuteTurn: Turn volume up/downPress: Mute
B
Short press: access to the tele-
phone menu on the dash pan- ela)
.
Hold down: redial a)Short press:
access to the tele-
phone menu on the dash pan- ela)
.
Hold down: redial a)Short press:
access to the tele-
phone menu on the dash pan- ela)
.
Hold down: redial a)Short press:
answer/hang up
calls, enable/open the tele- phone menu.
Hold down: reject an incoming call/switch to private/redial modeShort press: access to the tele-
phone menu on the dash pan- ela)
.
Hold down: redial a)
» 105
Technical data
Advice
Operation
Emergencies
Safety
Page 109 of 252

Opening and closing
Multimedia USB/A UX
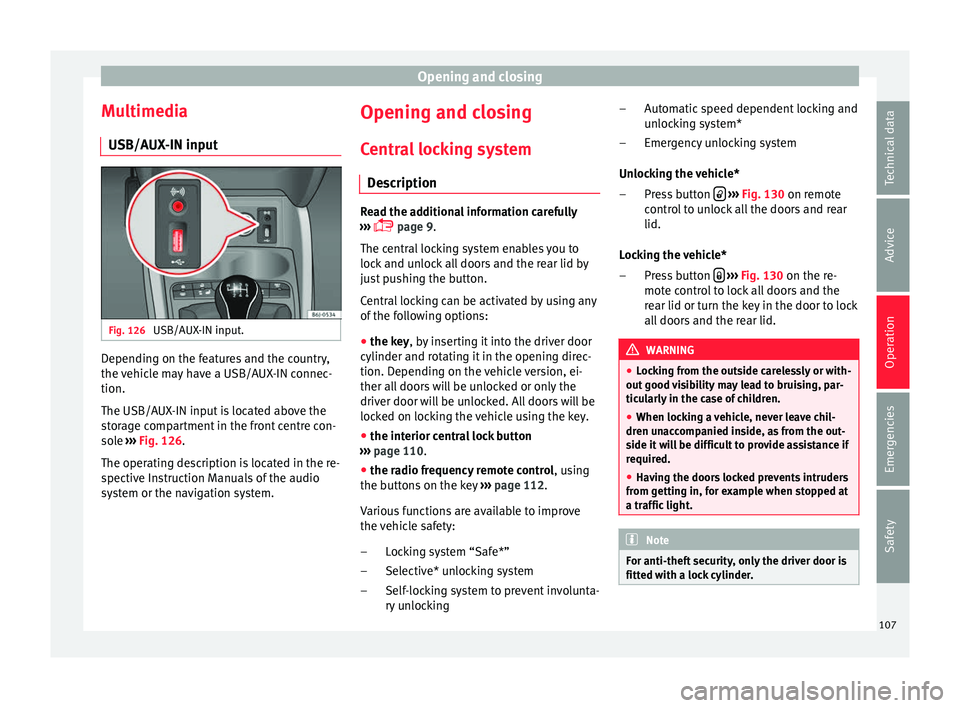
-IN inp ut Fig. 126
USB/AUX-IN input. Depending on the features and the country,
the
v
ehic l
e may have a USB/AUX-IN connec-
tion.
The USB/AUX-IN input is located above the
storage compartment in the front centre con-
sole ››› Fig. 126.
The operating description is located in the re-
spective Instruction Manuals of the audio
system or the navigation system. Opening and closing
C entr
al
locking system
Description Read the additional information carefully
›››
p
age 9.
The central locking system enables you to
lock and unlock all doors and the rear lid by
just pushing the button.
Central locking can be activated by using any
of the following options:
● the key, by inserting it into the driver door
cylinder and rot atin
g it in the opening direc-
tion. Depending on the vehicle version, ei-
ther all doors will be unlocked or only the
driver door will be unlocked. All doors will be
locked on locking the vehicle using the key.
● the interior central lock button
››› p
age 110.
● the radio frequency remote control , using
the b
uttons on the key ›››
page 112.
Various functions are available to improve
the vehicle safety: Locking system “Safe*”
Selective* unlocking system
Self-locking system to prevent involunta-
ry unlocking
–
–
– Automatic speed dependent locking and
unlock
ing system*
Emergency unlocking system
Unlocking the vehicle* Press button
› ››
Fig. 130
on remot
e
control to unlock all the doors and rear
lid.
Locking the vehicle* Press button
› ››
Fig. 130
on the r e-
mot
e control to lock all doors and the
rear lid or turn the key in the door to lock
all doors and the rear lid. WARNING
● Lock in
g from the outside carelessly or with-
out good visibility may lead to bruising, par-
ticularly in the case of children.
● When locking a vehicle, never leave chil-
dren unac
companied inside, as from the out-
side it will be difficult to provide assistance if
required.
● Having the doors locked prevents intruders
from getting in, f
or example when stopped at
a traffic light. Note
For anti-theft security, only the driver door is
fitted with a loc k
cylinder. –
–
–
–
107
Technical data
Advice
Operation
Emergencies
Safety
Page 111 of 252

Opening and closing
doors and to use the luggage compartment.
The w arnin
g lamp and the al
arm (only vehi-
cles fitted with one) are turned off.
Unlocking the luggage compartment
See ›››
page 9.
Activating the selective unlocking system*
With the door open, insert a key into the start
cylinder and start the ignition. Insert the oth-
er key into the driver door lock and turn in the
opening direction for at least 3 seconds. The
turn signals will flash twice.
Deactivating the selective unlocking system*
With the door open, insert a key into the start
cylinder and start the ignition. Insert the oth-
er key into the driver door lock and turn in the
locking direction for at least 3 seconds. The
turn signals will flash once.
Self-locking system to prevent invol-
untary
unlocking It is an anti-theft system and prevents the un-
int
ention
al u
nlocking of the vehicle.
If the vehicle is unlocked and none of the
doors (including the boot) are opened within
30 seconds, it re-locks automatically. Automatic speed-dependent locking
and unlock
ing system* This is a safety system which prevents access
to the v
ehic
le from the outside when it is run-
ning (e.g. when stopped at a traffic light).
Locking
The doors will lock automatically if the speed
of 15 km/h (9 mph) is exceeded. The rear lid
will lock automatically if the speed of 6 km/h
(4 mph) is exceeded.
If the vehicle is stopped and any of its doors
open, when starting again and exceeding the
mentioned speed, all doors will lock again.
Unlocking
On withdrawing the ignition key, the vehicle
will returns to its status prior to self-locking.
Each door can be unlocked and opened inde-
pendently from the inside (for example, when
a passenger gets out). To do it, simply oper-
ate the lever inside the door.
Activating the system*
With the ignition on, press the locking key on
the central locking system within 3 to 10 sec-
onds. Deactivating the system*
With the ignition on, pre
s
s the unlocking key
on the central locking system within 3 to 10
seconds.
In both cases, if the operation has been car-
ried out correctly, the locking lamp will flash
› ››
Fig. 127
. WARNING
The door handles must not be operated when
the vehic l
e is running: the door would open. Note
If the airbags are triggered during an acci-
dent, the vehic l
e is unlocked, except for the
luggage compartment. It is possible to lock
the vehicle from inside with the central lock-
ing, after turning the ignition off and back on
again. 109
Technical data
Advice
Operation
Emergencies
Safety
Page 113 of 252

Opening and closing
and clockwise for the right-hand side
door s.
D eactiv
ating the childproof lock
– Unlock the vehicle and open the door
whose chil
dproof lock you want to deacti-
vate.
– With the door open, rotate the groove in
the door using the ignition k
ey, anti-clock-
wise for the right-hand side doors, and
clockwise for the left-hand side doors
››› Fig. 128.
Once the childproof lock is activated, the
door can only be opened from the outside.
The childproof lock can be activated or deac-
tivated by inserting the key in the groove
when the door is open, as described above. Keys
Set of key
s Fig. 129
Set of keys. The set of keys may consists of the following,
dependin
g on the
ver
sion of your vehicle:
● a remote control key ››› Fig. 129
A ●
a key without remote control B ,
● a plastic key tab* C .
or
● two keys without remote control B ●
a plastic key tab* C .
D up
licat
e keys
If you need a replacement key, go to a Techni-
cal Service with your vehicle identification
number. WARNING
● An incorrect u
se of the keys can cause seri-
ous injuries.
● Never leave children or disabled persons in
the vehicl
e. In case of emergency, they may
not be able to leave the vehicle or manage on
their own.
● An uncontrolled use of the key could start
the engine or activate an
y electric equipment
(e.g. electric windows), causing risk of acci-
dent. The doors can be locked using the re-
mote control key. This could become an ob-
stacle for assistance in an emergency situa-
tion.
● Never forget the keys inside the vehicle. An
unauthorised u
se of your vehicle could result
in injury, damage or theft. Therefore always
take the key with you when you leave the ve-
hicle.
● Never remove the key from the ignition if
the vehicl
e is in motion. Otherwise, the steer-
ing could suddenly block and it would be im-
possible to steer the vehicle. CAUTION
There are electronic components in the re-
mote contr o
l key. Avoid wetting and hitting
the keys. 111
Technical data
Advice
Operation
Emergencies
Safety
Page 115 of 252

Opening and closing
While the vehicle is open:
– Press the button
2
› ››
Fig. 130
on the
r emot
e control.
– Then close the vehicle using the key shaft
within one minute.
Whil
e the vehicle is closed:
– Press the button
1
› ››
Fig. 130
on the
r emot
e control.
– Then close the vehicle using the key shaft
within one minute.
It i
s possible that the vehicle could no longer
be opened and closed with the remote con-
trol if the button is repeatedly pressed
outs ide of
the eff ectiv
e range of the radio fre-
quency remote control. The remote control
key will have to be resynchronised.
Spare remote control keys are available at
your Technical Service, where they must be
matched to the locking system.
Up to five remote control keys can be used. Anti-theft alarm*
Desc
ription of anti-theft alarm sys-
tem* The anti-theft alarm makes it more difficult to
break
int
o the vehicle or steal it. The system
will initiate acoustic and optical warning sig-
nals when your vehicle is tried to be forced.
The anti-theft alarm system is automatically
switched on when locking the vehicle. The
system is immediately activated and the turn
signal light located on the driver door will
flash along with the turn signals, indicating
that the alarm and the locking security sys-
tem (double lock) have been turned on.
If any of the doors or the bonnet are open,
they will not be included in the protection
zones of the vehicle when the alarm is con-
nected. If the door or the bonnet are subse-
quently closed, they will be automatically in-
cluded in the protection areas of the vehicle
and the turn signals will flash accordingly
when the doors close.
● The turn signal light will flash twice on
opening and deactiv atin
g the alarm.
● The turn signal light will flash once on clos-
ing and activating the al
arm. When does the system trigger an alarm?
The system trig
gers an alarm, if the following
unauthorised actions are carried out when
the vehicle is locked:
● Mechanical opening of the vehicle with the
vehicle k
ey without switching on the ignition
in the next 15 seconds (in certain markets,
such as the Netherlands, the alarm is activa-
ted immediately).
● A door is opened.
● Opening the bonnet.
● The rear lid is opened.
● Ignition switched on with a non-validated
key.
● Mov
ements in the driving compartment
(vehicle
s with a volume sensor).
● Towing of the vehicle 1)
.
● Vehicle tilt angle 1)
.
● Undue manipulation of the alarm.
● Battery handling.
In this ca
se, the acoustic signals will go off
and the turn signal will flash for approximate-
ly 30 seconds. This cycle may be repeated up
to 10 times depending on the country. »1)
With vehicles fitted with a tow-away protection
113
Technical data
Advice
Operation
Emergencies
Safety
Page 117 of 252

Opening and closing
● Tiltin
g panor
amic sunroof open (partially or
completely),
● Movement of objects inside the vehicle,
such as
loose papers, items hanging from
the rear vision mirror (air fresheners), etc. Note
● If the v ehic
le is relocked and the alarm is
activated without the volumetric sensor func-
tion, relocking will activate the alarm with all
its functions, except the volumetric sensor.
This function is reactivated when the alarm is
switched on again, unless it is deliberately
switched off.
● If the alarm has been triggered by the volu-
metric sensor, thi
s will be indicated by a
flashing of the warning lamp on the driver
door when the vehicle is opened. The flash is
different to the flash indicating the alarm is
activated.
● The vibration of a mobile phone left inside
the vehicl
e may cause the vehicle interior
monitoring alarm to trigger, as both sensors
react to movements and shakes inside the ve-
hicle.
● If on activating the alarm, any door or the
rear lid is
open, only the alarm will be activa-
ted. The vehicle interior monitoring and the
anti-tow system will only be activated once
all the doors are closed (including the rear
lid). Boot hatch
Openin g and c
los
ing Read the additional information carefully
›››
p
age 9 WARNING
● Alwa y
s close the rear lid properly. Risk of
accident or injury.
● The rear lid must not be opened when the
reverse or r
ear fog lights are lit. This may
damage the tail lights.
● Do not close the rear lid by pushing it down
with your h
and on the rear window. The glass
could smash. Risk of injury!
● Ensure the rear lid is locked after closing it.
If not, it ma
y open unexpectedly while driv-
ing.
● Never allow children to play in or around
the vehicl
e. A locked vehicle can be subjected
to extremely high and low temperatures, de-
pending on the time of year, thus causing se-
rious injuries/illness. It could even have fatal
consequences. Close and lock both the rear
lid and all the other doors when you are not
using the vehicle.
● Closing the rear lid without observing and
ensuring it
is clear could cause serious injury
to you and to third parties. Make sure that no
one is in the path of the rear lid. ●
Never drive w ith the r
ear lid open or half-
closed, exhaust gases may enter into the in-
terior of the vehicle. Danger of poisoning!
● If you only open the rear lid, do not leave
the key ins
ide. The vehicle cannot be opened
if the key is left inside. Electric windows
Opening and clo s
ing of the electric
windows* Fig. 132
Detail of the driver door: controls for
the fr ont
and r e
ar windows (5-door vehicles
with front and rear electric windows). Read the additional information carefully
› ›
›
p
age 11
The front and rear electric windows can be
operated by using the controls on the driver »
115
Technical data
Advice
Operation
Emergencies
Safety