2016 Peugeot 508 RXH parking brake
[x] Cancel search: parking brakePage 181 of 364
179
508_en_Chap06_conduite_ed01-2016
Manual operation
F Select position M for sequential changing
of the six gears.
F
P
ull the lever towards the + sign to change
up a gear.
F
P
ush the lever towards the - sign to change
down a gear.
It is only possible to change from one gear to
another if the vehicle speed and engine speed
permit; otherwise, the gearbox will operate
temporarily in automatic mode.
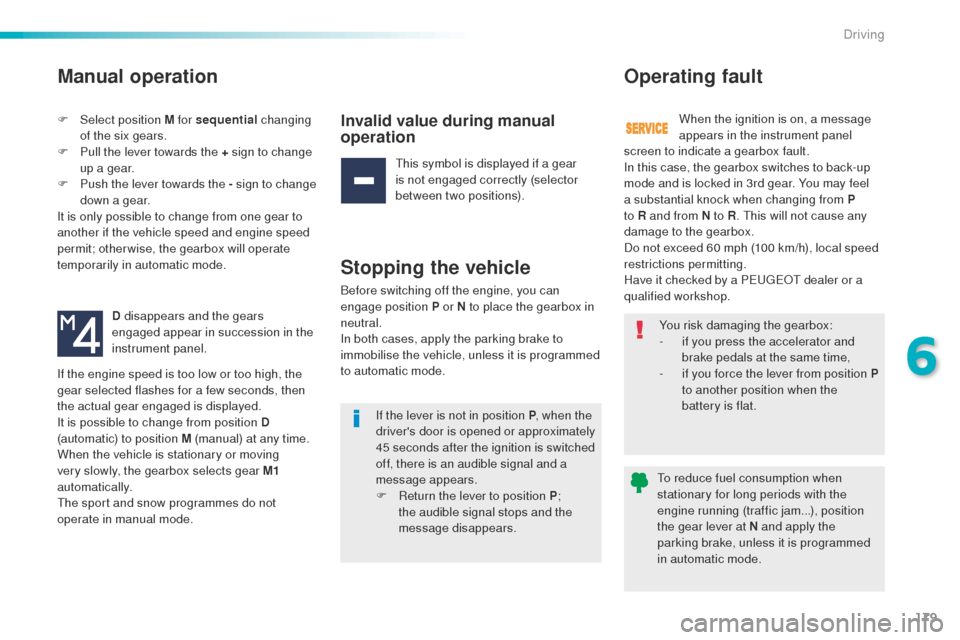
D disappears and the gears
engaged appear in succession in the
instrument panel.Invalid value during manual
operation
this symbol is displayed if a gear
is not engaged correctly (selector
between two positions).
Stopping the vehicle
Before switching off the engine, you can
engage position P or N to place the gearbox in
neutral.
In both cases, apply the parking brake to
immobilise the vehicle, unless it is programmed
to automatic mode.
Operating fault
When the ignition is on, a message
appears in the instrument panel
If the engine speed is too low or too high, the
gear selected flashes for a few seconds, then
the actual gear engaged is displayed.
It is possible to change from position D
(automatic) to position M (manual) at any time.
When the vehicle is stationary or moving
very slowly, the gearbox selects gear M1
automatically.
th
e sport and snow programmes do not
operate in manual mode. You risk damaging the gearbox:
-
i
f you press the accelerator and
brake pedals at the same time,
-
i
f you force the lever from position P
to another position when the
battery is flat.
If the lever is not in position P , when the
driver's door is opened or approximately
45 seconds after the ignition is switched
off, there is an audible signal and a
message appears.
F
R
eturn the lever to position P ;
the audible signal stops and the
message disappears.
to r
educe fuel consumption when
stationary for long periods with the
engine running (traffic jam...), position
the gear lever at N and apply the
parking brake, unless it is programmed
in automatic mode.
screen to indicate a gearbox fault.
In this case, the gearbox switches to back-up
mode and is locked in 3rd gear. You may feel
a substantial knock when changing from P
to R and from N to R
.
t
h
is will not cause any
damage to the gearbox.
Do not exceed 60 mph (100 km/h), local speed
restrictions permitting.
Have it checked by a P
e
uge
Ot
dealer or a
qualified workshop.
6
Driving
Page 182 of 364
180
508_en_Chap06_conduite_ed01-2016
Stop & Start
Operation
Going into engine STOP mode
the "ECO" indicator lamp comes
on in the instrument panel and the
engine goes into standby:
-
w
ith a manual gearbox, at speeds below
12 mph (20 km/h), or vehicle stationary
with the e-
tH
P 165 version, when you put
the gear lever into neutral and release the
clutch pedal,
-
w
ith an automatic gearbox, vehicle
stationary, when you press the brake pedal
or you put the gear selector in position N .
If your vehicle is fitted with the system, a time
counter calculates the sum of the periods in
S
tO
P mode during a journey. It rests itself to
zero every time the ignition is switched on with
t h e key. Never refuel with the engine in
S
tO
P mode; you must switch off the
ignition with the key. For your comfort, during parking
maoeuvres, S
tO
P mode is not
available for a few seconds after
coming out of reverse gear.
S
tO
P mode does not affect the
functionality of the vehicle, such as for
example, braking, power steering...
th
e Stop & Start
system puts the engine
temporarily into standby - S
tO
P mode -
during stops in the traffic (red lights, traffic
jams, or other...).
t
h
e engine restarts
automatically
-
StA
Rt
mode - as soon as
you want to move off.
th
e restart takes place
instantly, quickly and silently.
Per fect for urban use, the Stop & Start system
reduces fuel consumption and exhaust
emissions as well as the noise level when
stationary.
Driving
Page 183 of 364
181
508_en_Chap06_conduite_ed01-2016
Going into engine START mode
the "ECO" indicator lamp goes off
and the engine starts automatically:
-
w
ith a manual gearbox , when you fully
depress the clutch pedal,
-
w
ith an automatic gearbox:
●
g
ear selector in position D or M , when
you release the brake pedal,
●
o
r gear selector in position N and brake
pedal released, when you put the gear
selector in position D or M ,
●
o
r when you engage reverse gear. StA
Rt mode is invoked automatically when:
- t he driver's door is open,
-
t
he driver's seat belt is not fastened,
-
t
he speed of the vehicle exceeds 18 mph
(25 km/h) with a manual gearbox (2 mph
(3 km/h) with the
t
H
P 165 version), or
2
mph (3 km/h) with an automatic gearbox,
-
t
he electric parking brake is being applied,
-
s
ome special conditions (battery charge,
engine temperature, braking assistance,
ambient temperature...) where the engine is
needed for control of a system.
Special cases: START invoked
automatically
In this case the "ECO" indicator lamp
flashes for a few seconds, then goes
of f.
This operation is perfectly normal.
Special cases: STOP mode not
available
StOP mode is not invoked when:
- t he driver's door is open,
-
t
he driver's seat belt is not fastened,
-
t
he vehicle has not exceeded 6 mph
(10
km/h) since the last engine start using
t h e key,
-
t
he vehicle is stopped on a steep slope
(up
or down),
-
t
he electric parking brake is applied or
being applied,
-
t
he engine is needed to maintain a
comfortable temperature in the passenger
compartment,
-
d
emisting is selected,
-
s
ome special conditions (battery charge,
engine temperature, braking assistance,
ambient temperature...) where the engine is
needed to assure control of a system.
In this case, the "ECO" indicator
lamp flashes for a few seconds then
goes off.
This operation is perfectly normal.
6
Driving
Page 185 of 364
183
508_en_Chap06_conduite_ed01-2016
Hill start assist
System which keeps your vehicle immobilised
temporarily (approximately 2 seconds) when
starting on a gradient, the time it takes to
move your foot from the brake pedal to the
accelerator pedal.
th
is system only operates when:
-
t
he vehicle is completely stationary, with
your foot on the brake pedal,
-
c
ertain gradient conditions are met,
-
w
ith the driver’s door closed.
th
e hill start assist system cannot be
deactivated.
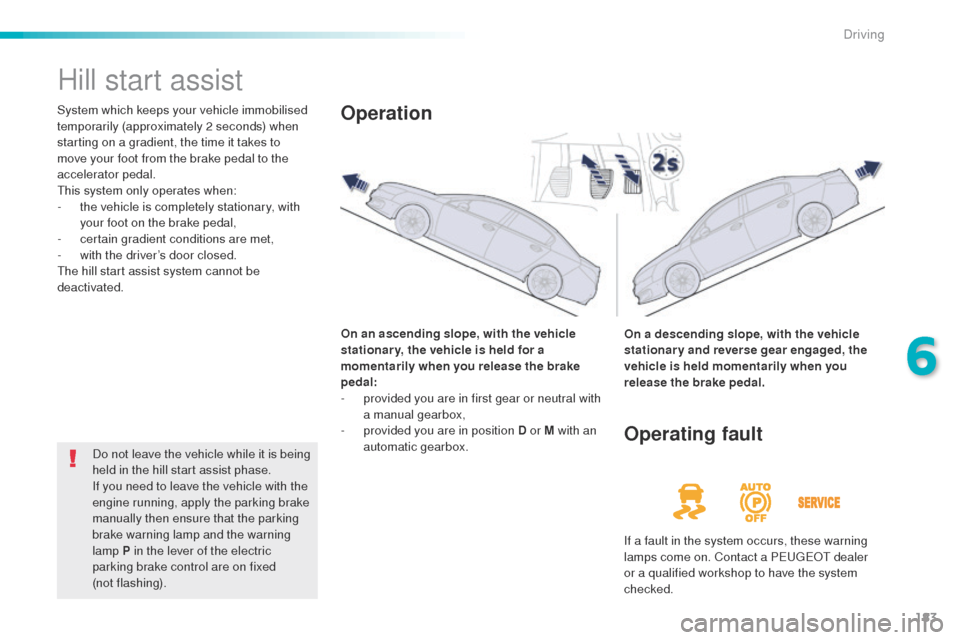
On an ascending slope, with the vehicle
stationar y, the vehicle is held for a
momentarily when you release the brake
pedal:
-
p
rovided you are in first gear or neutral with
a manual gearbox,
-
p
rovided you are in position D or M with an
automatic gearbox.Operation
On a descending slope, with the vehicle
stationary and reverse gear engaged, the
vehicle is held momentarily when you
release the brake pedal.
Do not leave the vehicle while it is being
held in the hill start assist phase.
If you need to leave the vehicle with the
engine running, apply the parking brake
manually then ensure that the parking
brake warning lamp and the warning
lamp P in the lever of the electric
parking brake control are on fixed
(not
flashing).
Operating fault
If a fault in the system occurs, these warning
lamps come on. Contact a Pe ugeOt dealer
or a qualified workshop to have the system
checked.
6
Driving
Page 205 of 364
203
508_en_Chap07_info-pratiques_ed01-2016
Snow chains
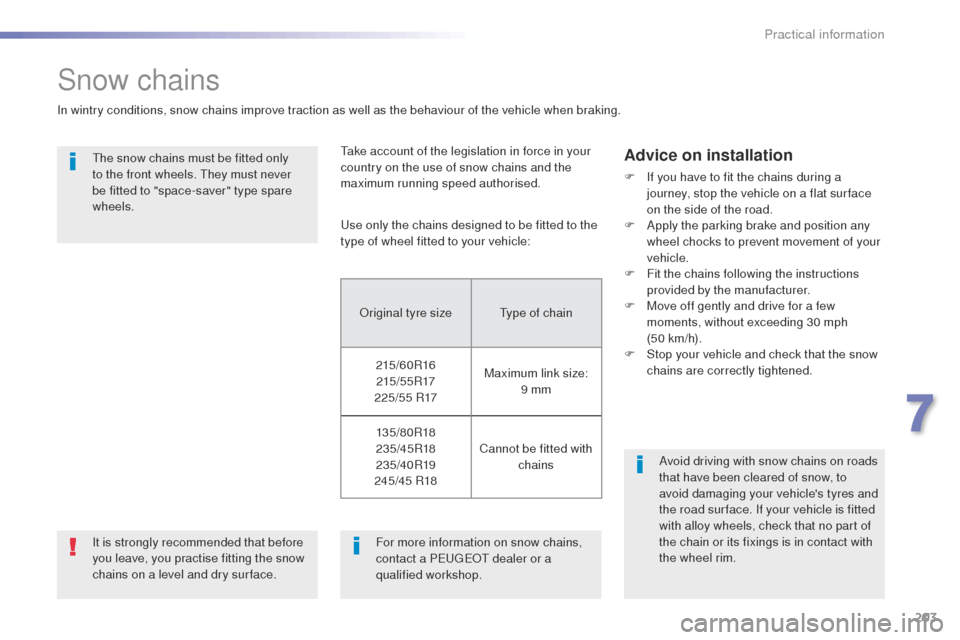
In wintry conditions, snow chains improve traction as well as the behaviour of the vehicle when braking.
th
e snow chains must be fitted only
to the front wheels.
t
h
ey must never
be fitted to "space-saver" type spare
wheels.
us
e only the chains designed to be fitted to the
type of wheel fitted to your vehicle:
Advice on installation
F If you have to fit the chains during a journey, stop the vehicle on a flat sur face
on the side of the road.
F
A
pply the parking brake and position any
wheel chocks to prevent movement of your
vehicle.
F
F
it the chains following the instructions
provided by the manufacturer.
F
M
ove off gently and drive for a few
moments, without exceeding 30 mph
(50
km/h).
F
S
top your vehicle and check that the snow
chains are correctly tightened.
Avoid driving with snow chains on roads
that have been cleared of snow, to
avoid damaging your vehicle's tyres and
the road sur face. If your vehicle is fitted
with alloy wheels, check that no part of
the chain or its fixings is in contact with
the wheel rim.
For more information on snow chains,
contact a P
e
uge
Ot
dealer or a
qualified workshop.
It is strongly recommended that before
you leave, you practise fitting the snow
chains on a level and dry sur face.
ta
ke account of the legislation in force in your
country on the use of snow chains and the
maximum running speed authorised.
Original tyre size
ty
pe of chain
215/60R16 215 / 5 5 R17
225/55 R17 Maximum link size:
9 mm
13 5 /8 0 R18
235/45R18
235/40R19
245/45 R18 Cannot be fitted with
chains
7
Practical information
Page 224 of 364
222
508_en_Chap07_info-pratiques_ed01-2016
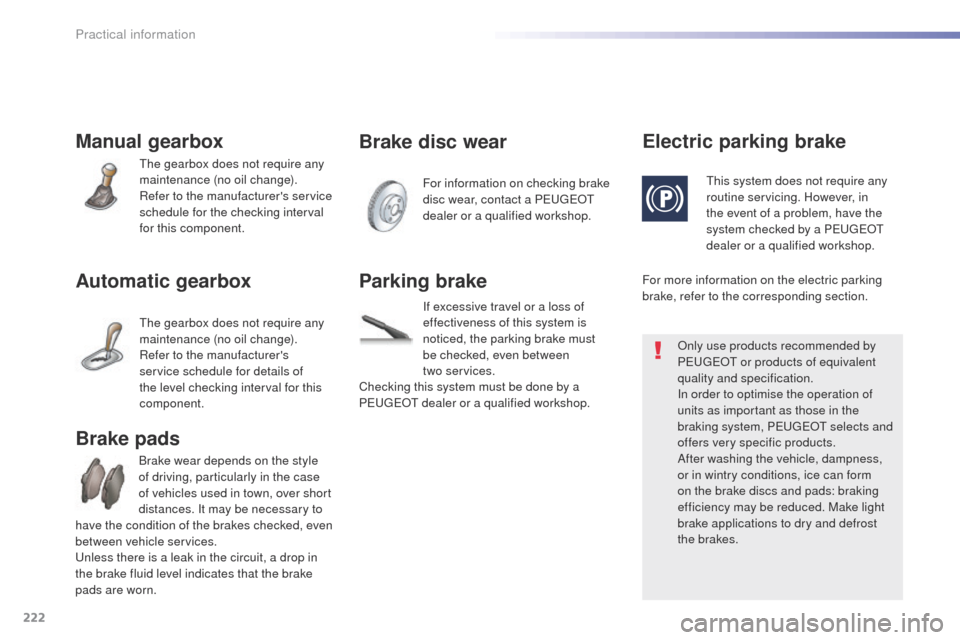
Manual gearbox
the gearbox does not require any
maintenance (no oil change).
Refer to the manufacturer's service
schedule for the checking interval
for this component.
Automatic gearbox
the gearbox does not require any
maintenance (no oil change).
Refer to the manufacturer's
service schedule for details of
the level checking interval for this
component.
Brake wear depends on the style
of driving, particularly in the case
of vehicles used in town, over short
distances. It may be necessary to
have the condition of the brakes checked, even
between vehicle services.
un
less there is a leak in the circuit, a drop in
the brake fluid level indicates that the brake
pads are worn.
Brake pads
For information on checking brake
disc wear, contact a Pe ugeOt
dealer or a qualified workshop.
Brake disc wear Electric parking brake
this system does not require any
routine servicing. However, in
the event of a problem, have the
system checked by a P
e
uge
Ot
dealer or a qualified workshop.
Only use products recommended by
P
e
uge
Ot
or products of equivalent
quality and specification.
In order to optimise the operation of
units as important as those in the
braking system, P
e
uge
Ot
selects and
offers very specific products.
After washing the vehicle, dampness,
or in wintry conditions, ice can form
on the brake discs and pads: braking
efficiency may be reduced. Make light
brake applications to dry and defrost
the brakes.
Parking brake
If excessive travel or a loss of
effectiveness of this system is
noticed, the parking brake must
be checked, even between
two
services.
Checking this system must be done by a
P
e
uge
Ot
dealer or a qualified workshop. For more information on the electric parking
brake, refer to the corresponding section.
Practical information
Page 240 of 364
238
508_en_Chap08_en-cas-de-pannes_ed01-2016
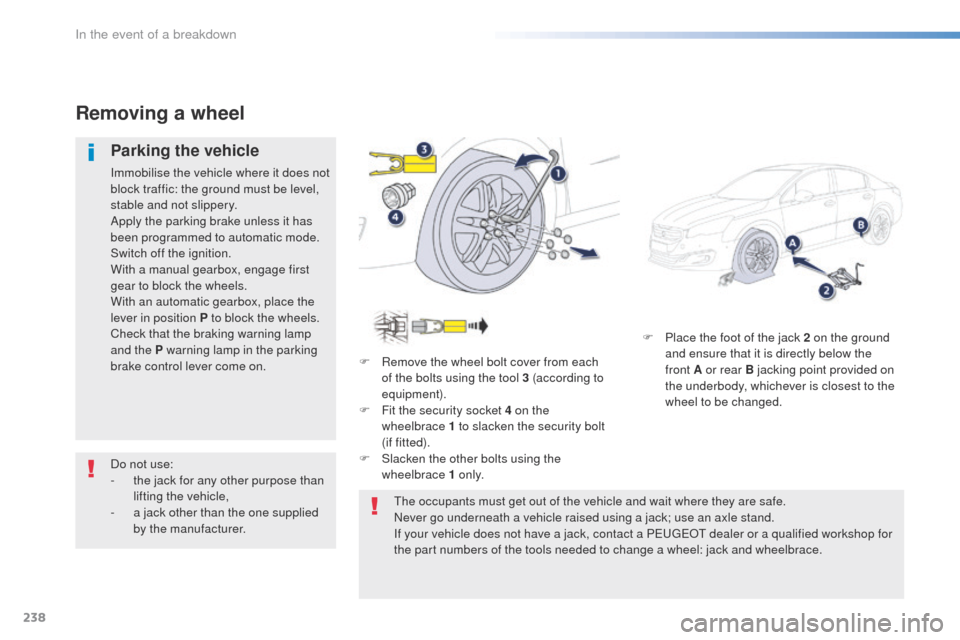
F Place the foot of the jack 2 on the ground and ensure that it is directly below the
front
A or rear B jacking point provided on
the underbody, whichever is closest to the
wheel to be changed.
Removing a wheel
Parking the vehicle
Immobilise the vehicle where it does not
block traffic: the ground must be level,
stable and not slippery.
Apply the parking brake unless it has
been programmed to automatic mode.
Switch off the ignition.
With a manual gearbox, engage first
gear to block the wheels.
With an automatic gearbox, place the
lever in position P to block the wheels.
Check that the braking warning lamp
and the P warning lamp in the parking
brake control lever come on. F
R
emove the wheel bolt cover from each
of the bolts using the tool 3 (according to
equipment).
F
F
it the security socket 4 on the
wheelbrace
1 to slacken the security bolt
(if
fitted).
F
S
lacken the other bolts using the
wheelbrace 1 o n l y.
th
e occupants must get out of the vehicle and wait where they are safe.
Never go underneath a vehicle raised using a jack; use an axle stand.
If your vehicle does not have a jack, contact a P
e
uge
Ot
dealer or a qualified workshop for
the part numbers of the tools needed to change a wheel: jack and wheelbrace.
Do not use:
-
t
he jack for any other purpose than
lifting the vehicle,
-
a j
ack other than the one supplied
by the manufacturer.
In the event of a breakdown
Page 259 of 364
257
508_en_Chap08_en-cas-de-pannes_ed01-2016
Removing - refitting the battery*
* Valid only for Saloon, SW and non-hybrid
RHX.
th
is procedure allows you to safely remove the
battery when needed to change a failed bulb.
You can also call on a P
e
uge
Ot
dealer or a qualified workshop to carry
out this procedure.
Before removal
- Place the vehicle in a ventilated location, with free access and preferably on a level
sur face.
-
A
pply the parking brake.
-
P
ut the gear lever into neutral (position N
for an automatic gearbox).
-
I
f the vehicle has an alarm, leave the
bonnet open to avoid triggering the alarm.
-
L
eave at least one window open if in a
secure location, other wise lock all the
doors and the boot. -
I f the vehicle has a motorised tailgate,
it will not be possible to open it after
disconnecting the battery.
-
S
witch off the ignition and remove the key.
-
I
f the vehicle has Keyless e
n
try and
Starting, take the remote control at least
3
metres away from the vehicle.
-
W
ait about 4 minutes (or 12 minutes
with an automatic gearbox) before
disconnecting the battery.
8
In the event of a breakdown