2016 Peugeot 508 low beam
[x] Cancel search: low beamPage 17 of 371

15
508 _en_Chap01_instrument-bord_ed01-2016
Operation indicator lamps
If one of the following indicator lamps comes on in the instrument panel and/or instrument panel screen, this confirms that the corresponding system has come into operation.
Warning / indicator lampStateCause Action / Observations
Left-hand
direction
indicato r flashing with buzzer.
th
e lighting stalk is pushed down.
Right-hand
direction
indicator flashing with buzzer.
th
e lighting stalk is pushed up.
Sidelamps fixed.
th
e lighting stalk is in the
"Sidelamps" position.
Dipped beam
headlamps fixed.
th
e lighting stalk is in the "Dipped
beam headlamps" position.
Main beam
headlamps fixed.
th
e lighting stalk is pulled towards
you. Pull the stalk to return to dipped beam headlamps.
Front foglamps fixed.
th
e front foglamps are switched on
using the ring on the lighting control
stalk.
tu
rn the ring on the lighting control stalk rear ward
twice to switch off the front foglamps.
Rear foglamps fixed.
th
e rear foglamps are on.
tu
rn the ring on the stalk rear ward to switch off the
rear foglamps.
For more information on the lighting controls, refer to the corresponding section.
1
Instruments
Page 119 of 371

117
508_en_Chap04_eclairage-et-visibilite_ed01-2016
Lighting controlsSelection and operation of the various front and rear lamps providing the vehicle's lighting and signalling.
Main lighting
there are various lamps on the vehicle:
- s idelamps, to be seen,
-
d
ipped beam headlamps to see without
dazzling other drivers,
-
m
ain beam headlamps to see clearly when
the road is clear,
-
d
irectional headlamps for improved
visibility when cornering.
Additional lighting
Other lamps are installed to fulfil the
requirements of particular driving conditions:
-
r
ear foglamps to better signal the presence
of the vehicle in foggy conditions,
-
f
ront foglamps for better visibility in foggy
conditions and to improve lighting at
intersections and when parking,
-
d
aytime running lamps at the front for
better visibility of the vehicle by day.
-
a
dditional headlamps for better lighting of
the inside of corners.
Lighting function settings
You can activate or deactivate the following
lighting functions:
-
gu
ide-me-home lighting,
-
m
ain additional lighting,
-
s
econdary additional lighting,
-
w
elcome lighting,
-
a
utomatic illumination of headlamps,
-
a
daptive lighting.
In some weather conditions (e.g. low
temperature or humidity), the presence
of misting on the internal sur face of the
glass of the headlamps and rear lamps
is normal; it disappears after the lamps
have been on for a few minutes.
4
Lighting and visibility
Page 123 of 371

121
508_en_Chap04_eclairage-et-visibilite_ed01-2016
In fog or snow, the sunshine sensor
may detect sufficient light. In this
case, the lighting will not come on
automatically.
Do not cover the sunshine sensor,
coupled with the rain sensor and
located in the centre of the windscreen
behind the rear view mirror; the
associated functions would no longer
be controlled.
the sidelamps and dipped beam headlamps are
switched on automatically, without any action on
the part of the driver, when a low level of external
light is detected or in certain cases of activation
of the windscreen wipers.
As soon as the brightness returns to a sufficient
level or after the windscreen wipers are switched
off, the lamps are switched off automatically.
Automatic illumination of headlamps
Activation
F turn the ring to the "AUTO" position. th
e automatic illumination of headlamps
is accompanied by a message in the
instrument panel screen.
Deactivation
F turn the ring to another position. Deactivation is accompanied by a message
in the instrument panel screen.
Association with automatic
guide-me-home lighting
Association with automatic illumination of
headlamps provides the guide-me-home
lighting with the following additional options:
-
s
election of the lighting duration of 15, 30
or 60 seconds,
-
a
utomatic activation of guide-me-home
lighting when the automatic illumination of
headlamps is in operation.
Operating fault
In the event of a fault with the
sunshine sensor, the lighting comes
on, this warning lamp is displayed
in the instrument panel and/or a
message appears in the instrument
panel screen, accompanied by an
audible signal.
Contact a P
e
uge
Ot
dealer or a
qualified workshop.
4
Lighting and visibility
Page 124 of 371

122
508_en_Chap04_eclairage-et-visibilite_ed01-2016
Adaptive lighting
Switching on
the driver can take over at any time, if the
circumstances dictate:
System which automatically changes between
dipped and main beam according to the driving
conditions, using a sensor in the rear view
m i r r o r.
th
e system is active from 15 mph (25 km/h)
and is deactivated below 9 mph (15 km/h).
F
P
ut the lighting control stalk on the "A
u
t
O
"
or "Dipped/main beam headlamps"
position.
Switching off
Flashing the headlamps does not
deactivate the system.
th
e state of the system is stored in
memory when switching off the ignition.
th
is automatic headlamp dipping
system is a driving aid.
t
h
e driver
remains responsible for the vehicle's
lighting and its correct use for the
prevailing conditions of light, visibility
and traffic.
the
system may suffer interference or
not work correctly:
-
u
nder conditions of poor visibility
(for example, snowfall, heavy rain
or thick fog, ...),
-
i
f the windscreen is dirty, misted or
obscured (by a sticker, ...) in front of
the sensor,
-
i
f the vehicle is facing highly
reflective signs.
th
e system is not able to detect:
-
r
oad users that do not have their
own lighting, such as pedestrians,
-
r
oad users whose lighting is
obscured, such as vehicles running
behind a safety barrier (on a
motorway, for example),
-
r
oad users at the top or bottom of
a steep slope, on twisty roads, on
crossroads.
F
P
ress this button, the
indicator lamp goes off,
or
F
D
ipping the headlamps
manually using the lighting
control stalk, whether in the
"A
u
t
O
" or "Dipped/main
beam headlamps" position.
F
P
ress this button, the
indicator lamp comes on.
Lighting and visibility
Page 125 of 371

123
508_en_Chap04_eclairage-et-visibilite_ed01-2016
Secondary additional headlamps
With the dipped or main beam headlamps
on, this function makes use of the beam from
a front foglamp to illuminate the inside of a
bend, when the vehicle speed is below 25 mph
(approximately 40 km/h).
th
is additional lighting is particularly useful in
town, at intersections, on very winding roads,
when parking,
...
Operation
this system operates:
- w hen the direction indicators are switched
on (the foglamp on the same side is
switched on),
or
-
f
rom a certain angle of rotation of the
steering wheel.
System inactive
Programming
the system does not operate:
- b elow a certain angle of rotation of the
steering wheel,
-
w
hen the direction indicators are turned off.
th
e system is activated or deactivated in the
Main menu , select "Vehicle parameters ",
then " Lighting ", then activate/deactivate.
th
e system is activated by default.
With dipped or main beam on, this system uses
L
eD
s (light-emitting diodes) to illuminate the
inside of a bend.th
e speed of the vehicle must be below 75
m
ph
(120 km/h).
th
is function is a available only with "full-L
eD
"
headlamps.
Additional headlamps
Operation
this system operates from a certain angle of
rotation of the steering wheel.
System inactive
the system does not operate:
- b elow a certain angle of rotation of the
steering wheel,
-
a
bove 75 mph (120 km/h),
-
w
hen reverse gear is engaged.
Cornering lighting
4
Lighting and visibility
Page 126 of 371

124
508_en_Chap04_eclairage-et-visibilite_ed01-2016
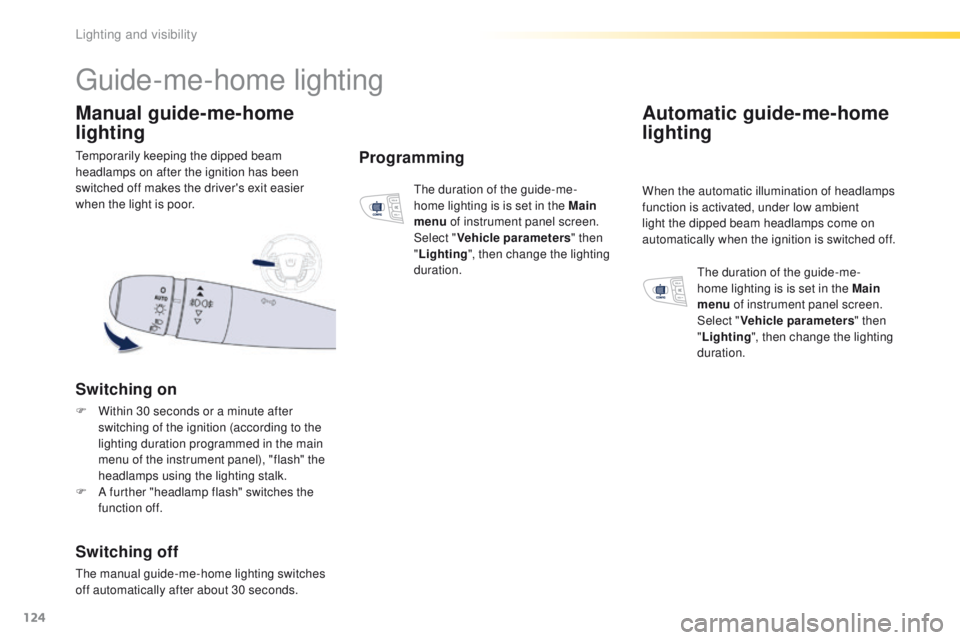
temporarily keeping the dipped beam
headlamps on after the ignition has been
switched off makes the driver's exit easier
when the light is poor.
Manual guide-me-home
lighting
Switching on
F Within 30 seconds or a minute after switching of the ignition (according to the
lighting duration programmed in the main
menu of the instrument panel), "flash" the
headlamps using the lighting stalk.
F
A f
urther "headlamp flash" switches the
function off.
Switching off
the manual guide-me-home lighting switches
off automatically after about 30 seconds.
Programming
the duration of the guide-me-
home lighting is is set in the Main
menu of instrument panel screen.
Select " Vehicle parameters " then
" Lighting ", then change the lighting
duration.
guide-me-home lighting
Automatic guide-me-home
lighting
When the automatic illumination of headlamps
function is activated, under low ambient
light the dipped beam headlamps come on
automatically when the ignition is switched off.
th
e duration of the guide-me-
home lighting is is set in the Main
menu of instrument panel screen.
Select " Vehicle parameters " then
" Lighting ", then change the lighting
duration.
Lighting and visibility
Page 128 of 371

126
508_en_Chap04_eclairage-et-visibilite_ed01-2016
Manual adjustment of
halogen headlampsAutomatic adjustment of
"full-LED" headlamps
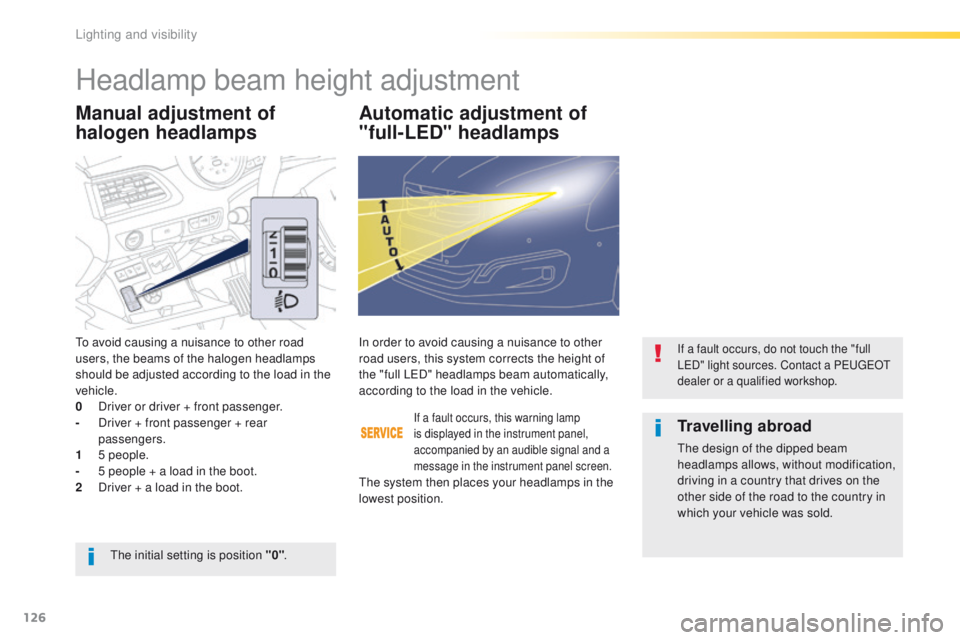
to avoid causing a nuisance to other road
users, the beams of the halogen headlamps
should be adjusted according to the load in the
vehicle.
0
D
river or driver + front passenger.
-
D
river + front passenger + rear
passengers.
1
5
people.
-
5 p
eople + a load in the boot.
2
D
river + a load in the boot.
If a fault occurs, this warning lamp
is displayed in the instrument panel,
accompanied by an audible signal and a
message in the instrument panel screen.
In order to avoid causing a nuisance to other
road users, this system corrects the height of
the "full L e
D
" headlamps beam automatically,
according to the load in the vehicle.If a fault occurs, do not touch the "full
LeD " light sources. Contact a Pe ugeOt
dealer or a qualified workshop.
the initial setting is position "0" .
Travelling abroad
the design of the dipped beam
headlamps allows, without modification,
driving in a country that drives on the
other side of the road to the country in
which your vehicle was sold.
th
e system then places your headlamps in the
lowest position.
Headlamp beam height adjustment
Lighting and visibility
Page 209 of 371

207
508_en_Chap07_info-pratiques_ed01-2016
Before each use
Check that the towball is correctly fitted by verifying the following points:
- t he towball is correctly locked in place (position A ),
-
t
he security key lock is on and the key removed; the locking wheel can no longer be
operated,
-
t
he towball must no longer move at all in its carrier; try to shake it by hand.
During use
Never unlock the towball when a trailer or load carrier is fitted.
Never exceed the maximum authorised weight for the vehicle plus trailer (gr oss tr ain
Weight -
gt
W
).
Before driving, check the adjustment of the headlamp beam height.
For more information on adjusting the headlamps, refer to the corresponding section.
After use
For journeys made without a trailer or load carrier, the trailer harness socket must be folded
away, the towball removed and the protective blanking plug inserted in the carrier. th is
measure applies particularly if the towball could hinder visibility of the number plate or
lighting.
7
Practical information