2016 PEUGEOT 5008 brake
[x] Cancel search: brakePage 182 of 364
180
5008_en_Chap08_conduite_ed01-2015
Stop & Start
Operation
Going into engine STOP mode
The "ECO" indicator lamp comes
on in the instrument panel and the
engine goes into standby:
-
w
ith a manual gearbox, at speeds below
12 mph (20 km/h), or vehicle stationary
with PureTech 130 and BlueHDi 115 and
120 versions, when you put the gear lever
into neutral and release the clutch pedal,
-
w
ith an electronic gearbox , at speeds
below 5 mph (8 km/h), when you press the
brake pedal or you put the gear selector in
position N ,
Special cases: STOP mode not
available
STOP mode is not invoked when:
- t
he driver's door is open,
-
t
he driver's seat belt is not fastened,
-
t
he vehicle has not exceeded 6 mph
(10 km/h) since the last engine start using
t h e key,
-
t
he vehicle is stopped on a steep slope (up
o r d ow n),
-
t
he electric parking brake is applied or
being applied,
-
t
he engine is needed to maintain a
comfortable temperature in the passenger
compartment,
-
d
emisting is active,
-
s
ome special conditions (battery charge,
engine temperature, braking assistance,
ambient temperature...) where the engine is
needed to assure control of a system.
In this case, the "ECO" indicator
lamp flashes for a few seconds then
goes off.
This operation is perfectly normal.
Never refuel with the engine in STOP
mode; you must switch off the ignition
with the key. For your comfort, during parking
maoeuvres, STOP mode is not
available for a few seconds after
coming out of reverse gear.
STOP mode does not affect the
functionality of the vehicle, such as for
example, braking, power steering...
The Stop & Start
system puts the engine
temporarily into standby - STOP mode -
during stops in the traffic (red lights, traffic
jams, or other...). The engine restarts
automatically
-
START mode - as soon as
you want to move off. The restart takes place
instantly, quickly and silently.
Per fect for urban use, the Stop & Start system
reduces fuel consumption and exhaust
emissions as well as the noise level when
stationary. -
w
ith an automatic gearbox, vehicle
stationary, when you press the brake pedal
or you put the gear selector in position N .
If your vehicle is fitted with the system,
a time counter calculates the sum of the
periods in STOP mode during a journey.
It rests itself to zero every time the
ignition is switched on with the key.
Driving
Page 183 of 364
181
5008_en_Chap08_conduite_ed01-2015
Going into engine START mode
The "ECO" indicator lamp goes off
and the engine starts automatically:
-
w
ith a manual gearbox , when you fully
depress the clutch pedal,
-
w
ith an electronic gearbox :
●
g
ear selector in position A or M , when
you release the brake pedal,
●
o
r gear selector in position N and brake
pedal released, when you put the gear
selector in position A or M ,
●
o
r when you engage reverse gear.
-
w
ith an automatic gearbox :
●
g
ear selector in position D or M , when
you release the brake pedal,
●
o
r gear selector in position N and brake
pedal released, when you put the gear
selector in position D or M ,
●
o
r when you engage reverse gear. In this case the "ECO" indicator lamp
flashes for a few seconds, then goes
of f.
Special cases: START invoked
automatically
This operation is perfectly normal.
Deactivation
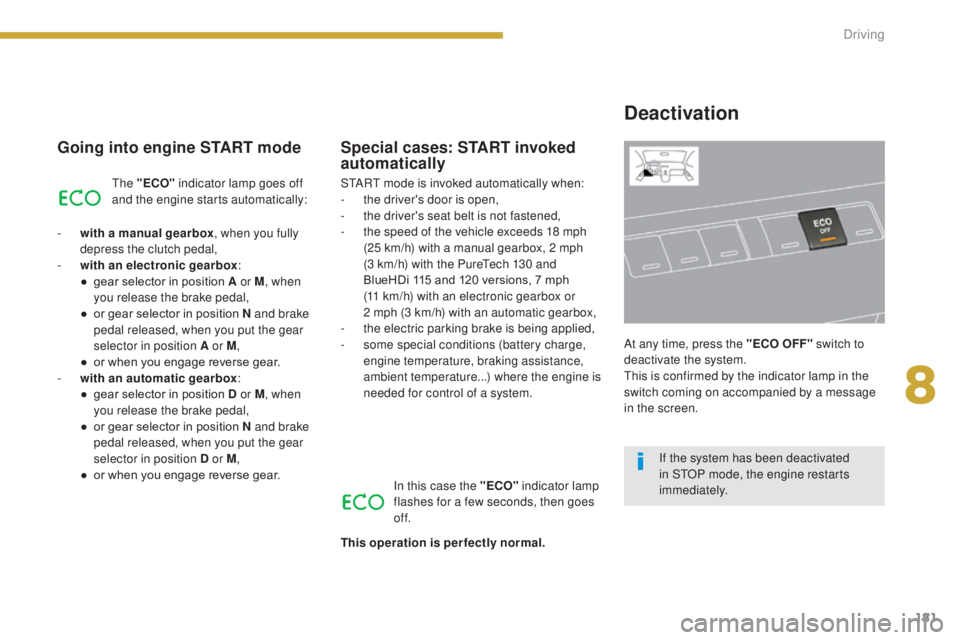
At any time, press the "ECO OFF" switch to
d eactivate the system.
This is confirmed by the indicator lamp in the
switch coming on accompanied by a message
in the screen.
START mode is invoked automatically when:
-
t
he driver's door is open,
-
t
he driver's seat belt is not fastened,
-
t
he speed of the vehicle exceeds 18 mph
(25 km/h) with a manual gearbox, 2
mph
(3
km/h) with the PureTech 130 and
BlueHDi 115 and 120 versions, 7 mph
(11
km/h) with an electronic gearbox or
2
mph (3 km/h) with an automatic gearbox,
-
t
he electric parking brake is being applied,
- s
ome special conditions (battery charge,
engine temperature, braking assistance,
ambient temperature...) where the engine is
needed for control of a system.
If the system has been deactivated
in STOP mode, the engine restarts
immediately.
8
Driving
Page 186 of 364
184
5008_en_Chap08_conduite_ed01-2015
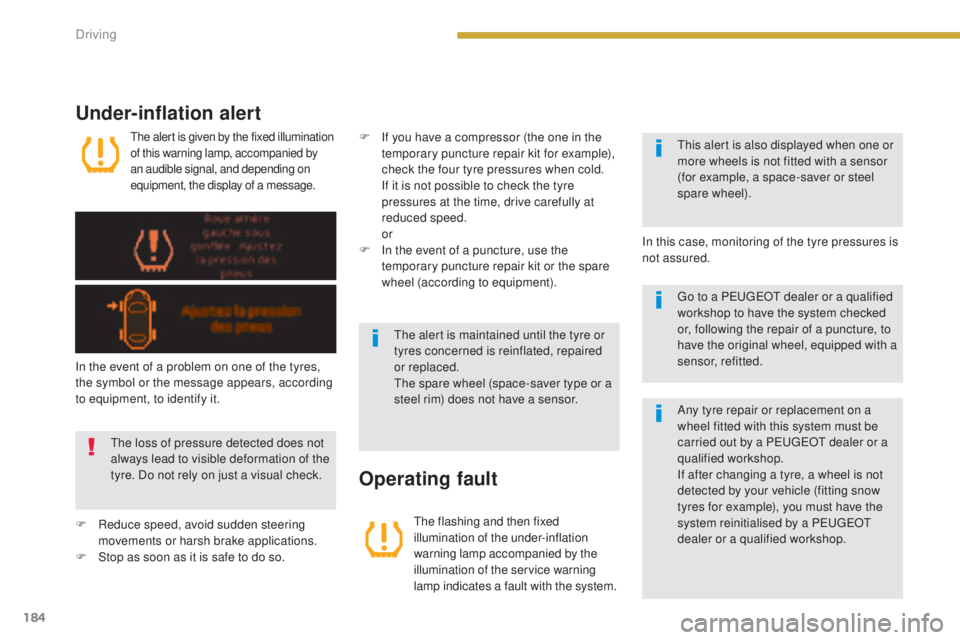
The alert is given by the fixed illumination
of this warning lamp, accompanied by
an audible signal, and depending on
equipment, the display of a message.
Under-inflation alert
The flashing and then fixed
illumination of the under-inflation
warning lamp accompanied by the
illumination of the service warning
lamp indicates a fault with the system.
Operating fault
In the event of a problem on one of the tyres,
the symbol or the message appears, according
to equipment, to identify it.
F
R
educe speed, avoid sudden steering
movements or harsh brake applications.
F
S
top as soon as it is safe to do so.The loss of pressure detected does not
always lead to visible deformation of the
tyre. Do not rely on just a visual check. The alert is maintained until the tyre or
tyres concerned is reinflated, repaired
or replaced.
The spare wheel (space-saver type or a
steel rim) does not have a sensor.This alert is also displayed when one or
more wheels is not fitted with a sensor
(for example, a space-saver or steel
spare wheel).
In this case, monitoring of the tyre pressures is
not assured. Go to a PEUGEOT dealer or a qualified
workshop to have the system checked
or, following the repair of a puncture, to
have the original wheel, equipped with a
sensor, refitted.
F
I
f you have a compressor (the one in the
temporary puncture repair kit for example),
check the four tyre pressures when cold.
I
f it is not possible to check the tyre
pressures at the time, drive carefully at
reduced speed.
or
F
I
n the event of a puncture, use the
temporary puncture repair kit or the spare
wheel (according to equipment).
Any tyre repair or replacement on a
wheel fitted with this system must be
carried out by a PEUGEOT dealer or a
qualified workshop.
If after changing a tyre, a wheel is not
detected by your vehicle (fitting snow
tyres for example), you must have the
system reinitialised by a PEUGEOT
dealer or a qualified workshop.
Driving
Page 202 of 364
200
5008_en_Chap09_verifications_ed01-2015
Power steering fluid level
The power steering fluid level should
be close to the "MA X" mark. With
the engine cold, unscrew the cap to
check the level.
Fluid specification
The brake fluid must conform to the
manufacturer's recommendations.
Changing the fluid
Refer to the manufacturer's service schedule
for details of the interval for this operation.
Brake fluid level
The brake fluid level should be close
to the "MA X" mark. If it is not, check
the brake pad wear.
After topping-up the oil, the check when
switching on the ignition with the oil
level indicator in the instrument panel
is not valid during the 30 minutes after
topping up.Oil grade
Before topping-up the oil or changing the oil,
check that the oil is the correct grade for your
engine and conforms to the manufacturer's
recommendations.
Topping-up the engine oil level
F Locate the oil filler cap in the engine
compartment of your vehicle.
For more information on the petrol or Diesel
engine, refer to the corresponding section.
F
U
nscrew the oil filler cap to reveal the filler
aperture.
F
A
dd oil in small quantities, avoiding any
spills on engine components (risk of fire).
F
W
ait a few minutes before checking the
level again using the dipstick.
F
A
dd more oil if necessary.
F
A
fter checking the level, carefully refit the
oil filler cap and the dipstick in its tube.
Engine oil change
Refer to the manufacturer's service schedule
for details of the interval for this operation.
In order to maintain the reliability of the engine
and emission control system, never use
additives in the engine oil.
Checks
Page 205 of 364
203
5008_en_Chap09_verifications_ed01-2015
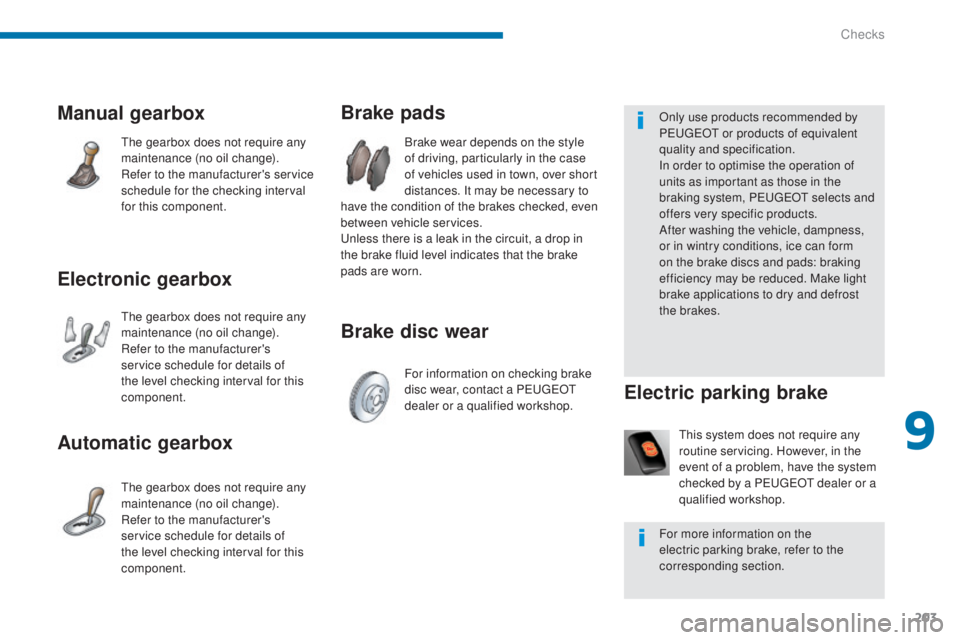
Brake disc wear Brake pads
Brake wear depends on the style
of driving, particularly in the case
of vehicles used in town, over short
distances. It may be necessary to
have the condition of the brakes checked, even
between vehicle services.
Unless there is a leak in the circuit, a drop in
the brake fluid level indicates that the brake
pads are worn.
For information on checking brake
disc wear, contact a PEUGEOT
dealer or a qualified workshop.
Manual gearbox
The gearbox does not require any
maintenance (no oil change).
Refer to the manufacturer's service
schedule for the checking interval
for this component.
Electronic gearbox
The gearbox does not require any
maintenance (no oil change).
Refer to the manufacturer's
service schedule for details of
the level checking interval for this
component.
Automatic gearbox
The gearbox does not require any
maintenance (no oil change).
Refer to the manufacturer's
service schedule for details of
the level checking interval for this
component. This system does not require any
routine servicing. However, in the
event of a problem, have the system
checked by a PEUGEOT dealer or a
qualified workshop.
Electric parking brake
Only use products recommended by
PEUGEOT or products of equivalent
quality and specification.
In order to optimise the operation of
units as important as those in the
braking system, PEUGEOT selects and
offers very specific products.
After washing the vehicle, dampness,
or in wintry conditions, ice can form
on the brake discs and pads: braking
efficiency may be reduced. Make light
brake applications to dry and defrost
the brakes.
For more information on the
electric parking brake, refer to the
corresponding section.
9
Checks
Page 228 of 364

226
5008_en_Chap10_infos-pratiques_ed01-2015
Removing a wheel
F Depending on equipment, clip the tool 4 to the finisher cap on each wheel bolt with
alloy wheels to remove them.
F
D
epending on equipment, slacken the
security bolt using the socket 3 fitted to the
wheelbrace 6 .
F
S
lacken the other bolts using the
wheelbrace 6 .
Parking the vehicle
Immobilise the vehicle where it does not
block traffic: the ground must be level,
stable and non-slippery ground.
Apply the parking brake unless it has
been programmed to automatic mode.
Switch off the ignition.
With a manual gearbox, engage first
gear to block the wheels.
With an electronic gearbox, place the
lever in position R to block the wheels.
With an automatic gearbox, place the
lever in position P to block the wheels.
Check that the braking warning lamp
and the P warning lamp in the parking
brake control come on.
If necessary, place a chock under the
wheel diagonally opposite the wheel to
be changed.
The occupants must get out of the
vehicle and wait where they are safe.
Never go underneath a vehicle raised
using a jack; use an axle stand. F
P
osition the foot of the jack 8 on the
ground and ensure that it is directly below
one of the front A or rear B jacking points
provided on the underbody, whichever is
closest to the wheel to be changed.
Wheel with wheel trim
When removing the wheel , first
remove the wheel trim using the
wheelbrace 6 by pulling at the valve
cut-out.
When refitting the wheel , refit the
wheel trim by placing its cut-out at the
valve, and press round its edge with the
palm of your hand.
Practical information
Page 232 of 364
230
5008_en_Chap10_infos-pratiques_ed01-2015
Snow chains
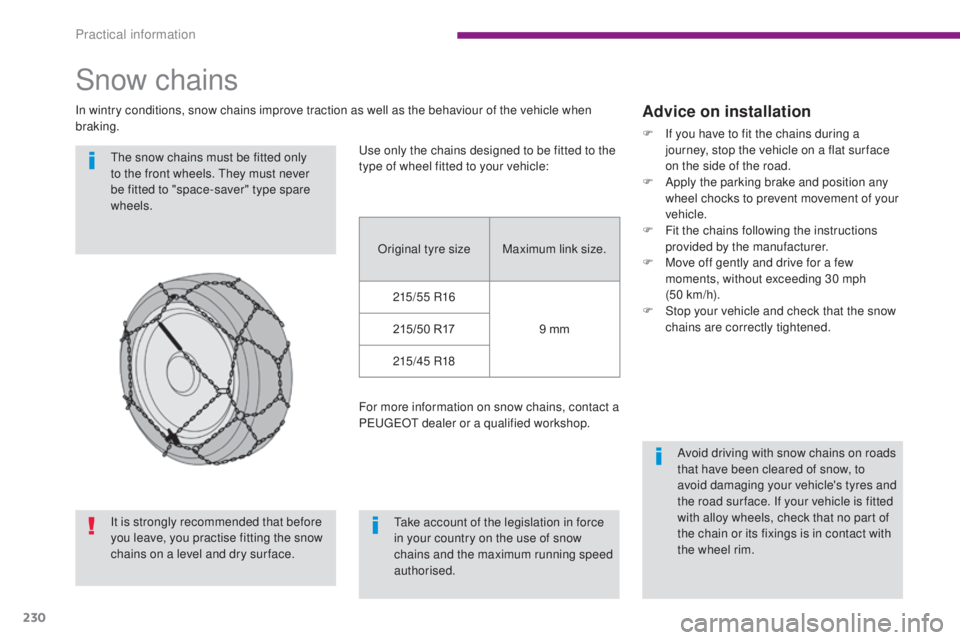
In wintry conditions, snow chains improve traction as well as the behaviour of the vehicle when
braking.The snow chains must be fitted only
to the front wheels. They must never
be fitted to "space-saver" type spare
wheels.
Take account of the legislation in force
in your country on the use of snow
chains and the maximum running speed
authorised.Advice on installation
F If you have to fit the chains during a journey, stop the vehicle on a flat sur face
on the side of the road.
F
A
pply the parking brake and position any
wheel chocks to prevent movement of your
vehicle.
F
F
it the chains following the instructions
provided by the manufacturer.
F
M
ove off gently and drive for a few
moments, without exceeding 30 mph
(50 km/h).
F
S
top your vehicle and check that the snow
chains are correctly tightened.
Avoid driving with snow chains on roads
that have been cleared of snow, to
avoid damaging your vehicle's tyres and
the road sur face. If your vehicle is fitted
with alloy wheels, check that no part of
the chain or its fixings is in contact with
the wheel rim.
Use only the chains designed to be fitted to the
type of wheel fitted to your vehicle:
Original tyre size Maximum link size.
215/55 R16 9 mm
215/50 R17
215/45 R18
For more information on snow chains, contact a
PEUGEOT dealer or a qualified workshop.
It is strongly recommended that before
you leave, you practise fitting the snow
chains on a level and dry sur face.
Practical information
Page 236 of 364
234
5008_en_Chap10_infos-pratiques_ed01-2015
Rear lamps
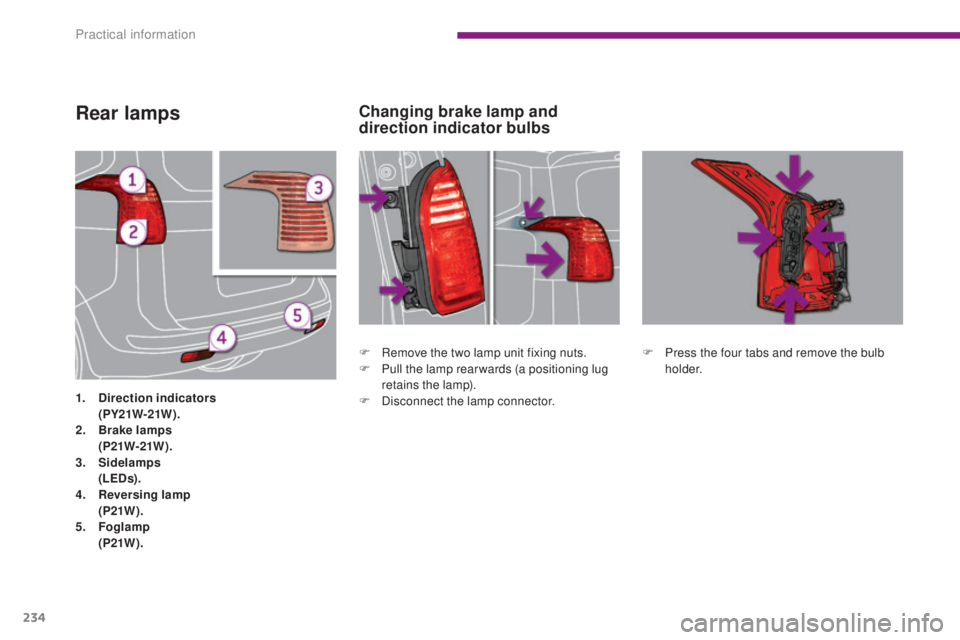
1. Direction indicators (
PY21W-21W ).
2.
Br
ake lamps
(
P21W-21W ).
3.
Si
delamps
(
LEDs).
4.
R
eversing lamp
(
P21W ).
5.
Fo
glamp
(
P21W ). F
R
emove the two lamp unit fixing nuts.
F
P
ull the lamp rear wards (a positioning lug
retains the lamp).
F D isconnect the lamp connector.F
P
ress the four tabs and remove the bulb
h o l d e r.
Changing brake lamp and
direction indicator bulbs
Practical information