2016 PEUGEOT 5008 remove seats
[x] Cancel search: remove seatsPage 15 of 364

13
5008_en_Chap00c_eco-conduite_ed01-2015
Limit the causes of excess consumption
Spread loads throughout the vehicle; place the heaviest items in the
bottom of the boot, as close as possible to the rear seats.
Limit the loads carried in the vehicle and reduce wind resistance (roof
bars, roof rack, bicycle carrier, trailer...). Use a roof box in preference.
Remove roof bars and roof racks after use.
At the end of winter, remove snow tyres and refit your summer tyres.
Observe the recommendations on
maintenance
Check the tyre pressures regularly, when cold, referring to the label in
the door aperture, driver's side.
Carry out this check in particular:
-
b
efore a long journey,
-
a
t each change of season,
-
a
fter a long period out of use.
Don't forget the spare wheel and the tyres on any trailer or caravan.
Have your vehicle serviced regularly (engine oil, oil filter, air filter,
passenger compartment filter...) and observe the schedule of
operations recommended in the manufacturer's service schedule.
With a BlueHDi Diesel engine, if the SCR system is faulty your vehicle
becomes polluting ; go to a PEUGEOT dealer or a qualified workshop
without delay to have the emissions of nitrous oxides brought back to
the legal level.
When refuelling, do not continue after the third cut-off of the nozzle to
avoid any over flow.
At the wheel of your new vehicle, it is only after the first 1 800 miles
(3
000 kilometres) that you will see the fuel consumption settle down to
a consistent average.
.
Eco-driving
Page 78 of 364
76
5008_en_Chap03_confort_ed01-2015
3rd row seats (7 seat version)
Concertina boards
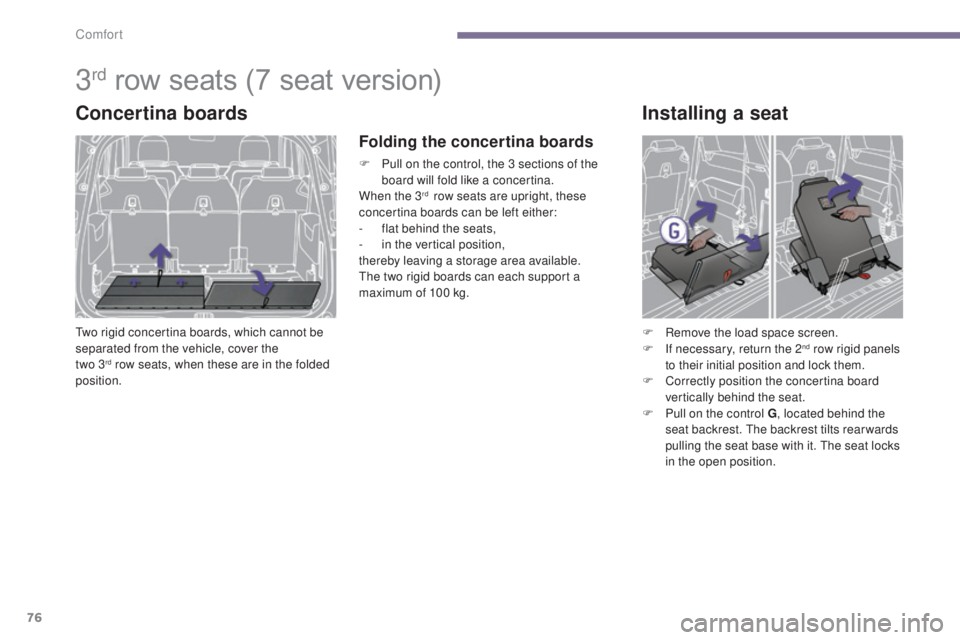
Two rigid concertina boards, which cannot be
separated from the vehicle, cover the
two 3
rd row seats, when these are in the folded
position.
Folding the concertina boards
F Pull on the control, the 3 sections of the board will fold like a concertina.
When the 3
rd row seats are upright, these
concertina boards can be left either:
-
f
lat behind the seats,
-
i
n the vertical position,
thereby leaving a storage area available.
The two rigid boards can each support a
maximum of 100 kg.
Installing a seat
F Remove the load space screen.
F I f necessary, return the 2nd row rigid panels
to their initial position and lock them.
F
C
orrectly position the concertina board
vertically behind the seat.
F
P
ull on the control G , located behind the
seat backrest. The backrest tilts rear wards
pulling the seat base with it. The seat locks
in the open position.
Comfort
Page 79 of 364
77
5008_en_Chap03_confort_ed01-2015
Storing a seat
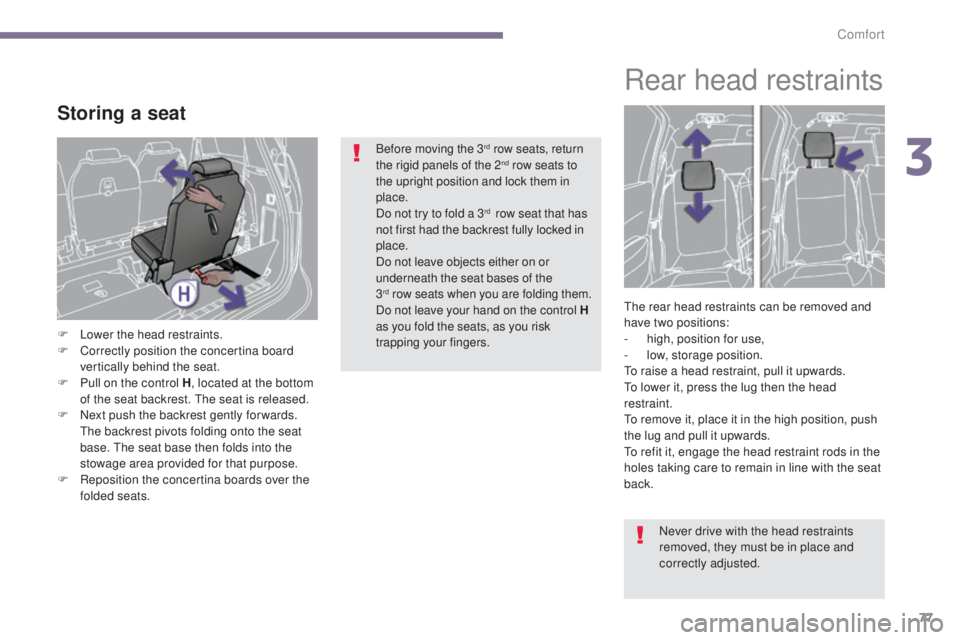
F Lower the head restraints.
F C orrectly position the concertina board
vertically behind the seat.
F
P
ull on the control H , located at the bottom
of the seat backrest. The seat is released.
F
N
ext push the backrest gently for wards.
The backrest pivots folding onto the seat
base. The seat base then folds into the
stowage area provided for that purpose.
F
R
eposition the concertina boards over the
folded seats. Before moving the 3
rd row seats, return
the rigid panels of the 2nd row seats to
the upright position and lock them in
place.
Do not try to fold a 3
rd row seat that has
not first had the backrest fully locked in
place.
Do not leave objects either on or
underneath the seat bases of the
3
rd row seats when you are folding them.
Do not leave your hand on the control H
as you fold the seats, as you risk
trapping your fingers.
Rear head restraints
The rear head restraints can be removed and
have two positions:
-
h
igh, position for use,
-
lo
w, storage position.
To raise a head restraint, pull it upwards.
To lower it, press the lug then the head
restraint.
To remove it, place it in the high position, push
the lug and pull it upwards.
To refit it, engage the head restraint rods in the
holes taking care to remain in line with the seat
back.
Never drive with the head restraints
removed, they must be in place and
correctly adjusted.
3
Comfort
Page 112 of 364
110
5008_en_Chap05_amenagements_ed01-2015
Roller load space cover
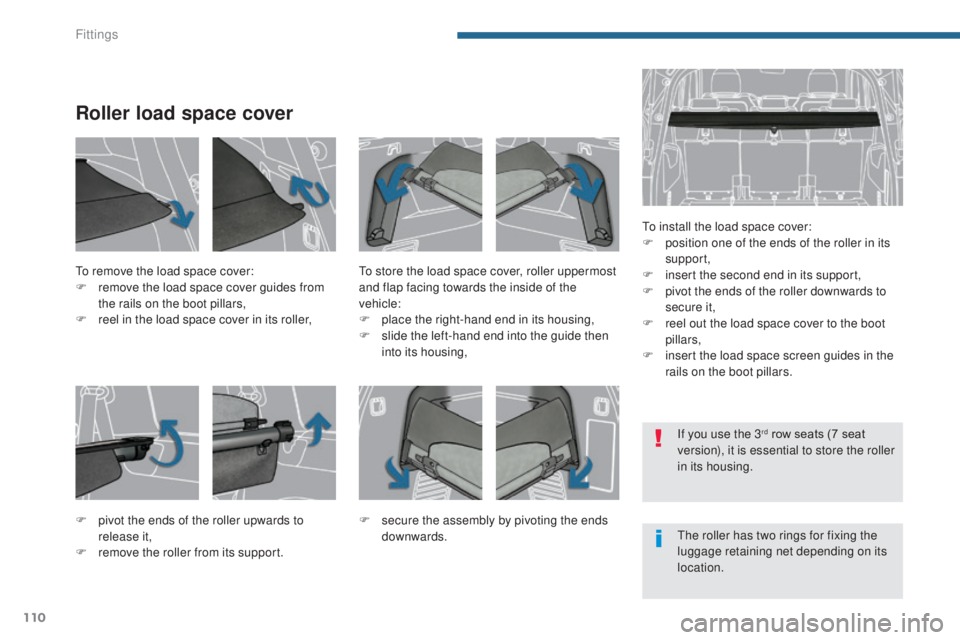
To install the load space cover:
F p osition one of the ends of the roller in its
support,
F
i
nsert the second end in its support,
F
p
ivot the ends of the roller downwards to
secure it,
F
r
eel out the load space cover to the boot
pillars,
F
i
nsert the load space screen guides in the
rails on the boot pillars.
To remove the load space cover:
F
r
emove the load space cover guides from
the rails on the boot pillars,
F
r
eel in the load space cover in its roller, To store the load space cover, roller uppermost
and flap facing towards the inside of the
vehicle:
F
p
lace the right-hand end in its housing,
F
s
lide the left-hand end into the guide then
into its housing,
F
p
ivot the ends of the roller upwards to
release it,
F
r
emove the roller from its support. F
se
cure the assembly by pivoting the ends
downwards. The roller has two rings for fixing the
luggage retaining net depending on its
location. If you use the 3
rd row seats (7 seat
version), it is essential to store the roller
in its housing.
Fittings
Page 113 of 364
111
5008_en_Chap05_amenagements_ed01-2015
High load retaining
net*
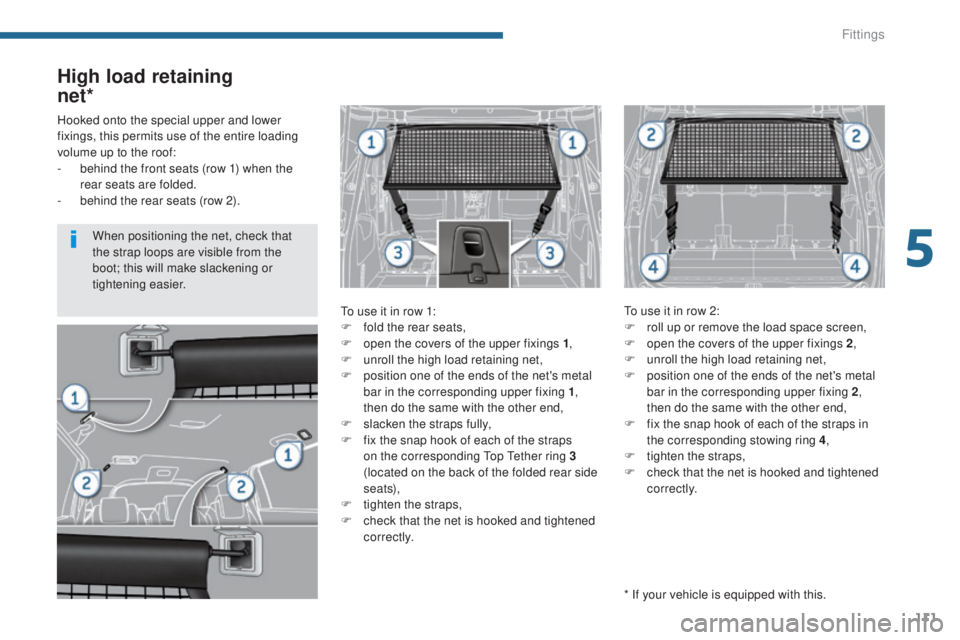
To use it in row 1:
F
f old the rear seats,
F
o
pen the covers of the upper fixings 1 ,
F
u
nroll the high load retaining net,
F
p
osition one of the ends of the net's metal
bar in the corresponding upper fixing 1 ,
then do the same with the other end,
F
s
lacken the straps fully,
F
f
ix the snap hook of each of the straps
on the corresponding Top Tether ring 3
(located on the back of the folded rear side
seats),
F
t
ighten the straps,
F
c
heck that the net is hooked and tightened
c o r r e c t l y. To use it in row 2:
F
r oll up or remove the load space screen,
F
o
pen the covers of the upper fixings 2,
F
u
nroll the high load retaining net,
F
p
osition one of the ends of the net's metal
bar in the corresponding upper fixing 2 ,
then do the same with the other end,
F
f
ix the snap hook of each of the straps in
the corresponding stowing ring 4 ,
F
t
ighten the straps,
F
c
heck that the net is hooked and tightened
c o r r e c t l y.
Hooked onto the special upper and lower
fixings, this permits use of the entire loading
volume up to the roof:
-
b
ehind the front seats (row 1) when the
rear seats are folded.
-
b
ehind the rear seats (row 2).
* If your vehicle is equipped with this.
When positioning the net, check that
the strap loops are visible from the
boot; this will make slackening or
tightening easier.
5
Fittings
Page 126 of 364
124
5008_en_Chap06_securite-enfants_ed01-2015
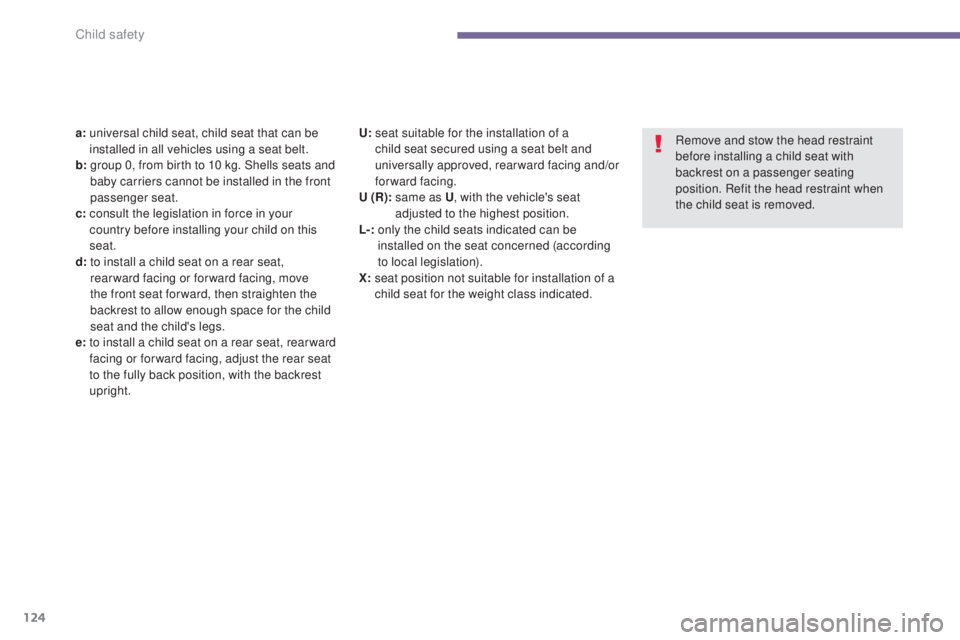
Remove and stow the head restraint
before installing a child seat with
backrest on a passenger seating
position. Refit the head restraint when
the child seat is removed.
a:
u
niversal child seat, child seat that can be
installed in all vehicles using a seat belt.
b:
g
roup 0, from birth to 10 kg. Shells seats and
baby carriers cannot be installed in the front
passenger seat.
c:
c
onsult the legislation in force in your
country before installing your child on this
seat.
d:
t
o install a child seat on a rear seat,
rear ward facing or for ward facing, move
the front seat for ward, then straighten the
backrest to allow enough space for the child
seat and the child's legs.
e:
t
o install a child seat on a rear seat, rear ward
facing or for ward facing, adjust the rear seat
to the fully back position, with the backrest
upright. U:
s
eat suitable for the installation of a
child seat secured using a seat belt and
universally approved, rear ward facing and/or
forward facing.
U (R):
s
ame as U , with the vehicle's seat
adjusted to the highest position.
L-:
o
nly the child seats indicated can be
installed on the seat concerned (according
to local legislation).
X:
s
eat position not suitable for installation of a
child seat for the weight class indicated.
Child safety
Page 128 of 364
126
5008_en_Chap06_securite-enfants_ed01-2015
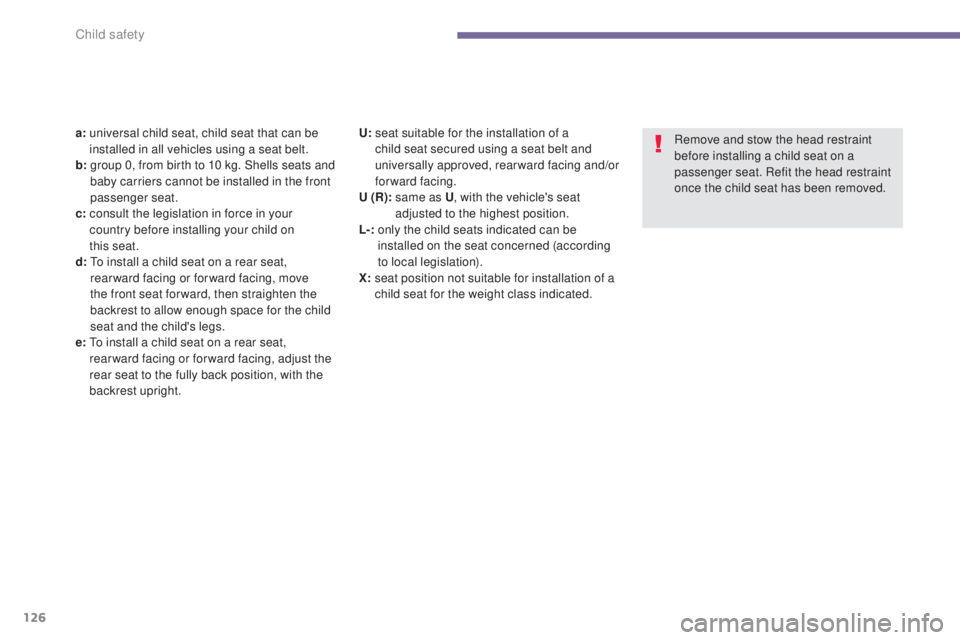
a: universal child seat, child seat that can be
installed in all vehicles using a seat belt.
b:
g
roup 0, from birth to 10 kg. Shells seats and
baby carriers cannot be installed in the front
passenger seat.
c:
c
onsult the legislation in force in your
country before installing your child on
this
seat.
d:
T
o install a child seat on a rear seat,
rear ward facing or for ward facing, move
the front seat for ward, then straighten the
backrest to allow enough space for the child
seat and the child's legs.
e:
T
o install a child seat on a rear seat,
rearward facing or forward facing, adjust the
rear seat to the fully back position, with the
backrest upright. Remove and stow the head restraint
before installing a child seat on a
passenger seat. Refit the head restraint
once the child seat has been removed.
U:
s eat suitable for the installation of a
child seat secured using a seat belt and
universally approved, rear ward facing and/or
forward facing.
U (R):
s
ame as U, with the vehicle's seat
adjusted to the highest position.
L-:
o
nly the child seats indicated can be
installed on the seat concerned (according
to local legislation).
X:
s
eat position not suitable for installation of a
child seat for the weight class indicated.
Child safety
Page 129 of 364
127
5008_en_Chap06_securite-enfants_ed01-2015
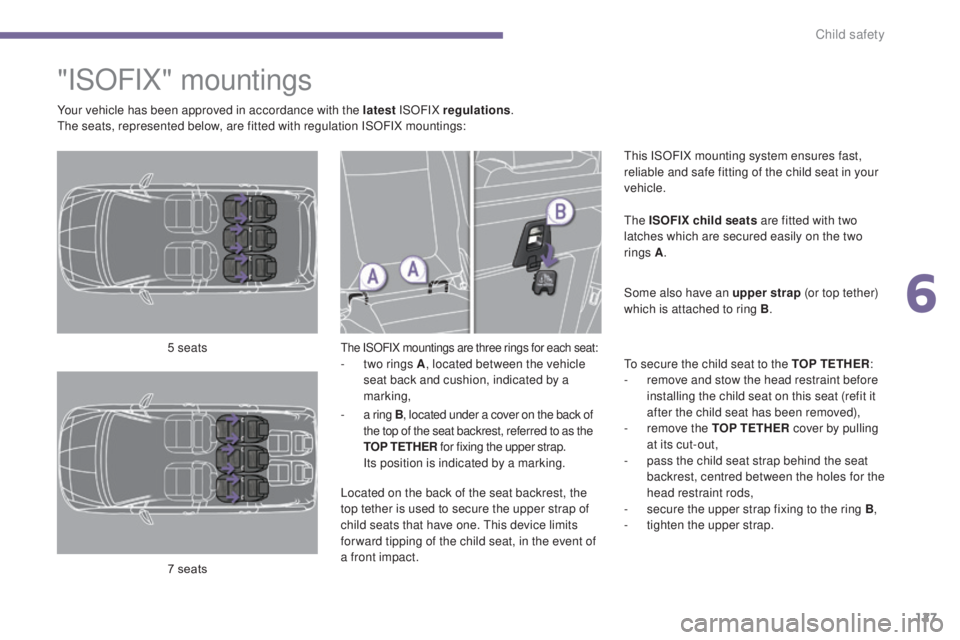
"ISOFIX" mountings
The ISOFIX mountings are three rings for each seat:- two rings A, located between the vehicle
seat back and cushion, indicated by a
marking, This ISOFIX mounting system ensures fast,
reliable and safe fitting of the child seat in your
vehicle.
The ISOFIX child seats are fitted with two
latches which are secured easily on the two
rings A
.
Some also have an upper strap (or top tether)
which is attached to ring B .
To secure the child seat to the TOP TETHER :
- r emove and stow the head restraint before
installing the child seat on this seat (refit it
after the child seat has been removed),
-
r
emove the TOP TETHER cover by pulling
at its cut-out,
-
p
ass the child seat strap behind the seat
backrest, centred between the holes for the
head restraint rods,
-
s
ecure the upper strap fixing to the ring B,
-
t
ighten the upper strap.
5 seats
7 seats
Your vehicle has been approved in accordance with the latest ISOFIX
regulations.
The seats, represented below, are fitted with regulation ISOFIX mountings:
-
a r
ing B, located under a cover on the back of
the top of the seat backrest, referred to as the
TOP TETHER for fixing the upper strap.
I
ts position is indicated by a marking.
Located on the back of the seat backrest, the
top tether is used to secure the upper strap of
child seats that have one. This device limits
for ward tipping of the child seat, in the event of
a front impact.
6
Child safety