Page 88 of 398
86
308_en_Chap03_ergonomie-et-confort_ed02-2015
Boot fittings (hatchback)
1. Rear parcel shelf
2. Boot floor
Ra
ise the floor for access to the storage.
3.
Sto
rage wells
in w
hich are stowed:
-
th
e towing eye,
-
th
e temporary puncture repair kit,
-
th
e spare wheel, depending on trim
level, an option or standard.
4.
St
owing rings
5.
St
rap (depending on version)
ease of use and comfort
Page 89 of 398
87
308_en_Chap03_ergonomie-et-confort_ed02-2015
Boot fittings (SW)
1. Boot lamp
2. Rea r seat folding controls
3.
12 V a
ccessory socket (120 W max)
4.
Re
movable storage boxes
Pu
ll up to unclip them.
5.
Sto
rage wells
wh
ere are stowed:
-
th
e towing eye,
-
th
e temporary puncture repair kit,
-
th
e spare wheel, depending on trim
level, an option or standard.
6.
St
rap
7.
Lo
ad space cover
(se
e corresponding section)
8.
eyes f
or fixing a net (to restrain luggage)
(d
epending on version)
F
e
xt
ract the eyes one at a time then slide
them into the oblong housing.
F
Wh
ile pressing the button, move the eye to
the desired position.
F
Ob
serve the direction of fitting (eyes in the
vertical position towards the outside of the
vehicle).
3
ease of use and comfort
Page 90 of 398
88
308_en_Chap03_ergonomie-et-confort_ed02-2015
Load space cover, roller blind (SW)
To reel inTo removeStorage
F Remove the roller guide from the rails in
t
he boot pillars.
F
Re
lease the roller blind, it reels in
automatically. F Pl
ace a hand on the left under
the luggage
c ove r.
F
t
ur
n the end of the reel towards the front
(clockwise) to release it.
F
Re
peat the operation on the right (anti-
clockwise). A recess in the floor well, under the boot
carpet, allows the luggage cover to be stowed
diagonally.
thi
s recess is not available with the
bass woofer unit.
ease of use and comfort
Page 93 of 398

91
308_en_Chap03_ergonomie-et-confort_ed02-2015
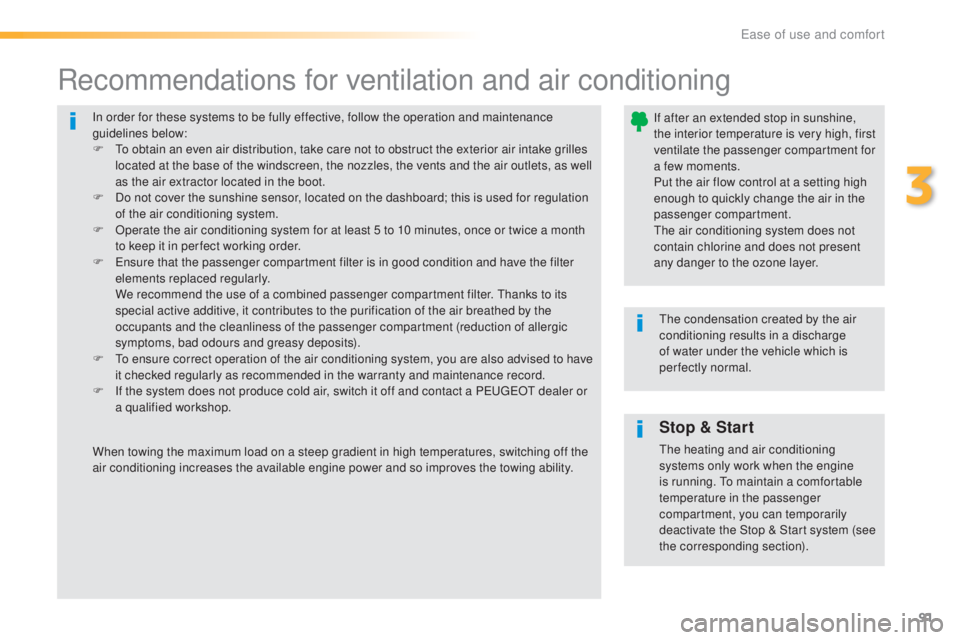
In order for these systems to be fully effective, follow the operation and maintenance
guidelines below:
F
t
o ob
tain an even air distribution, take care not to obstruct the exterior air intake grilles
located at the base of the windscreen, the nozzles, the vents and the air outlets, as well
as the air extractor located in the boot.
F
Do n
ot cover the sunshine sensor, located on the dashboard; this is used for regulation
of the air conditioning system.
F
Op
erate the air conditioning system for at least 5 to 10 minutes, once or twice a month
to keep it in per fect working order.
F
e
ns
ure that the passenger compartment filter is in good condition and have the filter
elements replaced regularly.
We r
ecommend the use of a combined passenger compartment filter.
tha
nks to its
special active additive, it contributes to the purification of the air breathed by the
occupants and the cleanliness of the passenger compartment (reduction of allergic
symptoms, bad odours and greasy deposits).
F
t
o en
sure correct operation of the air conditioning system, you are also advised to have
it checked regularly as recommended in the warranty and maintenance record.
F
If t
he system does not produce cold air, switch it off and contact a P
eu
ge
Ot d
ealer or
a qualified workshop.
Recommendations for ventilation and air conditioning
If after an extended stop in sunshine,
the interior temperature is very high, first
ventilate the passenger compartment for
a few moments.
Put the air flow control at a setting high
enough to quickly change the air in the
passenger compartment.
the a
ir conditioning system does not
contain chlorine and does not present
any danger to the ozone layer.
the c
ondensation created by the air
conditioning results in a discharge
of water under the vehicle which is
perfectly normal.
When towing the maximum load on a steep gradient in high temperatures, switching off the
air conditioning increases the available engine power and so improves the towing ability.
Stop & Start
the heating and air conditioning
s ystems only work when the engine
is running.
to ma
intain a comfortable
temperature in the passenger
compartment, you can temporarily
deactivate the Stop & Start system (see
the corresponding section).
3
ease of use and comfort
Page 103 of 398
101
308_en_Chap03_ergonomie-et-confort_ed02-2015
Front demist - defrost
these markings on the control panel indicate the control positions for rapid demisting or
d efrosting of the windscreen and side windows.
With manual air
conditioning
With Stop & Start, when demisting has
been activated, the StOP m ode is not
available.
With manual or dual-zone
digital air conditioning
F Put the air flow, temperature and
d istribution controls to the dedicated
marked position.
F
Pr
ess the "A /C " button for air conditioning;
the indicator lamp in the button comes on. F Pr
ess this button to demist or
defrost the windscreen and side
windows as quickly as possible.
(with the touch screen)
the system automatically manages the air
c onditioning, air flow and air intake, and
provides optimum distribution towards the
windscreen and side windows.
F
t
o st
op, press this button again or on
"AUTO" .
the s
ystem reverts to the previous settings.
3
ease of use and comfort
Page 117 of 398

115
308_en_Chap04_eclairage-et-visibilite_ed02-2015
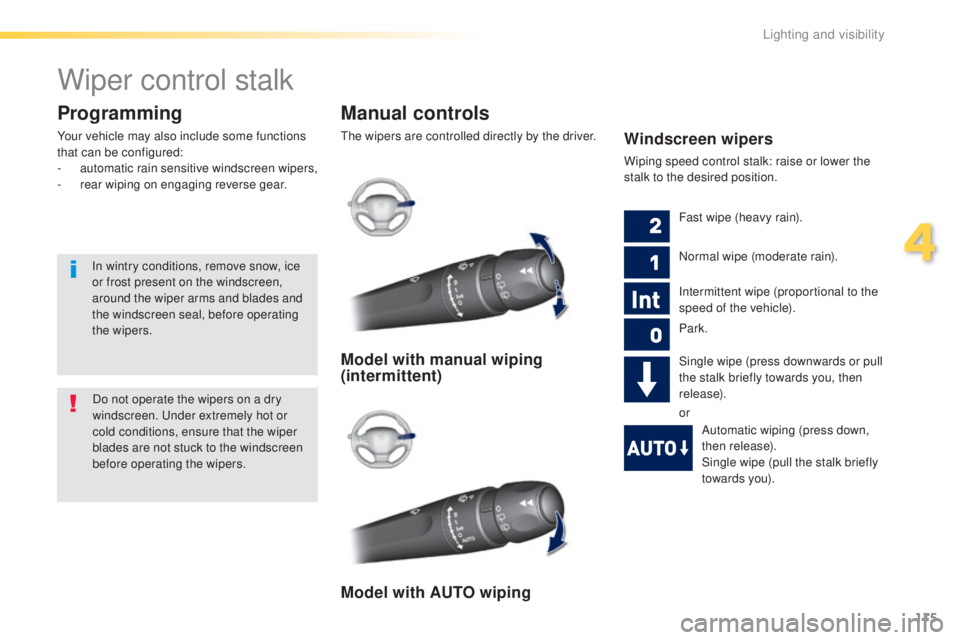
Wiper control stalk
Manual controls
the wipers are controlled directly by the driver.
Programming
Your vehicle may also include some functions
that can be configured:
-
au
tomatic rain sensitive windscreen wipers,
-
rea
r wiping on engaging reverse gear.Windscreen wipers
Wiping speed control stalk: raise or lower the
stalk to the desired position.
Model with manual wiping
(intermittent)
Model with AUTO wiping
Fast wipe (heavy rain).
Normal wipe (moderate rain).
Intermittent wipe (proportional to the
speed of the vehicle).
Park.
Single wipe (press downwards or pull
the stalk briefly towards you, then
release).
orAutomatic wiping (press down,
then release).
Single wipe (pull the stalk briefly
towards you).
Do not operate the wipers on a dry
windscreen.
und
er extremely hot or
cold conditions, ensure that the wiper
blades are not stuck to the windscreen
before operating the wipers.
In wintry conditions, remove snow, ice
or frost present on the windscreen,
around the wiper arms and blades and
the windscreen seal, before operating
the wipers.
4
Lighting and visibility
Page 118 of 398

116
308_en_Chap04_eclairage-et-visibilite_ed02-2015
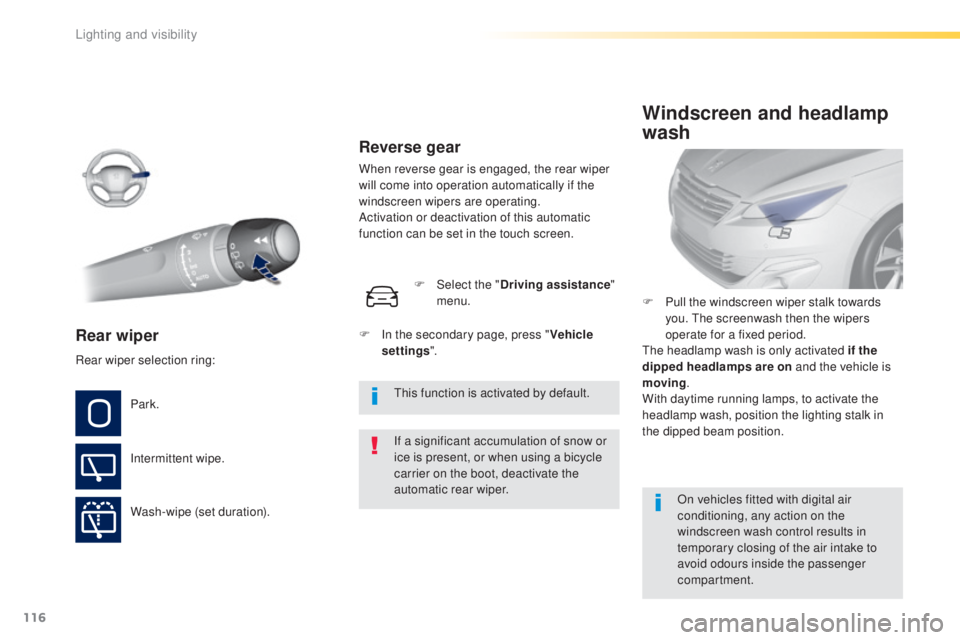
Rear wiper
If a significant accumulation of snow or
ice is present, or when using a bicycle
carrier on the boot, deactivate the
automatic rear wiper.
Park.
Intermittent wipe.
Wash-wipe (set duration). F
Pu
ll the windscreen wiper stalk towards
you.
the s
creenwash then the wipers
operate for a fixed period.
the h
eadlamp wash is only activated if the
dipped headlamps are on and the vehicle is
moving .
With daytime running lamps, to activate the
headlamp wash, position the lighting stalk in
the dipped beam position.
Windscreen and headlamp
wash
On vehicles fitted with digital air
conditioning, any action on the
windscreen wash control results in
temporary closing of the air intake to
avoid odours inside the passenger
compartment.
Rear wiper selection ring:
thi
s function is activated by default.
F
In t
he secondary page, press "
Vehicle
settings ".
F
Selec
t the "
Driving assistance "
menu.
Reverse gear
When reverse gear is engaged, the rear wiper
will come into operation automatically if the
windscreen wipers are operating.
Activation or deactivation of this automatic
function can be set in the touch screen.
Lighting and visibility
Page 121 of 398
119
308_en_Chap05_securite_ed02-2015
Automatic operation of
hazard warning lamps
Hazard warning lamps
When braking in an emergency, depending on
the rate of deceleration, as well as when the
ABS regulation is invoked or in the event of an
impact, the hazard warning lamps come on
automatically.
the
y switch off automatically the first time you
accelerate.
F
Yo
u can also switch them off by pressing
the button.
emergency or
a ssistance call
this system allows you to make an emergency
o r assistance call to the emergency services or
to the dedicated P
eu
ge
Ot s
ervice.
For more information on the use of this
function, refer to the "Audio equipment
and telematics" section.
Visual warning with of all the direction
indicators flashing to alert other road users to a
vehicle breakdown, towing or accident.
F
Pr
ess this button, all of the direction
indicators flash.
the
y can operate with the ignition off.
5
Safety