2016 NISSAN TITAN ECU
[x] Cancel search: ECUPage 321 of 636
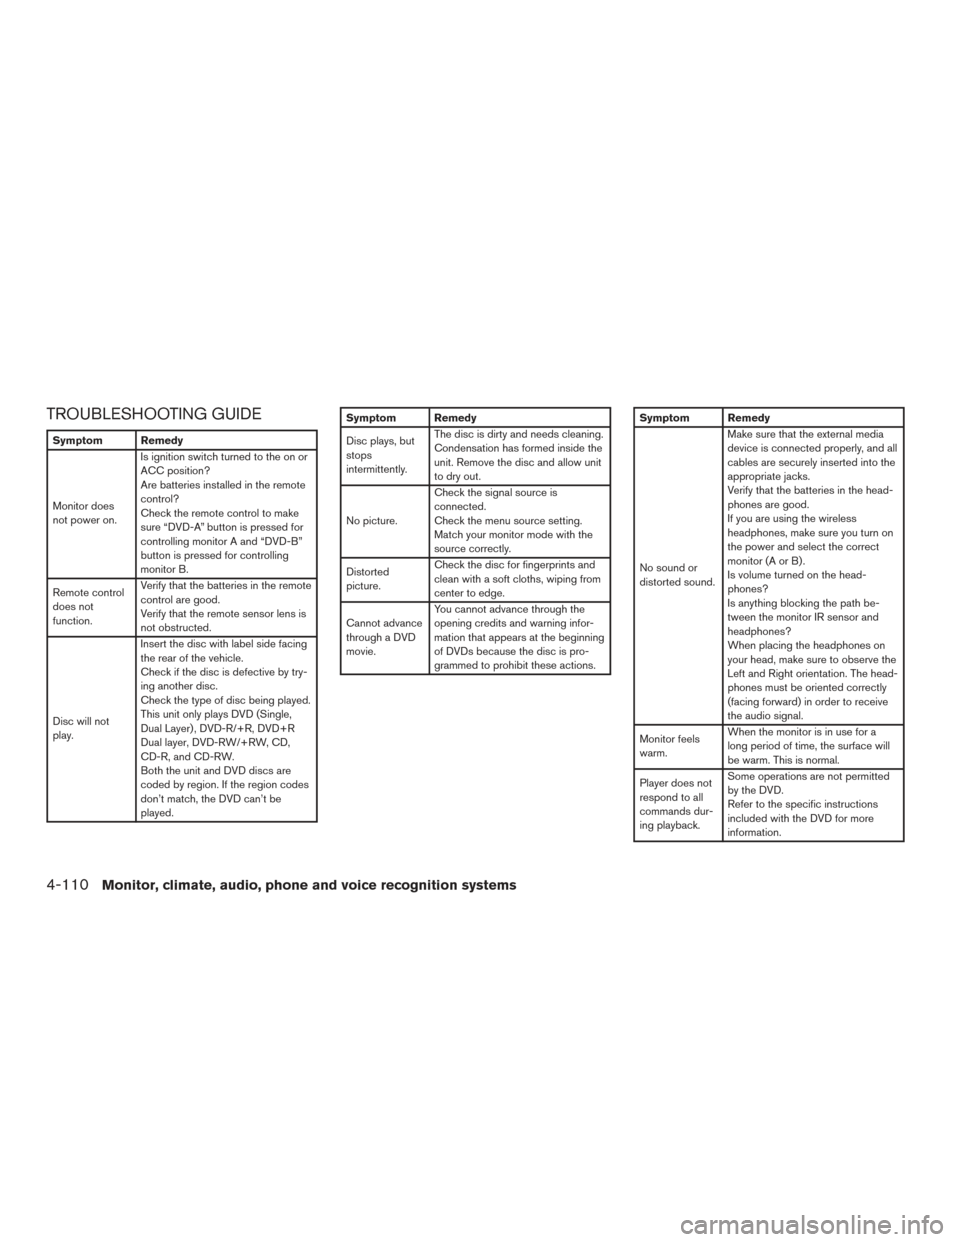
TROUBLESHOOTING GUIDE
Symptom Remedy
Monitor does
not power on.Is ignition switch turned to the on or
ACC position?
Are batteries installed in the remote
control?
Check the remote control to make
sure “DVD-A” button is pressed for
controlling monitor A and “DVD-B”
button is pressed for controlling
monitor B.
Remote control
does not
function. Verify that the batteries in the remote
control are good.
Verify that the remote sensor lens is
not obstructed.
Disc will not
play. Insert the disc with label side facing
the rear of the vehicle.
Check if the disc is defective by try-
ing another disc.
Check the type of disc being played.
This unit only plays DVD (Single,
Dual Layer) , DVD-R/+R, DVD+R
Dual layer, DVD-RW/+RW, CD,
CD-R, and CD-RW.
Both the unit and DVD discs are
coded by region. If the region codes
don’t match, the DVD can’t be
played.
Symptom Remedy
Disc plays, but
stops
intermittently.
The disc is dirty and needs cleaning.
Condensation has formed inside the
unit. Remove the disc and allow unit
to dry out.
No picture. Check the signal source is
connected.
Check the menu source setting.
Match your monitor mode with the
source correctly.
Distorted
picture. Check the disc for fingerprints and
clean with a soft cloths, wiping from
center to edge.
Cannot advance
through a DVD
movie. You cannot advance through the
opening credits and warning infor-
mation that appears at the beginning
of DVDs because the disc is pro-
grammed to prohibit these actions.Symptom Remedy
No sound or
distorted sound.Make sure that the external media
device is connected properly, and all
cables are securely inserted into the
appropriate jacks.
Verify that the batteries in the head-
phones are good.
If you are using the wireless
headphones, make sure you turn on
the power and select the correct
monitor(AorB).
Is volume turned on the head-
phones?
Is anything blocking the path be-
tween the monitor IR sensor and
headphones?
When placing the headphones on
your head, make sure to observe the
Left and Right orientation. The head-
phones must be oriented correctly
(facing forward) in order to receive
the audio signal.
Monitor feels
warm. When the monitor is in use for a
long period of time, the surface will
be warm. This is normal.
Player does not
respond to all
commands dur-
ing playback. Some operations are not permitted
by the DVD.
Refer to the specific instructions
included with the DVD for more
information.
4-110Monitor, climate, audio, phone and voice recognition systems
Page 355 of 636
WARNING
●Do not leave children or adults who
would normally require the assistance
of others alone in your vehicle. Pets
should also not be left alone. They
could accidentally injure themselves or
others through inadvertent operation of
the vehicle. Also, on hot, sunny days,
temperatures in a closed vehicle could
quickly become high enough to cause
severe or possibly fatal injuries to
people or animals.
● Properly secure all cargo with ropes or
straps to help prevent it from sliding or
shifting. Do not place cargo higher than
the seatbacks. In a sudden stop or col-
lision, unsecured cargo could cause
personal injury.
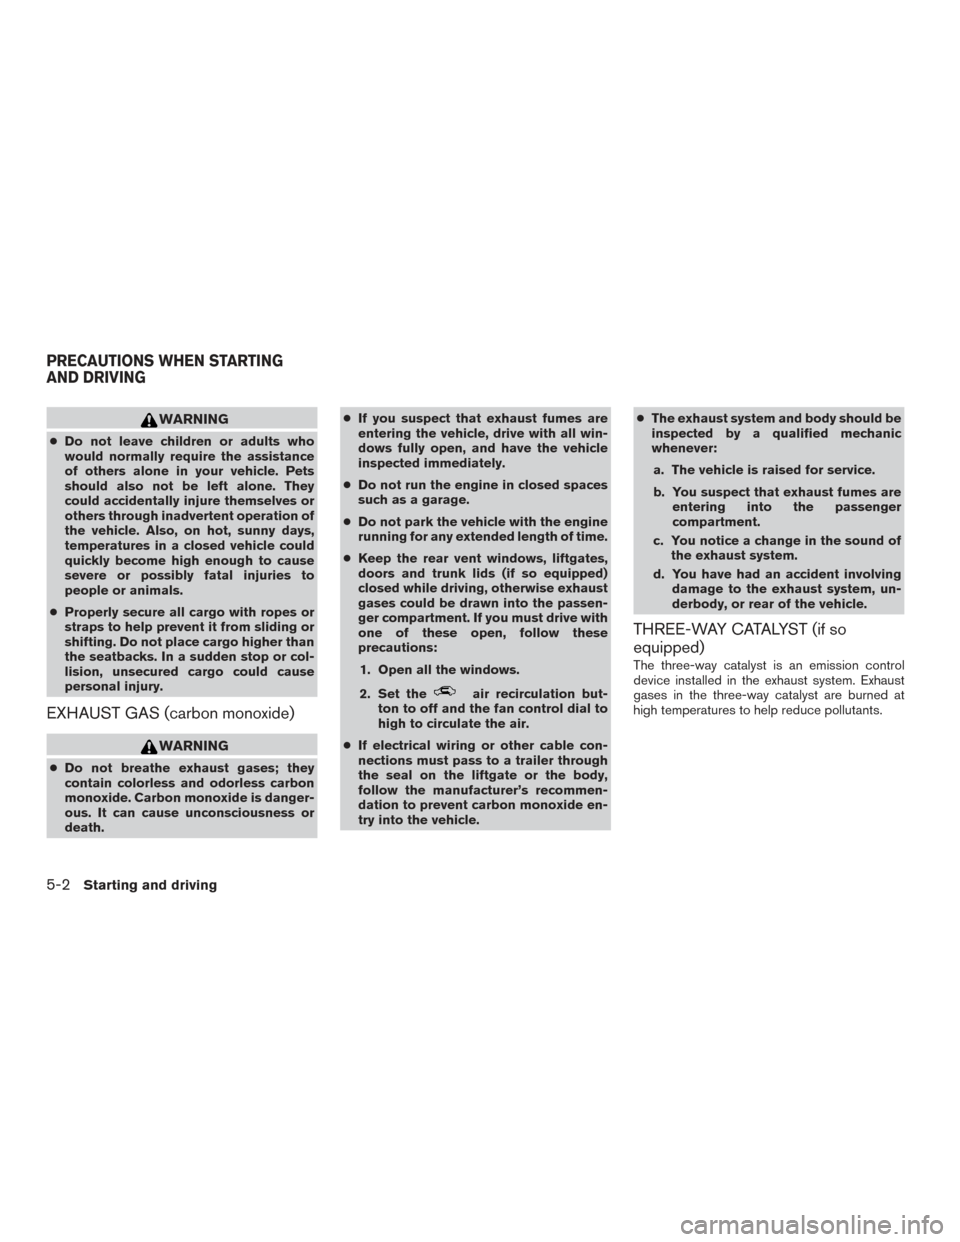
EXHAUST GAS (carbon monoxide)
WARNING
● Do not breathe exhaust gases; they
contain colorless and odorless carbon
monoxide. Carbon monoxide is danger-
ous. It can cause unconsciousness or
death. ●
If you suspect that exhaust fumes are
entering the vehicle, drive with all win-
dows fully open, and have the vehicle
inspected immediately.
● Do not run the engine in closed spaces
such as a garage.
● Do not park the vehicle with the engine
running for any extended length of time.
● Keep the rear vent windows, liftgates,
doors and trunk lids (if so equipped)
closed while driving, otherwise exhaust
gases could be drawn into the passen-
ger compartment. If you must drive with
one of these open, follow these
precautions:
1. Open all the windows.
2. Set the
air recirculation but-
ton to off and the fan control dial to
high to circulate the air.
● If electrical wiring or other cable con-
nections must pass to a trailer through
the seal on the liftgate or the body,
follow the manufacturer’s recommen-
dation to prevent carbon monoxide en-
try into the vehicle. ●
The exhaust system and body should be
inspected by a qualified mechanic
whenever:
a. The vehicle is raised for service.
b. You suspect that exhaust fumes are entering into the passenger
compartment.
c. You notice a change in the sound of the exhaust system.
d. You have had an accident involving damage to the exhaust system, un-
derbody, or rear of the vehicle.
THREE-WAY CATALYST (if so
equipped)
The three-way catalyst is an emission control
device installed in the exhaust system. Exhaust
gases in the three-way catalyst are burned at
high temperatures to help reduce pollutants.
PRECAUTIONS WHEN STARTING
AND DRIVING
5-2Starting and driving
Page 362 of 636
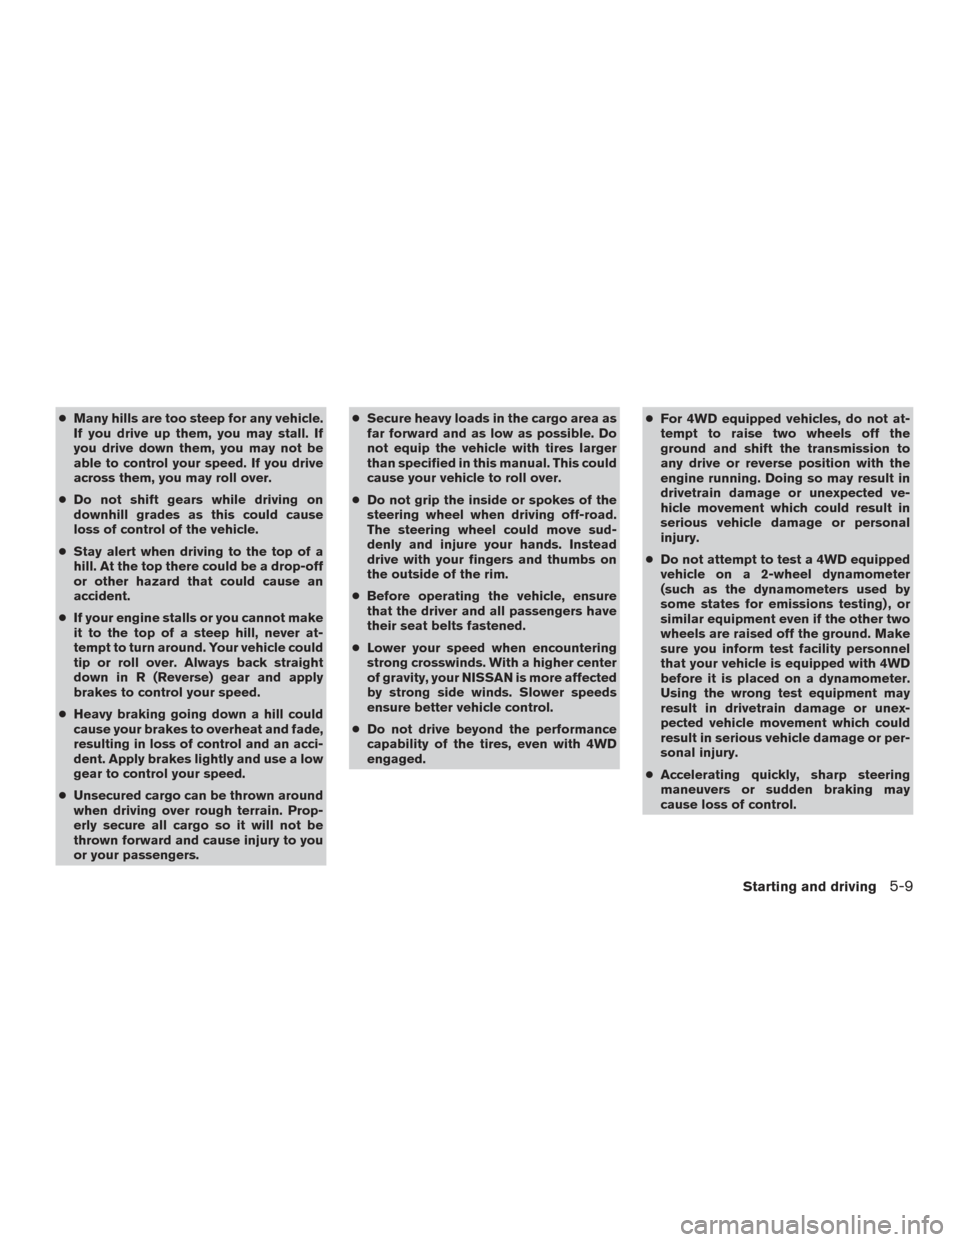
●Many hills are too steep for any vehicle.
If you drive up them, you may stall. If
you drive down them, you may not be
able to control your speed. If you drive
across them, you may roll over.
● Do not shift gears while driving on
downhill grades as this could cause
loss of control of the vehicle.
● Stay alert when driving to the top of a
hill. At the top there could be a drop-off
or other hazard that could cause an
accident.
● If your engine stalls or you cannot make
it to the top of a steep hill, never at-
tempt to turn around. Your vehicle could
tip or roll over. Always back straight
down in R (Reverse) gear and apply
brakes to control your speed.
● Heavy braking going down a hill could
cause your brakes to overheat and fade,
resulting in loss of control and an acci-
dent. Apply brakes lightly and use a low
gear to control your speed.
● Unsecured cargo can be thrown around
when driving over rough terrain. Prop-
erly secure all cargo so it will not be
thrown forward and cause injury to you
or your passengers. ●
Secure heavy loads in the cargo area as
far forward and as low as possible. Do
not equip the vehicle with tires larger
than specified in this manual. This could
cause your vehicle to roll over.
● Do not grip the inside or spokes of the
steering wheel when driving off-road.
The steering wheel could move sud-
denly and injure your hands. Instead
drive with your fingers and thumbs on
the outside of the rim.
● Before operating the vehicle, ensure
that the driver and all passengers have
their seat belts fastened.
● Lower your speed when encountering
strong crosswinds. With a higher center
of gravity, your NISSAN is more affected
by strong side winds. Slower speeds
ensure better vehicle control.
● Do not drive beyond the performance
capability of the tires, even with 4WD
engaged. ●
For 4WD equipped vehicles, do not at-
tempt to raise two wheels off the
ground and shift the transmission to
any drive or reverse position with the
engine running. Doing so may result in
drivetrain damage or unexpected ve-
hicle movement which could result in
serious vehicle damage or personal
injury.
● Do not attempt to test a 4WD equipped
vehicle on a 2-wheel dynamometer
(such as the dynamometers used by
some states for emissions testing) , or
similar equipment even if the other two
wheels are raised off the ground. Make
sure you inform test facility personnel
that your vehicle is equipped with 4WD
before it is placed on a dynamometer.
Using the wrong test equipment may
result in drivetrain damage or unex-
pected vehicle movement which could
result in serious vehicle damage or per-
sonal injury.
● Accelerating quickly, sharp steering
maneuvers or sudden braking may
cause loss of control.
Starting and driving5-9
Page 363 of 636

●If at all possible, avoid sharp turning
maneuvers, particularly at high speeds.
Your NISSAN 4-wheel drive vehicle has
a higher center of gravity than a passen-
ger car. The vehicle is not designed for
cornering at the same speeds as pas-
senger cars. Failure to operate this ve-
hicle correctly could result in loss of
control and/or a rollover accident.
● Always use tires of the same type, size,
brand, construction (bias, bias-belted,
or radial) , and tread pattern on all four
wheels. Install tire chains on the rear
wheels when driving on slippery roads
and drive carefully.
● Be sure to check the brakes immedi-
ately after driving in mud or water. For
additional information, refer to “Wet
brakes” in this section.
● Avoid parking your vehicle on steep
hills. If you get out of the vehicle and it
rolls forward, backward or sideways,
you could be injured. ●
Whenever you drive off-road through
sand, mud or water as deep as the
wheel hub, more frequent maintenance
may be required. For additional infor-
mation, refer to “Maintenance sched-
ules” in the “Maintenance” section of
this manual.
WARNING
Do not operate the push-button ignition
switch while driving the vehicle except in
an emergency. (The engine will stop when
the ignition switch is pushed three con-
secutive times in quick succession or the
ignition switch is pushed and held for
more than 2 seconds.) If the engine stops
while the vehicle is being driven, this
could lead to a crash and serious injury
LSD2014
PUSH-BUTTON IGNITION SWITCH
5-10Starting and driving
Page 366 of 636
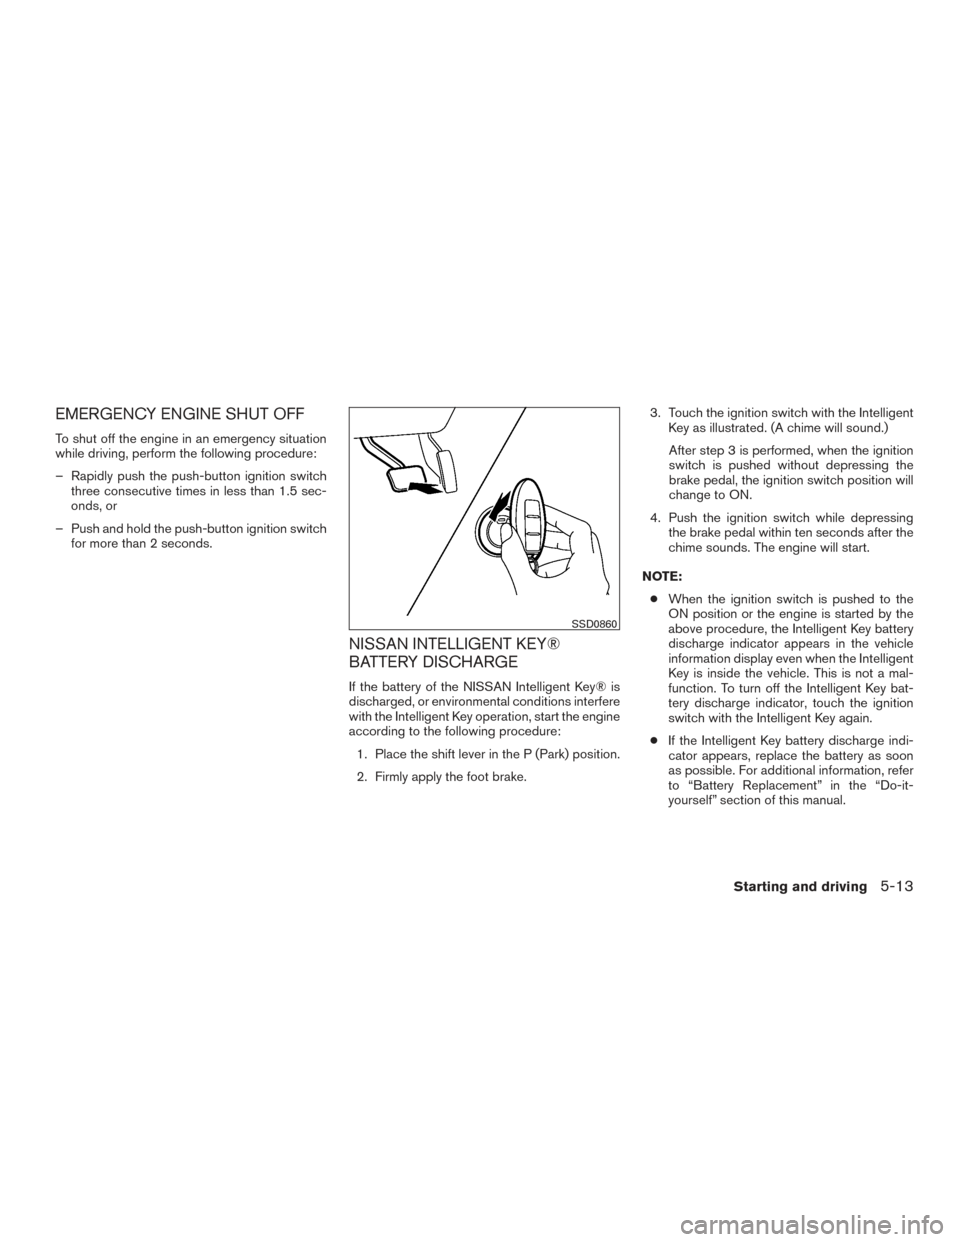
EMERGENCY ENGINE SHUT OFF
To shut off the engine in an emergency situation
while driving, perform the following procedure:
– Rapidly push the push-button ignition switchthree consecutive times in less than 1.5 sec-
onds, or
– Push and hold the push-button ignition switch for more than 2 seconds.
NISSAN INTELLIGENT KEY®
BATTERY DISCHARGE
If the battery of the NISSAN Intelligent Key® is
discharged, or environmental conditions interfere
with the Intelligent Key operation, start the engine
according to the following procedure:
1. Place the shift lever in the P (Park) position.
2. Firmly apply the foot brake. 3. Touch the ignition switch with the Intelligent
Key as illustrated. (A chime will sound.)
After step 3 is performed, when the ignition
switch is pushed without depressing the
brake pedal, the ignition switch position will
change to ON.
4. Push the ignition switch while depressing the brake pedal within ten seconds after the
chime sounds. The engine will start.
NOTE: ● When the ignition switch is pushed to the
ON position or the engine is started by the
above procedure, the Intelligent Key battery
discharge indicator appears in the vehicle
information display even when the Intelligent
Key is inside the vehicle. This is not a mal-
function. To turn off the Intelligent Key bat-
tery discharge indicator, touch the ignition
switch with the Intelligent Key again.
● If the Intelligent Key battery discharge indi-
cator appears, replace the battery as soon
as possible. For additional information, refer
to “Battery Replacement” in the “Do-it-
yourself” section of this manual.
SSD0860
Starting and driving5-13
Page 421 of 636
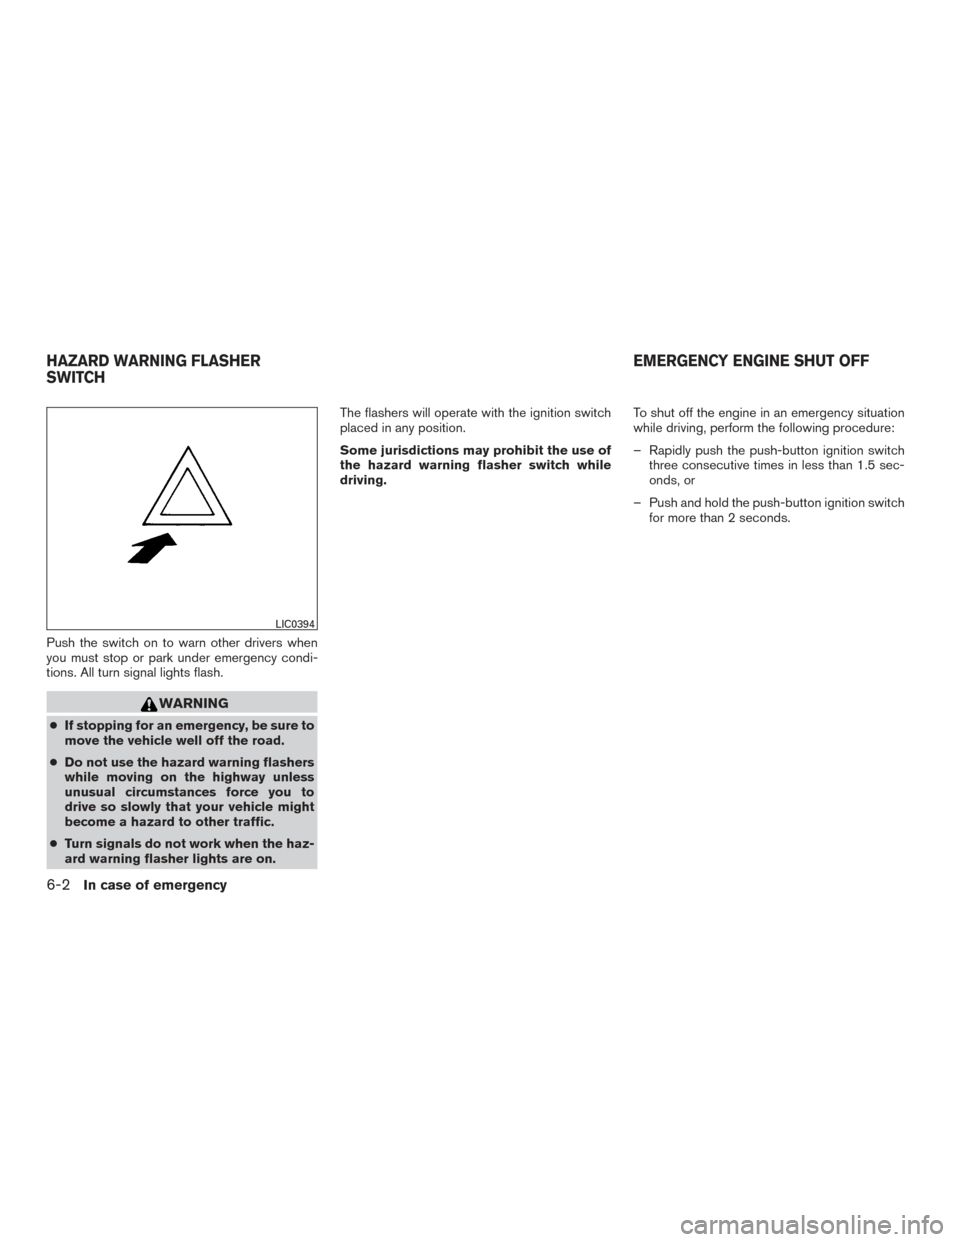
Push the switch on to warn other drivers when
you must stop or park under emergency condi-
tions. All turn signal lights flash.
WARNING
●If stopping for an emergency, be sure to
move the vehicle well off the road.
● Do not use the hazard warning flashers
while moving on the highway unless
unusual circumstances force you to
drive so slowly that your vehicle might
become a hazard to other traffic.
● Turn signals do not work when the haz-
ard warning flasher lights are on. The flashers will operate with the ignition switch
placed in any position.
Some jurisdictions may prohibit the use of
the hazard warning flasher switch while
driving.
To shut off the engine in an emergency situation
while driving, perform the following procedure:
– Rapidly push the push-button ignition switch
three consecutive times in less than 1.5 sec-
onds, or
– Push and hold the push-button ignition switch for more than 2 seconds.
LIC0394
HAZARD WARNING FLASHER
SWITCH EMERGENCY ENGINE SHUT OFF
6-2In case of emergency
Page 423 of 636
3. Park on a level surface and apply the parkingbrake. Move the shift lever to P (Park) .
4. Turn off the engine.
5. Raise the hood to warn other traffic and to signal professional road assistance person-
nel that you need assistance.
6. Have all passengers get out of the vehicle and stand in a safe place, away from traffic
and clear of the vehicle.
WARNING
●Make sure the parking brake is securely
applied and the shift lever is shifted into
P (Park) .
● Never change tires when the vehicle is
on a slope, ice or slippery areas. This is
hazardous.
● Never change tires if oncoming traffic is
close to your vehicle. Wait for profes-
sional road assistance.
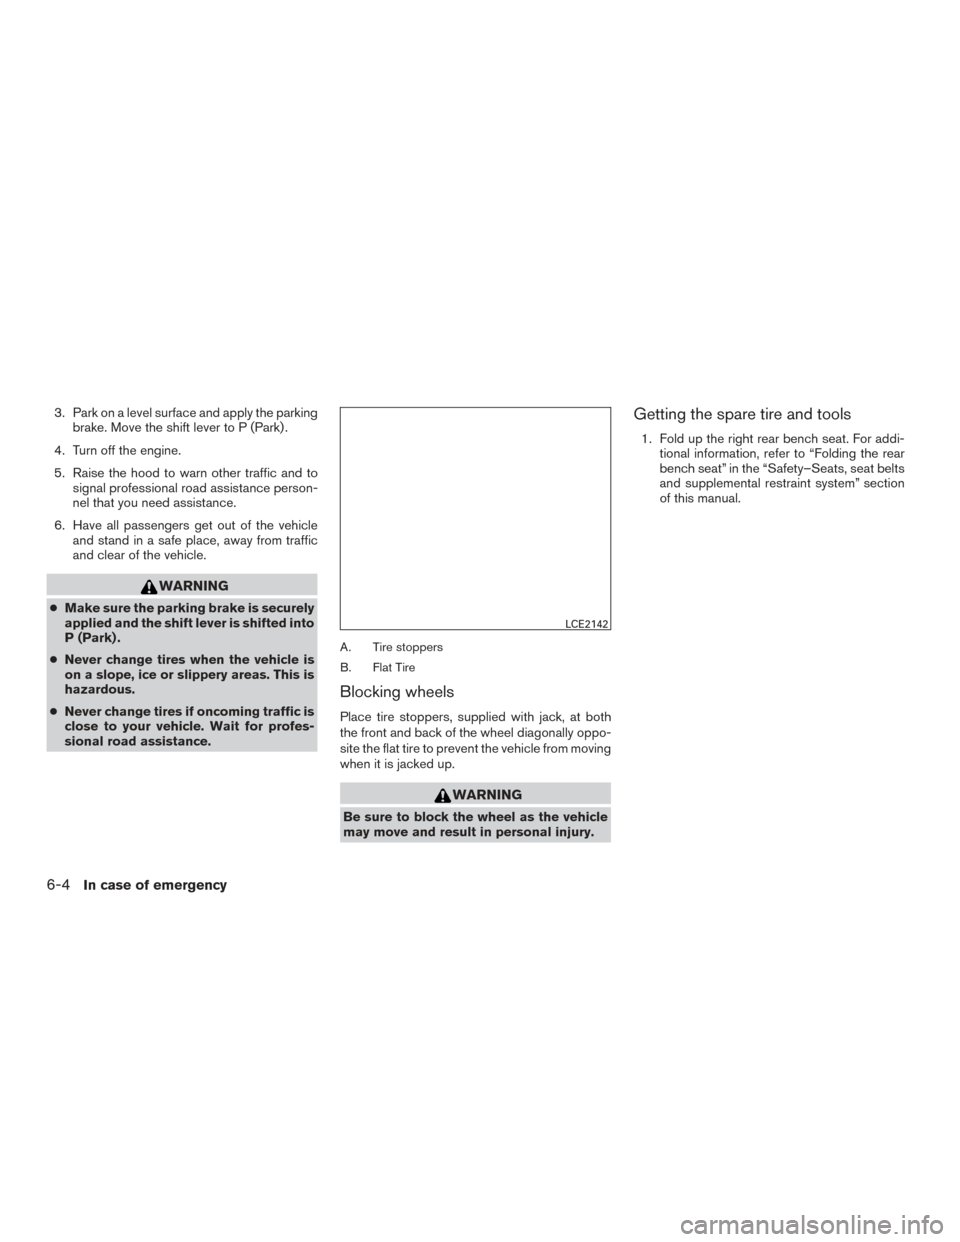
A. Tire stoppers
B. Flat Tire
Blocking wheels
Place tire stoppers, supplied with jack, at both
the front and back of the wheel diagonally oppo-
site the flat tire to prevent the vehicle from moving
when it is jacked up.
WARNING
Be sure to block the wheel as the vehicle
may move and result in personal injury.
Getting the spare tire and tools
1. Fold up the right rear bench seat. For addi- tional information, refer to “Folding the rear
bench seat” in the “Safety–Seats, seat belts
and supplemental restraint system” section
of this manual.
LCE2142
6-4In case of emergency
Page 425 of 636
10. Securely store the flat tire beneath the ve-hicle, from where the full size spare was
removed.
11. To reinstall the jack and tool kit, reverse steps 1 through 5.
CAUTION
Be sure to center the spare tire suspend-
ing plate on the wheel and then lift the
spare tire.
Jacking up vehicle and removing the
damaged tire
WARNING
●Never get under the vehicle while it is
supported only by the jack. If it is nec-
essary to work under the vehicle, sup-
port it with safety stands.
● Use only the jack provided with your
vehicle to lift the vehicle. Do not use the
jack provided with your vehicle on other
vehicles. The jack is designed for lifting
only your vehicle during a tire change.
● Use the correct jack-up points. Never
use any other part of the vehicle for jack
support. ●
Never jack up the vehicle more than
necessary.
● Never use blocks on or under the jack.
● Do not start or run the engine while
vehicle is on the jack. It may cause the
vehicle to move. This is especially true
for vehicles with limited slip
differentials.
● Do not allow passengers to stay in the
vehicle while it is on the jack.
● Never run the engine with a wheel(s) off
the ground. It may cause the vehicle to
move.
6-6In case of emergency