2016 NISSAN TITAN ECU
[x] Cancel search: ECUPage 63 of 636
ment, removal and installation, refer to
“Head restraints/headrests” in this section.
2. Position the top tether strap over the seat- back.
3. Secure the tether strap to the tether anchor point on the back side of the seatback be-
hind the child restraint.
4. Tighten the tether strap according to the manufacturer’s instructions to remove any
slack.
CENTER SEATING POSITION 1. Position the top tether strap over the seat- back.
2. Secure the tether strap to the tether anchor point on the back side of the seatback be-
hind the child restraint.
3. Tighten the tether strap according to the manufacturer’s instructions to remove any
slack.
If you have any questions when installing a
top tether strap, it is recommended that
you visit a NISSAN dealer for this service.WARNING
Child restraint anchorages are designed
to withstand only those loads imposed by
correctly fitted child restraints. Under no
circumstances are they to be used to at-
tach adult seat belts, or other items or
equipment to the vehicle. Doing so could
damage the child restraint anchorages.
The child restraint will not be properly
installed using the damaged anchorage,
and a child could be seriously injured or
killed in a collision.
BOOSTER SEATS
For additional information on installing a booster
seat in your vehicle, follow the instructions out-
lined in this section.
Precautions on booster seats
WARNING
If a booster seat and seat belt are not used
properly, the risk of a child being injured
or killed in a sudden stop or collision
greatly increases: – Make sure the shoulder portion of the belt is away from the child’s face
and neck and the lap portion of the
belt does not cross the stomach.
– Make sure the shoulder belt is not behind the child or under the child’s
arm.
– A booster seat must only be installed in a seating position that has a
lap/shoulder belt.
1-42Safety—Seats, seat belts and supplemental restraint system
Page 65 of 636
All U.S. states and Canadian provinces or
territories require that infants and small
children be restrained in an approved child
restraint at all times while the vehicle is
being operated.
The instructions in this section apply to booster
seat installation in the rear seats or the front
passenger seat.
Booster seat installation
WARNING
To avoid injury to child, do not use the
lap/shoulder belt in the Automatic Lock-
ing Retractor (ALR) mode when using a
booster seat with the seat belts.
For additional information, refer to all Warnings
and Cautions in the “Child safety”, “Child re-
straints” and “Booster seats” sections of this
manual before installing a child restraint.
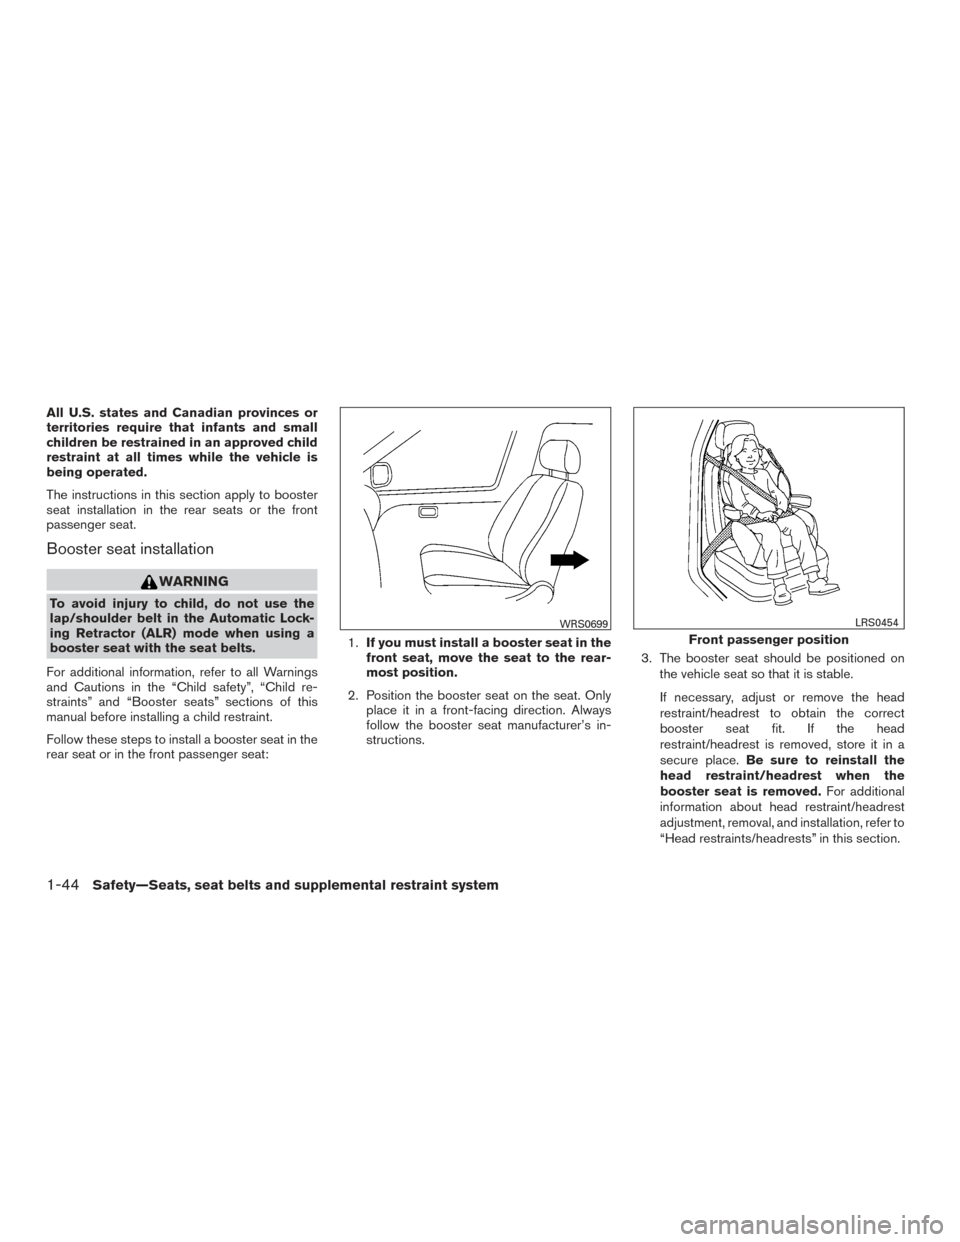
Follow these steps to install a booster seat in the
rear seat or in the front passenger seat: 1.
If you must install a booster seat in the
front seat, move the seat to the rear-
most position.
2. Position the booster seat on the seat. Only place it in a front-facing direction. Always
follow the booster seat manufacturer’s in-
structions. 3. The booster seat should be positioned on
the vehicle seat so that it is stable.
If necessary, adjust or remove the head
restraint/headrest to obtain the correct
booster seat fit. If the head
restraint/headrest is removed, store it in a
secure place. Be sure to reinstall the
head restraint/headrest when the
booster seat is removed. For additional
information about head restraint/headrest
adjustment, removal, and installation, refer to
“Head restraints/headrests” in this section.
WRS0699
Front passenger position
LRS0454
1-44Safety—Seats, seat belts and supplemental restraint system
Page 81 of 636

2 Instruments and controls
Instrument panel...................................2-2
Meters and gauges ................................2-4
Speedometer and odometer .....................2-5
Tachometer ....................................2-7
Engine coolant temperature gauge ...............2-7
Fuel gauge ....................................2-8
Auxiliary gauges (if so equipped) .................2-9
Diesel Exhaust Fluid (DEF) Level
(if so equipped) ............................... 2-10
Off-road monitor (if so equipped) ................2-11
Trip computer (if so equipped) ..................2-11
Compass (if so equipped) ......................... 2-16
Warning lights, indicator lights and audible
reminders ........................................ 2-19
Checking lights ............................... 2-20
Warning lights ................................ 2-20
Indicator lights ................................ 2-26
Audible reminders ............................. 2-29
Vehicle Information Display (if so equipped) .........2-29
How to use the vehicle information display .......2-30
Startup display ................................ 2-30
Settings ...................................... 2-31
Vehicle information display warnings and
indicators ..................................... 2-39Diesel warnings and indicators
(if so equipped)
............................... 2-44
Security systems ................................. 2-44
Vehicle security system ......................... 2-45
NISSAN vehicle immobilizer system .............2-46
Wiper and washer switch ......................... 2-47
Switch operation .............................. 2-48
Rain-sensing auto wiper system
(if so equipped) ............................... 2-49
Rear window and/or outside mirror defroster switch
(if so equipped) .................................. 2-50
Headlight switch ................................. 2-51
Headlight control switch ........................ 2-51
Daytime running light system
(if so equipped) ............................... 2-53
Instrument brightness control ...................2-54
Turn signal switch ................................ 2-54
Turn signal .................................... 2-54
Lane change signal ............................ 2-54
Fog
light switch (if so equipped) ...................2-55
Horn ............................................ 2-55
Cargo lamp switch ................................ 2-56
Climate controlled seat switches (if so equipped) ....2-56
Heated seat switches (if so equipped) ..............2-57
Page 100 of 636
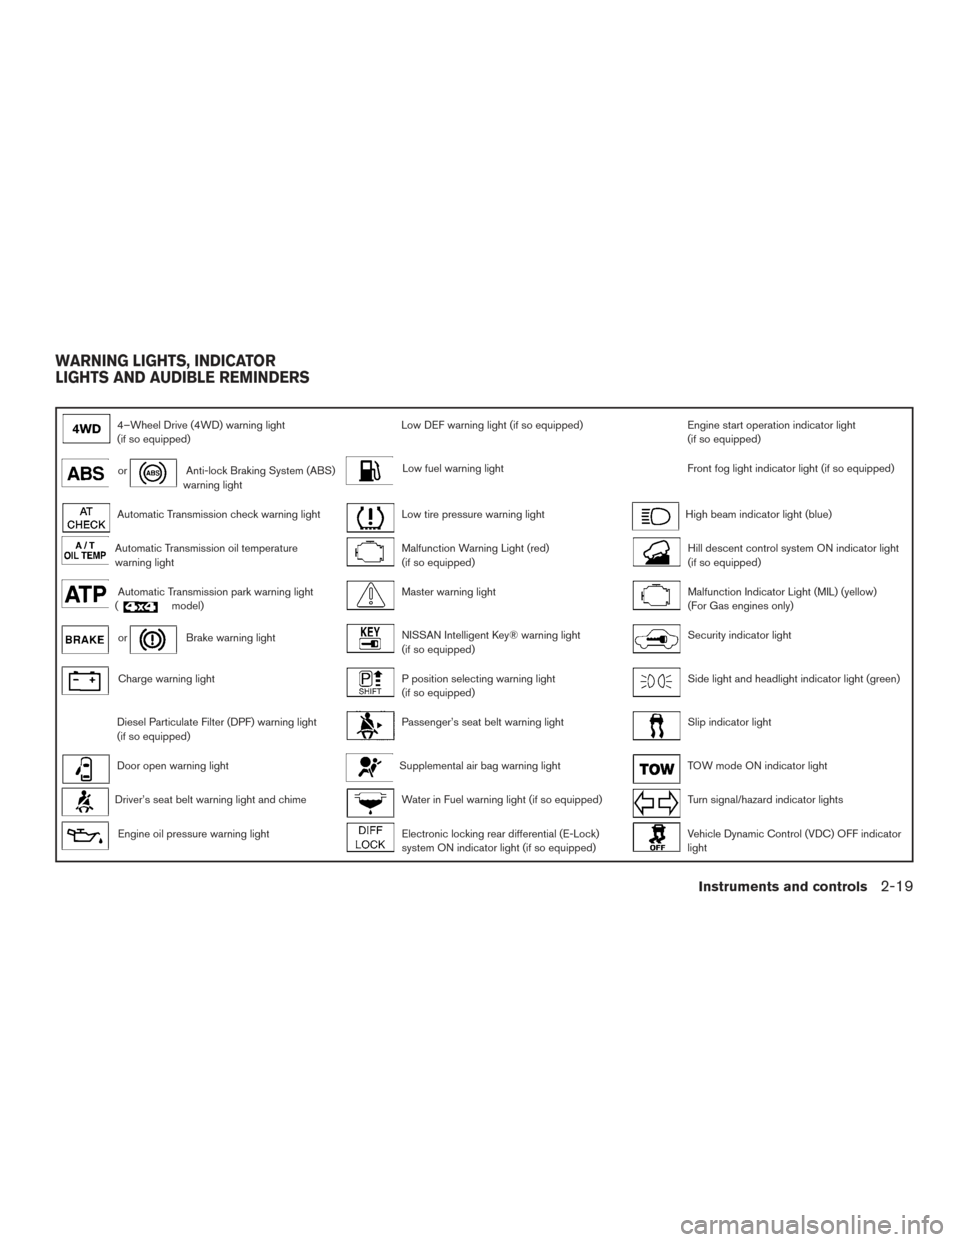
4–Wheel Drive (4WD) warning light
(if so equipped)Low DEF warning light (if so equipped)Engine start operation indicator light
(if so equipped)
orAnti-lock Braking System (ABS)
warning lightLow fuel warning lightFront fog light indicator light (if so equipped)
Automatic Transmission check warning lightLow tire pressure warning lightHigh beam indicator light (blue)
Automatic Transmission oil temperature
warning lightMalfunction Warning Light (red)
(if so equipped)Hill descent control system ON indicator light
(if so equipped)
Automatic Transmission park warning light
(model)Master warning lightMalfunction Indicator Light (MIL) (yellow)
(For Gas engines only)
orBrake warning lightNISSAN Intelligent Key® warning light
(if so equipped)Security indicator light
Charge warning lightP position selecting warning light
(if so equipped)Side light and headlight indicator light (green)
Diesel Particulate Filter (DPF) warning light
(if so equipped)Passenger’s seat belt warning lightSlip indicator light
Door open warning lightSupplemental air bag warning lightTOW mode ON indicator light
Driver’s seat belt warning light and chimeWater in Fuel warning light (if so equipped)Turn signal/hazard indicator lights
Engine oil pressure warning lightElectronic locking rear differential (E-Lock)
system ON indicator light (if so equipped)Vehicle Dynamic Control (VDC) OFF indicator
light
WARNING LIGHTS, INDICATOR
LIGHTS AND AUDIBLE REMINDERS
Instruments and controls2-19
Page 102 of 636
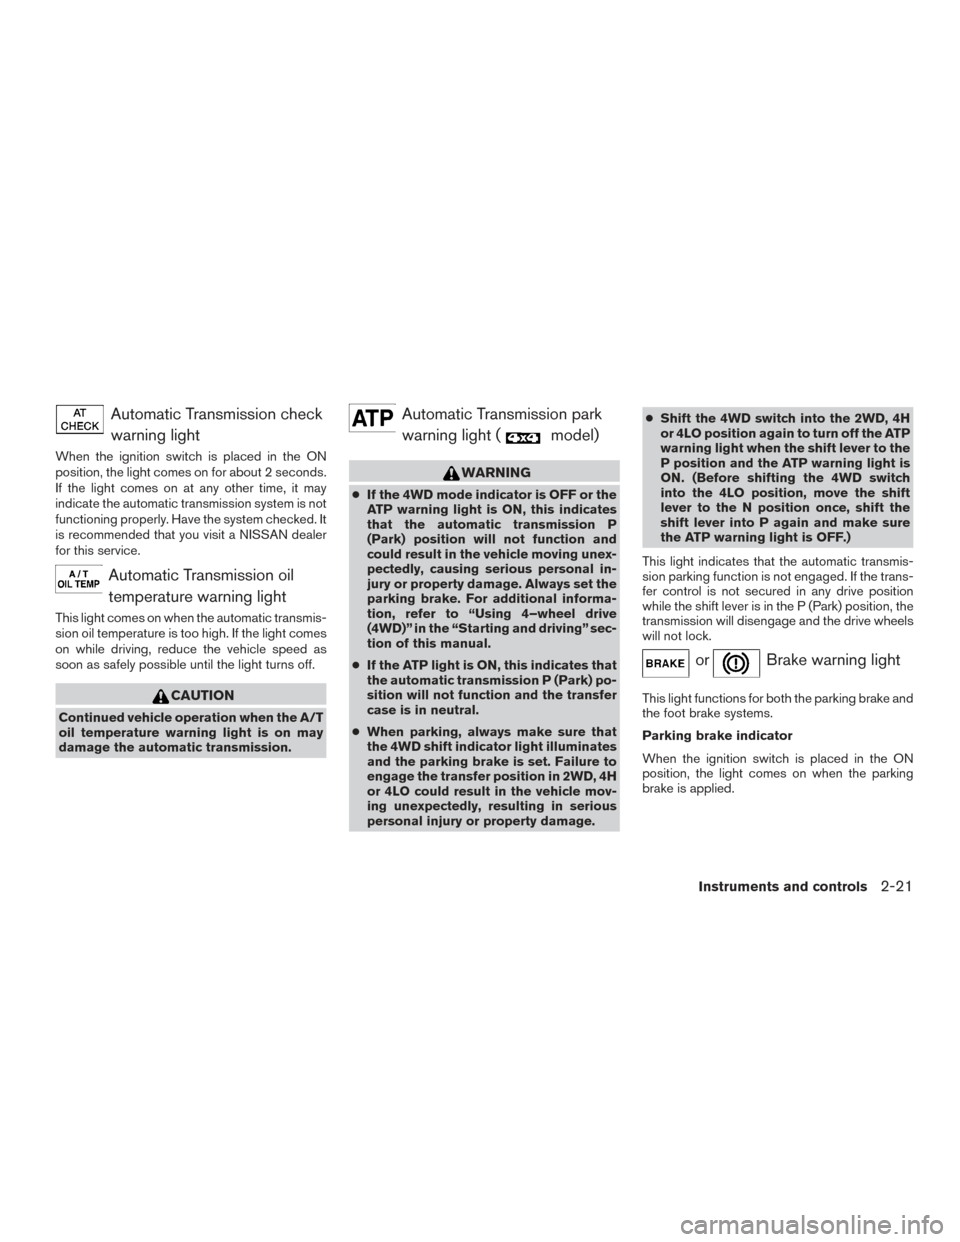
Automatic Transmission checkwarning light
When the ignition switch is placed in the ON
position, the light comes on for about 2 seconds.
If the light comes on at any other time, it may
indicate the automatic transmission system is not
functioning properly. Have the system checked. It
is recommended that you visit a NISSAN dealer
for this service.
Automatic Transmission oiltemperature warning light
This light comes on when the automatic transmis-
sion oil temperature is too high. If the light comes
on while driving, reduce the vehicle speed as
soon as safely possible until the light turns off.
CAUTION
Continued vehicle operation when the A/T
oil temperature warning light is on may
damage the automatic transmission.
Automatic Transmission parkwarning light (
model)
WARNING
● If the 4WD mode indicator is OFF or the
ATP warning light is ON, this indicates
that the automatic transmission P
(Park) position will not function and
could result in the vehicle moving unex-
pectedly, causing serious personal in-
jury or property damage. Always set the
parking brake. For additional informa-
tion, refer to “Using 4–wheel drive
(4WD)” in the “Starting and driving” sec-
tion of this manual.
● If the ATP light is ON, this indicates that
the automatic transmission P (Park) po-
sition will not function and the transfer
case is in neutral.
● When parking, always make sure that
the 4WD shift indicator light illuminates
and the parking brake is set. Failure to
engage the transfer position in 2WD, 4H
or 4LO could result in the vehicle mov-
ing unexpectedly, resulting in serious
personal injury or property damage. ●
Shift the 4WD switch into the 2WD, 4H
or 4LO position again to turn off the ATP
warning light when the shift lever to the
P position and the ATP warning light is
ON. (Before shifting the 4WD switch
into the 4LO position, move the shift
lever to the N position once, shift the
shift lever into P again and make sure
the ATP warning light is OFF.)
This light indicates that the automatic transmis-
sion parking function is not engaged. If the trans-
fer control is not secured in any drive position
while the shift lever is in the P (Park) position, the
transmission will disengage and the drive wheels
will not lock.
orBrake warning light
This light functions for both the parking brake and
the foot brake systems.
Parking brake indicator
When the ignition switch is placed in the ON
position, the light comes on when the parking
brake is applied.
Instruments and controls2-21
Page 103 of 636
Low brake fluid warning light
When the ignition switch is placed in the ON
position, the light warns of a low brake fluid level.
If the light comes on while the engine is running,
with the parking brake not applied, stop the ve-
hicle and perform the following:1. Check the brake fluid level. Add brake fluid as necessary. For additional information, re-
fer to “Brake fluid” in the “Do-it-yourself”
section of this manual.
2. If the brake fluid level is correct, have the warning system checked. It is recommended
that you visit a NISSAN dealer for this ser-
vice.
WARNING
●Your brake system may not be working
properly if the warning light is on. Driv-
ing could be dangerous. If you judge it
to be safe, drive carefully to the nearest
service station for repairs. Otherwise,
have your vehicle towed because driv-
ing it could be dangerous.
● Pressing the brake pedal with the en-
gine stopped and/or a low brake fluid
level may increase your stopping dis-
tance and braking will require greater
pedal effort and pedal travel. ●
If the brake fluid level is below the
MINIMUM or MIN mark on the brake
fluid reservoir, do not drive until the
brake system has been checked. It is
recommended that you visit a NISSAN
dealer for this service.
Anti-lock Braking System (ABS) warning
indicator
When the parking brake is released and the
brake fluid level is sufficient, if both the brake
warning light and the ABS warning light illumi-
nate, it may indicate the ABS is not functioning
properly. Have the brake system checked and, if
necessary, repaired. It is recommended you visit
a NISSAN dealer for this service. Avoid high-
speed driving and abrupt braking. For additional
information, refer to “Anti-lock Braking System
(ABS) warning light” in this section.
Charge warning light
If this light comes on while the engine is running,
it may indicate the charging system is not func-
tioning properly. Turn the engine off and check
the generator belt. If the belt is loose, broken,
missing, or if the light remains on, have the sys-
tem checked. It is recommended that you visit a
NISSAN dealer for this service.
CAUTION
● Do not ground electrical accessories di-
rectly to the battery terminal. Doing so
will bypass the variable control system
(if so equipped) and the vehicle battery
may not charge completely. For addi-
tional information, refer to “Variable
voltage control system” in the “Do-it-
yourself” section of this manual.
● Do not continue driving if the generator
belt is loose, broken or missing.
Diesel Particulate Filter (DPF)
warning light (if so equipped)
For additional information, refer to the “Titan Die-
sel Owner’s Manual”.
Door open warning light
This light comes on when any of the doors are not
closed securely while the ignition switch is
placed in the ON position.
A warning also appears in the vehicle information
display showing the specific door(s) that is/are
open.
2-22Instruments and controls
Page 104 of 636
Driver’s seat belt warning lightand chime
The light and chime remind you to fasten your
seat belt. The light illuminates whenever the igni-
tion switch is placed in the ON or START position
and remains illuminated until the driver’s seat belt
is fastened. At the same time, the chime sounds
for about 6 seconds unless the driver’s seat belt
is securely fastened.
For additional information, refer to “Seat belts” in
the “Safety—Seats, seat belts and supplemental
restraint system” section for precautions on seat
belt usage.
Engine oil pressure warninglight
This light warns of low engine oil pressure. If the
light flickers or comes on during normal driving,
pull off the road in a safe area, stop the engine
immediately, and call a NISSAN dealer or other
authorized repair shop.
The engine oil pressure warning light is not
designed to indicate a low oil level. Use the
dipstick to check the oil level. For additional in-
formation, refer to “Engine oil” in the “Do-it-
yourself” section of this manual.
CAUTION
Running the engine with the engine oil
pressure warning light on could cause se-
rious damage to the engine almost imme-
diately. Such damage is not covered by
warranty. Turn off the engine as soon as it
is safe to do so.
Low DEF warning light (if so
equipped)
For additional information, refer to the “Titan Die-
sel Owner’s Manual”.
Low fuel warning light
This light comes on when the fuel level in the fuel
tank is getting low. Refuel as soon as it is conve-
nient, preferably before the fuel gauge reaches 0
(Empty) . There will be a small reserve of fuel
in the tank when the fuel gauge reaches 0
(Empty) .
Low tire pressure warning light
Your vehicle is equipped with a TPMS that moni-
tors the tire pressure of all tires except the spare.
The low tire pressure warning light warns of low
tire pressure or indicates that the TPMS is not
functioning properly. After the ignition switch is placed in the ON
position, this light illuminates for about 1 second
and turns off.
Low tire pressure warning
If the vehicle is being driven with low tire
pressure, the warning light will illuminate.
A “Tire Press Low - Add Air” warning also
appears in the vehicle information display.
When the low tire pressure warning light
illuminates, you should stop and adjust the
tire pressure of all four tires to the recom-
mended COLD tire pressure shown on the
Tire and Loading Information label located
in the driver’s door opening. The low tire
pressure warning light does not automati-
cally turn off when the tire pressure is ad-
justed. After the tire is inflated to the rec-
ommended pressure, the vehicle must be
driven at speeds above 16 mph (25 km/h) to
activate the TPMS and turn off the low tire
pressure warning light. Use a tire pressure
gauge to check the tire pressure.
The “Tire Press Low - Add Air” warning appears
each time the ignition switch is placed in the ON
position as long as the low tire pressure warning
light remains illuminated.
For additional information, refer to “Vehicle infor-
mation display” in the “Instruments and controls”
Instruments and controls2-23
Page 109 of 636
Operation
The MIL will come on in one of two ways:● MIL on steady — An emission control system
malfunction has been detected. Check the
fuel-filler cap. If the LOOSE FUEL CAP
warning message (if so equipped) is dis-
played in the odometer, and the fuel-filler
cap is loose or missing, tighten or install the
cap and continue to drive the vehicle.
The
light should turn off after a few
driving trips. If the
light does not turn
off after a few driving trips, have the vehicle
inspected. It is recommended that you visit a
NISSAN dealer for this service. You do not
need to have your vehicle towed to the
dealer.
● MIL blinking — An engine misfire has been
detected which may damage the emission
control system. To reduce or avoid emission
control system damage:
– do not drive at speeds above 45 mph (72 km/h);
– avoid hard acceleration or deceleration;
– avoid steep uphill grades;
– if possible, reduce the amount of cargo being hauled. The MIL may stop blinking and come on steady.
Have the vehicle inspected. It is recommended
that you visit a NISSAN dealer for this service.
You do not need to have your vehicle towed to the
dealer.
CAUTION
Continued vehicle operation without hav-
ing the emission control system checked
and repaired as necessary could lead to
poor driveability, reduced fuel economy,
and possible damage to the emission con-
trol system.
Security indicator light
This light blinks whenever the ignition switch is
placed in the LOCK, OFF or ACC position. This
function indicates the security system equipped
on the vehicle is operational.
For additional information, refer to “Security sys-
tems” in this section.
Side light and headlight
indicator light (green)
The side light and headlight indicator light illumi-
nates when the side light or headlight position is
selected. For additional information, refer to
“Headlight and turn signal switch” in this section.
Slip indicator light
This indicator will blink when the Vehicle Dynamic
Control (VDC) system is operating, thus alerting
that the vehicle is nearing its traction limits. The
road surface may be slippery.
TOW mode ON indicator light
This light comes on when the tow mode function
is ON.
Turn signal/hazard indicator lights
The appropriate light flashes when the turn signal
switch is activated.
Both lights flash when the hazard switch is turned
on.
Vehicle Dynamic Control(VDC) OFF indicator light
This indicator light comes on when the VDC off
switch is pushed to OFF. This indicates the VDC
system is not operating.
Push the VDC off switch again or restart the
engine and the system will operate normally. For
additional information, refer to “Vehicle Dynamic
Control (VDC) system” in the “Starting and driv-
ing” section of this manual.
2-28Instruments and controls