Page 12 of 380
1. Engine hood (P. 3-12)
2. Wiper and washer switch (P. 2-25)
3. Windshield (P. 8-22)
4. Power windows (if so equipped)(P. 2-46)
5. Door locks (P. 3-3) Key fob (if so equipped) (P. 3-8)
Keys (P. 3-2)
6. Mirrors (P. 3-17)
7. Tire pressure (P. 8-33)
8. Flat tire (P. 6-2)
9. Tire chains (P. 8-33)
10. Headlight and turn signal switch
(P. 2-27)
Replacing bulbs (P. 8-29)
Refer to the page number indicated in
parentheses for operating details.
LII2320
EXTERIOR FRONT
Illustrated table of contents0-3
Page 19 of 380
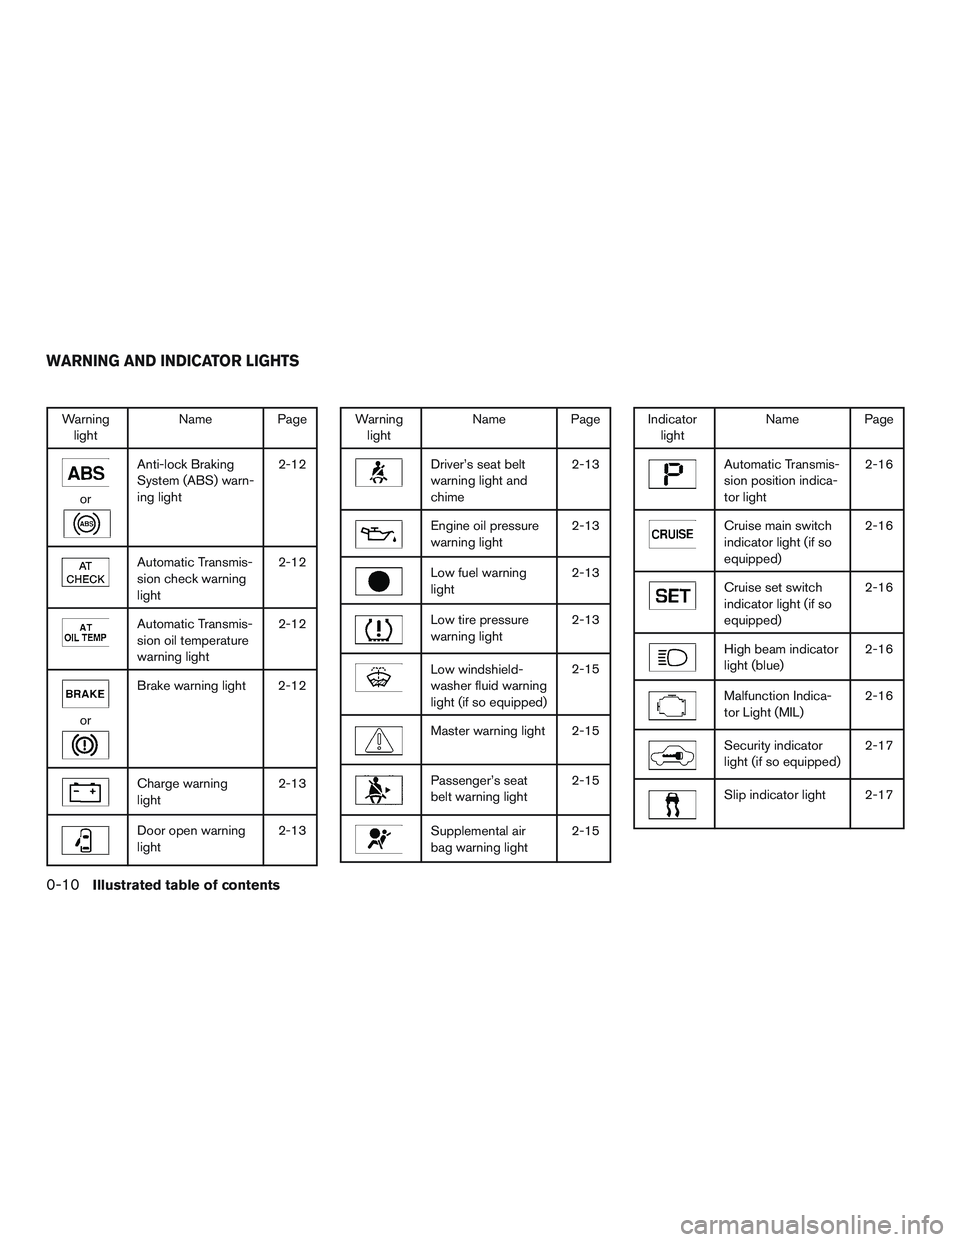
Warninglight Name Page
or
Anti-lock Braking
System (ABS) warn-
ing light 2-12
Automatic Transmis-
sion check warning
light2-12
Automatic Transmis-
sion oil temperature
warning light2-12
or
Brake warning light 2-12
Charge warning
light
2-13
Door open warning
light2-13
Warning
light Name Page
Driver’s seat belt
warning light and
chime 2-13
Engine oil pressure
warning light
2-13
Low fuel warning
light2-13
Low tire pressure
warning light2-13
Low windshield-
washer fluid warning
light (if so equipped)2-15
Master warning light 2-15
Passenger’s seat
belt warning light
2-15
Supplemental air
bag warning light2-15
Indicator
light Name Page
Automatic Transmis-
sion position indica-
tor light 2-16
Cruise main switch
indicator light (if so
equipped)2-16
Cruise set switch
indicator light (if so
equipped)2-16
High beam indicator
light (blue)
2-16
Malfunction Indica-
tor Light (MIL)2-16
Security indicator
light (if so equipped)2-17
Slip indicator light 2-17
WARNING AND INDICATOR LIGHTS
0-10Illustrated table of contents
Page 23 of 380
WARNING
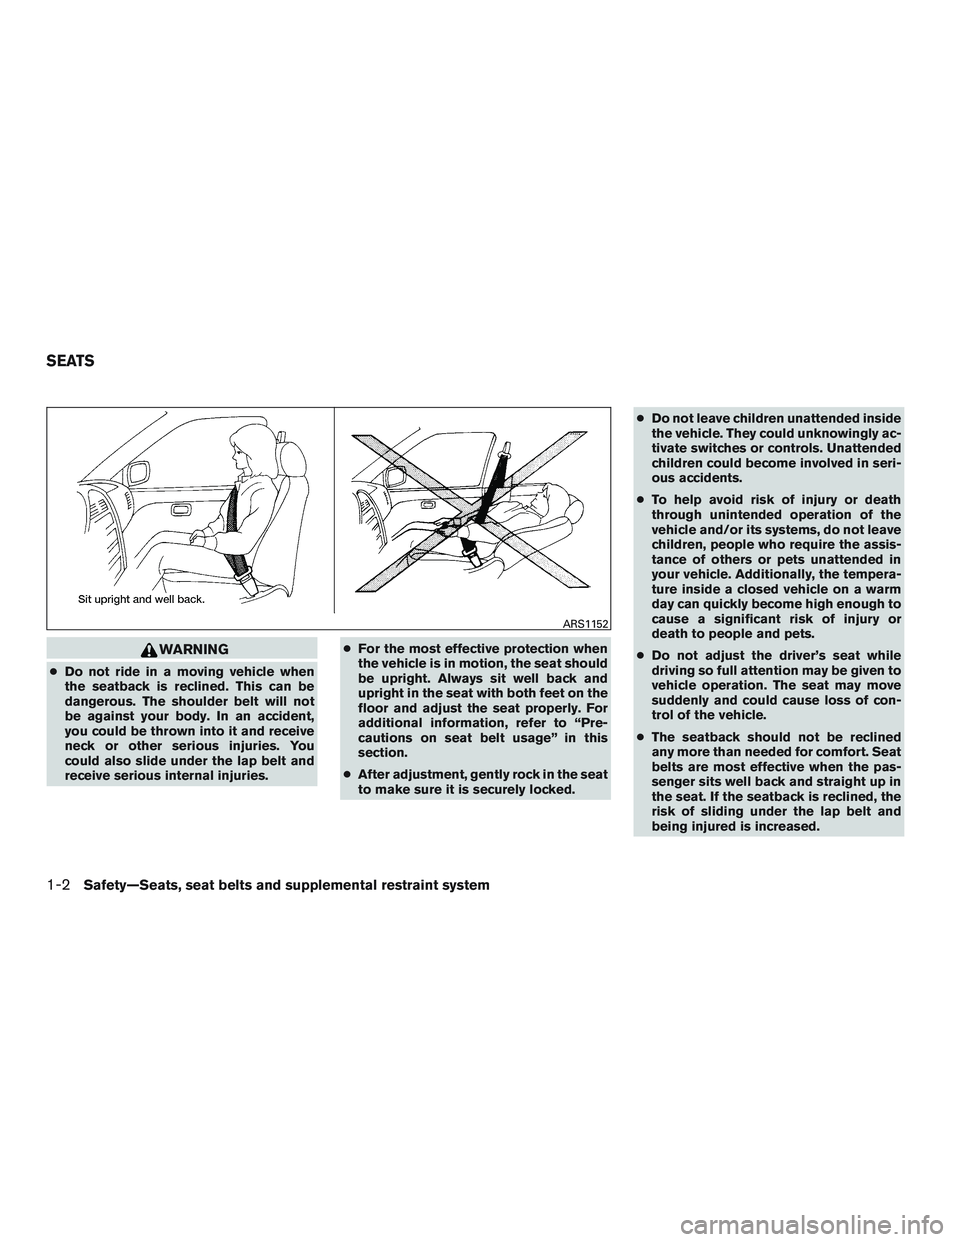
●Do not ride in a moving vehicle when
the seatback is reclined. This can be
dangerous. The shoulder belt will not
be against your body. In an accident,
you could be thrown into it and receive
neck or other serious injuries. You
could also slide under the lap belt and
receive serious internal injuries. ●
For the most effective protection when
the vehicle is in motion, the seat should
be upright. Always sit well back and
upright in the seat with both feet on the
floor and adjust the seat properly. For
additional information, refer to “Pre-
cautions on seat belt usage” in this
section.
● After adjustment, gently rock in the seat
to make sure it is securely locked. ●
Do not leave children unattended inside
the vehicle. They could unknowingly ac-
tivate switches or controls. Unattended
children could become involved in seri-
ous accidents.
● To help avoid risk of injury or death
through unintended operation of the
vehicle and/or its systems, do not leave
children, people who require the assis-
tance of others or pets unattended in
your vehicle. Additionally, the tempera-
ture inside a closed vehicle on a warm
day can quickly become high enough to
cause a significant risk of injury or
death to people and pets.
● Do not adjust the driver’s seat while
driving so full attention may be given to
vehicle operation. The seat may move
suddenly and could cause loss of con-
trol of the vehicle.
● The seatback should not be reclined
any more than needed for comfort. Seat
belts are most effective when the pas-
senger sits well back and straight up in
the seat. If the seatback is reclined, the
risk of sliding under the lap belt and
being injured is increased.
ARS1152
SEATS
1-2Safety—Seats, seat belts and supplemental restraint system
Page 24 of 380
CAUTION
When adjusting the seat positions, be
sure not to contact any moving parts to
avoid possible injuries and/or damage.
FRONT MANUAL SEAT
ADJUSTMENT (for passenger’s seat
and if so equipped for driver’s seat)
Your vehicle seats can be adjusted manually. For
additional information about adjusting the seats,
refer to the steps outlined in this section.
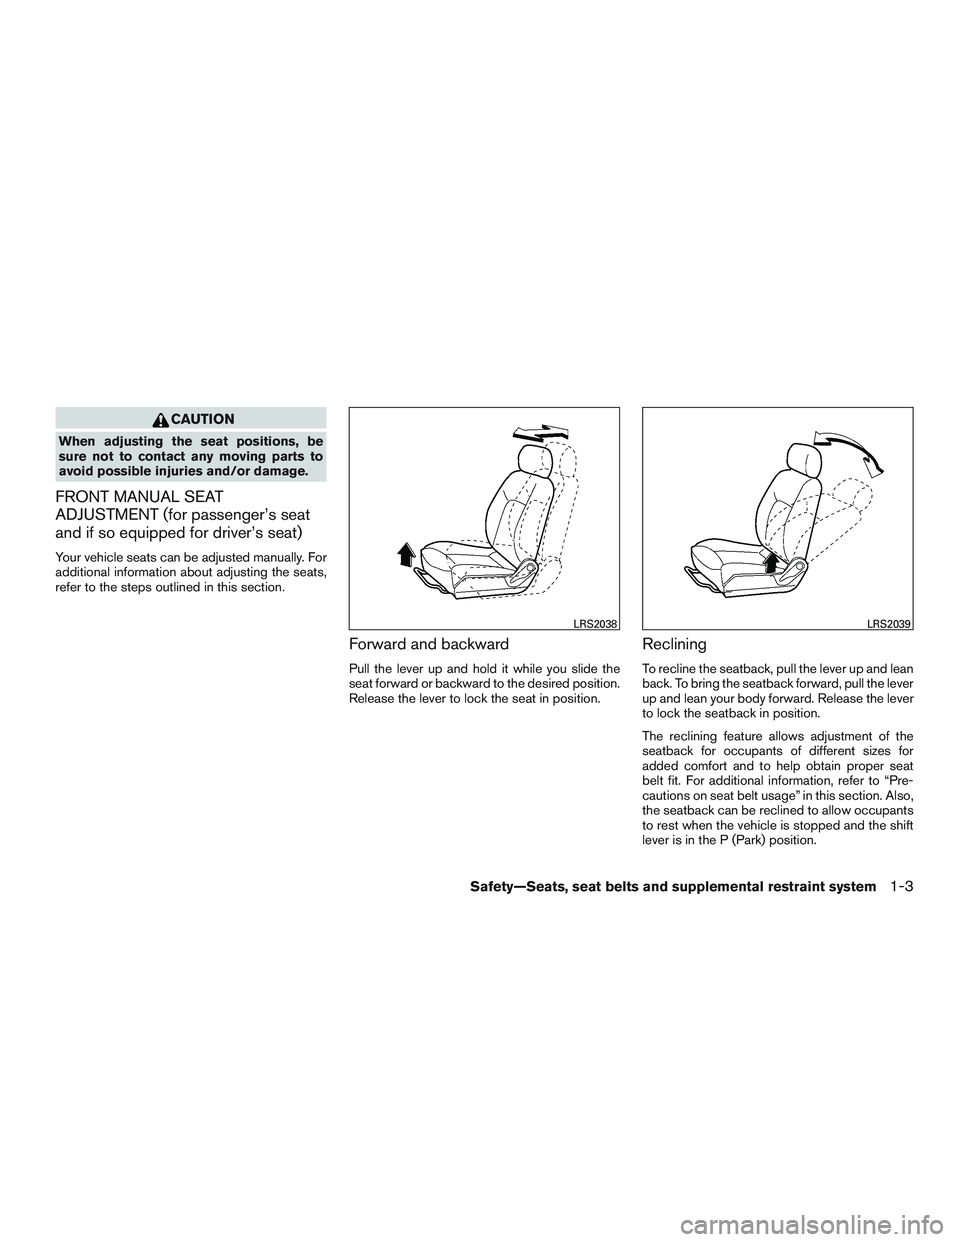
Forward and backward
Pull the lever up and hold it while you slide the
seat forward or backward to the desired position.
Release the lever to lock the seat in position.
Reclining
To recline the seatback, pull the lever up and lean
back. To bring the seatback forward, pull the lever
up and lean your body forward. Release the lever
to lock the seatback in position.
The reclining feature allows adjustment of the
seatback for occupants of different sizes for
added comfort and to help obtain proper seat
belt fit. For additional information, refer to “Pre-
cautions on seat belt usage” in this section. Also,
the seatback can be reclined to allow occupants
to rest when the vehicle is stopped and the shift
lever is in the P (Park) position.
LRS2038LRS2039
Safety—Seats, seat belts and supplemental restraint system1-3
Page 27 of 380
FLEXIBLE SEATING
WARNING
●Do not allow people to ride in any area
of your vehicle that is not equipped with
seats and seat belts. Be sure everyone
in your vehicle is in a seat and using a
seat belt properly.
● Head restraints/headrests should be
adjusted properly as they may provide
significant protection against injury in
an accident. Always replace them prop-
erly if they have been removed for any
reason.
● If the head restraints/headrests are re-
moved for any reason, they should be
securely stored to prevent them from
causing injury to passengers or damage
to the vehicle in case of sudden braking
or an accident.
● When returning the seatbacks to the
upright position, be certain they are
completely secured in the latched posi-
tion. If they are not completely secured,
passengers may be injured in an acci-
dent or sudden stop. ●
Properly secure all cargo to help pre-
vent it from sliding or shifting. Do not
place cargo higher than the seatbacks.
In a sudden stop or collision, unsecured
cargo could cause personal injury.
● Do not drive the vehicle unless all of the
seats are installed and locked in posi-
tion. Loose seats can become projec-
tiles in a sudden stop or collision and
cause serious personal injury or death.
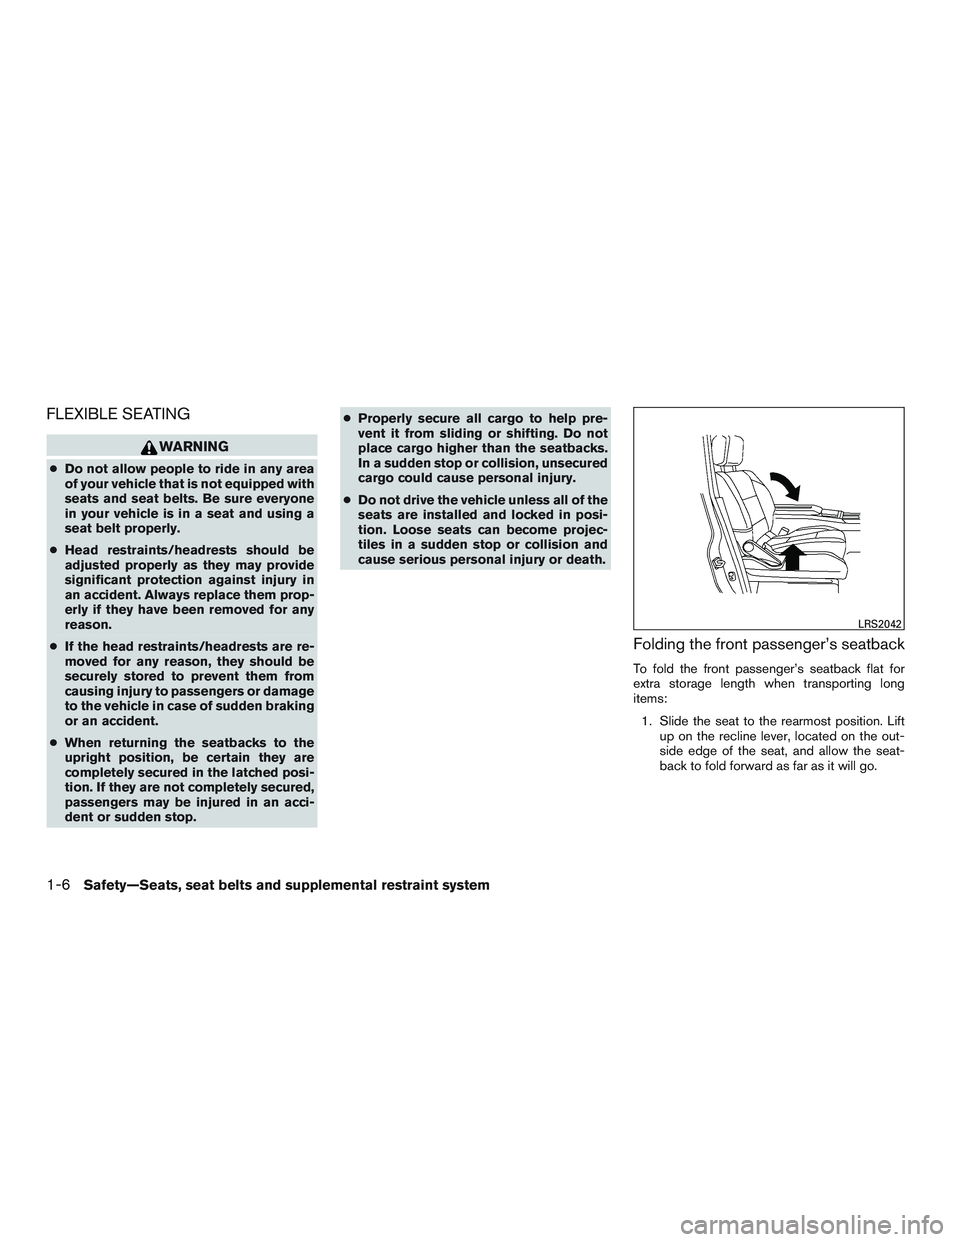
Folding the front passenger’s seatback
To fold the front passenger’s seatback flat for
extra storage length when transporting long
items:
1. Slide the seat to the rearmost position. Lift up on the recline lever, located on the out-
side edge of the seat, and allow the seat-
back to fold forward as far as it will go.
LRS2042
1-6Safety—Seats, seat belts and supplemental restraint system
Page 28 of 380
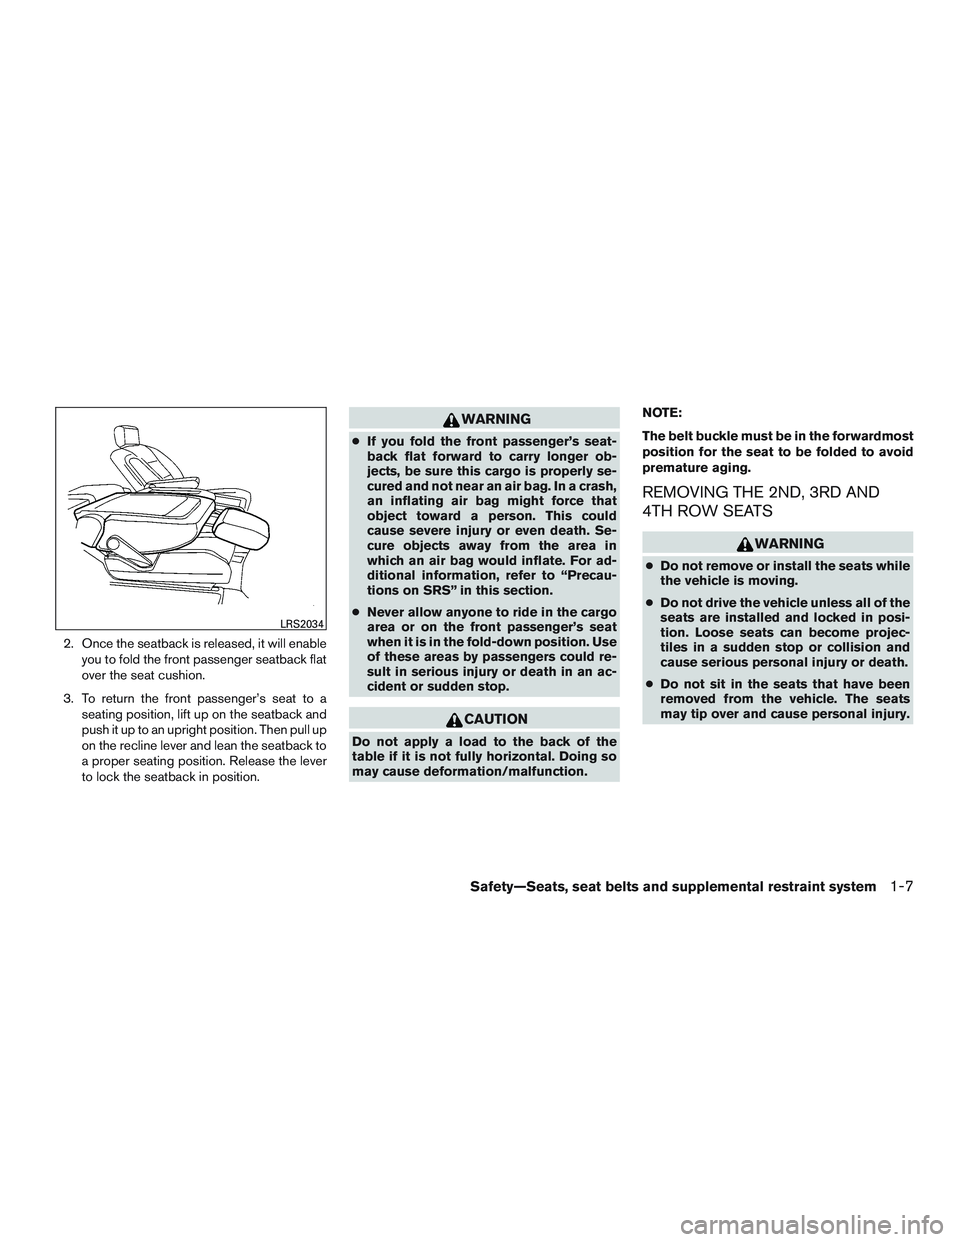
2. Once the seatback is released, it will enableyou to fold the front passenger seatback flat
over the seat cushion.
3. To return the front passenger’s seat to a seating position, lift up on the seatback and
push it up to an upright position. Then pull up
on the recline lever and lean the seatback to
a proper seating position. Release the lever
to lock the seatback in position.
WARNING
●If you fold the front passenger’s seat-
back flat forward to carry longer ob-
jects, be sure this cargo is properly se-
cured and not near an air bag. In a crash,
an inflating air bag might force that
object toward a person. This could
cause severe injury or even death. Se-
cure objects away from the area in
which an air bag would inflate. For ad-
ditional information, refer to “Precau-
tions on SRS” in this section.
● Never allow anyone to ride in the cargo
area or on the front passenger’s seat
when it is in the fold-down position. Use
of these areas by passengers could re-
sult in serious injury or death in an ac-
cident or sudden stop.
CAUTION
Do not apply a load to the back of the
table if it is not fully horizontal. Doing so
may cause deformation/malfunction. NOTE:
The belt buckle must be in the forwardmost
position for the seat to be folded to avoid
premature aging.
REMOVING THE 2ND, 3RD AND
4TH ROW SEATS
WARNING
●
Do not remove or install the seats while
the vehicle is moving.
● Do not drive the vehicle unless all of the
seats are installed and locked in posi-
tion. Loose seats can become projec-
tiles in a sudden stop or collision and
cause serious personal injury or death.
● Do not sit in the seats that have been
removed from the vehicle. The seats
may tip over and cause personal injury.
LRS2034
Safety—Seats, seat belts and supplemental restraint system1-7
Page 31 of 380
4. Push up on the rear of the seat.5. Line up the seat with the mounting locations.
Tilt the seat slightly forward so the front
hooks engage into the front mounting loca-
tions. 6. Push up on the rear of the seat so the rear
latches are 4 inches (100 mm) above the
floor. Make sure that the area beneath
the seat is clear. Release the seat so the
rear latches drop into the mounting location
and lock.
7. Check front hook and rear latch to make sure the latches are locked into the mounting
location.
LRS2647LRS2129LRS2647
1-10Safety—Seats, seat belts and supplemental restraint system
Page 33 of 380
WARNING
Properly stow the rail covers when not in
use. They should be securely stored to
prevent them from causing injury to pas-
sengers or damage to the vehicle in case
of sudden braking or an accident.
Installation of rail covers
When installing the rail covers into the rail open-
ing, make sure that the Owner’s Manual symbol is
placed in the correct direction.● 2nd row towards front of the vehicle
● 3rd row towards rear of the vehicle To install the rail covers:
1. Remove the locking cap from the cover us- ing a suitable tool, such as a small screw-
driver or key, before installing the cover in the
rail opening.
LRS2124LRS2125
1-12Safety—Seats, seat belts and supplemental restraint system