2016 NISSAN NV PASSENGER VAN window
[x] Cancel search: windowPage 194 of 380
display will be reset to 9:00. At the same time the
display will return to the audio.
FM/AM radio operation
FM·AM button
Press the FM·AM button to change the band as
follows:
FM1→FM2 →AM →FM1
The FM stereo indicator, ST (STEREO) , illumi-
nates during FM stereo reception. When the
stereo broadcast signal is weak, the radio auto-
matically changes from stereo to monaural re-
ception.
TUNE buttons
Manual tuning
Press the TUNE
orbutton for less
than 0.5 seconds for manual tuning.
To move quickly through the channels, press and
hold either TUNE
orbutton down
for more than 1.5 seconds.
SEEK buttons
SEEK tuning
Press the SEEK
orbutton to seek
through the frequencies. Seek tuning begins from low to high frequencies, or high to low
frequencies, depending on which button is
pressed, and stops at the next broadcasting sta-
tion. Once the highest broadcasting station is
reached, the radio continues in the seek mode at
the lowest broadcasting station.
Station memory operations
Twelve stations can be set for the FM band (6 for
FM1 and 6 for FM2) and 6 stations can be set for
the AM band to the preset buttons.
1. Press the FM-AM button to change to the desired band.
2. Tune to the desired station using manual TUNE or SEEK tuning. Press and hold any of
the desired station memory buttons (1 – 6)
until a beep sound is heard. (The radio mutes
when the select button is pressed.)
3. The channel indicator will then come on and the sound will resume. Programming is now
complete.
4. Other buttons can be set in the same man- ner.
If the battery cable is disconnected, or if the fuse
opens, the radio memory will be canceled. In that
case, reset the desired stations.
Compact disc (CD) player operation
If the radio is already operating, it automatically
turns off and the compact disc begins to play.
CD button
When the CD button is pressed with a compact
disc loaded and the radio playing, the radio turns
off and the last used compact disc starts to play.
TUNE (rewind and fast forward) buttons
When the TUNE
orbutton is
pressed while the compact disc is playing, the
compact disc plays at an increased speed while
rewinding or fast forwarding. When the button is
released, the compact disc returns to normal play
speed.
SEEK buttons
When
is pressed while the compact disc
is playing, the next track following the present
one starts to play from the beginning.
Press
several times to skip several tracks.
Each time the button is pressed, the CD ad-
vances 1 additional track. The track number ap-
pears in the display window. (When the last track
on the compact disc is skipped, the first track is
played.)
Monitor, climate, audio, phone and voice recognition systems4-39
Page 199 of 380
When the TUNE/FF-REW/FOLDER button
(fast forward) or(reverse) is pressed for
more than 1.5 seconds while the compact disc is
playing, the compact disc plays at an increased
speed while reversing or fast forwarding. When the
button is released, the compact disc returns to
normal play speed.
SEEK/TRACK button
When the SEEK/TRACK button
is
pressed while the compact disc is playing, the
next track following the present one starts to play
from the beginning. Press the SEEK/TRACK
button
several times to skip several tracks.
Each time the button is pressed, the CD ad-
vances one additional track. The track number
appears in the display window. (When the last
track on the compact disc is skipped, the first
track is played.)
When the SEEK/TRACK button
is
pressed, the track being played returns to the
beginning. Press the SEEK/TRACK
button
several times to skip back several
tracks. Each time the button is pressed the CD
moves back one track. RPT button
When the RPT button is pressed while a com-
pact disc is playing, the play pattern can be
changed as follows:
CD:
TRACK REPEAT
→DISC REPEAT
CD with MP3 or WMA:
FOLDER REPEAT →TRACK REPEAT →DISC
REPEAT
TRACK REPEAT: the current track will be re-
peated.
DISC REPEAT: play pattern returns to normal.
FOLDER REPEAT: the current folder will be re-
peated.
RDM button
When the RDM button is pressed while a com-
pact disc is playing, the play pattern can be
changed as follows:
CD:
DISC RANDOM →DISC REPEAT
CD with MP3 or WMA:
DISC RANDOM →FOLDER RANDOM →DISC
REPEAT DISC RANDOM: all tracks on the disc will be
played randomly.
FOLDER RANDOM: all tracks in the current
folder will be played randomly.
DISC REPEAT: play pattern returns to normal.
AUX (Auxiliary) button
The AUX IN jack is located on the front of the
radio. The AUX IN audio input jack accepts any
standard analog audio input such as from a por-
table cassette tape/CD player, MP3 player or a
laptop computer.
Press the AUX button to play a compatible device
when it is plugged into the AUX IN jack.
EJECT button
When the
button is pressed with a com-
pact disc loaded, the compact disc will eject and
the last source will be played.
When the
button is pressed twice with a
compact disc loaded, the compact disc will be
ejected further for easier CD removal. If the disc
is not removed within 15 seconds, the disc will
reload.
4-44Monitor, climate, audio, phone and voice recognition systems
Page 219 of 380
Operating tips
To get the best performance out of the NISSAN
Voice Recognition system, observe the following:● Keep the interior of the vehicle as quiet as
possible. Close the windows to eliminate
surrounding noises (traffic noises, vibration
sounds, etc.) , which may prevent the system
from recognizing voice commands correctly.
● Wait until the tone sounds before speaking a
command. Otherwise, the command will not
be received properly.
● Start speaking a command within 5 seconds
after the tone sounds.
● Speak in a natural voice without pausing
between words.
Giving voice commands
To operate NISSAN Voice Recognition System,
press and release the
button located on
the steering wheel. After the tone sounds, speak
a command.
The command given is picked up by the micro-
phone, and voice feedback is given when the
command is accepted.
● If you need to hear the available commands
for the current menu again, say “Help” and
the system will repeat them. ●
If a command is not recognized, the system
announces, “Command not recognized.
Please try again.” Make sure the command is
said exactly as prompted by the system and
repeat the command in a clear voice.
● If you want to go back to the previous com-
mand, you can say “Go back” or “Correc-
tion” any time the system is waiting for a
response.
● You can cancel a command when the sys-
tem is waiting for a response by saying,
“Cancel” or “Quit.” The system announces
“Cancel” and ends the NISSAN Voice Rec-
ognition System session. You can also press
and hold the
button on the steering
wheel for 5 seconds at any time to end the
NISSAN Voice Recognition System session.
Whenever the NISSAN Voice Recognition
System session is cancelled, a double beep
is played to indicate you have exited the
system.
● If you want to adjust the volume of the voice
feedback, press the volume control switches
(+ or -) on the steering wheel while being
provided with feedback. You can also use
the radio volume control knob. ●
In most cases you can interrupt the voice
feedback to speak the next command by
pressing the
button on the steering
wheel.
● To use the system faster, you may speak the
second level commands with the main menu
command on the main menu. For example,
press the
button and after the tone
say, “Call Redial.”
How to say numbers
NISSAN Voice Recognition requires a certain
way to speak numbers in voice commands. Refer
to the following rules and examples. ● Either “zero” or “oh” can be used for “0”.
Example: 1-800-662-6200
– “One eight oh oh six six two six two oh oh”, or
– “One eight zero zero six six two six two oh oh”
● Words can be used for the first 4 digits
places only.
Example: 1-800-662-6200
– “One eight hundred six six two six two oh oh”,
4-64Monitor, climate, audio, phone and voice recognition systems
Page 229 of 380
TROUBLESHOOTING GUIDE
The system should respond correctly to all voice
commands without difficulty. If problems are en-
countered, try the following solutions.
Where the solutions are listed by number, try
each solution in turn, starting with number 1, until
the problem is resolved.
SymptomSolution
System fails to interpret the command correctly. 1. Ensure that the command is valid. For additional information, refer to “List of voice commands” in this section.
2. Ensure that the command is spoken after the tone.
3. Speak clearly without pausing between words and at a level appropriate to the ambient noise level in the vehicle.
4. Ensure that the ambient noise level is not excessive (for example, windows open or defroster on) . NOTE: If it is too
noisy to use the phone, it is likely that the voice commands will not be recognized.
5. If more than one command was said at a time, try saying the commands separately.
6. If the system consistently fails to recognize commands, the voice training procedure should be carried out to im-
prove the recognition response for the speaker. For additional information, refer to “Voice Adaptation (VA) mode” in
this section.
The system consistently selects the wrong entry from the
phone book. 1. Ensure that the phone book entry name requested matches what was originally stored. This can be confirmed by
using the “List Names” command. For additional information, refer to “Phonebook” in this section.
2. Replace one of the names being confused with a new name.
4-74Monitor, climate, audio, phone and voice recognition systems
Page 238 of 380
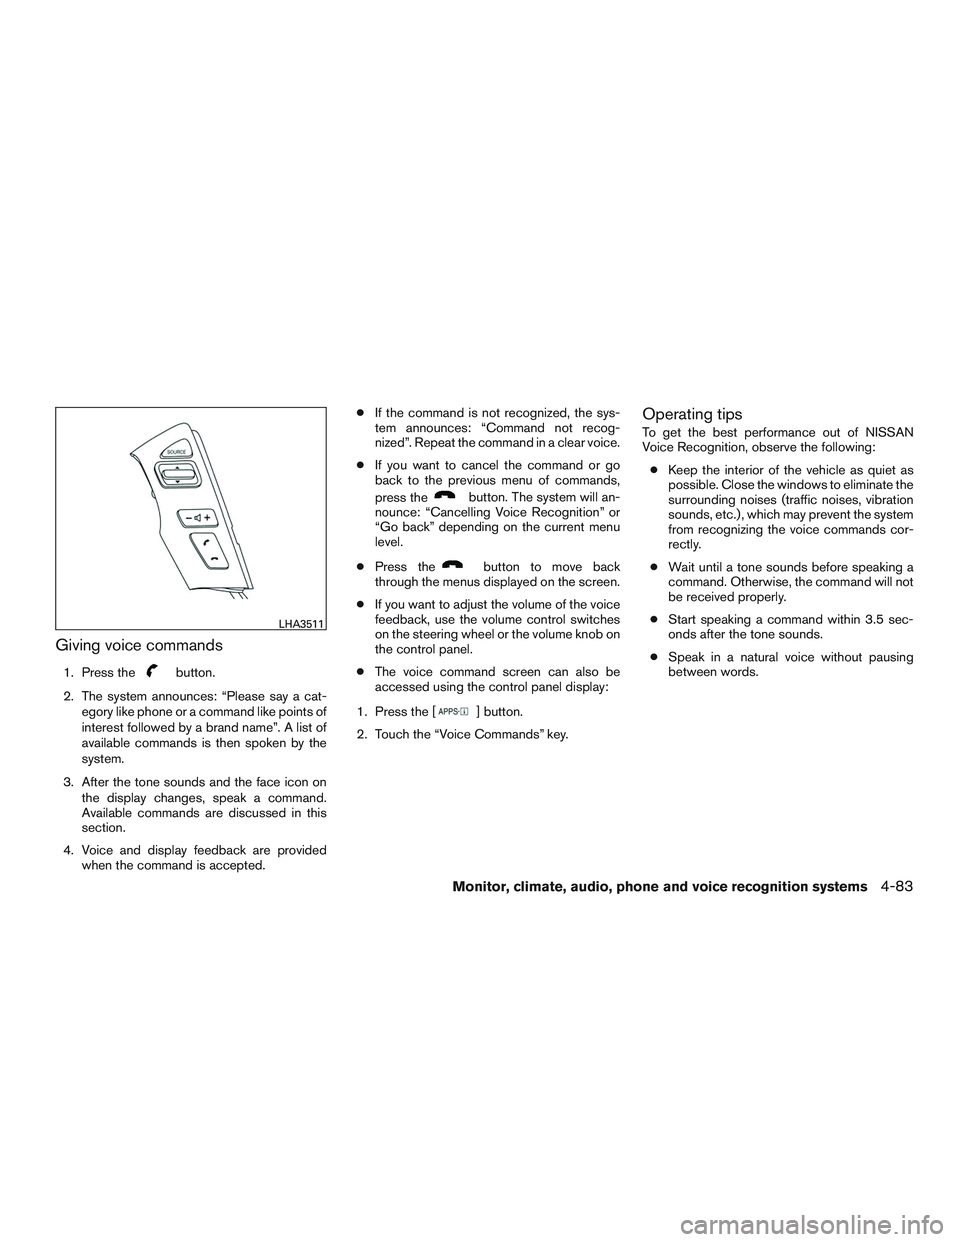
Giving voice commands
1. Press thebutton.
2. The system announces: “Please say a cat- egory like phone or a command like points of
interest followed by a brand name”. A list of
available commands is then spoken by the
system.
3. After the tone sounds and the face icon on the display changes, speak a command.
Available commands are discussed in this
section.
4. Voice and display feedback are provided when the command is accepted. ●
If the command is not recognized, the sys-
tem announces: “Command not recog-
nized”. Repeat the command in a clear voice.
● If you want to cancel the command or go
back to the previous menu of commands,
press the
button. The system will an-
nounce: “Cancelling Voice Recognition” or
“Go back” depending on the current menu
level.
● Press the
button to move back
through the menus displayed on the screen.
● If you want to adjust the volume of the voice
feedback, use the volume control switches
on the steering wheel or the volume knob on
the control panel.
● The voice command screen can also be
accessed using the control panel display:
1. Press the [
] button.
2. Touch the “Voice Commands” key.
Operating tips
To get the best performance out of NISSAN
Voice Recognition, observe the following: ● Keep the interior of the vehicle as quiet as
possible. Close the windows to eliminate the
surrounding noises (traffic noises, vibration
sounds, etc.) , which may prevent the system
from recognizing the voice commands cor-
rectly.
● Wait until a tone sounds before speaking a
command. Otherwise, the command will not
be received properly.
● Start speaking a command within 3.5 sec-
onds after the tone sounds.
● Speak in a natural voice without pausing
between words.
LHA3511
Monitor, climate, audio, phone and voice recognition systems4-83
Page 242 of 380
TROUBLESHOOTING GUIDE
The system should respond correctly to all voice
commands without difficulty. If problems are en-
countered, follow the solutions given in this guide
for the appropriate error. Where the solutions are
listed by number, try each solution in turn, starting
with number one, until the problem is resolved.
Symptom/error messageSolution
The system responds “Command Not
Recognized” or the system fails to rec-
ognize the command correctly. 1. Ensure that the command format is valid. Use the “List Commands” or “What Can I Say?” command under the “Help” menu.
2. Speak clearly without pausing between words and at a level appropriate to the ambient noise level.
3. Ensure that the ambient noise level is not excessive (for example, with the windows open or the defroster on) .
NOTE:
If it is too noisy to use the phone, it is likely that voice commands will not be recognized.
4. If optional words of the command have been omitted, then the command should be tried with these in place.
Monitor, climate, audio, phone and voice recognition systems4-87
Page 245 of 380
WARNING
●Do not leave children or adults who
would normally require the assistance
of others alone in your vehicle. Pets
should also not be left alone. They
could accidentally injure themselves or
others through inadvertent operation of
the vehicle. Also, on hot, sunny days,
temperatures in a closed vehicle could
quickly become high enough to cause
severe or possibly fatal injuries to
people or animals.
● Properly secure all cargo with ropes or
straps to help prevent it from sliding or
shifting. Do not place cargo higher than
the seatbacks. In a sudden stop or col-
lision, unsecured cargo could cause
personal injury.
EXHAUST GAS (carbon monoxide)
WARNING
● Do not breathe exhaust gases; they
contain colorless and odorless carbon
monoxide. Carbon monoxide is danger-
ous. It can cause unconsciousness or
death. ●
Always keep the doors closed when
driving the vehicle. Do not drive with the
doors open and do not attempt to trans-
port long cargo by driving with the
doors open. Doing so can damage the
doors and door hinges. Cargo may also
fall out of the vehicle which may cause
serious personal injury or death.
● If you suspect that exhaust fumes are
entering the vehicle, drive with all win-
dows fully open, and have the vehicle
inspected immediately.
● Do not run the engine in closed spaces
such as a garage.
● Do not park the vehicle with the engine
running for any extended length of time.
● Keep the doors closed while driving,
otherwise exhaust gases could be
drawn into the passenger compartment.
If you must drive with this open, follow
these precautions:
1. Open all the windows.
2. Set the
air recirculation but-
ton to off and the fan control dial to
high to circulate the air. ●
If electrical wiring or other cable con-
nections must pass to a trailer through
the seal on the body, follow the manu-
facturer’s recommendation to prevent
carbon monoxide entry into the vehicle.
● The exhaust system and body should be
inspected by a qualified mechanic
whenever:
a. The vehicle is raised for service.
b. You suspect that exhaust fumes are entering into the passenger
compartment.
c. You notice a change in the sound of the exhaust system.
d. You have had an accident involving damage to the exhaust system, un-
derbody, or rear of the vehicle.
THREE-WAY CATALYST
The three-way catalyst is an emission control
device installed in the exhaust system. Exhaust
gases in the three-way catalyst are burned at
high temperatures to help reduce pollutants.
PRECAUTIONS WHEN STARTING
AND DRIVING
5-2Starting and driving
Page 248 of 380
●Tire pressure rises and falls depending on
the heat caused by the vehicle’s operation
and the outside temperature. Do not reduce
the tire pressure after driving because the
tire pressure rises after driving. Low outside
temperature can lower the temperature of
the air inside the tire which can cause a
lower tire inflation pressure. This may cause
the low tire pressure warning light to illumi-
nate. If the warning light illuminates, check
the tire pressure for all four tires.
● The Tire and Loading Information label (also
referred to as the vehicle placard or tire
inflation pressure label) is located in the
driver’s door opening.
For additional information, refer to “Low tire pres-
sure warning light” in the “Instruments and con-
trols” section and “Tire Pressure Monitoring Sys-
tem (TPMS)” in the “In case of emergency”
section of this manual.WARNING
● If the low tire pressure warning light
illuminates while driving, avoid sudden
steering maneuvers or abrupt braking,
reduce vehicle speed, pull off the road
to a safe location and stop the vehicle
as soon as possible. Driving with under-
inflated tires may permanently damage
the tires and increase the likelihood of
tire failure. Serious vehicle damage
could occur and may lead to an accident
and could result in serious personal in-
jury. Check the tire pressure for all four
tires. Adjust the tire pressure to the
recommended COLD tire pressure
shown on the Tire and Loading Informa-
tion label to turn the low tire pressure
warning light OFF. If you have a flat tire,
replace it with a spare tire as soon as
possible. (For additional information,
refer to “Flat tire” in the “In case of
emergency” section of this manual.)
● Radio waves could adversely affect
electric medical equipment. Those who
use a pacemaker should contact the
electric medical equipment manufac-
turer for the possible influences before
use. ●
Since the spare tire is not equipped with
the TPMS, when a spare tire is mounted
or a wheel is replaced, tire pressure will
not be indicated, the TPMS will not
function and the low tire pressure warn-
ing light will flash for approximately
1 minute. The light will remain on after
1 minute. Contact a NISSAN dealer as
soon as possible for tire replacement
and/or system resetting
● Replacing tires with those not originally
specified by NISSAN could affect the
proper operation of the TPMS.
● Do not inject any tire liquid or aerosol
tire sealant into the tires, as this may
cause a malfunction of the tire pressure
sensors.
CAUTION
Do not place metalized film or any metal
parts (antenna, etc.) on the windows. This
may cause poor reception of the signals
from the tire pressure sensors, and the
TPMS will not function properly.
Some devices and transmitters may temporarily
interfere with the operation of the TPMS and
cause the low tire pressure warning light to illu-
minate.
Starting and driving5-5