2016 NISSAN NV PASSENGER VAN radio
[x] Cancel search: radioPage 240 of 380
●Dial Number
Allows for up to 24 digits to be dialed. After
the number is entered, say “Dial” to initiate
dialing. Say “Correction” to correct the num-
ber entered. Say “Go Back” to return to the
main menu.
● List Phonebook
Starting with the first alphabetical entry in
the vehicle phonebook, the system prompts
for an additional command. Say “Dial” to call
the number of the phonebook entry. Say
“Send Text” to send a text message to the
number of the phonebook entry. Say “Next
Entry” to skip to the next alphabetical entry in
the vehicle phonebook, where the same op-
tions will then be available.
● Recent Calls
The system prompts for an additional com-
mand. Say “Missed Calls”, “Incoming Calls”
or “Outgoing Calls” to display a list of such
calls on the screen.
Speak the number of the entry displayed on
the screen to dial that number or say “Next
Page” to view entries on the next page (if
available) .
● Redial
Redials the last called number. ●
Read Text
Reads an incoming text message. For addi-
tional information, refer to “Bluetooth®
Hands-Free Phone System with Navigation
System” in this section.
● Send Text
Sends a text message. For additional infor-
mation, refer to “Bluetooth® Hands-Free
Phone System with Navigation System” in
this section.
● Select Phone
The system replies “Please use manual con-
trols to continue”. Use manual controls to
change the active phone from among the
listed phones connected to the vehicle.
For additional information, refer to “Bluetooth®
Hands-Free Phone System with Navigation Sys-
tem” in this section.
NAVIGATION SYSTEM VOICE
COMMANDS
The following voice commands are available for
the Navigation System: ● Street Address (address)
● Points of Interest (name)
● POI by Category ●
Home
● Address Book
● Previous Destinations
● Enter Address in Steps
● Cancel Route
For additional information, refer to the separate
Navigation System Owner’s Manual.
AUDIO SYSTEM VOICE
COMMANDS
To access the audio system voice commands: 1. Press the button.
2. Say “Audio”
3. Speak a command from the following avail- able commands:
● Play (AM, FM, etc.)
Allows user to select radio band
● Tune AM (number)
Allows user to tune directly to a desired AM
frequency
● Tune FM (number)
Allows user to tune directly to a desired FM
frequency
Monitor, climate, audio, phone and voice recognition systems4-85
Page 248 of 380
●Tire pressure rises and falls depending on
the heat caused by the vehicle’s operation
and the outside temperature. Do not reduce
the tire pressure after driving because the
tire pressure rises after driving. Low outside
temperature can lower the temperature of
the air inside the tire which can cause a
lower tire inflation pressure. This may cause
the low tire pressure warning light to illumi-
nate. If the warning light illuminates, check
the tire pressure for all four tires.
● The Tire and Loading Information label (also
referred to as the vehicle placard or tire
inflation pressure label) is located in the
driver’s door opening.
For additional information, refer to “Low tire pres-
sure warning light” in the “Instruments and con-
trols” section and “Tire Pressure Monitoring Sys-
tem (TPMS)” in the “In case of emergency”
section of this manual.WARNING
● If the low tire pressure warning light
illuminates while driving, avoid sudden
steering maneuvers or abrupt braking,
reduce vehicle speed, pull off the road
to a safe location and stop the vehicle
as soon as possible. Driving with under-
inflated tires may permanently damage
the tires and increase the likelihood of
tire failure. Serious vehicle damage
could occur and may lead to an accident
and could result in serious personal in-
jury. Check the tire pressure for all four
tires. Adjust the tire pressure to the
recommended COLD tire pressure
shown on the Tire and Loading Informa-
tion label to turn the low tire pressure
warning light OFF. If you have a flat tire,
replace it with a spare tire as soon as
possible. (For additional information,
refer to “Flat tire” in the “In case of
emergency” section of this manual.)
● Radio waves could adversely affect
electric medical equipment. Those who
use a pacemaker should contact the
electric medical equipment manufac-
turer for the possible influences before
use. ●
Since the spare tire is not equipped with
the TPMS, when a spare tire is mounted
or a wheel is replaced, tire pressure will
not be indicated, the TPMS will not
function and the low tire pressure warn-
ing light will flash for approximately
1 minute. The light will remain on after
1 minute. Contact a NISSAN dealer as
soon as possible for tire replacement
and/or system resetting
● Replacing tires with those not originally
specified by NISSAN could affect the
proper operation of the TPMS.
● Do not inject any tire liquid or aerosol
tire sealant into the tires, as this may
cause a malfunction of the tire pressure
sensors.
CAUTION
Do not place metalized film or any metal
parts (antenna, etc.) on the windows. This
may cause poor reception of the signals
from the tire pressure sensors, and the
TPMS will not function properly.
Some devices and transmitters may temporarily
interfere with the operation of the TPMS and
cause the low tire pressure warning light to illu-
minate.
Starting and driving5-5
Page 249 of 380
Some examples are:
– Facilities or electric devices using similar radiofrequencies are near the vehicle.
– If a transmitter set to similar frequencies is being used in or near the vehicle.
– If a computer (or similar equipment) or a DC/AC converter is being used in or near the
vehicle.
Low tire pressure warning light may illuminate in
the following cases. ● If the vehicle equipped with a wheel and tire
without TPMS.
● If the TPMS has been replaced and the ID
has not been registered.
● If the wheel is not originally specified by
NISSAN.
FCC Notice:
For USA:
This device complies with Part 15 of the
FCC Rules. Operation is subject to the fol-
lowing two conditions: (1) This device may
not cause harmful interference, and (2) this
device must accept any interference re-
ceived, including interference that may
cause undesired operation. NOTE:
Changes or modification not expressly ap-
proved by the party responsible for compli-
ance could void the user’s authority to op-
erate the equipment.
For Canada:
This device complies with Industry Canada
license-exempt RSS standard(s) . Opera-
tion is subject to the following two condi-
tions: (1) this device may not cause inter-
ference, and (2) this device must accept any
interference, including interference that
may cause undesired operation of the de-
vice.
AVOIDING COLLISION AND
ROLLOVER
WARNING
Failure to operate this vehicle in a safe
and prudent manner may result in loss of
control or an accident.
Be alert and drive defensively at all times. Obey
all traffic regulations. Avoid excessive speed,
high speed cornering, or sudden steering ma-
neuvers, because these driving practices could
cause you to lose control of your vehicle. As with any vehicle, loss of control could
result in a collision with other vehicles or
objects or cause the vehicle to roll over,
particularly if the loss of control causes the
vehicle to slide sideways.
Be attentive at all times, and avoid driving when
tired. Never drive when under the influence of
alcohol or drugs (including prescription or over-
the-counter drugs which may cause drowsi-
ness) . Always wear your seat belt as outlined in
the “Safety – Seats, seat belts and supplemental
restraint system” section of this manual, and also
instruct your passengers to do so.
Seat belts help reduce the risk of injury in colli-
sions and rollovers.
In a rollover crash, an
unbelted or improperly belted person is
significantly more likely to be injured or
killed than a person properly wearing a
seat belt.OFF-ROAD RECOVERY
While driving, the right side or left side wheels
may unintentionally leave the road surface. If this
occurs, maintain control of the vehicle by follow-
ing the procedure below. Please note that this
procedure is only a general guide. The vehicle
must be driven as appropriate based on the con-
ditions of the vehicle, road and traffic.
1. Remain calm and do not overreact.
5-6Starting and driving
Page 252 of 380
To remove the key from the ignition switch:1. Shift the shift lever to the P (Park) position with the ignition switch in the ON position.
2. Place the ignition switch in the LOCK posi- tion.
3. Remove the key from the ignition switch.
If the shift lever is shifted to the P (Park) position
after the ignition switch is placed in the OFF
position or when the ignition switch cannot be
placed in the LOCK position, proceed as follows
to remove the key. 1. Move the shift lever into the P (Park) posi- tion.
2. Place the ignition switch slightly toward the ON position.
3. Place the ignition switch in the LOCK posi- tion.
4. Remove the key.
The shift lever is designed so it cannot move out
of P (Park) and into any of the other gear posi-
tions if the ignition switch is placed in the OFF
position or if the key is removed from the switch.
The shift lever can be moved if the ignition
switch is in the ON position and the foot
brake pedal is depressed. There is an OFF position between the
LOCK and ON positions. The OFF position
is indicated by a “1” on the ignition switch.
For models without NISSAN Vehicle Immo-
bilizer System: when the ignition switch is
in the OFF position, the steering wheel is
not locked.
In order for the steering wheel to be locked, it
must be turned about 1/8 of a turn clockwise
from the straight up position.
To lock the steering wheel, turn the ignition
to the LOCK position. Remove the key. To
unlock the steering wheel, insert the key
and turn it gently while rotating the steer-
ing wheel slightly right and left.
If the key will not turn from the LOCK posi-
tion, turn the steering wheel to the left or
right while turning the key to unlock the key
cylinder.
IGNITION SWITCH POSITIONS
LOCK: Normal parking position (0)
OFF: (1)
The engine can be turned off without locking the
steering wheel.
ACC: (Accessories) (2)
This position activates electrical accessories
such as the radio when the engine is not running.
ON: Normal operating position (3)
This position turns on the ignition system and the
electrical accessories.
START: (4)
This position starts the engine. As soon as the
engine has started, release the key. It automati-
cally returns to the ON position.
NISSAN VEHICLE IMMOBILIZER
SYSTEM (if so equipped)
The NISSAN Vehicle Immobilizer System will not
allow the engine to start without the use of the
registered key.
If the engine fails to start using a registered key (for
example, when interference is caused by another
registered key, an automated toll road device or
automatic payment device on the key ring) , restart
the engine using the following procedures:
1. Leave the ignition switch in the ON position
for approximately 5 seconds.
2. Turn the ignition switch to the OFF or LOCK position, and wait approximately 10 sec-
onds.
Starting and driving5-9
Page 277 of 380
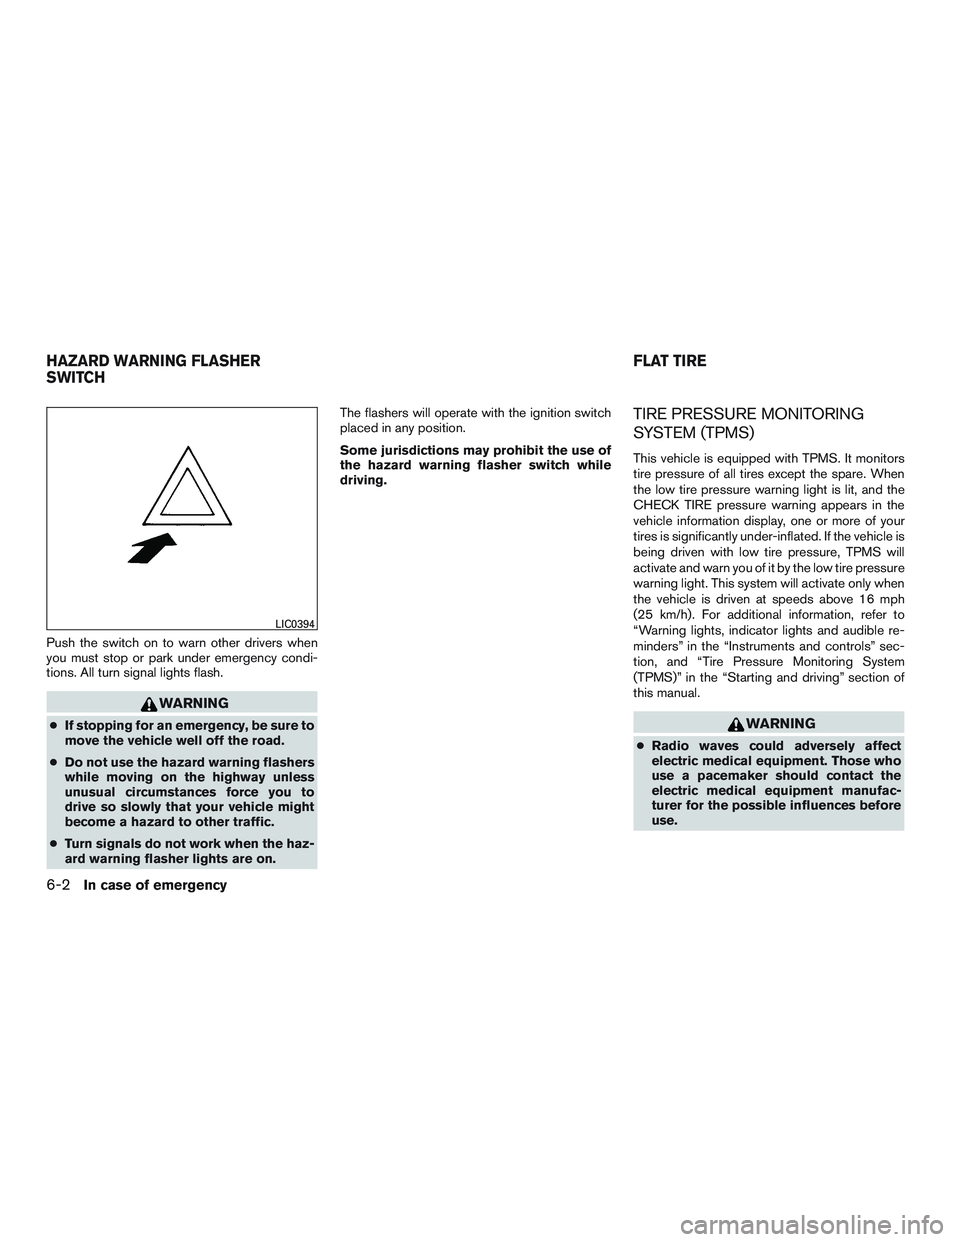
Push the switch on to warn other drivers when
you must stop or park under emergency condi-
tions. All turn signal lights flash.
WARNING
●If stopping for an emergency, be sure to
move the vehicle well off the road.
● Do not use the hazard warning flashers
while moving on the highway unless
unusual circumstances force you to
drive so slowly that your vehicle might
become a hazard to other traffic.
● Turn signals do not work when the haz-
ard warning flasher lights are on. The flashers will operate with the ignition switch
placed in any position.
Some jurisdictions may prohibit the use of
the hazard warning flasher switch while
driving.
TIRE PRESSURE MONITORING
SYSTEM (TPMS)
This vehicle is equipped with TPMS. It monitors
tire pressure of all tires except the spare. When
the low tire pressure warning light is lit, and the
CHECK TIRE pressure warning appears in the
vehicle information display, one or more of your
tires is significantly under-inflated. If the vehicle is
being driven with low tire pressure, TPMS will
activate and warn you of it by the low tire pressure
warning light. This system will activate only when
the vehicle is driven at speeds above 16 mph
(25 km/h). For additional information, refer to
“Warning lights, indicator lights and audible re-
minders” in the “Instruments and controls” sec-
tion, and “Tire Pressure Monitoring System
(TPMS)” in the “Starting and driving” section of
this manual.
WARNING
●
Radio waves could adversely affect
electric medical equipment. Those who
use a pacemaker should contact the
electric medical equipment manufac-
turer for the possible influences before
use.
LIC0394
HAZARD WARNING FLASHER
SWITCH FLAT TIRE
6-2In case of emergency
Page 292 of 380
REMOVING SPOTS
Remove tar and oil spots, industrial dust, insects,
and tree sap as quickly as possible from the
surface of the paint to avoid lasting damage or
staining. Special cleaning products are available
at a NISSAN dealer or any automotive accessory
store.
UNDERBODY
In areas where road salt is used in winter, it is
necessary to clean the underbody regularly in
order to prevent dirt and salt from building up and
causing the acceleration of corrosion on the un-
derbody and suspension. Before the winter pe-
riod and again in the spring, the underseal must
be checked and, if necessary, re-treated.
GLASS
Use glass cleaner to remove smoke and dust film
from the glass surfaces. It is normal for glass to
become coated with a film after the vehicle is
parked in the hot sun. Glass cleaner and a soft
cloth will easily remove this film.
CAUTION
When cleaning the inside of the windows,
do not use sharp-edged tools, abrasive
cleaners or chlorine-based disinfectant
cleaners. They could damage the electrical
conductors, radio antenna elements or
rear window defroster elements.
CHROME PARTS
Clean all chrome parts regularly with a non-
abrasive chrome polish to maintain the finish.
TIRE DRESSINGS
NISSAN does not recommend the use of tire
dressings. Tire manufacturers apply a coating to
the tires to help reduce discoloration of the rub-
ber. If a tire dressing is applied to the tires, it may
react with the coating and form a compound. This
compound may come off the tire while driving and
stain the vehicle paint.
If you choose to use a tire dressing, take the
following precautions:● Use a water-based tire dressing. The coat-
ing on the tire dissolves more easily than
with an oil-based tire dressing. ●
Apply a light coat of tire dressing to help
prevent it from entering the tire
tread/grooves (where it would be difficult to
remove) .
● Wipe off excess tire dressing using a dry
towel. Make sure the tire dressing is com-
pletely removed from the tire tread/grooves.
● Allow the tire dressing to dry as recom-
mended by the tire dressing manufacturer.
Appearance and care7-3
Page 372 of 380
10 Index
A
Active brake limited slip (ABLS) system . . .5-24
Air bag (See supplemental restraint
system) .....................1-51
Air bag system Front (See supplemental front impact
air bag system) ...............1-58
Airbagwarninglabels.............1-62
Airbagwarninglight...........1-62,2-15
Air bag warning light, supplemental . .1-62, 2-15
AirCleaner ...................8-21
Air cleaner housing filter ............8-21
Air conditioner Air conditioner operation ..........4-21
Air conditioner service ...........4-29
Air conditioner specification label .....9-12
Air conditioner system refrigerant and
oil recommendations .............9-7
Air conditioner system refrigerant
recommendations ..............9-7
Heater and air conditioner
controls................4-18,4-26
Rear seat air conditioner ..........4-28
Servicing air conditioner .......4-22,4-29
Alarm system (See vehicle security system). .2-23
Anchor point locations .............1-34
Antenna .....................4-59
Antifreeze ....................5-30
Anti-lock brake warning light ..........2-12
Anti-lock Braking System (ABS) ........5-23
Apps .......................4-60 Audible reminders
...............2-18
Audio system ..................4-29
AM-FM radio with compact disc (CD)
player.................4-37,4-41
AMradioreception.............4-30
Bluetooth®audio..............4-56
Bluetooth® streaming audio ........4-56
Compact disc (CD) player . .4-39, 4-43, 4-50
FM/AM radio with compact disc (CD)
player.................4-37,4-41
FM/AM/SAT radio with compact disc (CD)
player ....................4-45
FMradioreception.............4-30
iPod® Player ................4-53
iPod® player operation ...........4-53
Radio ....................4-29
Steering wheel audio control switch . . .4-58
USB interface ................4-51
USB (Universal Serial Bus) Connection
Port .....................4-51
Automatic Automatic power window switch .....2-47
Automatic transmission position indicator
light .....................2-16
Driving with automatic transmission ....5-12
Automatic anti-glare inside mirror .......3-17
Automatic door locks ..............3-8
Automatic transmission fluid temperature
gauge.......................2-7
AUXjack..............4-40,4-44,4-51 B
Back button ....................4-7
Back door .....................3-7
Battery ..................5-30, 8-17
Charge warning light ............2-13
Battery replacement Keyfob................8-27,8-28
Before starting the engine ...........5-10
Belt (See drive belt) ..............8-19
Block heater Engine ....................5-31
Bluetooth® audio ................4-56
Bluetooth® Hands-Free Phone System with
Navigation System ...............4-75
Bluetooth® Hands-Free Phone System without
Navigation System ...............4-61
Bluetooth® streaming audio with Navigation
System .....................4-56
Boosterseats..................1-48
Brake Anti-lock Braking System (ABS) ......5-23
Brake fluid ..................8-16
Brakelight(Seestoplight).........8-31
Brake system ................5-22
Brakewarninglight.............2-12
Brakewearindicators........2-18,8-23
Parking brake operation ..........5-17
Self-adjusting brakes ............8-23
Brake fluid ....................8-16
Brakes ......................8-23
Brake system ..................5-22
Page 373 of 380
Break-in schedule................5-19
Brightness/contrastbutton............4-9
Brightness control Instrument panel ...............2-29
Bulb replacement ................8-31
C
Capacities and recommended fuel/lubricants . .9-2
Cargo(Seevehicleloadinginformation)....9-13
Car phone or CB radio .............4-61
CD care and cleaning ..............4-58
CD player (See audio system) . .4-39, 4-43, 4-50
Check engine indicator light
(Seemalfunctionindicatorlamp)........2-16
Checkingbulbs .................2-11
Check tire pressure ...............2-22
Child restraints .......1-27,1-27,1-29,1-31
LATCH (Lower Anchors and Tethers for
CHildren) System ..............1-31
Precautions on child
restraints.........1-30,1-37,1-44,1-49
Top tether strap anchor point locations . .1-34
Child restraint with top tether strap .......1-34
Child safety sliding door lock ...........3-8
Chimes, audible reminders ...........2-18
Cleaningexteriorandinterior........7-2,7-4
Clock ...................4-38,4-42
Clock set/adjustment ...........4-7,4-38
Clock setting (models with Navigation System)..4-7
Clock setting
(models without Navigation System) . .4-38, 4-42
C.M.V.S.S. certification label ..........9-11
Cold weather driving ...............5-30
Compact disc (CD) player ....4-39,4-43,4-50Compass
......................2-8
Compass display .................2-8
Connect phone .................4-60
Console box ...................2-42
Control panel buttons ...............4-4
Back button ..................4-7
Brightness/contrast button ..........4-9
Enterbutton..................4-4
Setting button .................4-7
With navigation system .........4-4,4-5
Controls Audio controls (steering wheel) .......4-58
Heater and air conditioner controls. .4-18, 4-26
Rear seat air conditioner ..........4-28
Coolant Capacities and recommended
fuel/lubricants .................9-2
Changingenginecoolant..........8-10
Checking engine coolant level .......8-10
Engine coolant temperature gauge .....2-5
Corrosion protection ...............7-6
Cruisecontrol ...........5-17,5-17,5-18
Cupholders...................2-40
Curtainside-impactandrolloverairbag....1-59
D
Daytime light system ...............2-28
Defroster switch Rear window and outside mirror defroster
switch.....................2-26
Dimensionsandweights.............9-9
Dimmer switch for instrument panel ......2-29
Display controls (see control panel buttons) . .4-4
Door open warning light .............2-13 Doors
........................3-3
Drive belt .....................8-19
Driving Cold weather driving .............5-30
Driving with automatic transmission ....5-12
Precautions when starting and driving ....5-2
Driving the vehicle ................5-11
E
Economy-fuel..................5-21
Emission control information label .......9-12
Emission control system warranty .......9-29
Engine Before starting the engine ..........5-10
Blockheater.................5-31
Capacities and recommended
fuel/lubricants.................9-2
Changing engine coolant ..........8-10
Changingengineoil.............8-12
Changing engine oil filter ..........8-14
Checking engine coolant level .......8-10
Checking engine oil level ..........8-11
Engine compartment check locations ....8-7
Engine coolant temperature gauge .....2-5
Engine cooling system ............8-9
Engineoil...................8-11
Engine oil and oil filter recommendation . . .9-6
Engineoilpressuregauge..........2-6
Engine oil pressure warning light ......2-13
Engine oil viscosity ..............9-7
Engine serial number ............9-11
Engine specifications .............9-8
Starting the engine .............5-10
Engine coolant temperature gauge .......2-5
10-2