Page 33 of 36

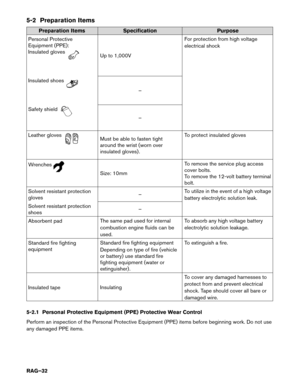
5-2.2 Daily Inspection
This
inspection is performed before and after use. The worker who will be using the items should perform
the inspection and check for deterioration and damage. • Insulated rubber gloves should be inspected for scratches, holes and tears. (Visual check and airleakage test)
• Insulated safety boots should be inspected for holes, damage, nails, metal pieces, wear or other problems on the soles. (Visual check)
• Insulated rubber sheet should be inspected for tears. (Visual check)
5-2.3 Insulated Tools
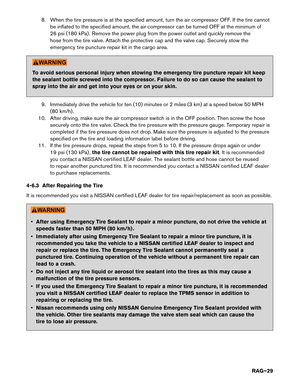
When performing work at locations where high voltage is applied (such as terminals) , use insulated tools
meeting 1,000V/300A specifications.
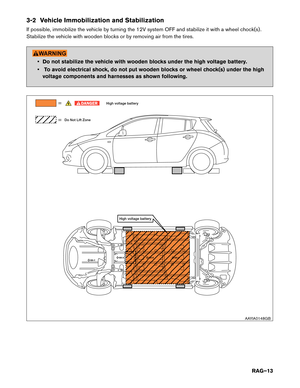
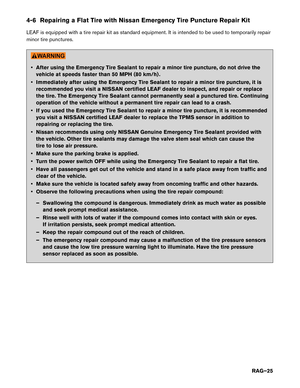
5-3 Removing the Service Plug •
Do not remove the service plug without always wearing appropriate Personal
Protective
Equipment (PPE) to help protect the responder from serious injury or death
by electrical shock.
• Immediately cover the service plug socket with insulated tape. The high voltage
battery
retains high voltage power even when the service plug is removed. To avoid
electric shock, NEVER touch the terminals inside the socket. To avoid unintended reinstallation and risk of electrical shock and severe personal injury
or
death, the service plug should be securely stored away from the vehicle while the vehicle
is in storage.
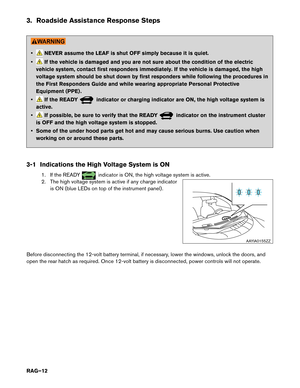
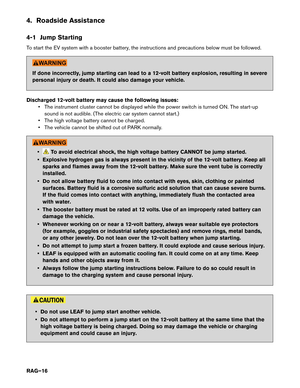
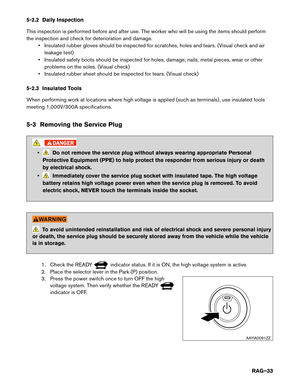
1. Check the READY indicator status. If it is ON, the high voltage system is active.
2.
Place the selector lever in the Park (P) position.
3. Press the power switch once to turn OFF the high voltage system. Then verify whether the READY indicator is OFF.
AAYIA0091ZZ
RAG–33
Page 34 of 36
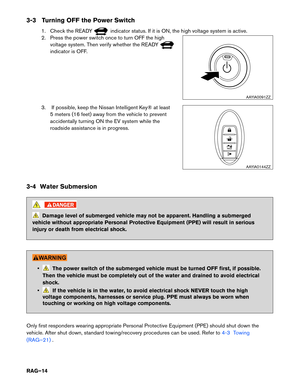
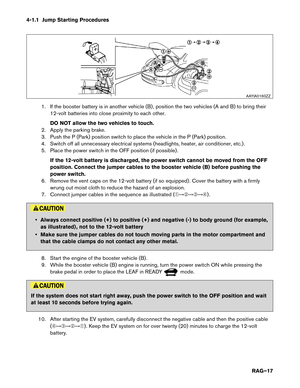
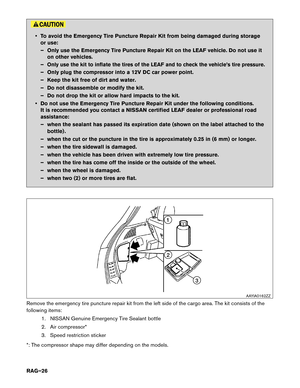
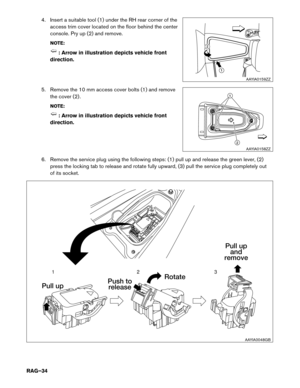
4. Insert a suitable tool (1) under the RH rear corner of the
access trim cover located on the floor behind the center
console. Pry up (2) and remove.
NOTE: : Arrow in illustration depicts vehicle front
direction.
5.
Remove the 10 mm access cover bolts (1) and remove
the cover (2) .
NOTE: : Arrow in illustration depicts vehicle front
direction.
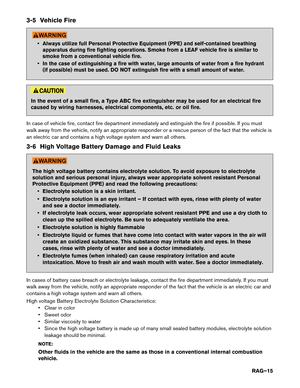
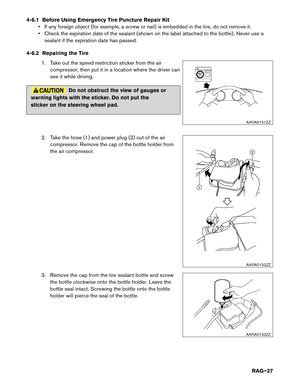
6.
Remove the service plug using the following steps: (1) pull up and release the green lever, (2)
press the locking tab to release and rotate fully upward, (3) pull the service plug completely out
of its socket. 12
AAYIA0159ZZ
1
2
AAYIA0158ZZ
1
2
3
Pull up Rotate
Push to
release Pull up
and
remove
AAYIA0048GB
RAG–34
Page 35 of 36
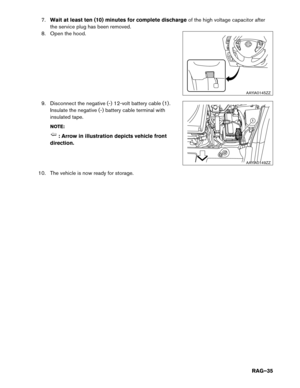
7.
Waitat least ten (10) minutes for complete discharge of the high voltage capacitor after
the service plug has been removed.
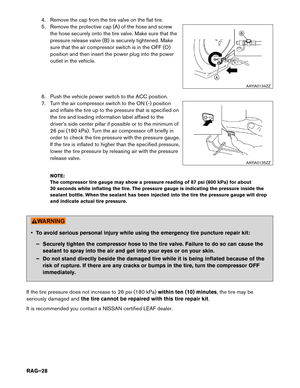
8. Open the hood.
9. Disconnect the negative (-) 12-volt battery cable (1) . Insulate the negative (-) battery cable terminal with
insulated tape.
NOTE: : Arrow in illustration depicts vehicle front
direction.
10.
The vehicle is now ready for storage. AAYIA0145ZZ
1
AAYIA0149ZZ
RAG–35
Page 36 of 36
© 2015 Nissan North America, Inc.
All
rights reserved.
This document may not be altered without the written permission of Nissan North America, Inc.
Pub. No. RG16EA0ZE0U0
RAG–36


 under the RH rear corner of the
access trim cover located on the floor behind the center
console. Pry up (2) and remove.
NOTE: : Arrow in illustration depicts vehicle fro")
 minutes for complete discharge of the high voltage capacitor after
the service plug has been removed.
8. Open the hood.
9. Disconnect the negative (-) 12-volt battery cable (1")
