Page 17 of 24

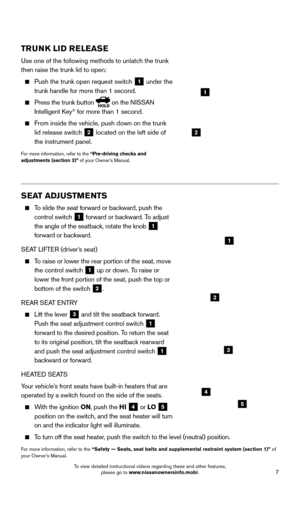
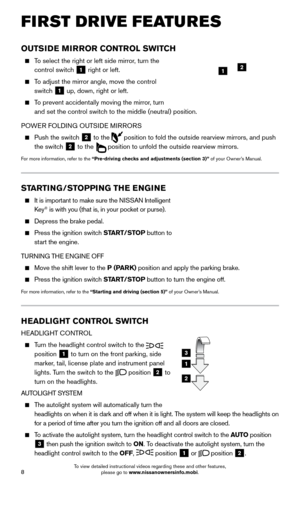
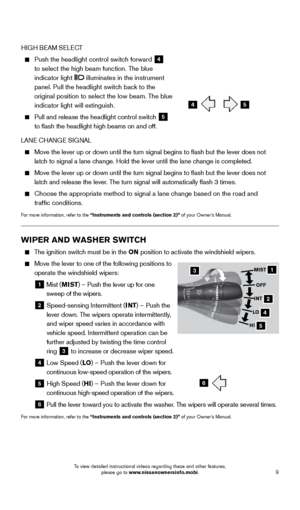
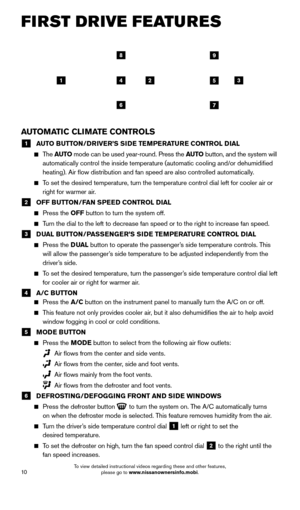
15
FOR DEVICES OTHER THAN PHONES
1.
Press the
SETTING button on the instrument
panel and select the “Bluetooth” key on
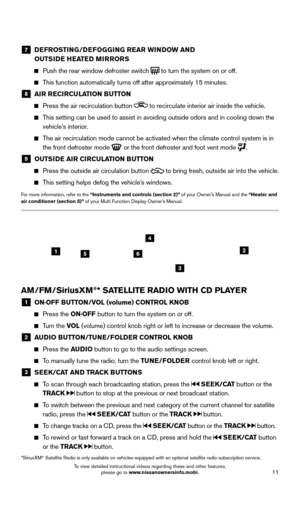
the display.
2. Select the “Connect Bluetooth” key
.
3.
A pop-up bo
x will appear on the screen,
prompting you to confirm that the connection is
for the phone system. Touch the “No” key.
4. Initiate connecting from the device.
•
T
he connecting procedure varies according to
each device model. For detailed connecting
instructions and a list of compatible
devices, please visit
www.nissanusa.com/bluetooth.
•
W
hen prompted for a PIN, enter “1234” from
the device. (The PIN is assigned by NISSAN
and cannot be changed.)
•
Either enter the 4-digit P
IN into your device, or
if your device supports SSP (Simple Secure
Pairing), the PIN you entered in the previous
step may be replaced with a six-digit PIN.
Confirm that the PIN on the vehicle’s display
matches the PIN displayed on your device.
5.
V
erify that the system confirms that your device
has been selected as an audio player.
For more information, refer to the “Audio system (section 3)” of your Multi Function Display Owner’s Manual or please
visit www.nissanusa.com/bluetooth.
BLUETOOTH® HANDS-FREE PHONE SYSTEM
A cellular telephone should not be used
while driving so full attention may be given to
vehicle operation.*
Before using the hands-free feature, you need to
set up or connect the system to recognize your
compatible cellular phone(s). Five Bluetooth
®-
enabled phones can be connected. After set-up,
the system automatically connects with a connected phone when the igniti\
on is in the
ACC or ON position as long as the phone is on and in the vehicle.
*Some jurisdictions prohibit the use of cellular telephones while drivin\
g.
1852879_16a_GTR_QRG_Guts_123014.indd 1512/30/14 11:37 AM
To view detailed instructional videos regarding these and other features, please go to www.nissanownersinfo.mobi.
Page 18 of 24

16
SYSTEM GUIDE
SYSTEM OPERATING TIPS
Press the button to interrupt the voice prompts at any time and speak a command
after the tone.
This system has an Alternate Command Mode setting that allows the total number and length of prompts to be reduced. When activated, you may speak second level
commands with the main menu command. For example, press the
button and after
the tone say “Call” followed by a stored name. Refer to the “Voice recognition
(section 8)” of your Multi Function Display Owner’s Manual for more information.
The “Help” command can be used to hear a list of available commands\
at any time.
Reduce bac kground noise as much as possible by closing windows and pointing
HVAC vents away from the ceiling.
Speak naturally without long pauses and without raising your voice.
When speaking phonebook names, please be aware some phones require the la\
st name to be spoken before the first name. For example, “Michael Smith” may be
spoken as “Smith Michael”.
To cancel a Voice Recognition session, simply wait 5 seconds, say “Cancel” or “Quit”, or press and hold the
button for 5 seconds.
If the Voice Recognition system does not recognize your voice commands, train the system using the Voice Adaptation Mode. See your Owner’s Manual for
detailed information.
For more detailed information and instructions, refer to your cellular phone’s Owner’s Manual and visit www.nissanusa.com/bluetooth.
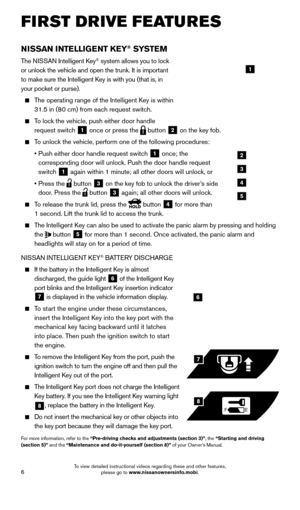
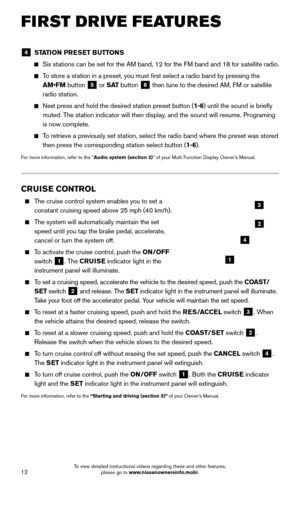
CONNECTING PROCEDURE
The vehicle must be stationary when connecting the phone.
1.
Press the PHONE button on the control panel
1 or press the
button on the steering wheel
and touch the “Connect Phone” key.
2.
Initiate connecting from the phone.
•
T
he connecting procedure varies
according to each cellular phone model.
For detailed connecting instructions and
a list of compatible phones, please visit
www.nissanusa.com/bluetooth.
•
W
hen prompted for a PIN, enter “1234” from
the handset. (The PIN is assigned by NISSAN
and cannot be changed.)
3.
W
hen the connecting is complete, the screen will
return to the Phone menu display.
1
1852879_16a_GTR_QRG_Guts_123014.indd 1612/30/14 11:37 AM
To view detailed instructional videos regarding these and other features, please go to www.nissanownersinfo.mobi.
Page 19 of 24

17
PHONEBOOK SETUP
Depending on your cellular phone, the system may automatically download your
cellular phone’s entire phonebook to the vehicle’s Bluetooth® system.
If the phonebook does not download automatically, up to 40 entries can be manually downloaded.
To manually download entries:
1. P
ress the
button and select the “Quick
Dial” key.
2
.
S
elect the “Add New” key at the top of
the display. There are different methods to
input a phone number. Select one of the
following options:
•
“
Copy from Call History”- to save a number
from the Outgoing, Incoming or Missed
Calls lists.
•
“
Copy from the Phonebook”- to save a
number that has been downloaded from your
handset to the vehicle.
•
“
Enter Number by Keypad”- to input the number and name manually.
MAKING A CALL
To make a call, follow this procedure:
1
.
Press the
button on the steering wheel.
The Phone menu will appear on the control
panel display.
2
.
S
elect the “Quick Dial”, “Call History”,
“Phonebook” or “Dial Number” key.
3
.
S
elect the desired entry from the list.
4
.
S
elect “Call” to start dialing the number.
RECEIVING/ENDING A CALL
To accept the call, press the button on the
steering wheel or touch the “Answer” key.
To reject the call, touch the “Reject Call” key.
To hang-up, press the
button or touch the
“Hang up” key.
For more information, refer to the “Bluetooth® Hands-Free Phone
System (section 4)” of your Multi Function Display Owner’s Manual
or please visit www.nissanusa.com/bluetooth.
1852879_16a_GTR_QRG_Guts_123014.indd 1712/30/14 11:37 AM
To view detailed instructional videos regarding these and other features, please go to www.nissanownersinfo.mobi.
Page 20 of 24

18
NAVIGATION SYSTEM
The Navigation System starts when the ignition switch is placed in the ACC or ON
position. To help ensure safe driving, some functions are grayed out or muted while driving.
Park the vehicle in a safe location and then operate the Navigation System.
STORING YOUR HOME LOCATION
IN YOUR ADDRESS BOOK
Press the DEST button.
Touch the “Home (Add New)” key. If you have
already stored your home, this key may not appear.
When you touch the “Home (Add New)” key,
a confirmation message is displayed.
Touch the “Yes” key.
Make sure the correct region is selected. To change the region, touch the “Change Region”
key and select the appropriate region.
Touch the “Street Address” key. A character input
screen is displayed.
Enter the street number of your home then touc h
the “OK” key.
Enter your street name then touc h the “OK” key.
The map screen is displayed.
Press the directional buttons to adjust your home
location if necessary. After adjusting the location,
touch the “ENTER” key.
Your home is displayed at the center of the map.
A confirmation message is displayed, and the
system sets your home as the destination.
SYSTEM GUIDE
1852879_16a_GTR_QRG_Guts_123014.indd 1812/30/14 11:38 AM
To view detailed instructional videos regarding these and other features, please go to www.nissanownersinfo.mobi.
Page 21 of 24

19
Press the MAP button to return to the current
location map screen. The home icon is
displayed on the screen.
SETTING A STREET ADDRESS AS A DESTINATION
Press the DEST button.
Touch the “Street Address” key. A character input
screen is displayed.
Enter the house number; when finished, touc h the
“OK” key. If you do not know the house number,
touch the “No House #” key.
Enter the name of the street. After finishing the
entry, touch the “List” key. A list of possible street
names is displayed.
Touch the correct name of the destination
from the list. You might need to touch the up or
down arrow keys to find the preferred street name.
The selected destination is displayed at the center
of the map. Touch the “Start” key after confirming
the location of the displayed destination. The
system sets the destination to the selected
location and starts calculating a route.
For more information, refer to the “Navigation (section 2)” of your
Multi Function Display Owner’s Manual.
1852879_16a_GTR_QRG_Guts_123014.indd 1912/30/14 11:38 AM
To view detailed instructional videos regarding these and other features, please go to www.nissanownersinfo.mobi.
Page 22 of 24

20
SYSTEM GUIDE
HOMELINK® UNIVERSAL TRANSCEIVER
The HomeLink® Universal Transceiver can learn and consolidate the functions of up to
three different hand-held transmitters, operating items such as garage doors, property
gates, outdoor and indoor lights or alarm systems.
To program the HomeLink® Universal Transceiver:
•
P
osition the handheld transceiver 1-3 in (26-76 mm) away from the HomeLink surface,
keeping the HomeLink indicator light in view.
•
Press and hold the desired HomeLink button and the handheld transmitter \
button
simultaneously until the HomeLink indicator light flashes slowly and then ra\
pidly.
•
B
oth buttons may be released when the indicator light flashes rapidly.
To verify the programing is complete, press and hold the HomeLink button \
and observe the indicator light:
•
A solid, continuous light indicates the programing is complete and the H\
omeLink
button will activate your device.
•
A blinking light that turns to a solid, continuous light after 2 seconds\
indicates
additional steps are required to complete the programing.
An additional person may make the remaining steps easier . To complete the
programing process:
•
At the receiver of the device that you are programing to the HomeLink bu\
tton, press
and release the learn or smart button (the name may vary by manufacture\
r, but it is
usually located near where the hanging antenna wire is attached to the unit). You have
approximately 30 seconds to initiate the following step.
•
Press and hold the programed HomeLink button for 2 seconds and release.
You may have to repeat the previous two steps up to 3 times to complete t\
he programing process. HomeLink should now activate your device.
For more information, refer to the “Instruments and controls (section 2)” of your Owner’s Manual, the HomeLink website
at www.homelink.com or call 1-800-355-3515.
HOMELINK
1852879_16a_GTR_QRG_Guts_123014.indd 2012/30/14 11:38 AM
To view detailed instructional videos regarding these and other features, please go to www.nissanownersinfo.mobi.
Page 23 of 24
MEMO
1852879_16a_GTR_QRG_Cover_123014.indd 512/30/14 11:39 AM
Page 24 of 24

To view detailed instructional videos,")
Nissan, the Nissan Brand Symbol, Z and
Nissan model names are Nissan trademarks.
©
2015 Nissan North America, Inc.
QR16E A 0R35U0Printing: Februar y 2015 (09)
To view detailed instructional videos,
go to www.nissanownersinfo.mobi/2016/gtr
or snap this barcode with an appropriate barcode reader.
This Quick Reference Guide is intended to provide an overview of some of the unique features of your new vehicle. Please see
your Owner’s Manual for important safety information and system operation limitations. Features and equipment in your vehicle
may vary depending on model, trim level, options selected, order, date of production, region or availability. Therefore, you may find
information about features or equipment that are not included or installed on your vehicle.
All information, specifications and illustrations in this Quick Reference Guide are those in effect at the time of printing. NISSAN
reserves the right to change specifications, performance, design or component suppliers witho\
ut notice and without obligation.
From time to time, NISSAN may update or revise this Quick Reference Guide to provide owners with the most accurate
information currently available. Please carefully read and retain, with this Quick Reference Guide, all revision updates sent to you
by NISSAN to ensure you have access to accurate and up-to-date information reg\
arding your vehicle. Current versions of vehicle
Quick Reference Guides, Owner’s Manuals and any updates can also be found in the Owner section of the \
NISSAN website at
https://owners.nissanusa.com/nowners/navigation/manualsGuide. If you have questions concerning any information
in your Owner’s Manual, contact NISSAN Consumer Affairs. See the NISSAN CUSTOMER CARE PROGRAM page in the
Owner’s Manual for contact information.
Helpful Resources
Below is a list of helpful resources that can be used to learn
more about the vehicle’s systems and feature operations.
Vehicle Owner’s Manual
Navigation Owner ’s Manual (if so equipped)
Printed Quick Reference Guide (this document)
www.NissanUSA.com/bluetooth
www.NissanUSA.com/connect
www.youtube.com/user/NissanUSA
NISSAN Consumer Affairs: 1-800-647-7261
Electronic Quic k Reference Guide
(Use Quick Response (QR) code or URL below.)
1852879_16a_GTR_QRG_Cover_123014.indd 212/30/14 11:39 AM
Page:
< prev 1-8 9-16 17-24