2016 NISSAN 370Z COUPE Head light
[x] Cancel search: Head lightPage 82 of 428
WARNING
If the supplemental air bag warning
light is on, it could mean that the front
air bag, side air bag and curtain air bag
systems and/or pretensioner system
will not operate in an accident. To help
avoid injury to yourself or others, have
your vehicle checked by a dealer as
soon as possible.
Vehicle Dynamic Control (VDC)
warning light
When the ignition switch is in the ON position,
the Vehicle Dynamic Control (VDC) warning
light illuminates and then turns off.
The light will blink when the VDC system or the
traction control system is operating, thus alerting
the driver that the vehicle is nearing its traction
limits. The road surface may be slippery.
When the VDC warning light illuminates when
the VDC system is turned on, this light alerts the
driver to the fact that the VDC system’s fail-safe
mode is operating, for example the VDC system
may not be functioning properly. Have the
system checked by a NISSAN dealer. If a
malfunction occurs in the system, the VDC system function will be canceled but the vehicle
is still driveable. For additional information, see
“Vehicle Dynamic Control (VDC) system” (P.5-
28) of this manual.
INDICATOR LIGHTS
Cruise indicator light
Cruise main switch indicator:
This light illuminates when the cruise control
main switch is pushed. The light turns off when
the main switch is pushed again. When the
cruise main switch indicator light illuminates, the
cruise control system is operational. (See
“Cruise control” (P.5-21).)
Cruise malfunction:
If the cruise indicator light blinks while the
engine is running, it may indicate the cruise
control system is not functioning properly. Have
the system checked by a NISSAN dealer. (See
“Cruise control” (P.5-21).)
Exterior light indicator
This indicator illuminates when the headlight
switch is turned to the AUTO,orposition and the front parking lights, instrument
panel lights, rear combination lights, license
plate lights or headlights are on. The indicator
turns off when these lights are turned off.
Front passenger air bag status light
The front passenger air bag status light (),
located on the center of the instrument panel,
will be lit and the passenger front air bag will be
OFF depending on how the front passenger
seat is being used.
For front passenger air bag status light opera-
tion, see “NISSAN Advanced Air Bag System
(front seats)” (P.1-35) of this manual.
High beam indicator light
This light comes on when the headlight high
beam is on and goes out when the low beam is
selected.
Malfunction Indicator Light (MIL)
If the malfunction indicator light comes on
steady or blinks while the engine is running, it
may indicate a potential emission control mal-
function.
The malfunction indicator light may also come on
steady if the fuel-filler cap is loose or missing, or
if the vehicle runs out of fuel. Check to make
sure the fuel-filler cap is installed and closed
tightly, and that the vehicle has at least 3 US
gallons (11.4 liters) of fuel in the fuel tank.
After a few driving trips, the
light should
turn off if no other potential emission control
Instruments and controls2-15
Page 96 of 428
SIC2045
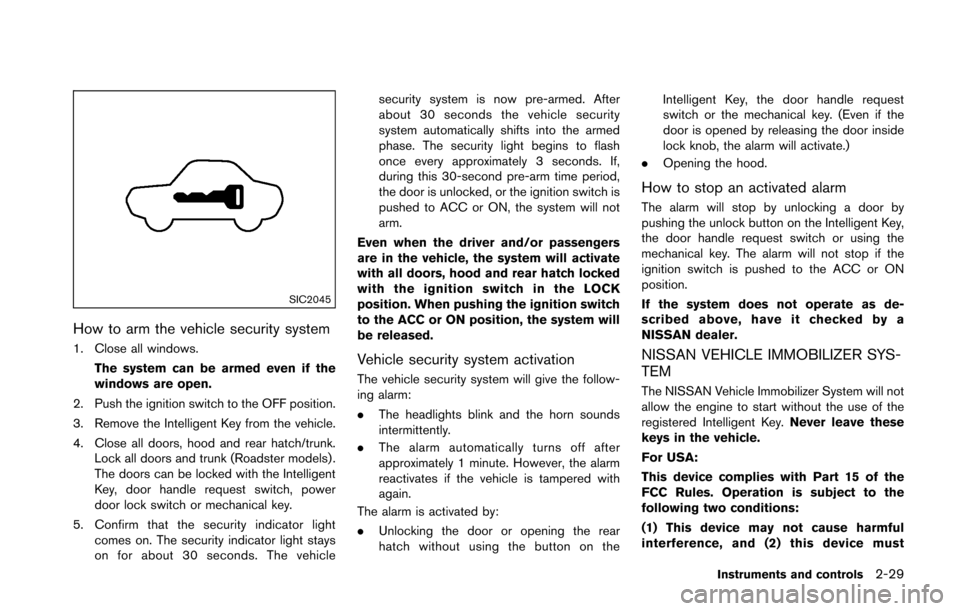
How to arm the vehicle security system
1. Close all windows.The system can be armed even if the
windows are open.
2. Push the ignition switch to the OFF position.
3. Remove the Intelligent Key from the vehicle.
4. Close all doors, hood and rear hatch/trunk. Lock all doors and trunk (Roadster models) .
The doors can be locked with the Intelligent
Key, door handle request switch, power
door lock switch or mechanical key.
5. Confirm that the security indicator light comes on. The security indicator light stays
on for about 30 seconds. The vehicle security system is now pre-armed. After
about 30 seconds the vehicle security
system automatically shifts into the armed
phase. The security light begins to flash
once every approximately 3 seconds. If,
during this 30-second pre-arm time period,
the door is unlocked, or the ignition switch is
pushed to ACC or ON, the system will not
arm.
Even when the driver and/or passengers
are in the vehicle, the system will activate
with all doors, hood and rear hatch locked
with the ignition switch in the LOCK
position. When pushing the ignition switch
to the ACC or ON position, the system will
be released.Vehicle security system activation
The vehicle security system will give the follow-
ing alarm:
. The headlights blink and the horn sounds
intermittently.
. The alarm automatically turns off after
approximately 1 minute. However, the alarm
reactivates if the vehicle is tampered with
again.
The alarm is activated by:
. Unlocking the door or opening the rear
hatch without using the button on the Intelligent Key, the door handle request
switch or the mechanical key. (Even if the
door is opened by releasing the door inside
lock knob, the alarm will activate.)
. Opening the hood.
How to stop an activated alarm
The alarm will stop by unlocking a door by
pushing the unlock button on the Intelligent Key,
the door handle request switch or using the
mechanical key. The alarm will not stop if the
ignition switch is pushed to the ACC or ON
position.
If the system does not operate as de-
scribed above, have it checked by a
NISSAN dealer.
NISSAN VEHICLE IMMOBILIZER SYS-
TEM
The NISSAN Vehicle Immobilizer System will not
allow the engine to start without the use of the
registered Intelligent Key. Never leave these
keys in the vehicle.
For USA:
This device complies with Part 15 of the
FCC Rules. Operation is subject to the
following two conditions:
(1) This device may not cause harmful
interference, and (2) this device must
Instruments and controls2-29
Page 100 of 428
XENON HEADLIGHTS
WARNING
HIGH VOLTAGE
. When xenon headlights are on, they
produce a high voltage. To prevent
an electric shock, never attempt to
modify or disassemble. Always have
your xenon headlights replaced at a
NISSAN dealer.
. Xenon headlights provide consider-
ably more light than conventional
headlights. If they are not correctly
aimed, they might temporarily blind
an oncoming driver or the driver
ahead of you and cause a serious
accident. If headlights are not aimed
correctly, immediately take your ve-
hicle to a NISSAN dealer and have
the headlights adjusted correctly.
When the xenon headlight is initially turned on,
its brightness or color varies slightly. However,
the color and brightness will soon stabilize.
. The life of xenon headlights will be
shortened by frequent on-off opera-
tion. It is generally desirable not to turn off the headlights for short intervals
(for example, when the vehicle stops at
a traffic signal) .
. If the xenon headlight bulb is close to
burning out, the brightness will drasti-
cally decrease, the light will start
blinking, or the color of the light will
become reddish. If one or more of the
above signs appear, contact a NISSAN
dealer.
SIC3994
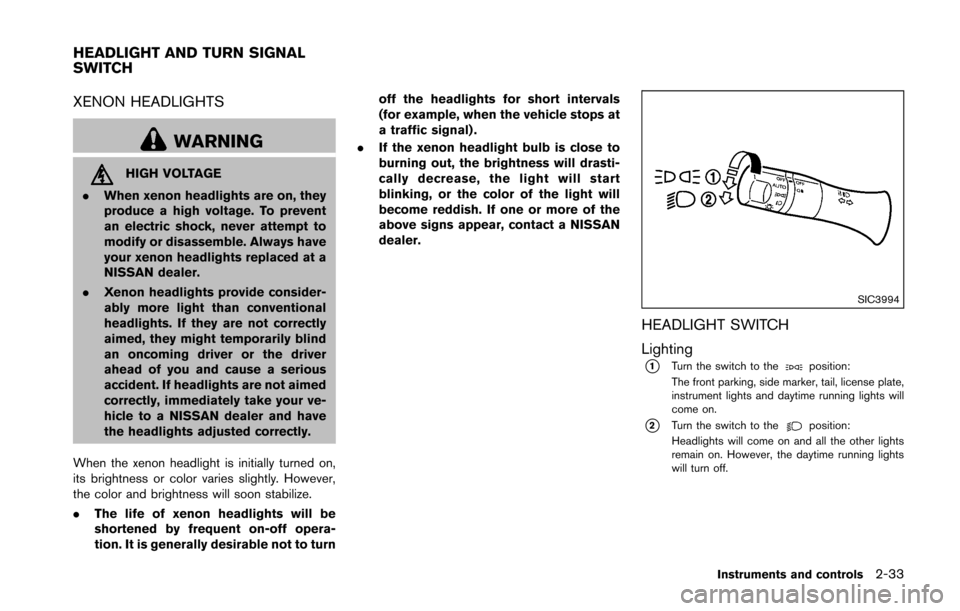
HEADLIGHT SWITCH
Lighting
*1Turn the switch to theposition:
The front parking, side marker, tail, license plate,
instrument lights and daytime running lights will
come on.
*2Turn the switch to theposition:
Headlights will come on and all the other lights
remain on. However, the daytime running lights
will turn off.
Instruments and controls2-33
HEADLIGHT AND TURN SIGNAL
SWITCH
Page 101 of 428
2-34Instruments and controls
SIC3995
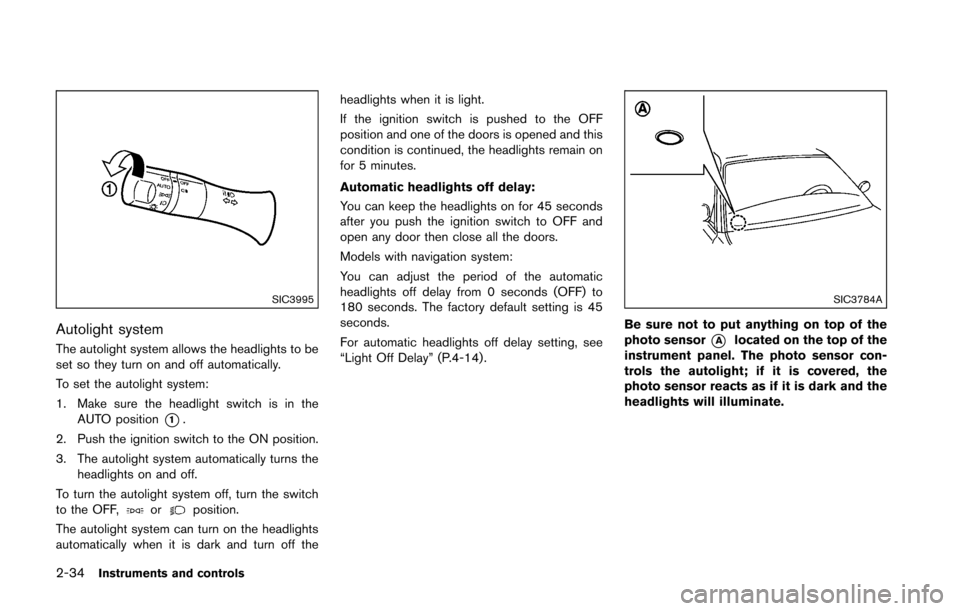
Autolight system
The autolight system allows the headlights to be
set so they turn on and off automatically.
To set the autolight system:
1. Make sure the headlight switch is in theAUTO position
*1.
2. Push the ignition switch to the ON position.
3. The autolight system automatically turns the headlights on and off.
To turn the autolight system off, turn the switch
to the OFF,
orposition.
The autolight system can turn on the headlights
automatically when it is dark and turn off the headlights when it is light.
If the ignition switch is pushed to the OFF
position and one of the doors is opened and this
condition is continued, the headlights remain on
for 5 minutes.
Automatic headlights off delay:
You can keep the headlights on for 45 seconds
after you push the ignition switch to OFF and
open any door then close all the doors.
Models with navigation system:
You can adjust the period of the automatic
headlights off delay from 0 seconds (OFF) to
180 seconds. The factory default setting is 45
seconds.
For automatic headlights off delay setting, see
“Light Off Delay” (P.4-14) .
SIC3784A
Be sure not to put anything on top of the
photo sensor
*Alocated on the top of the
instrument panel. The photo sensor con-
trols the autolight; if it is covered, the
photo sensor reacts as if it is dark and the
headlights will illuminate.
Page 102 of 428
SIC3996
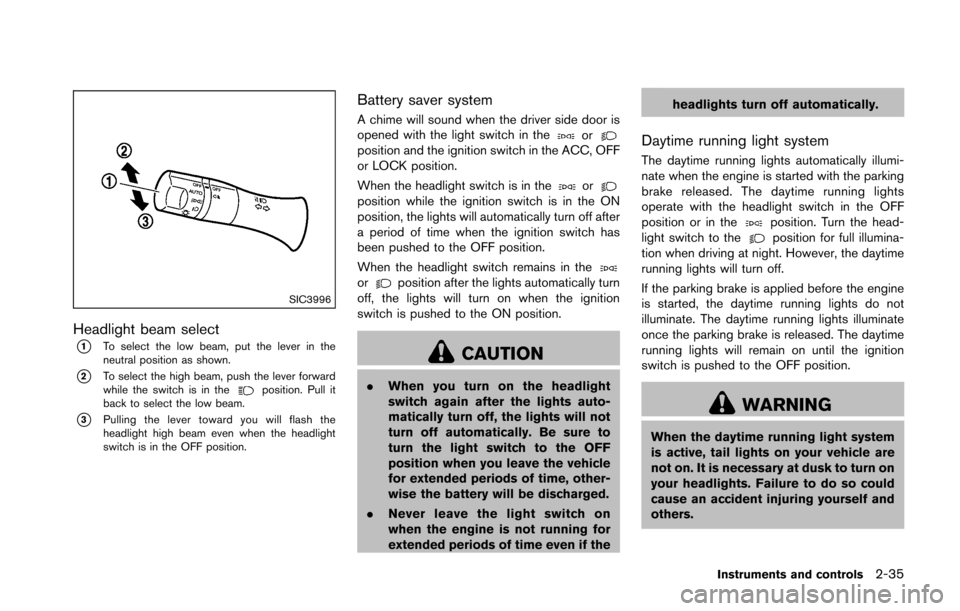
Headlight beam select
*1To select the low beam, put the lever in the
neutral position as shown.
*2To select the high beam, push the lever forward
while the switch is in theposition. Pull it
back to select the low beam.
*3Pulling the lever toward you will flash the
headlight high beam even when the headlight
switch is in the OFF position.
Battery saver system
A chime will sound when the driver side door is
opened with the light switch in theorposition and the ignition switch in the ACC, OFF
or LOCK position.
When the headlight switch is in the
orposition while the ignition switch is in the ON
position, the lights will automatically turn off after
a period of time when the ignition switch has
been pushed to the OFF position.
When the headlight switch remains in the
orposition after the lights automatically turn
off, the lights will turn on when the ignition
switch is pushed to the ON position.
CAUTION
. When you turn on the headlight
switch again after the lights auto-
matically turn off, the lights will not
turn off automatically. Be sure to
turn the light switch to the OFF
position when you leave the vehicle
for extended periods of time, other-
wise the battery will be discharged.
. Never leave the light switch on
when the engine is not running for
extended periods of time even if the headlights turn off automatically.
Daytime running light system
The daytime running lights automatically illumi-
nate when the engine is started with the parking
brake released. The daytime running lights
operate with the headlight switch in the OFF
position or in the
position. Turn the head-
light switch to theposition for full illumina-
tion when driving at night. However, the daytime
running lights will turn off.
If the parking brake is applied before the engine
is started, the daytime running lights do not
illuminate. The daytime running lights illuminate
once the parking brake is released. The daytime
running lights will remain on until the ignition
switch is pushed to the OFF position.
WARNING
When the daytime running light system
is active, tail lights on your vehicle are
not on. It is necessary at dusk to turn on
your headlights. Failure to do so could
cause an accident injuring yourself and
others.
Instruments and controls2-35
Page 103 of 428
2-36Instruments and controls
SIC3981
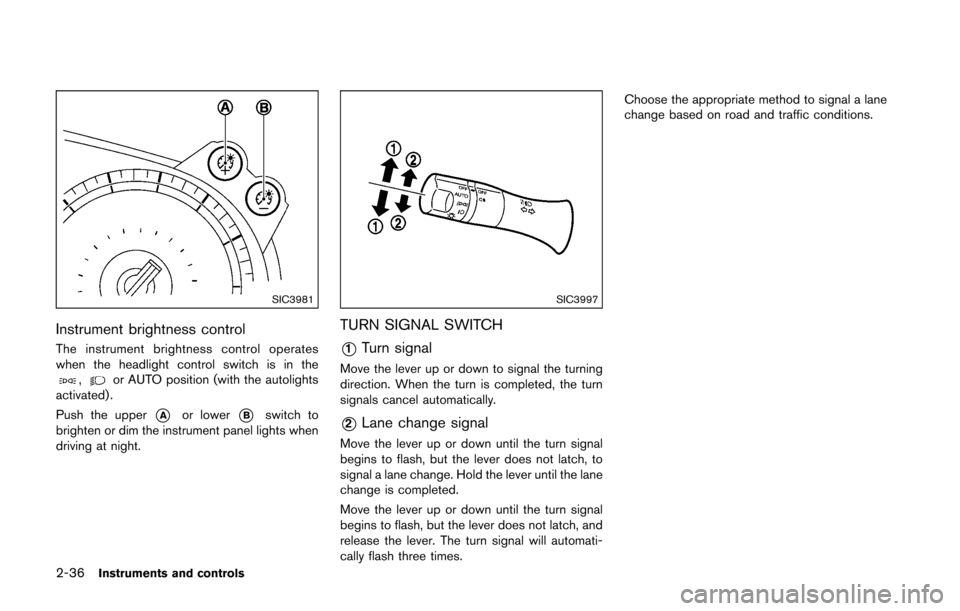
Instrument brightness control
The instrument brightness control operates
when the headlight control switch is in the
,or AUTO position (with the autolights
activated) .
Push the upper
*Aor lower*Bswitch to
brighten or dim the instrument panel lights when
driving at night.
SIC3997
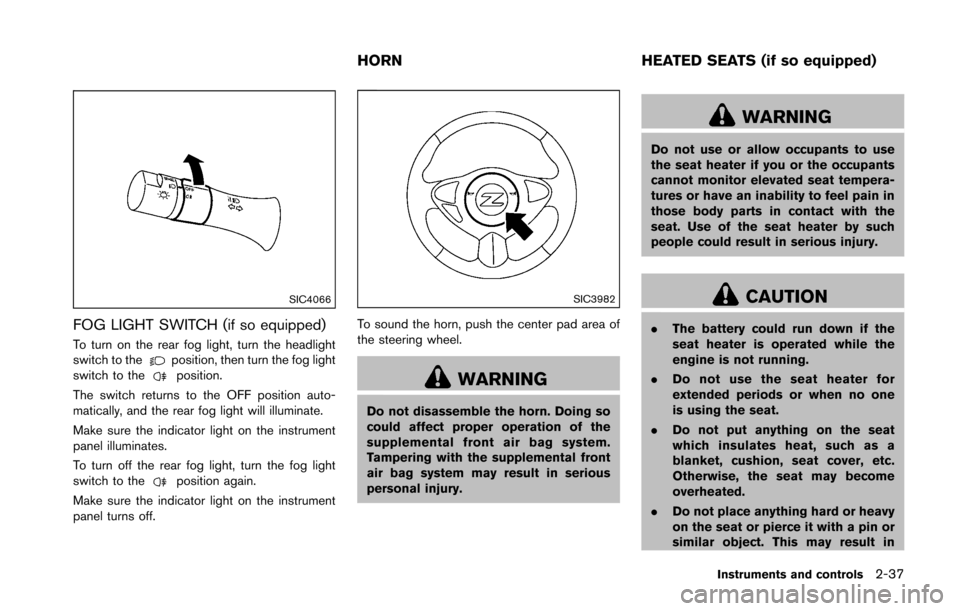
TURN SIGNAL SWITCH
*1Turn signal
Move the lever up or down to signal the turning
direction. When the turn is completed, the turn
signals cancel automatically.
*2Lane change signal
Move the lever up or down until the turn signal
begins to flash, but the lever does not latch, to
signal a lane change. Hold the lever until the lane
change is completed.
Move the lever up or down until the turn signal
begins to flash, but the lever does not latch, and
release the lever. The turn signal will automati-
cally flash three times. Choose the appropriate method to signal a lane
change based on road and traffic conditions.
Page 104 of 428
SIC4066
FOG LIGHT SWITCH (if so equipped)
To turn on the rear fog light, turn the headlight
switch to theposition, then turn the fog light
switch to theposition.
The switch returns to the OFF position auto-
matically, and the rear fog light will illuminate.
Make sure the indicator light on the instrument
panel illuminates.
To turn off the rear fog light, turn the fog light
switch to the
position again.
Make sure the indicator light on the instrument
panel turns off.
SIC3982
To sound the horn, push the center pad area of
the steering wheel.
WARNING
Do not disassemble the horn. Doing so
could affect proper operation of the
supplemental front air bag system.
Tampering with the supplemental front
air bag system may result in serious
personal injury.
WARNING
Do not use or allow occupants to use
the seat heater if you or the occupants
cannot monitor elevated seat tempera-
tures or have an inability to feel pain in
those body parts in contact with the
seat. Use of the seat heater by such
people could result in serious injury.
CAUTION
. The battery could run down if the
seat heater is operated while the
engine is not running.
. Do not use the seat heater for
extended periods or when no one
is using the seat.
. Do not put anything on the seat
which insulates heat, such as a
blanket, cushion, seat cover, etc.
Otherwise, the seat may become
overheated.
. Do not place anything hard or heavy
on the seat or pierce it with a pin or
similar object. This may result in
Instruments and controls2-37
HORN HEATED SEATS (if so equipped)
Page 108 of 428
The power outlet is located in the center console
and on the lower glove box.
CAUTION
.The outlet and plug may be hot
during or immediately after use.
. Do not use with accessories that
exceed a 12 volt, 120W (10A) power
draw. Do not use double adapters or
more than one electrical accessory.
. Use power outlet with the engine
running to avoid discharging the
vehicle battery.
. Avoid using power outlet when the
air conditioner, headlights or rear
window defroster is on.
. This power outlet is not designed
for use with a cigarette lighter unit.
. Push the plug in as far as it will go.
If good contact is not made, the plug
may overheat or the internal tem-
perature fuse may blow.
. Before inserting or disconnecting a
plug, be sure the electrical acces-
sory being used is turned OFF. .
When not in use, be sure to close
the cap. Do not allow water or any
liquid to contact the outlet.
SIC3987
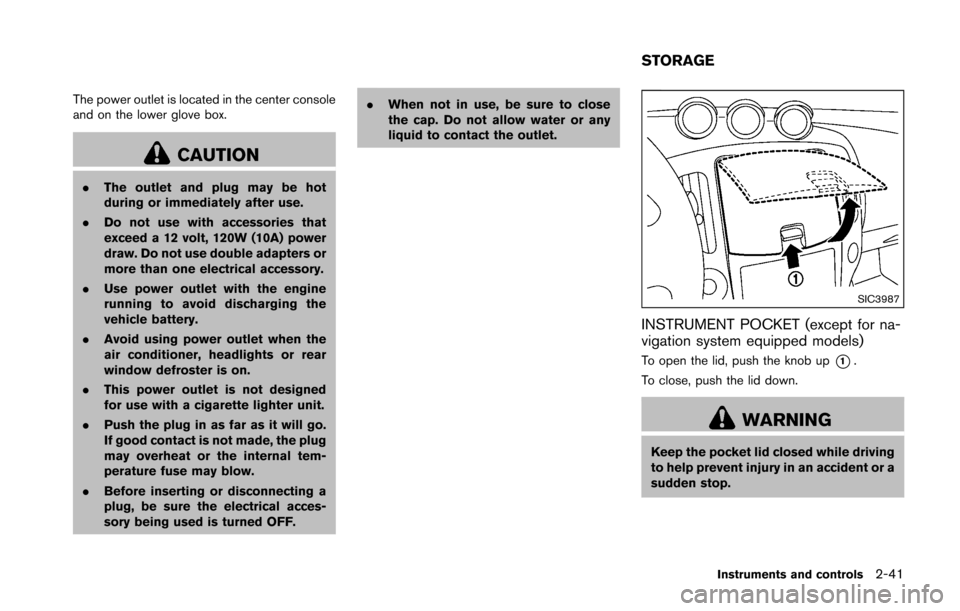
INSTRUMENT POCKET (except for na-
vigation system equipped models)
To open the lid, push the knob up*1.
To close, push the lid down.
WARNING
Keep the pocket lid closed while driving
to help prevent injury in an accident or a
sudden stop.
Instruments and controls2-41
STORAGE