2016 MITSUBISHI OUTLANDER SPORT lock
[x] Cancel search: lockPage 249 of 398
Loading information Driving safety 6-7
6
Always remove the key from the ignition switch and lock all doors and the liftgatewhen leaving the vehicle unattended. Always try to park your vehicle in a well lit area.
N00629900408
It is very importan
t to know how much
weight your vehicle can carry. This weight is called the vehicle capacity weight andincludes the weight of all occupants, cargo (including the roof load), non-factory- installed options, if any, being towed. The tireand loading information placard located on the driver’s door sill of your vehicle will show how much weight it may properly carry. It is important to fami
liarize yourself with the
following terms before loading your vehicle:
Vehicle maximum load on the tire: load on an individual tire that is determined by distributing to each axle its share of the maximum loaded vehicle weight anddividing by two. Vehicle normal load on the tire: load on an individual tire that is determined bydistributing to each axle its share of the curb weight, accessory weight, and nor- mal occupant weight and dividing by two. Maximum loaded vehicle weight: the sum of - (a) Curb weight; (b) Accessory weight;(c) Vehicle capacity weight; and (d) Production options weight. Curb weight: the weight of a motor vehi- cle with standard equipment including the maximum capacity of fuel, oil, and cool- ant. Accessory weight: the combined weight (in excess of those standard items which may be replaced) of automatic transmis-sion, power steering, power brakes, power windows, power seats, radio, and heater, to the extent that these items are availableas factory- installed equipment (whether installed or not). Vehicle capacity weight: the rated cargo and luggage load plus 150 lbs (68 kg)
*
times the vehicle’s designated seating capacity.
Production options weight: the combined weight of those installed regular produc- tion options weighing over 5 lbs (2.3 kg) in excess of those standard items whichthey replace, not previously considered in curb weight or accessory weight, includ- ing heavy duty brakes, ride levelers, roofrack, heavy duty battery, and special trim. Normal occupant weight: 150 lbs (68 kg)
* times the number of specified
occupants. (In your vehicle the number is3) Occupant distribution: Occupant distribu- tion within the passenger compartment (Inyour vehicle the distribution is 2 in front, 1 in second row seat)
N00630100383
The tire and loading information placard is located on the inside sill of the driver’s door.
When leaving the vehicle Loading information
WA R N I N G Never overload your vehicle. Overloading can damage your vehicle, adversely affect vehicle performance, including handling and braking, cause tire failure, and result in an accident.
* :150 lbs (68 kg) is the weight of one per- son as defined by U.S.A. and Canadian regulations.
Tire and loading information placard
BK0229600US.bo
ok 7 ページ 2015年10月1日 木曜日 午後2時29分
Page 253 of 398
Cargo loads
Driving safety 6-11
6
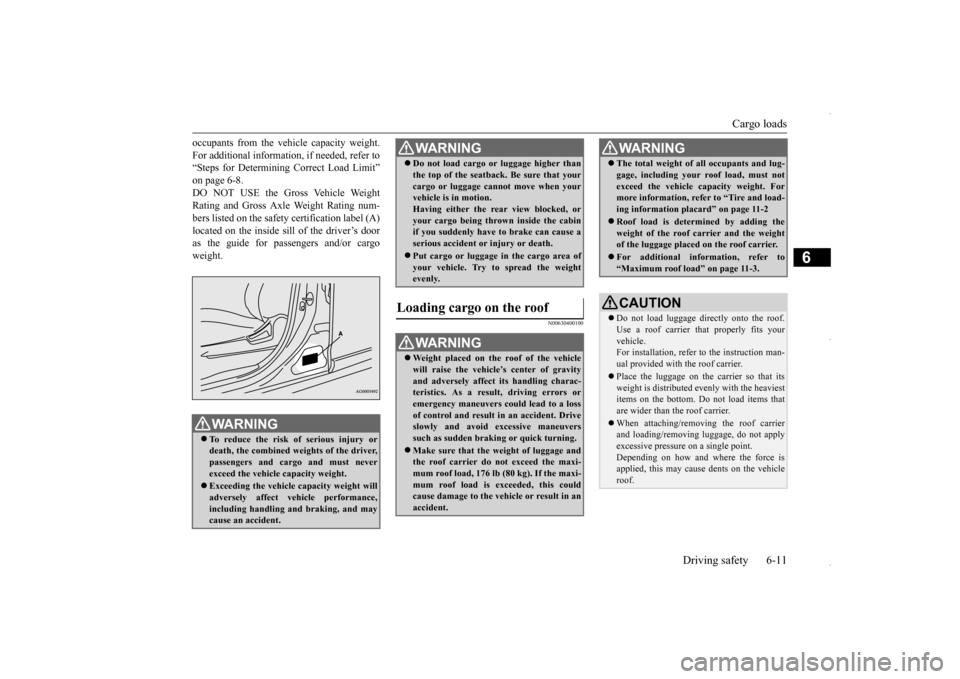
occupants from the vehicle capacity weight. For additional information, if needed, refer to “Steps for Determining Correct Load Limit” on page 6-8.DO NOT USE the Gross Vehicle Weight Rating and Gross Axle Weight Rating num- bers listed on the safety certification label (A)located on the inside sill of the driver’s door as the guide for passengers and/or cargo weight.
N00630400100
WA R N I N G To reduce the risk of serious injury or death, the combined weights of the driver, passengers and cargo and must neverexceed the vehicle capacity weight. Exceeding the vehicle capacity weight will adversely affect vehicle performance, including handling and braking, and may cause an accident.
Do not load cargo or luggage higher than the top of the seatback. Be sure that your cargo or luggage cannot move when your vehicle is in motion. Having either the rear view blocked, oryour cargo being thrown inside the cabin if you suddenly have to brake can cause a serious accident or injury or death. Put cargo or luggage in the cargo area of your vehicle. Try to spread the weightevenly.
Loading cargo on the roof
WA R N I N G Weight placed on the roof of the vehicle will raise the vehicle’s center of gravity and adversely affect its handling charac- teristics. As a result, driving errors oremergency maneuvers could lead to a loss of control and result in an accident. Drive slowly and avoid excessive maneuverssuch as sudden braking or quick turning. Make sure that the weight of luggage and the roof carrier do not exceed the maxi- mum roof load, 176 lb (80 kg). If the maxi-mum roof load is exceeded, this could cause damage to the vehicle or result in an accident.WA R N I N G
The total weight of all occupants and lug- gage, including your roof load, must not exceed the vehicle capacity weight. For more information, refer to “Tire and load- ing information placard” on page 11-2 Roof load is determined by adding the weight of the roof carrier and the weightof the luggage placed on the roof carrier. For additional information, refer to “Maximum roof load” on page 11-3.CAUTION Do not load luggage directly onto the roof. Use a roof carrier th
at properly fits your
vehicle.For installation, refer to the instruction man- ual provided with the roof carrier. Place the luggage on the carrier so that its weight is distributed evenly with the heaviest items on the bottom. Do not load items thatare wider than the roof carrier. When attaching/removing the roof carrier and loading/removing luggage, do not apply excessive pressure on a single point. Depending on how and where the force is applied, this may cause dents on the vehicle roof.WA R N I N G
BK0229600US.bo
ok 11 ページ 2015年10月1日 木曜日 午後2時29分
Page 257 of 398
7
Comfort controlsVents .........................................
.......................................................7-2
Manual air conditioning-Type 1
(if so equipped) ............................7-4
Manual air conditioning-Type 2
(if so equipped) ............................7-9
Automatic air conditioning-Type1 (if so equipped) ......................7-14Automatic air conditioning-Type2 (if so equipped) ......................7-19 Important air conditioning op
erating tips ......................................7-24
Air purifier ......................
...............................................................7-25
AM/FM radio/CD player (if so equipped) .....................................7-25 Handling of Discs .
.................................................
........................7-29
Audio Files (MP3/WMA/
AAC) ....................................................7-31
Important Points on Safety fo
r the Customer ................................7-35
Operation Keys ...............
...............................................................7-35
Listen to Radio ......
.................................................
........................7-38
Listen to Satellite Radio (if so equipped) .......................................7-40 Listen to CDs ..................
...............................................................7-42
Listen to MP3s ......
.................................................
........................7-43
Listen to an iPod ...
.................................................
........................7-44
Listen to Audio Files on
a USB Device .........................................7-46
To play iPod/USB memory device tracks via voice operation (vehicles with Bluetooth
® 2.0 interface)
...................................7-49
Listen to Bluetooth Audio (i
f so equipped) ....................................7-52
Display Indicator ..
.................................................
........................7-54
Audio Quality and Volume Balance Adjustment ...........................7-55System Settings .....
.................................................
........................7-56
Troubleshooting ..............
...............................................................7-60
Antenna .....................................
.....................................................7-62
Clock (if so equipped)
............................................
........................7-62
General information about
your radio ...........................................7-63
BK0229600US.bo
ok 1 ページ 2015年10月1日 木曜日 午後2時29分
Page 260 of 398
Manual air conditioning-T
ype 1 (if so equipped)
7-4 Comfort controls
7
N00730300331 N00730500258
N00736500175
When the ignition switch or the operation mode is in ON, select the blower speed byturning the blower speed selection dial. Turning the dial clockwise will increase the blower speed; turning the dial counterclock-wise will decrease it. When the dial is set to the “OFF” position, all fan-driven airflow will stop.
N00736600222
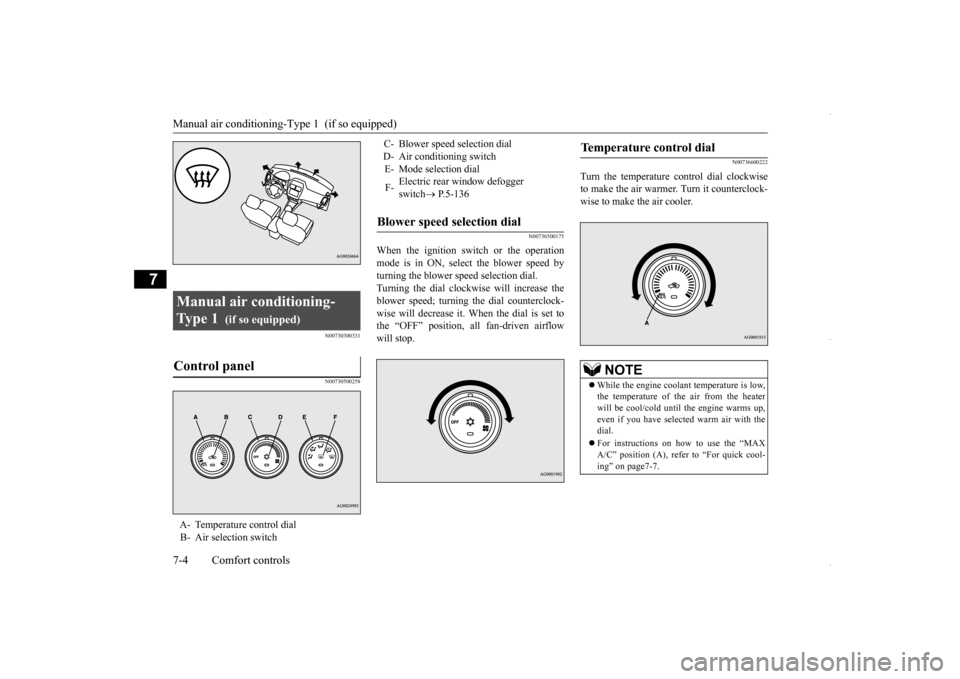
Turn the temperature control dial clockwiseto make the air warmer. Turn it counterclock-wise to make the air cooler.
Manual air conditioning- Ty p e 1
(if so equipped)
Control panel
A- Temperature control dial B- Air selection switch
C- Blower speed selection dial D- Air conditioning switchE- Mode selection dial F-
Electric rear window defogger switch
P.5-136
Blower speed selection dial
Temperature control dial
NOTE
While the engine coolant temperature is low, the temperature of the air from the heater will be cool/cold until the engine warms up, even if you have selected warm air with thedial. For instructions on how to use the “MAX A/C” position (A), refer to “For quick cool- ing” on page7-7.
BK0229600US.bo
ok 4 ページ 2015年10月1日 木曜日 午後2時29分
Page 263 of 398
Manual air conditioning-Type 1 (if so equipped)
Comfort controls 7-7
7
N00731101287
Set the mode selection dial to the “ ” posi- tion and set the air sel
ection switch (A) to the
outside air position. Turn the temperature control dial clockwise or counterclockwise to the desired tempera-ture. Select the best speed to fit your needs.
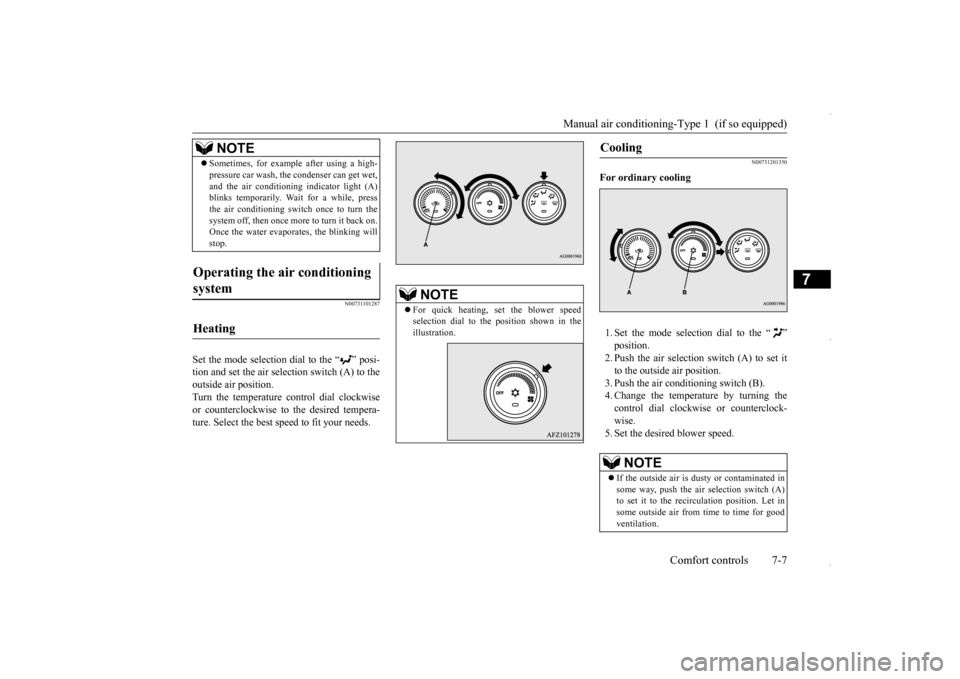
N00731201350
For ordinary cooling 1. Set the mode selection dial to the “ ”2. Push the air selection switch (A) to set itto the outside air position. 3. Push the air conditioning switch (B). 4. Change the temperature by turning thecontrol dial clockwise or counterclock- wise. 5. Set the desired blower speed.
Sometimes, for example after using a high- pressure car wash, the condenser can get wet, and the air conditioning indicator light (A) blinks temporarily. Wait for a while, press the air conditioning switch once to turn thesystem off, then once more to turn it back on. Once the water evaporates, the blinking will stop.
Operating the air conditioning system
Heating
NOTE
NOTE
For quick heating, set the blower speed selection dial to the position shown in the illustration.
Cooling
NOTE
If the outside air is dusty or contaminated in some way, push the air selection switch (A) to set it to the recirculation position. Let insome outside air from time to time for good ventilation.
BK0229600US.bo
ok 7 ページ 2015年10月1日 木曜日 午後2時29分
Page 266 of 398
Manual air conditioning-T
ype 2 (if so equipped)
7-10 Comfort controls
7
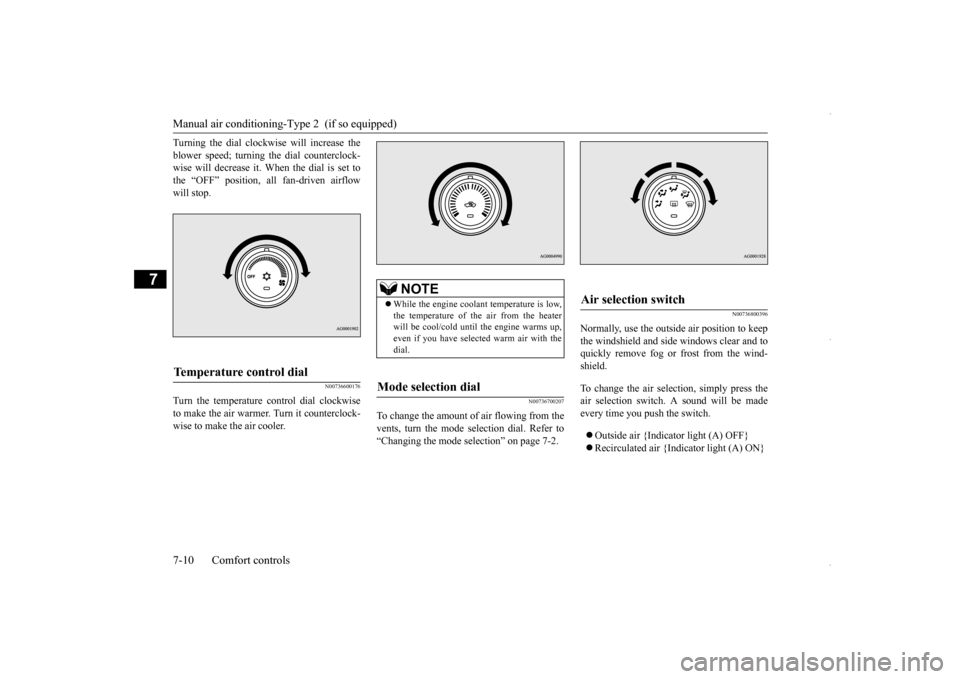
Turning the dial clockwise will increase the blower speed; turning the dial counterclock- wise will decrease it. When the dial is set to the “OFF” position, all fan-driven airflowwill stop.
N00736600176
Turn the temperature control dial clockwiseto make the air warmer. Turn it counterclock-wise to make the air cooler.
N00736700207
To change the amount of
air flowing from the
vents, turn the mode selection dial. Refer to “Changing the mode selection” on page 7-2.
N00736800396
Normally, use the outside air position to keepthe windshield and side windows clear and toquickly remove fog or frost from the wind- shield. To change the air selection, simply press the air selection switch. A sound will be made every time you push the switch. Outside air {Indicator light (A) OFF} Recirculated air {Indicator light (A) ON}
Temperature control dial
NOTE
While the engine coolant temperature is low, the temperature of the air from the heater will be cool/cold until the engine warms up,even if you have selected warm air with the dial.
Mode selection dial
Air selection switch
BK0229600US.bo
ok 10 ページ 2015年10月1日 木曜日 午後2時29分
Page 268 of 398
Manual air conditioning-T
ype 2 (if so equipped)
7-12 Comfort controls
7
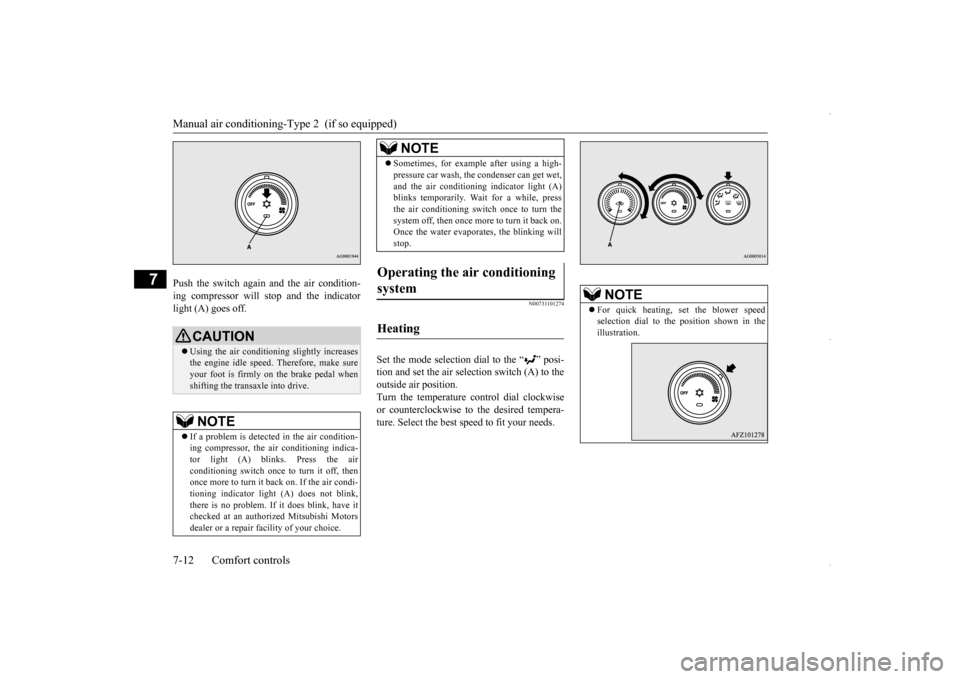
Push the switch again and the air condition- ing compressor will stop and the indicator light (A) goes off.
N00731101274
Set the mode selection dial to the “ ” posi-tion and set the air selection switch (A) to theoutside air position. Turn the temperature control dial clockwise or counterclockwise to the desired tempera-ture. Select the best speed to fit your needs.
CAUTION Using the air conditioning slightly increases the engine idle speed. Therefore, make sureyour foot is firmly on the brake pedal when shifting the transaxle into drive.NOTE
If a problem is detected in the air condition- ing compressor, the air conditioning indica- tor light (A) blinks. Press the air conditioning switch once to turn it off, thenonce more to turn it back on. If the air condi- tioning indicator light (A) does not blink, there is no problem. If it does blink, have itchecked at an authorized Mitsubishi Motors dealer or a repair facility of your choice.
Sometimes, for example after using a high- pressure car wash, the condenser can get wet, and the air conditioning indicator light (A) blinks temporarily. Wait for a while, press the air conditioning switch once to turn thesystem off, then once more to turn it back on. Once the water evaporates, the blinking will stop.
Operating the air conditioning system
Heating
NOTE
NOTE
For quick heating, set the blower speed selection dial to the position shown in the illustration.
BK0229600US.bo
ok 12 ページ 2015年10月1日 木曜日 午後2時29分
Page 269 of 398
Manual air conditioning-Type 2 (if so equipped)
Comfort controls 7-13
7
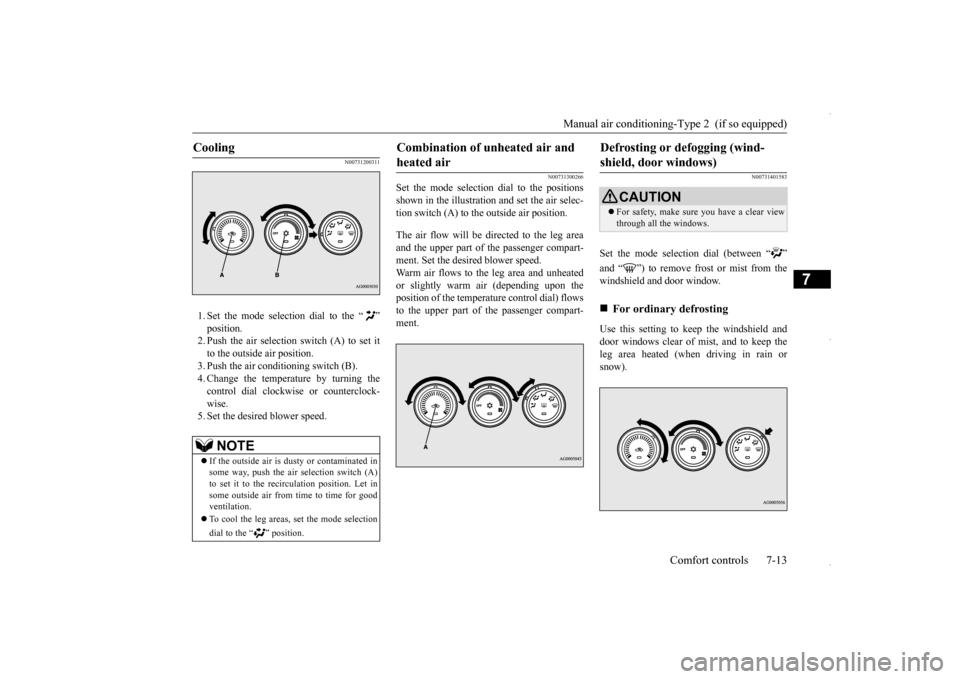
N00731200311
1. Set the mode selection dial to the “ ”2. Push the air selection switch (A) to set it to the outside air position. 3. Push the air conditioning switch (B).4. Change the temperature by turning thecontrol dial clockwise or counterclock- wise. 5. Set the desired blower speed.
N00731300266
Set the mode selection dial to the positions shown in the illustration and set the air selec- tion switch (A) to the outside air position. The air flow will be directed to the leg area and the upper part of the passenger compart- ment. Set the desired blower speed. Warm air flows to the leg area and unheatedor slightly warm air (depending upon theposition of the temperature control dial) flows to the upper part of the passenger compart- ment.
N00731401583
Set the mode selection dial (between “ ” windshield and door window. Use this setting to keep the windshield and door windows clear of mist, and to keep the leg area heated (when driving in rain or snow).
Cooling
NOTE
If the outside air is dusty or contaminated in some way, push the air selection switch (A) to set it to the recirculation position. Let insome outside air from time to time for good ventilation. To cool the leg areas, set the mode selection dial to the “ ” position.
Combination of unheated air and heated air
Defrosting or defogging (wind-shield, door windows)
CAUTION For safety, make sure you have a clear view through all the windows.
For ordinary defrosting
BK0229600US.bo
ok 13 ページ 2015年10月1日 木曜日 午後2時29分