2016 MITSUBISHI OUTLANDER Back light
[x] Cancel search: Back lightPage 162 of 464
4-wheel drive operation 5-86 Features and controls
5
When turning a sharp corner in “4WD LOCK” (Electronically
controlled 4WD) or
“LOCK” (S-AWC) position at low speed, a slight difference in
steering may be experi-
enced similar to feeling as if the brakes wereapplied. This is calle
d tight corner braking
and results from each of the four tires being at a different distance from the corner. The phe-nomenon is typical of 4-
wheel drive vehicles.
If this occurs, either straighten out the steer- ing wheel or change to another mode. Set the drive mode-selector to “4WD AUTO”, “4WD LOCK” (Electronically con-trolled 4WD) or “SNOW” (S-AWC) in accor- dance with the road conditions, and then gradually depress the accelerator pedal for asmooth start.
Set the drive mode-selector to “4WD LOCK” (Electronically contro
lled 4WD) or “LOCK”
(S-AWC) and then gradually depress the accelerator pedal for a
smooth start. Keep the
pressure on the accelera
tor pedal as constant
as possible, and drive at low speed.
CAUTION Setting the drive mode-selector to “4WD LOCK” (Electronically
controlled 4WD) or
“LOCK” (S-AWC) position to drive on drypaved road will increa
se fuel consumption,
with possible noise generation.
Turning sharp corners On snowy or icy roads
NOTE
The use of snow tires is recommended. Maintain a safe distan
ce between vehicles,
avoid sudden braking, and use engine brak- ing (downshifting).CAUTION Avoid sudden braking,
sudden acceleration
and sharp turning. Skidding occurs and con-trol of the vehicl
e could be lost.
Driving on sandy or muddy roads
CAUTION Do not force the vehicle or drive recklessly on sandy surfaces. In comparison with nor- mal road surfaces, th
e engine and other
drive-system components are put underexcessive strain when driving on such a sur- face. This could lead to accidents.
If any of the following conditions occur while the vehicle is
being driven, immedi-
ately park your vehicle
in a safe place and
follow these procedures:• If the engine coolan
t temperature display
flashes on the information screen in the multi-information di
splay or the engine
power drops suddenly. Refer to “Engine overheating” on page 8-4.• If the “ ” warning display and “SLOW DOWN” or the “ ” warning display and “SERVICE REQUIRED” appear on the information screen in the multi-informationdisplay. Refer to “Warning disp
lay” on page 5-66,
5-74.WA R N I N G When attempting to rock your vehicle out of a stuck position, be sure that the areaaround the vehicle is
clear of people and
physical objects. The rocking motion may cause the vehicle to suddenly launch for- ward/backward, caus
ing injury or dam-
age to nearby people or objects.CAUTION
BK0223400US.book 86 ページ 2015年2月13日 金曜日 午後12時15分
Page 165 of 464
Service brake
Features and controls 5-89
5
N00517500275
Overuse of the brake can cause weakening, resulting in poor brake response and prema- ture wear of the brake pads.When driving down a long or steep hill, use engine braking by downshifting.
N00517600364
Your vehicle is equipped with power brakesfor more braking force with less brake pedal effort.Your brakes are designed to operate at full capacity, even if the power assist is not being used.If the power assist is not being used, the effort needed to press the br
ake pedal is greater.
If you should lose the power assist for some reason, the brakes will still work. If the power brake unit or either of the twobrake hydraulic systems stops working prop- erly, the rest of the brake system will still work, but the vehicle
will not slow down as
quickly. You will know this has happened if you find you need to press the brake down farther, orharder when slowing down or stopping, or if the brake warning light and the warning dis- play in the multi-information display comeon.
N00550700124
The disc brakes have an alarm that makes a metallic squeal when
the brake pads have
worn down enough to need service.If you hear this sound, have the brake pads replaced at an authorized Mitsubishi Motors dealer or a repair fa
cility of your choice.
N00562601097
The hill start assist make
s it easy to start off
on a steep uphill slope by preventing the vehicle from moving back
wards. It keeps the
braking force for about 2 second when you move your foot from the brake pedal to the accelerator pedal.
Service brake Brake pedal
WA R N I N G Do not leave any objects near the brake pedal or let a floor mat slide under it; doing so could prevent the full pedalstroke that would be necessary in an emergency. Make sure that the pedal can be operated freely at all times. Make surethe floor mat is securely held in place.CAUTION It is important not to drive the vehicle with your foot resting on the brake pedal when braking is not required. This practice can result in very high brake temperatures, pre-mature lining wear, a
nd possible damage to
the brakes.
Power brakes
WA R N I N G Never coast downhill
with the engine OFF.
Keep the engine running whenever your vehicle is in motion. If you turn off the engine while driving, the power brakebooster will stop wo
rking and your brakes
will not work as well.
If the power assist is lost or if either brake hydraulic system stop
s working properly,
take your vehicle to
an authorized Mit-
subishi Motors dealer or a repair facility of your choice immediately.
Brake pad wear alarm
WA R N I N G Driving with worn brake pads will make it harder to stop, and can cause an accident.
Hill start assist
(if so equipped)
WA R N I N G
BK0223400US.book 89 ページ 2015年2月13日 金曜日 午後12時15分
Page 257 of 464
Combination headlights and dimmer switch
Features and controls 5-181
5
N00550001209
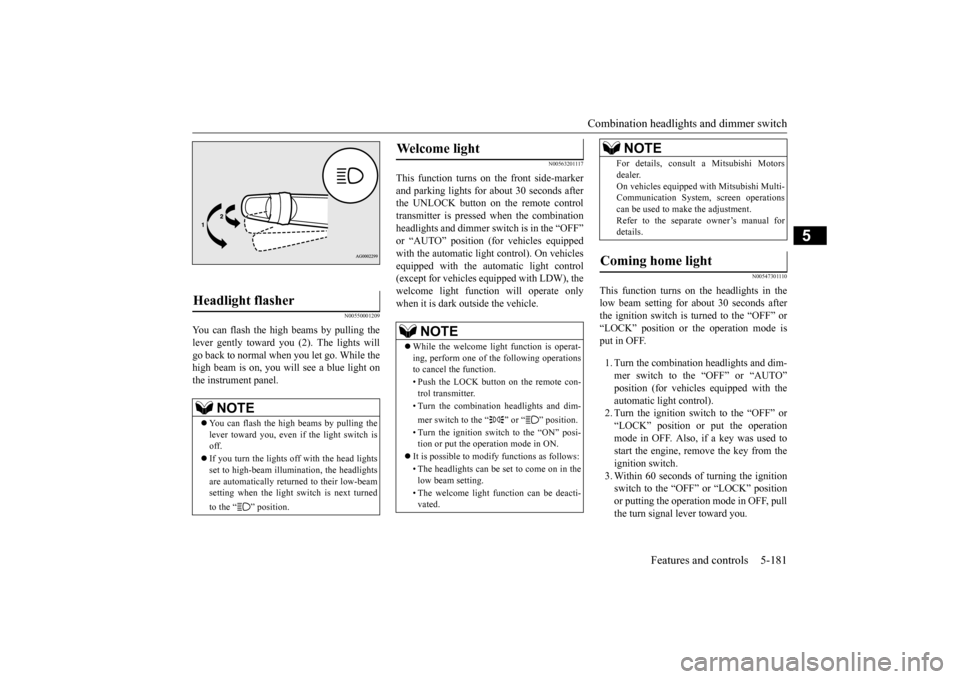
You can flash the high beams by pulling the lever gently toward you (2). The lights will go back to normal when you let go. While the high beam is on, you will see a blue light onthe instrument panel.
N00563201117
This function turns on the front side-marker and parking lights for about 30 seconds after the UNLOCK button on the remote controltransmitter is pressed when the combination headlights and dimmer swit
ch is in the “OFF”
or “AUTO” position (fo
r vehicles equipped
with the automatic light control). On vehicles equipped with the automatic light control (except for vehicles equipped with LDW), the welcome light functi
on will operate only
when it is dark outside the vehicle.
N00547301110
This function turns on the headlights in thelow beam setting for about 30 seconds afterthe ignition switch is turned to the “OFF” or “LOCK” position or the operation mode is put in OFF. 1. Turn the combination headlights and dim- mer switch to the “OFF” or “AUTO” position (for vehicles
equipped with the
automatic light control).2. Turn the ignition switch to the “OFF” or “LOCK” position or put the operation mode in OFF. Also, if a key was used tostart the engine, rem
ove the key from the
ignition switch. 3. Within 60 seconds of turning the ignitionswitch to the “OFF” or “LOCK” position or putting the operation mode in OFF, pull the turn signal lever toward you.
Headlight flasher
NOTE
You can flash the high beams by pulling the lever toward you, even if the light switch is off. If you turn the lights off with the head lights set to high-beam illumi
nation, the headlights
are automatically returned to their low-beamsetting when the light
switch is next turned
to the “ ” position.
Welcome light
NOTE
While the welcome light function is operat- ing, perform one of
the following operations
to cancel the function. • Push the LOCK button on the remote con- trol transmitter. • Turn the combination headlights and dim- mer switch to the “ ” or “ ” position. • Turn the ignition switch to the “ON” posi- tion or put the operation mode in ON.
It is possible to modify functions as follows: • The headlights can be set to come on in the low beam setting. • The welcome light f
unction can be deacti-
vated.
For details, consult a Mitsubishi Motorsdealer.On vehicles equipped
with Mitsubishi Multi-
Communication System
, screen operations
can be used to make the adjustment. Refer to the separate owner’s manual fordetails.
Coming home light
NOTE
BK0223400US.book 181 ページ 2015年2月13日 金曜日 午後12時15分
Page 261 of 464
Wiper and washer switch
Features and controls 5-185
5
N00523001722
The windshield wiper and washer can be operated with the ignition switch or the oper-ation mode is in ON or ACC. If the blades are frozen to the windshield, do not operate the wipers
until the ice has melted
and the blades are freed, otherwise the wiper motor may be damaged.
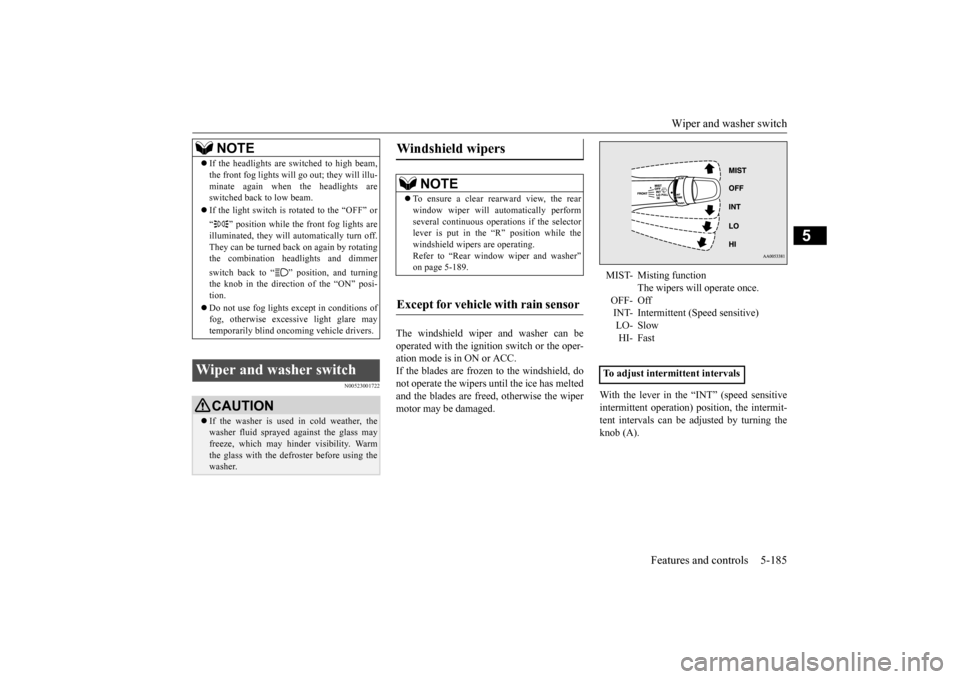
With the lever in the “INT” (speed sensitive intermittent operation)
position, the intermit-
tent intervals can be adjusted by turning the knob (A).
NOTE
If the headlights are sw
itched to high beam,
the front fog lights will go out; they will illu-minate again when the headlights areswitched back to low beam. If the light switch is rotated to the “OFF” or “ ” position while the
front fog lights are
illuminated, they will automatically turn off. They can be turned back on again by rotatingthe combination headlights and dimmer switch back to “ ” position, and turning the knob in the direction of the “ON” posi- tion. Do not use fog lights ex
cept in conditions of
fog, otherwise excessive light glare maytemporarily blind oncoming vehicle drivers.
Wiper and washer switch
CAUTION If the washer is used
in cold weather, the
washer fluid sprayed against the glass may freeze, which may hinder visibility. Warm the glass with the defroster before using thewasher.
Windshield wipers
NOTE
To ensure a clear rearward view, the rear window wiper will au
tomatically perform
several continuous opera
tions if the selector
lever is put in the “R” position while the windshield wipers are operating.Refer to “Rear window wiper and washer” on page 5-189.
Except for vehicle with rain sensor
MIST- Misting function
The wipers will operate once.
OFF- Off INT- Intermittent (Speed sensitive)LO- Slow HI- Fast
To adjust intermittent intervals
BK0223400US.book 185 ページ 2015年2月13日 金曜日 午後12時15分
Page 294 of 464
Sun visors 5-218 Features and controls
5
N00567201056
You can play music files of the following specifications that are saved in a USB mem- ory device or other device supporting mass storage class. When you connect your iPod,playable file specifications depend on the connected iPod.
N00524601363
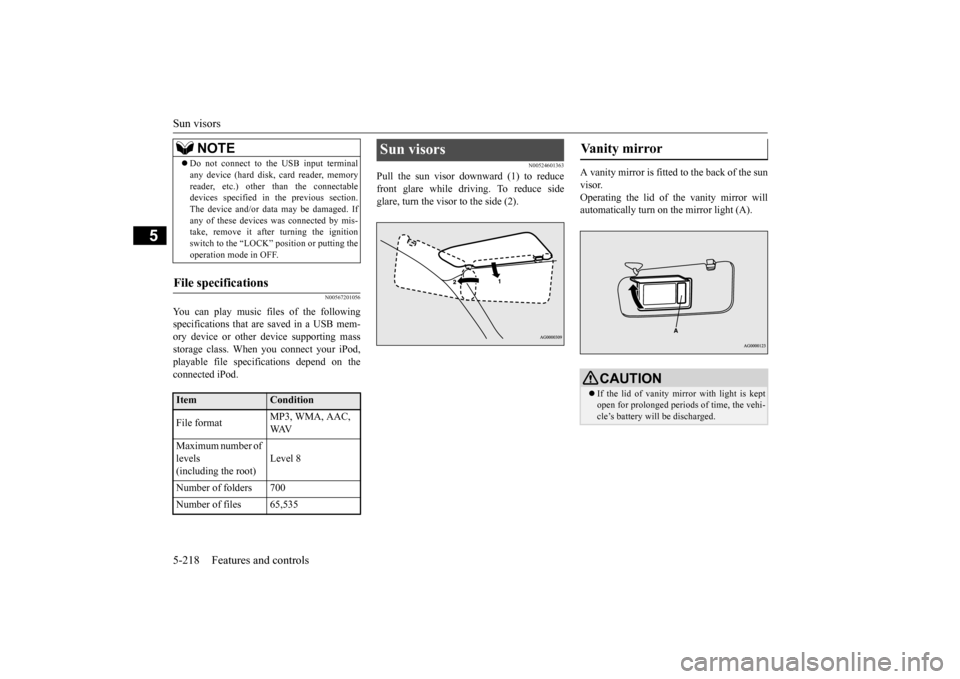
Pull the sun visor downward (1) to reducefront glare while driving. To reduce side glare, turn the visor to the side (2).
A vanity mirror is fitted to the back of the sun visor. Operating the lid of the vanity mirror will automatically turn on the mirror light (A).
Do not connect to the USB input terminal any device (hard disk, card reader, memoryreader, etc.) other than the connectabledevices specified in the previous section. The device and/or data
may be damaged. If
any of these devices
was connected by mis-
take, remove it afte
r turning the ignition
switch to the “LOCK”
position or putting the
operation mode in OFF.
File specifications
Item
Condition
File format
MP3, WMA, AAC, WAV
Maximum number of levels (including the root)
Level 8
Number of folders 700 Number of files 65,535
NOTE
Sun visors
Vanity mirror
CAUTION If the lid of vanity mirror with light is kept open for prolonged periods
of time, the vehi-
cle’s battery will be discharged.
BK0223400US.book 218 ページ 2015年2月13日 金曜日 午後12時15分
Page 299 of 464
HomeLink® Wireless Control System (if so equipped)
Features and controls 5-223
5
3. Press and release - every 2 seconds (“cycle”) your hand-held transmitter until the HomeLink
® indicator light changes from
slowly flashing orange to either rapidly flash- ing green (rolling code
) or continuously lit
green (fixed code). Now you may release the hand-held transmitter button. Proceed with “Programming a new Home- Link
®” step 4 to complete.
N00584900022
The HomeLink
® has the capability of receiv-
ing garage door status from compatiblegarage door opener systems. Check your garage door opener manual for the available feature and HomeLink
® compatibility. Also
for a listing of compatible systems contact HomeLink
® at: www.homelink.com
1. Within 5 seconds after successfully pro- gramming the garage door opener (refer to “Programming a new HomeLink
®”
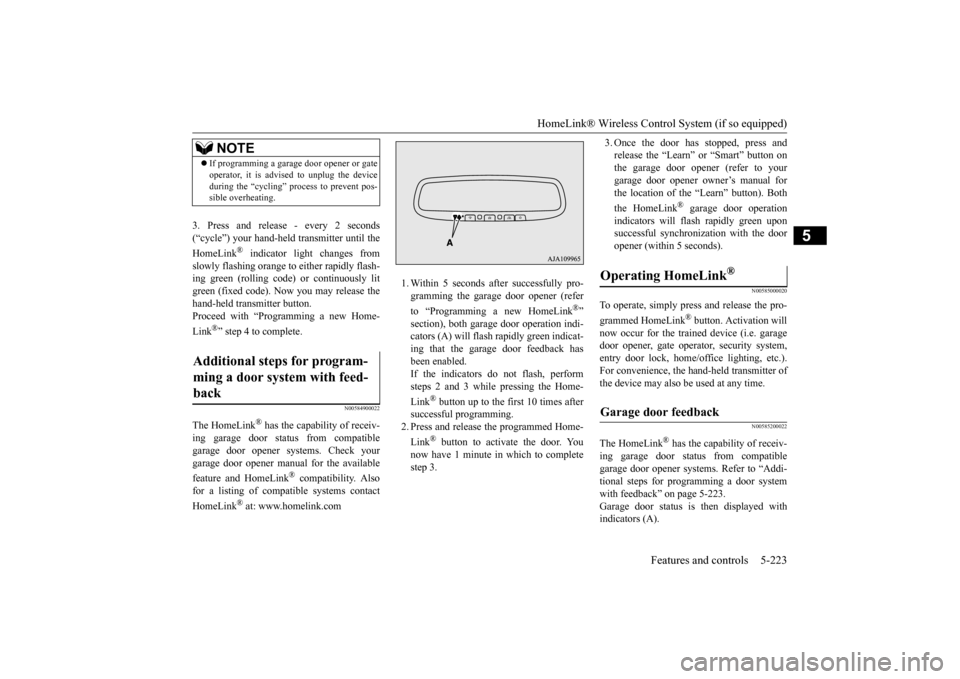
section), both garage door operation indi- cators (A) will flash
rapidly green indicat-
ing that the garage door feedback has been enabled. If the indicators do not flash, performsteps 2 and 3 while pressing the Home- Link
® button up to the first 10 times after
successful programming.2. Press and release
the programmed Home-
Link
® button to activate the door. You
now have 1 minute in which to completestep 3.
3. Once the door has stopped, press and release the “Learn” or “Smart” button onthe garage door opener (refer to your garage door opener owner’s manual for the location of the “Learn” button). Both the HomeLink
® garage door operation
indicators will fl
ash rapidly green upon
successful synchroni
zation with the door
opener (within 5 seconds).
N00585000020
To operate, simply press and release the pro- grammed HomeLink
® button. Activation will
now occur for the trained device (i.e. garagedoor opener, gate opera
tor, security system,
entry door lock, home/office lighting, etc.). For convenience, the ha
nd-held transmitter of
the device may also be used at any time.
N00585200022
The HomeLink
® has the capab
ility of receiv-
ing garage door status from compatible garage door opener systems. Refer to “Addi- tional steps for programming a door systemwith feedback” on page 5-223. Garage door status is
then displayed with
indicators (A).
NOTE
If programming a garage door opener or gate operator, it is advise
d to unplug the device
during the “cycling” pr
ocess to prevent pos-
sible overheating.
Additional steps for program- ming a door system with feed- back
Operating HomeLink
®
Garage door feedback
BK0223400US.book 223 ページ 2015年2月13日 金曜日 午後12時15分
Page 300 of 464
HomeLink® Wireless Control System (if so equipped) 5-224 Features and controls
5
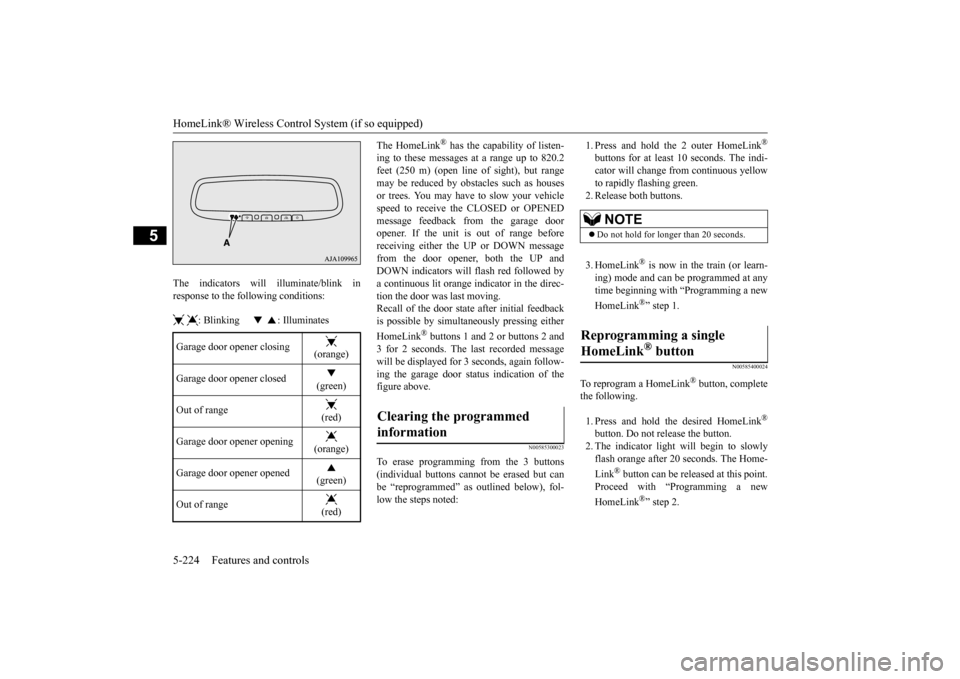
The indicators will illuminate/blink in response to the following conditions: : Blinking : Illuminates
The HomeLink
® has the capability of listen-
ing to these messages at a range up to 820.2feet (250 m) (open line
of sight), but range
may be reduced by obstacles such as houses or trees. You may have to slow your vehiclespeed to receive the CLOSED or OPENED message feedback from the garage door opener. If the unit is out of range beforereceiving either th
e UP or DOWN message
from the door opener, both the UP and DOWN indicators will fl
ash red followed by
a continuous lit orange
indicator in the direc-
tion the door was last moving.Recall of the door stat
e after initial feedback
is possible by simultane
ously pressing either
HomeLink
® buttons 1 and 2 or buttons 2 and
3 for 2 seconds. The last recorded message will be displayed for 3
seconds, again follow-
ing the garage door st
atus indication of the
figure above.
N00585300023
To erase programming from the 3 buttons (individual buttons cannot
be erased but can
be “reprogrammed” as
outlined below), fol-
low the steps noted:
1. Press and hold the 2 outer HomeLink
®
buttons for at least 10 seconds. The indi- cator will change
from continuous yellow
to rapidly flashing green. 2. Release both buttons. 3. HomeLink
® is now in the train (or learn-
ing) mode and can be programmed at anytime beginning with
“Programming a new
HomeLink
®” step 1.
N00585400024
To reprogram a HomeLink
® button, complete
the following. 1. Press and hold the desired HomeLink
®
button. Do not release the button. 2. The indicator light will begin to slowly flash orange after 20
seconds. The Home-
Link
® button can be released at this point.
Proceed with “P
rogramming a new
HomeLink
®” step 2.
Garage door opener closing
(orange)
Garage door opener closed
(green)
Out of range
(red)
Garage door opener opening
(orange)
Garage door opener opened
(green)
Out of range
(red)
Clearing the programmed information
NOTE
Do not hold for longer than 20 seconds.
Reprogramming a single HomeLink
® button
BK0223400US.book 224 ページ 2015年2月13日 金曜日 午後12時15分
Page 316 of 464
Vehicle preparation before driving 6-4 Driving safety
6
N00629001709
For a safer and more enjoyable trip, always check for the following: Before starting the vehicle, make certain that you and all passengers are seated and wearing their seat
belts properly (with
children in the rear seat, in appropriate restraints), and that all the doors and the liftgate are locked. Move the driver’s seat as far backward as possible, while keep
ing good visibility,
and good control of the steering wheel,brakes, accelerator,
and controls. Check
the instrument panel
indicators and multi-
information display for any possible prob-lem. Similarly, the front
passenger seat should
also be moved as far back as possible. Make sure that infa
nts and small children
are properly restrained in accordance with all laws and regulations.
Check these by selecting the defroster mode, and set the blower swit
ch on high. You should
be able to feel the air blowing against thewindshield. Refer to “Defrosti
ng or defogging (wind-
shield, door windows)” on page 7-13 Check all the tires for heavy tread wear or uneven wear patterns. Look for stones, nails, glass, or other objects
stuck in the tread. Look
for any tread cuts or
sidewall cracks. Check
the wheel nuts for tightness, and the tires (including spare tire) for proper pressure. Replace your tires before they are heavilyworn out. As your vehicle is equi
pped with a tire pres-
sure monitoring system, there is a risk ofdamage to the tire inflation pressure sensors when the tire is replaced on the rim. Tire replacement should, only, be performed by anauthorized Mitsubishi Motors dealer. Have someone watch while you turn all the exterior lights on and off. Also check the turn
signal indicators and hi
gh-beam indicators on
the instrument panel. Check the ground under the vehicle after parking overnight, for
fuel, water, oil, or
other leaks. Make sure
all the fluid levels are
correct. Also, if you
can smell fuel, you need
to find out why imme
diately and have it
fixed.
N00629201134
Even this vehicle’s sa
fety equipment, and
your safest driving, ca
nnot guarantee that you
can avoid an accident or injury. However, ifyou give extra attention to the following areas, you can better protect yourself and your passengers: Drive defensively. Be aware of traffic, road and weather conditions. Leave plenty of stopping distance between your vehicle and the vehicle ahead. Before changing lanes, check your mir- rors, blind spots, and use your turn-signal light. While driving, watch the behavior of other drivers, bicyc
lists, and pedestrians.
Vehicle preparation before driving Seat belts and seats
Defrosters Tires Lights
Fluid leaks Safe driving techniques
BK0223400US.book 4 ページ 2015年2月13日 金曜日 午後12時15分