2016 MERCEDES-BENZ SL ROADSTER reset
[x] Cancel search: resetPage 7 of 333

Adjusting volume
Audio 20 ........................................ 254
Air conditioning
General notes ................................ 122
AIR FLOW .......................................... .125
Air pressure
see Tyre pressure
Air vents
Glove compartment ....................... 130
Important safety notes .................. 129
Setting .......................................... .129
Setting the blower output of the
AIRSCARF vents ............................ .130
Setting the centre air vents ........... 129
Setting the side air vents .............. .130
Switching AIRSCARF on/off .......... 105
Air-conditioning system
see Climate control
Airbag
Automatic front-passenger front
airbag deactivatio n .......................... 46
Headbag .......................................... 46
Introduction ..................................... 43
PASSENGER AIR BAG indicator
lamps ............................................... 40
Airbags
Display message ............................ 226
Front airbag (driver, front
passenger) ....................................... 45
Important safety guidelines ............. 43
Sidebag ............................................ 45
Triggering ......................................... 51
AIRSCARF
Switching on/off ........................... 105
AIRSCARF vents
Setting the blower output .............. 130
Alarm
ATA (Anti-Theft Alarm system) ......... 74
Switching off (ATA) .......................... 74
Switching the function on/off
(ATA) ................................................ 74
Alarm system
see ATA (Anti-Theft Alarm system)
Ambient lighting
Setting the brightness (on-board
computer) ...................................... 210
Setting the colour (on-board com-
puter) ............................................. 210 AMG menu (on-board computer)
..... 213
Anti-glare film ................................... .275
Anti-lock braking system
see ABS (Anti-lock Braking System)
Anti-Theft Alarm system
see ATA (Anti-Theft Alarm system)
Aquaplaning ....................................... 158
Ashtray ............................................... 267
Assistance display (on-board com-
puter) ................................................. .207
Assistance menu (on-board com-
puter) ................................................. .207
ASSYST PLUS
Displaying a service message ....... .281
Hiding a service message .............. 281
Resetting the service interval dis-
play ................................................ 281
Service message ............................ 280
Special service requirements ......... 281
ATA (Anti-Theft Alarm system)
Activating/deactivating ................... 74
Function .......................................... .74
Switching off the alarm .................... 74
ATTENTION ASSIST
Activating/deactivating ................. 208
Display message ............................ 232
Function/note s............................. 190
Audio 20
Switching on/of f........................... 253
Audio menu (on-board computer) .... 204
Authorised workshop
see Qualified specialist workshop
AUTO lights
Display message ............................ 228
see Lights
Automatic engine start (ECO start/
stop function) .................................... 136
Automatic engine switch-off (ECO
start/stop function) .......................... 135
Automatic front-passenger front
airbag deactivation
Display message ............................ 226
Automatic front-passenger front
airbag deactivation system
Operation ......................................... 46
Problems ......................................... 50
System self-test ............................... 48 4
Index
Page 13 of 333

Removing ......................................
.318
Storage location ............................ 318
Technical data ............................... 318
Emergency unlocking
Vehicle ............................................. 84
Engine
Display message ............................ 229
ECO start/stop function ................ 135
Jump-starting ................................. 296
Running irregularl y......................... 138
Starting problems .......................... 138
Starting the engine with the key .... 134
Starting with KEYLESS GO ............. 134
Stopping ........................................ 153
Tow-starting (vehicle) ..................... 301
Warning lamp (engine diagnos-
tics) ............................................... 249
Engine electronics
Notes ............................................. 320
Problem (fault) ............................... 138
Engine oil
Additives ........................................ 325
Checking the oil level ..................... 277
Checking the oil level using the
dipstick .......................................... 278
Display message ............................ 230
Filling capacity ............................... 325
General notes ................................ 324
Notes about oil grade s................... 324
Notes on oil level/consumption .... 277
Temperature (on-board computer, Mercedes-AMG vehicles) ............... 213
Topping up ..................................... 278
Entering an address
See also Digital Owner's Manua l... 253
Environmental protection
Returning an end-of-life vehicle ....... 23
ESP ®
(Electronic Stability Pro-
gram)
AMG menu (on-board computer) ... 213
Characteristics ................................. 67
Deactivating/activating (button
in Mercedes-AMG vehicles) ............. 70
Deactivating/activating (except
Mercedes‑ AMG vehicles) ................. 69
Display message ............................ 217
Function/note s................................ 67
General notes .................................. 67 Important safety guidelines ............. 67
Warning lamp ................................. 246
ETS/4ETS (Electronic Traction Sys-
tem) ...................................................... 67
Exhaust pipe (cleaning instruc-
tions) .................................................. 285
Exterior lighting
Settings options ............................. 113
see Lights
Exterior mirrors
Adjusting ....................................... 108
Anti-dazzle mode (automatic) ........ 109
Folding in when locking (on-board computer) ...................................... 212
Folding in/out (automatically )....... 109
Folding in/out (electrically) ........... 109
Out of position (troubleshooting) ... 109
Parking position ............................. 110
Resetting ....................................... 109
Storing settings (memory func-
tion) ............................................... 111 F
Fault message see Display messages
Favourites
Overview ........................................ 254
Filler cap
see Fuel filler flap
Fire extinguisher ............................... 287
First-aid kit ......................................... 287
Fitting a wheel
Fitting a wheel ............................... 316
Lowering the vehicle ...................... 316
Preparing the vehicle ..................... 313
Raising the vehicle ......................... 313
Removing a wheel .......................... 315
Securing the vehicle against roll-
ing away ........................................ 313
Flat tyre
MOExtended tyre s......................... 289
Preparing the vehicle ..................... 289
TIREFIT kit ...................................... 290
see Emergency spare wheel
Floormat ............................................. 274
Foglamps
Extended rang e.............................. 116 10
Index
Page 17 of 333
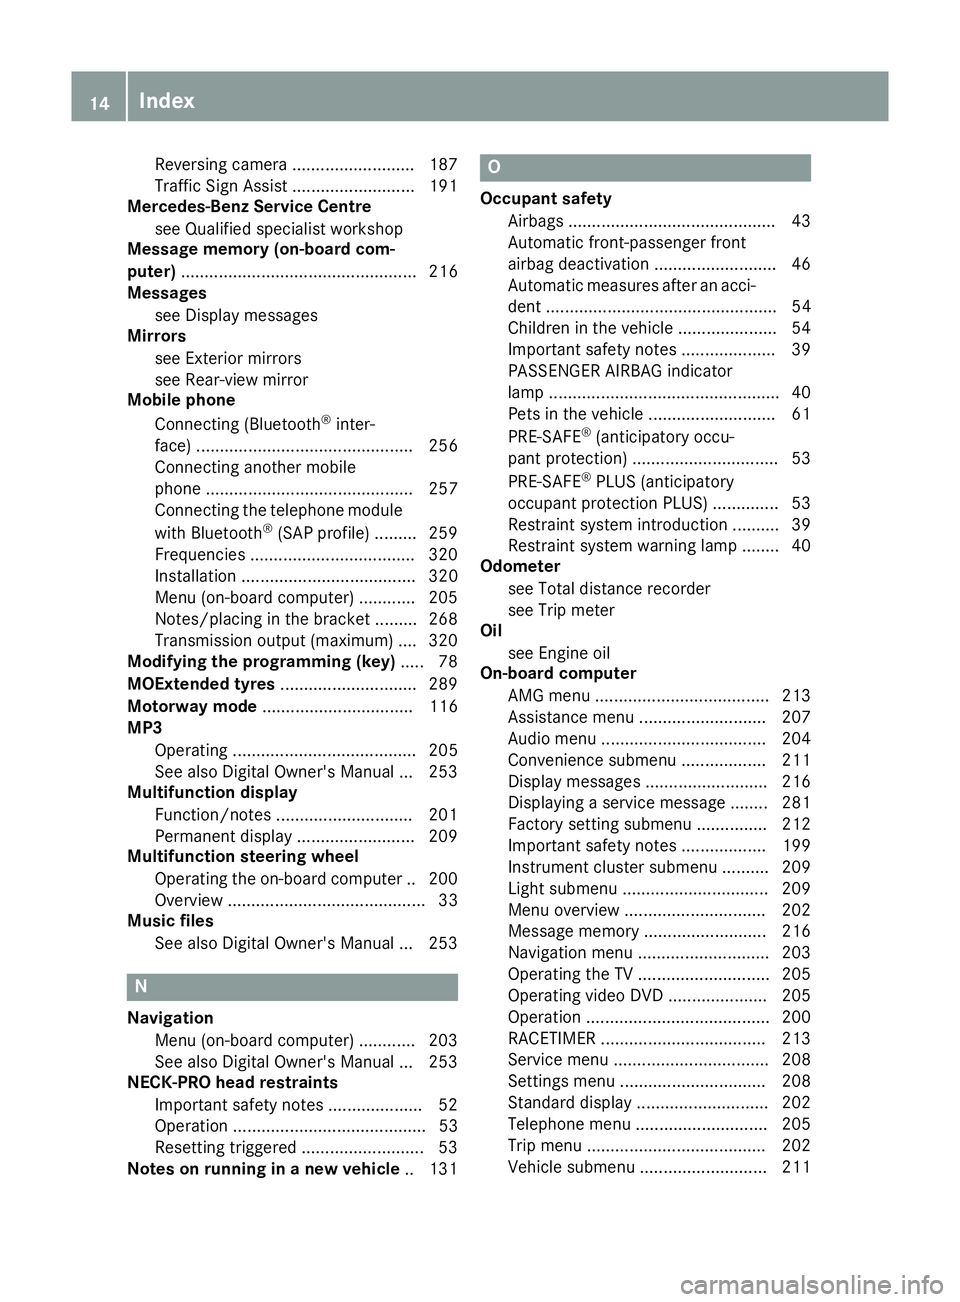
Reversing camera .......................... 187
Traffic Sign Assist .......................... 191
Mercedes-Benz Service Centre
see Qualified specialist workshop
Message memory (on-board com-
puter) .................................................. 216
Messages
see Display messages
Mirrors
see Exterior mirrors
see Rear-view mirror
Mobile phone
Connecting (Bluetooth ®
inter-
face) .............................................. 256
Connecting another mobile
phone ............................................ 257
Connecting the telephone module
with Bluetooth ®
(SAP profile ) ......... 259
Freq uencies .................................. .320
Installation ..................................... 320
Menu (on-board computer) ............ 205
Notes/placing in the bracket ......... 268
Transmission output (maximum) .... 320
Modifying the programming (key) ..... 78
MOExtended tyres .............................289
Motorway mode ................................ 116
MP3
Operating ....................................... 205
See also Digital Owner's Manual ... 253
Multifunction display
Function/notes ............................ .201
Permanent display ......................... 209
Multifunction steering wheel
Operating the on-board computer .. 200
Overview .......................................... 33
Music files
See also Digital Owner's Manual ... 253 N
Navigation Menu (on-board computer) ............ 203
See also Digital Owner's Manual ... 253
NECK-PRO head restraints
Important safety notes .................... 52
Operation ......................................... 53
Resetting triggered .......................... 53
Notes on running in a new vehicle .. 131 O
Occupant safety Airbags ............................................ 43
Automatic front-passenger front
airbag deactivatio n .......................... 46
Automatic measures after an acci-
dent ................................................. 54
Children in the vehicle ..................... 54
Important safety notes .................... 39
PASSENGER AIRBAG indicator
lamp ................................................. 40
Pets in the vehicle ........................... 61
PRE-SAFE ®
(anticipatory occu-
pant protection) ............................... 53
PRE-SAFE ®
PLUS (anticipatory
occupant protection PLUS) .............. 53
Restraint system introduction .......... 39
Restraint system warning lamp ....... .40
Odometer
see Total distance recorder
see Trip meter
Oil
see Engine oil
On-board computer
AMG menu .....................................2 13
Assistance menu ........................... 207
Audio menu ................................... 204
Convenience submenu .................. 211
Display messages .......................... 216
Displaying a service message ....... .281
Factory setting submenu .............. .212
Important safety notes .................. 199
Instrument cluster submenu .......... 209
Light submenu ............................... 209
Menu overview .............................. 202
Message memory .......................... 216
Navigation menu ............................ 203
Operating the TV ............................ 205
Operating video DVD ..................... 205
Operation ....................................... 200
RACETIMER ................................... 213
Service menu ................................. 208
Settings menu ............................... 208
Standard display ............................ 202
Telephone menu ............................ 205
Trip menu ...................................... 202
Vehicle submenu ........................... 211 14
Index
Page 20 of 333
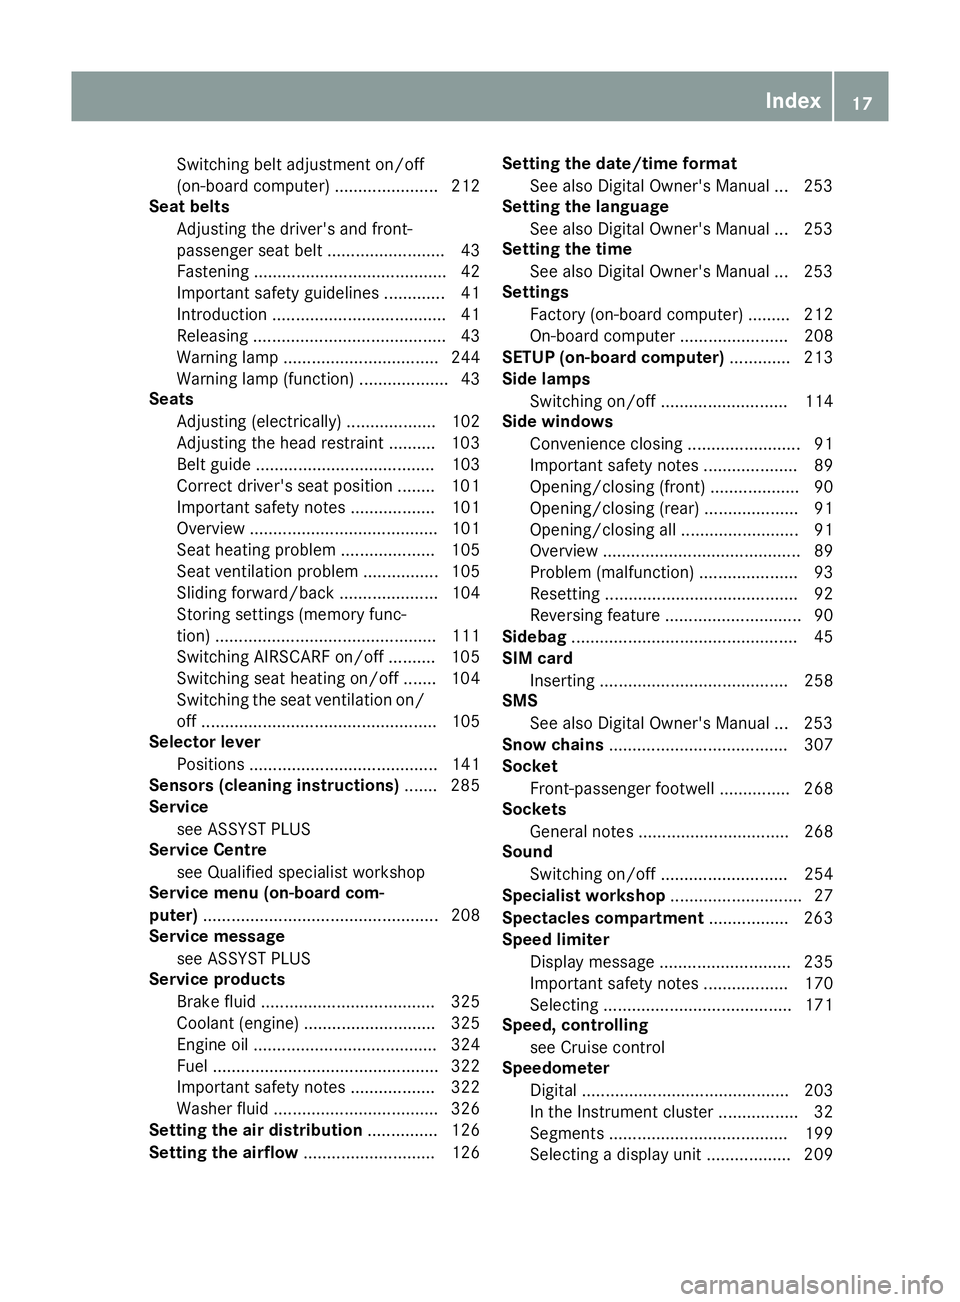
Switching belt adjustment on/off
(on-board computer) ...................... 212
Seat belts
Adjusting the driver's and front-
passenger seat belt ......................... 43
Fastening ......................................... 42
Important safety guidelines ............. 41
Introduction ..................................... 41
Releasing ......................................... 43
Warning lamp ................................. 244
Warning lamp (function) ................... 43
Seats
Adjusting (electrically) ................... 102
Adjusting the head restraint .......... 103
Belt guide ...................................... 103
Correct driver's seat position ........ 101
Important safety notes .................. 101
Overview ........................................ 101
Seat heating problem .................... 105
Seat ventilation problem ................ 105
Sliding forward/back ..................... 104
Storing settings (memory func-
tion) ............................................... 111
Switching AIRSCARF on/of f.......... 105
Switching seat heating on/of f....... 104
Switching the seat ventilation on/
off .................................................. 105
Selector lever
Positions ........................................ 141
Sensors (cleaning instructions) ....... 285
Service
see ASSYST PLUS
Service Centre
see Qualified specialist workshop
Service menu (on-board com-
puter) .................................................. 208
Service message
see ASSYST PLUS
Service products
Brake fluid ..................................... 325
Coolant (engine) ............................ 325
Engine oil ....................................... 324
Fuel ................................................ 322
Important safety notes .................. 322
Washer fluid ................................... 326
Setting the air distribution ............... 126
Setting the airflow ............................ 126 Setting the date/time format
See also Digital Owner's Manua l... 253
Setting the language
See also Digital Owner's Manua l... 253
Setting the time
See also Digital Owner's Manua l... 253
Settings
Factory (on-board computer) ......... 212
On-board compute r....................... 208
SETUP (on-board computer) ............. 213
Side lamps
Switching on/of f........................... 114
Side windows
Convenience closing ........................ 91
Important safety notes .................... 89
Opening/closing (front) ................... 90
Opening/closing (rear) .................... 91
Opening/closing all ......................... 91
Overview .......................................... 89
Problem (malfunction) ..................... 93
Resetting ......................................... 92
Reversing feature ............................. 90
Sidebag ................................................ 45
SIM card
Inserting ........................................ 258
SMS
See also Digital Owner's Manua l... 253
Snow chains ...................................... 307
Socket
Front-passenger footwell ............... 268
Sockets
General notes ................................ 268
Sound
Switching on/of f........................... 254
Specialist workshop ............................ 27
Spectacles compartment ................. 263
Speed limiter
Display message ............................ 235
Important safety notes .................. 170
Selecting ........................................ 171
Speed, controlling
see Cruise control
Speedometer
Digital ............................................ 203
In the Instrument cluster ................. 32
Segments ...................................... 199
Selecting a display uni t.................. 209 Index
17
Page 22 of 333
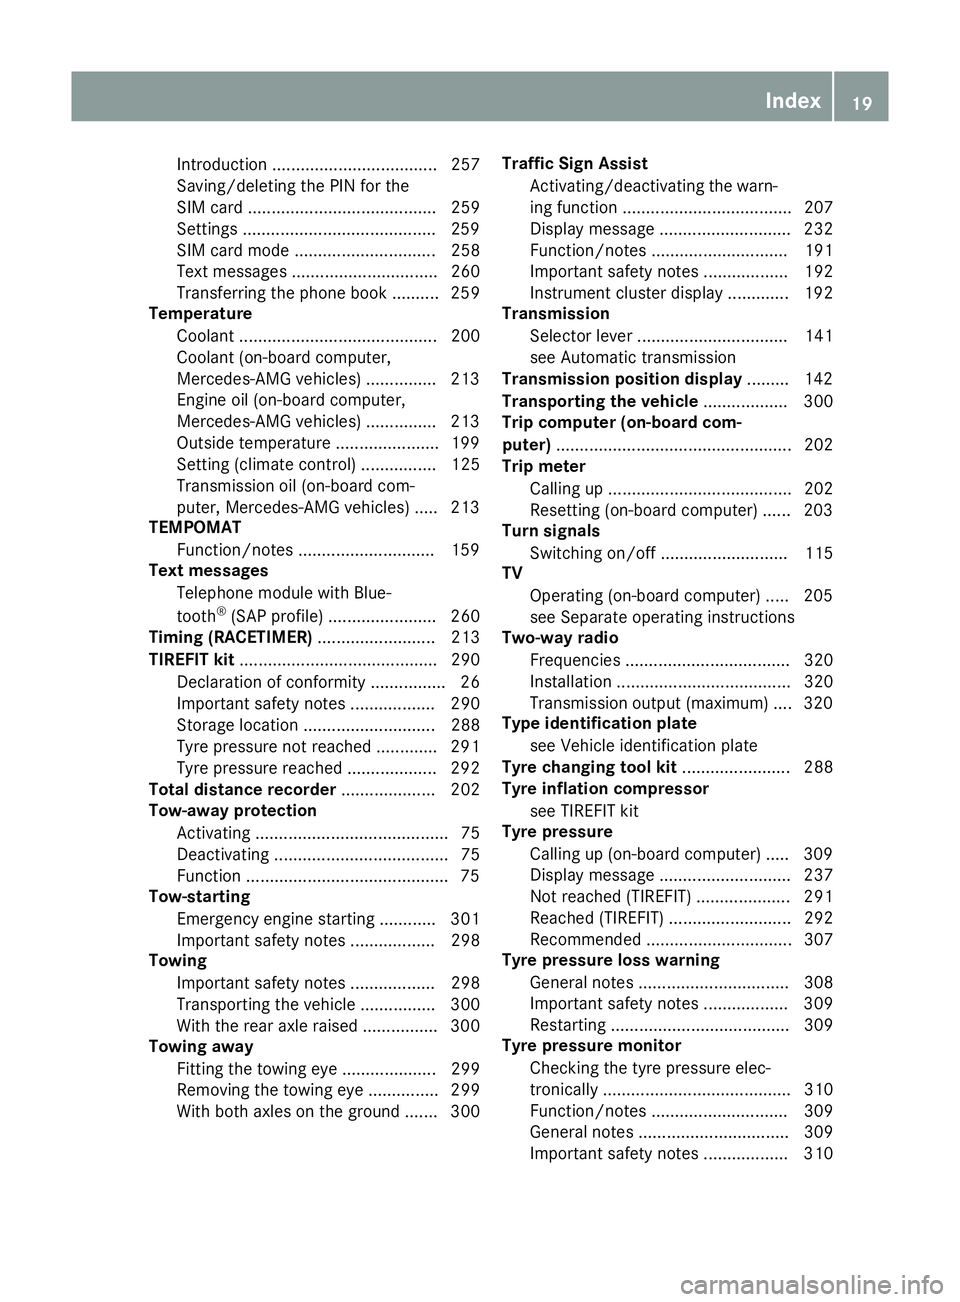
Introduction ................................... 257
Saving/deleting the PIN for the
SIM card ........................................ 259
Settings .........................................2 59
SIM card mode .............................. 258
Text messages ............................... 260
Transferring the phone book .......... 259
Temperature
Coolant .......................................... 200
Coolant (on-board computer,
Mercedes-AMG vehicles) .............. .213
Engine oil (on-board computer,
Mercedes-AMG vehicles) .............. .213
Outside temperature ..................... .199
Setting (climate control) ................ 125
Transmission oil (on-board com-
puter, Mercedes-AMG vehicles) ..... 213
TEMPOMAT
Function/notes ............................ .159
Text messages
Telephone module with Blue-
tooth ®
(SAP profile) ....................... 260
Timing (RACETIMER) ......................... 213
TIREFIT kit .......................................... 290
Declaration of conformity ................ 26
Important safety notes .................. 290
Storage location ............................ 288
Tyre pressure not reached ............. 291
Tyre pressure reached ................... 292
Total distance recorder .................... 202
Tow-away protection
Activating ......................................... 75
Deactivating ..................................... 75
Function .......................................... .75
Tow-starting
Emergency engine starting ............ 301
Important safety notes .................. 298
Towing
Important safety notes .................. 298
Transporting the vehicle ................ 300
With the rear axle raised ................ 300
Towing away
Fitting the towing ey e.................... 299
Removing the towing eye ............... 299
With both axles on the ground ....... 300 Traffic Sign Assist
Activating/deactivating the warn-ing function .................................... 207
Display message ............................ 232
Function/note s............................. 191
Important safety notes .................. 192
Instrument cluster display ............. 192
Transmission
Selector lever ................................ 141
see Automatic transmission
Transmission position display ......... 142
Transporting the vehicle .................. 300
Trip computer (on-board com-
puter) .................................................. 202
Trip meter
Calling up ....................................... 202
Resetting (on-board computer) ...... 203
Turn signals
Switching on/of f........................... 115
TV
Operating (on-board computer) ..... 205
see Separate operating instructions
Two-way radio
Frequencies ................................... 320
Installation ..................................... 320
Transmission output (maximum) .... 320
Type identification plate
see Vehicle identification plate
Tyre changing tool kit ....................... 288
Tyre inflation compressor
see TIREFIT kit
Tyre pressure
Calling up (on-board computer) ..... 309
Display message ............................ 237
Not reached (TIREFIT) .................... 291
Reached (TIREFIT) .......................... 292
Recommended ............................... 307
Tyre pressure loss warning
General notes ................................ 308
Important safety notes .................. 309
Restarting ...................................... 309
Tyre pressure monitor
Checking the tyre pressure elec-
tronically ........................................ 310
Function/note s............................. 309
General notes ................................ 309
Important safety notes .................. 310 Index
19
Page 30 of 333
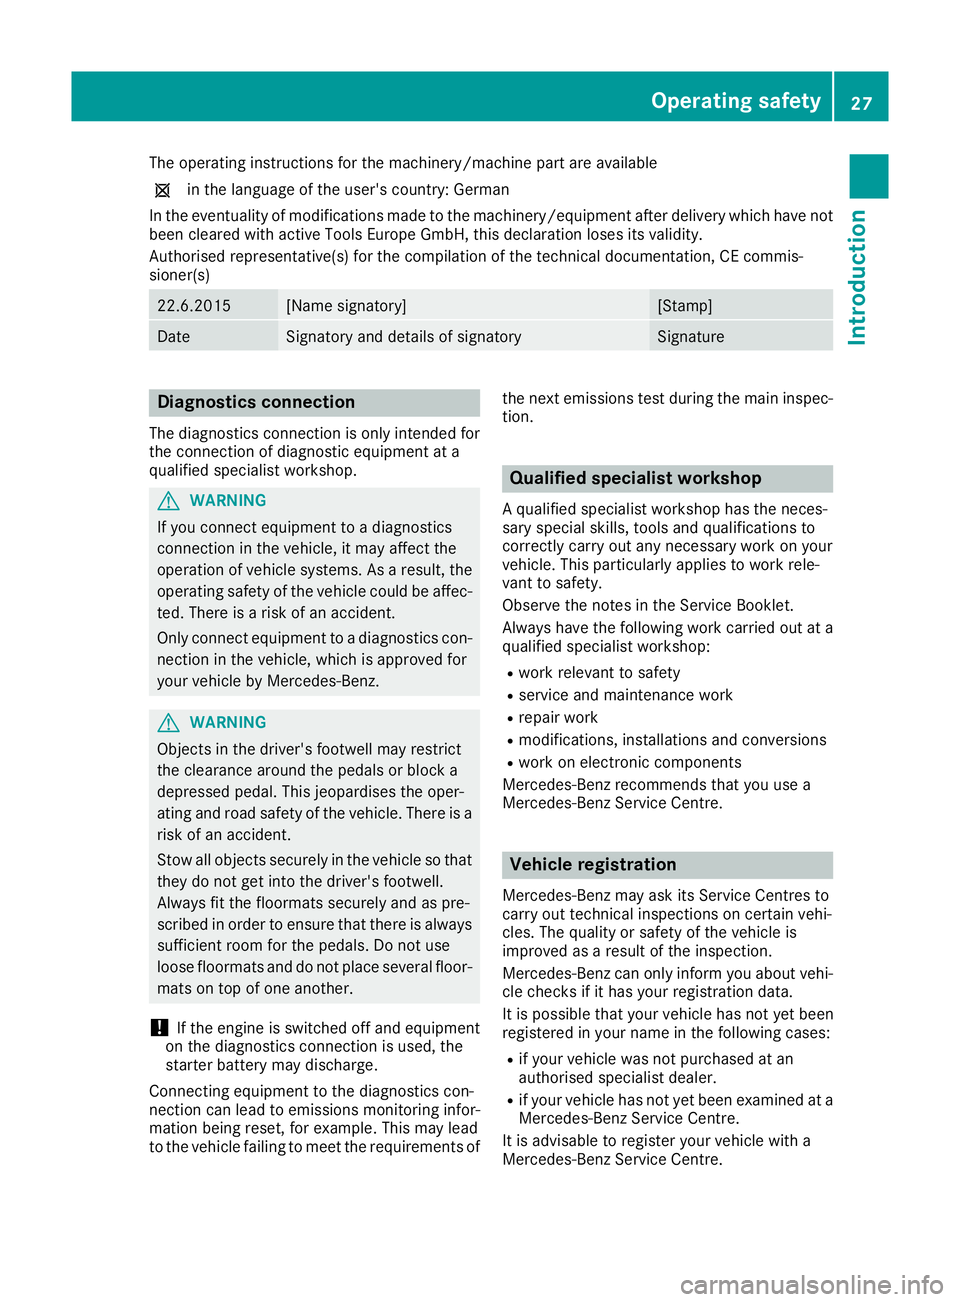
The operating instructions for the machinery/machine part are available
1 in the language of the user's country: German
In the eventuality of modifications made to the machinery/equipment after delivery which have not
been cleared with active Tools Europe GmbH, this declaration loses its validity.
Authorised representative(s) for the compilation of the technical documentation, CE commis-
sioner(s) 22.6.2015 [Name signatory] [Stamp]
Date Signatory and details of signatory Signature
Diagnostics connection
The diagnostics connection is only intended for
the connection of diagnostic equipment at a
qualified specialist workshop. G
WARNING
If you connect equipment to a diagnostics
connection in the vehicle, it may affect the
operation of vehicle systems. As a result, the operating safety of the vehicle could be affec-
ted. There is a risk of an accident.
Only connect equipment to a diagnostics con-
nection in the vehicle, which is approved for
your vehicle by Mercedes-Benz. G
WARNING
Objects in the driver's footwell may restrict
the clearance around the pedals or block a
depressed pedal. This jeopardises the oper-
ating and road safety of the vehicle. There is a risk of an accident.
Stow all objects securely in the vehicle so that
they do not get into the driver's footwell.
Always fit the floormats securely and as pre-
scribed in order to ensure that there is always sufficient room for the pedals. Do not use
loose floormats and do not place several floor- mats on top of one another.
! If the engine is switched off and equipment
on the diagnostics connection is used, the
starter battery may discharge.
Connecting equipment to the diagnostics con-
nection can lead to emissions monitoring infor-
mation being reset, for example. This may lead
to the vehicle failing to meet the requirements of the next emissions test during the main inspec-
tion. Qualified specialist workshop
A qualified specialist workshop has the neces-
sary special skills, tools and qualifications to
correctly carry out any necessary work on your
vehicle. This particularly applies to work rele-
vant to safety.
Observe the notes in the Service Booklet.
Always have the following work carried out at a
qualified specialist workshop:
R work relevant to safety
R service and maintenance work
R repair work
R modifications, installations and conversions
R work on electronic components
Mercedes-Benz recommends that you use a
Mercedes-Benz Service Centre. Vehicle registration
Mercedes-Benz may ask its Service Centres to
carry out technical inspections on certain vehi-
cles. The quality or safety of the vehicle is
improved as a result of the inspection.
Mercedes-Benz can only inform you about vehi-
cle checks if it has your registration data.
It is possible that your vehicle has not yet been
registered in your name in the following cases:
R if your vehicle was not purchased at an
authorised specialist dealer.
R if your vehicle has not yet been examined at a
Mercedes-Benz Service Centre.
It is advisable to register your vehicle with a
Mercedes-Benz Service Centre. Operating safety
27Introduction Z
Page 56 of 333
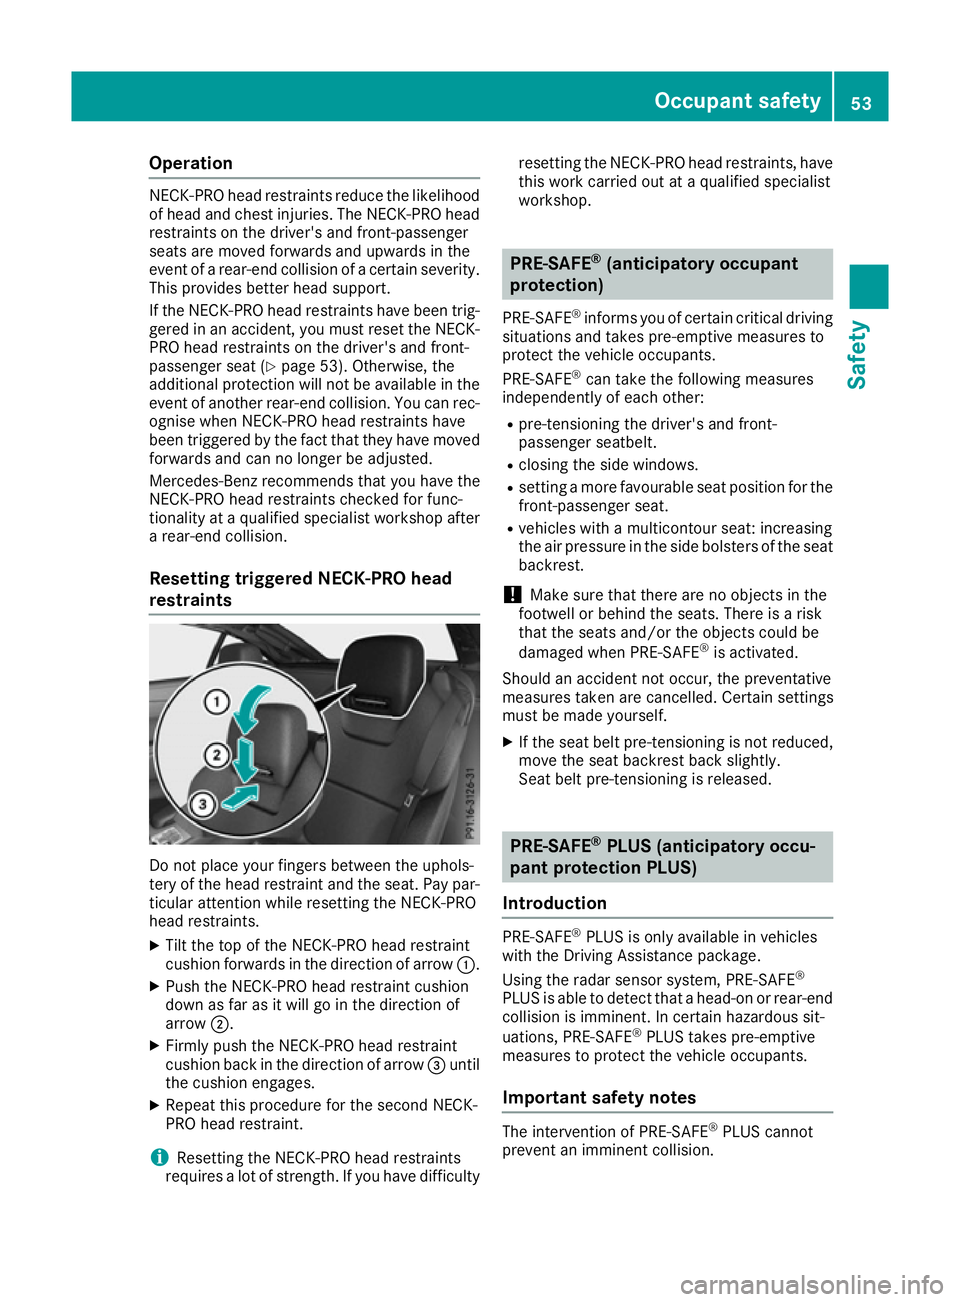
Operation
NECK-PRO head restraints reduce the likelihood
of head and chest injuries. The NECK-PRO head
restraints on the driver's and front-passenger
seats are moved forwards and upwards in the
event of a rear-end collision of a certain severity. This provides better head support.
If the NECK-PRO head restraints have been trig-
gered in an accident, you must reset the NECK-
PRO head restraints on the driver's and front-
passenger seat (Y page 53). Otherwise, the
additional protection will not be available in the event of another rear-end collision. You can rec-ognise when NECK-PRO head restraints have
been triggered by the fact that they have moved
forwards and can no longer be adjusted.
Mercedes-Benz recommends that you have the
NECK-PRO head restraints checked for func-
tionality at a qualified specialist workshop after a rear-end collision.
Resetting triggered NECK-PRO head
restraints Do not place your fingers between the uphols-
tery of the head restraint and the seat. Pay par-
ticular attention while resetting the NECK-PRO
head restraints.
X Tilt the top of the NECK-PRO head restraint
cushion forwards in the direction of arrow :.
X Push the NECK-PRO head restraint cushion
down as far as it will go in the direction of
arrow ;.
X Firmly push the NECK-PRO head restraint
cushion back in the direction of arrow =until
the cushion engages.
X Repeat this procedure for the second NECK-
PRO head restraint.
i Resetting the NECK-PRO head restraints
requires a lot of strength. If you have difficulty resetting the NECK-PRO head restraints, have
this work carried out at a qualified specialist
workshop. PRE-SAFE
®
(anticipatory occupant
protection)
PRE-SAFE ®
informs you of certain critical driving
situations and takes pre-emptive measures to
protect the vehicle occupants.
PRE-SAFE ®
can take the following measures
independently of each other:
R pre-tensioning the driver's and front-
passenger seatbelt.
R closing the side windows.
R setting a more favourable seat position for the
front-passenger seat.
R vehicles with a multicontour seat: increasing
the air pressure in the side bolsters of the seat
backrest.
! Make sure that there are no objects in the
footwell or behind the seats. There is a risk
that the seats and/or the objects could be
damaged when PRE-SAFE ®
is activated.
Should an accident not occur, the preventative
measures taken are cancelled. Certain settings
must be made yourself. X If the seat belt pre-tensioning is not reduced,
move the seat backrest back slightly.
Seat belt pre-tensioning is released. PRE-SAFE
®
PLUS (anticipatory occu-
pant protection PLUS)
Introduction PRE-SAFE
®
PLUS is only available in vehicles
with the Driving Assistance package.
Using the radar sensor system, PRE-SAFE ®
PLUS is able to detect that a head-on or rear-end collision is imminent. In certain hazardous sit-
uations, PRE-SAFE ®
PLUS takes pre-emptive
measures to protect the vehicle occupants.
Important safety notes The intervention of PRE-SAFE
®
PLUS cannot
prevent an imminent collision. Occupant safety
53Safety Z
Page 93 of 333

G
WARNING
While closing the side windows, body parts in the closing area could become trapped. There is a risk of injury.
When closing make sure that no parts of the
body are in the closing area. If somebody
becomes trapped, release the switch or press
the switch to open the side window again. G
WARNING
Children could become trapped if they oper-
ate the side windows, particularly when unat- tended. There is a risk of injury.
When leaving the vehicle, always take the key
with you and lock the vehicle. Never leave
children unattended in the vehicle. Side window reversing feature
The front side windows are equipped with an
automatic reversing feature. If a solid object
blocks or restricts the upward movement of one of the front side windows during the closing
process, the side window opens again automat-
ically. During the manual closing process, the
side window only opens again automatically
after the corresponding switch is released. How- ever, the automatic reversing feature is only an
aid, not a substitute for your attention when
closing the side window. G
WARNING
The reversing function does not react:
R to soft, light and thin objects, e.g. small fin-
gers
R over the last 4 mm of the closing movement
R during resetting
R when closing the side window again man-
ually immediately after automatic reversing
This means that the reversing function cannot prevent someone being trapped in these sit-
uations. There is a risk of injury.
When closing make sure that no parts of the
body are in the closing area. If someone
becomes trapped, press the switch to open
the side window again. Opening and closing the side win-
dows
Opening and closing the side windows
in the front The switches for the side windows are located
on the driver's door. There is also a switch for
the front-passenger side window on the front-
passenger door.
The switches on the driver's door take prece-
dence. :
Left
; Right
X Turn the key to position 1or 2in the ignition
lock.
X To open manually: press and hold the cor-
responding button.
X To open fully: press the button beyond the
point of resistance and release it.
Automatic operation is started.
X To close manually: pull the corresponding
button and hold it.
X To close fully: pull the button beyond the
point of resistance and release it.
Automatic operation is started.
X To interrupt automatic operation: press or
pull the corresponding switch again.
You can continue to operate the side windows
after you switch off the engine. This function
remains active for five minutes or until the driv- er's or front-passenger door is opened. 90
Side windowsOpening and closing