2016 MERCEDES-BENZ SL-CLASS ROADSTER ignition
[x] Cancel search: ignitionPage 128 of 614
XTo switch on:turn the SmartKey in the
ignition lock to position 1or 2or start the
engine.
XPull the combination switch in the direction of arrow =.
Hazard warning lamps
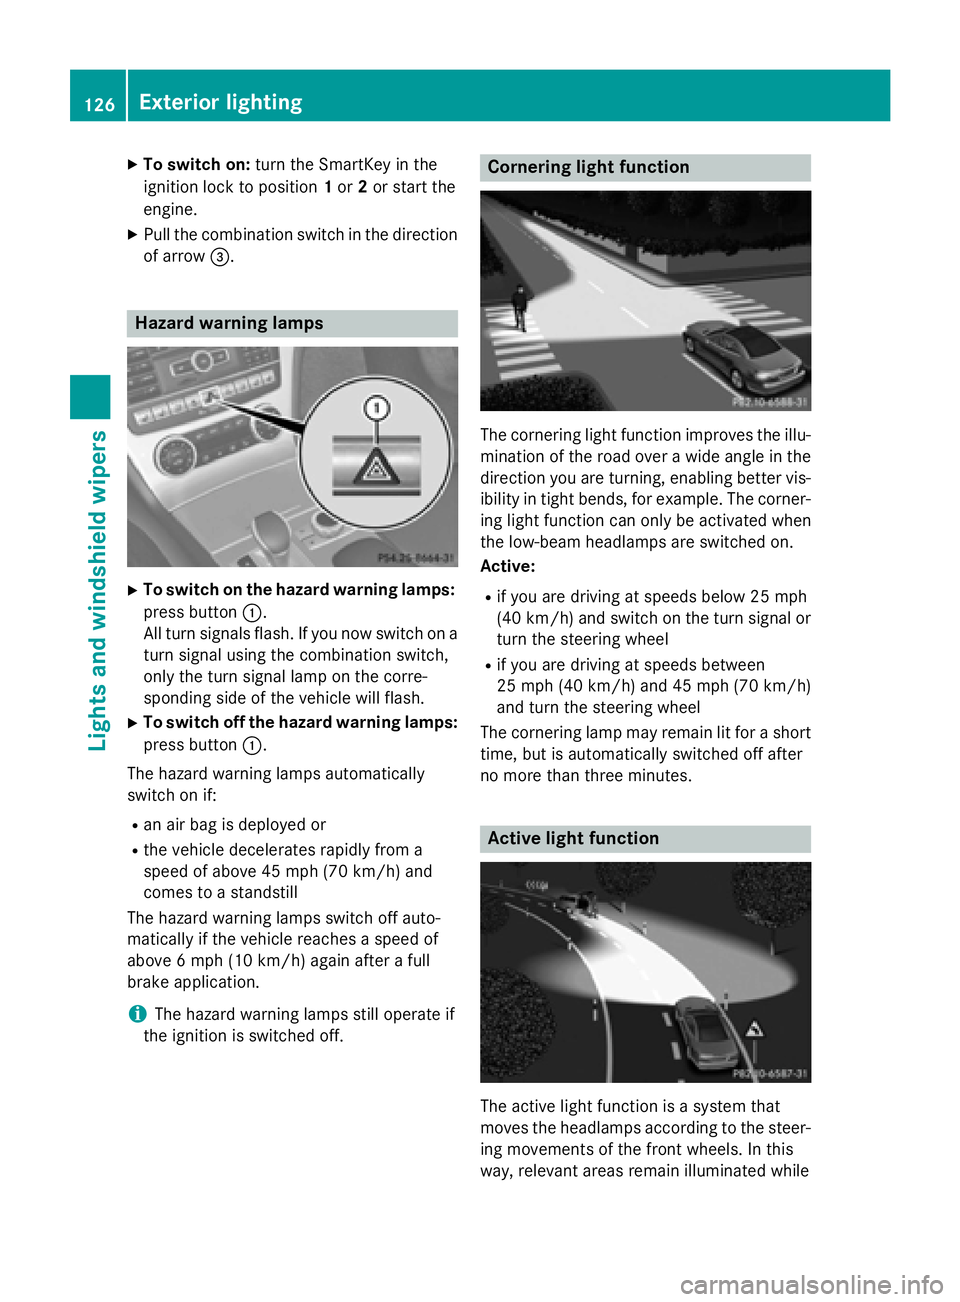
XTo switch on the hazard warning lamps:
press button :.
All turn signals flash. If you now switch on a
turn signal using the combination switch,
only the turn signal lamp on the corre-
sponding side of the vehicle will flash.
XTo switch off the hazard warning lamps:
press button :.
The hazard warning lamps automatically
switch on if:
Ran air bag is deployed or
Rthe vehicle decelerates rapidly from a
speed of above 45 mph (70 km/h) and
comes to a standstill
The hazard warning lamps switch off auto-
matically if the vehicle reaches a speed of
above 6 mph (10 km/h) again after a full
brake application.
iThe hazard warning lamps still operate if
the ignition is switched off.
Cornering light function
The cornering light function improves the illu-
mination of the road over a wide angle in the
direction you are turning, enabling better vis-
ibility in tight bends, for example. The corner-
ing light function can only be activated when
the low-beam headlamps are switched on.
Active:
Rif you are driving at speeds below 25 mph
(40 km/h) and switch on the turn signal or
turn the steering wheel
Rif you are driving at speeds between
25 mph (40 km/h) and 45 mph (70 km/h)
and turn the steering wheel
The cornering lamp may remain lit for a short
time, but is automatically switched off after
no more than three minutes.
Active light function
The active light function is a system that
moves the headlamps according to the steer-
ing movements of the front wheels. In this
way, relevant areas remain illuminated while
126Exterior lighting
Lights and windshield wiper s
Page 132 of 614

that these function correctly at all times.
Have the headlamp setting checked regularly.
Windshield wipers
Switching the windshield wipers
on/off
!
Do not operate the windshield wipers
when the windshield is dry, as this could
damage the wiper blades. Moreover, dust
that has collected on the windshield can
scratch the glass if wiping takes place when
the windshield is dry.
If it is necessary to switch on the windshield
wipers in dry weather conditions, always
use washer fluid when operating the wind-
shield wipers.
!If the windshield wipers leave smears on
the windshield after the vehicle has been
washed in an automatic car wash, wax or
other residues may be the reason for this.
Clean the windshield using washer fluid
after washing the vehicle in an automatic
car wash.
!Intermittent wiping with rain sensor: due
to optical influences and the windshield
becoming dirty in dry weather conditions,
the windshield wipers may be activated
inadvertently. This could then damage the
windshield wiper blades or scratch the
windshield.
For this reason, you should always switch
off the windshield wipers in dry weather.
Combination switch
1
$ Windshield wiper off
2ÄIntermittent wipe, low (rain sensor
set to low sensitivity)
3Å Intermittent wipe, high (rain sensor
set to high sensitivity)
4° Continuous wipe, slow
5¯Continuous wipe, fast
BíSingle wipe/î Wipes the wind-
shield using washer fluid
XSwitch on the ignition.
XTurn the combination switch to the corre-
sponding position.
In the ÄorÅ position, the appropriate
wiping frequency is set automatically accord-
ing to the intensity of the rain. In the Å
position, the rain sensor is more sensitive
than in the Äposition, causing the wind-
shield wiper to wipe more frequently.
If the wiper blades are worn, the windshield
will no longer be wiped properly. This could
prevent you from observing the traffic condi-
tions.
iThe vehicle is equipped with the MAGIC
VISION CONTROL wipe/wash system. The
washer fluid is fed through the wiper
blades; when the screen is wiped with
washer fluid î, the water is emitted
directly from the blades.
130Windshield wipers
Lights and windshield wiper s
Page 133 of 614
Replacing the wiper blades
Important safety notes
GWARNING
If the windshield wipers begin to move while
you are changing the wiper blades, you could be trapped by the wiper arm. There is a risk of
injury.
Always switch off the windshield wipers and
ignition before changing the wiper blades.
!To avoid damaging the wiper blades,
make sure that you touch only the wiper
arm of the wiper.
!Never open the hood if a windshield wiper
arm has been folded away from the wind-
shield.
Never fold a windshield wiper arm without a
wiper blade back onto the windshield.
Hold the windshield wiper arm firmly when
you change the wiper blade. If you release
the windshield wiper arm without a wiper
blade and it falls onto the windshield, the
windshield may be damaged by the force of
the impact.
Mercedes-Benz recommends that you have
the wiper blades changed at a qualified
specialist workshop.
!Always position the windshield wiper
arms vertically before folding them away
from the windshield. By doing so, you will
avoid damage to the hood.
Changing the windshield wiper blades
Moving the wiper arm to a vertical posi-
tion
On vehicles without KEYLESS-GO:
XTurn the SmartKey to position 1or 2in the
ignition lock.
XSet the windshield wiper to position °.
XWhen the wiper arms have reached the ver-
tical position, turn the SmartKey to position
0 and remove it from the ignition lock.
XFold the wiper arm away from the wind-
shield until it engages.
On vehicles with KEYLESS-GO:
XSwitch off the engine.
XRemove your foot from the brake pedal.
XSet the windshield wiper to the °posi-
tion.
XPress the Start/Stop button repeatedly
until the windshield wiper starts.
XWhen the wiper arms have reached a ver-
tical position, press the Start/Stop button.
XFold the wiper arm away from the wind-
shield until it engages.
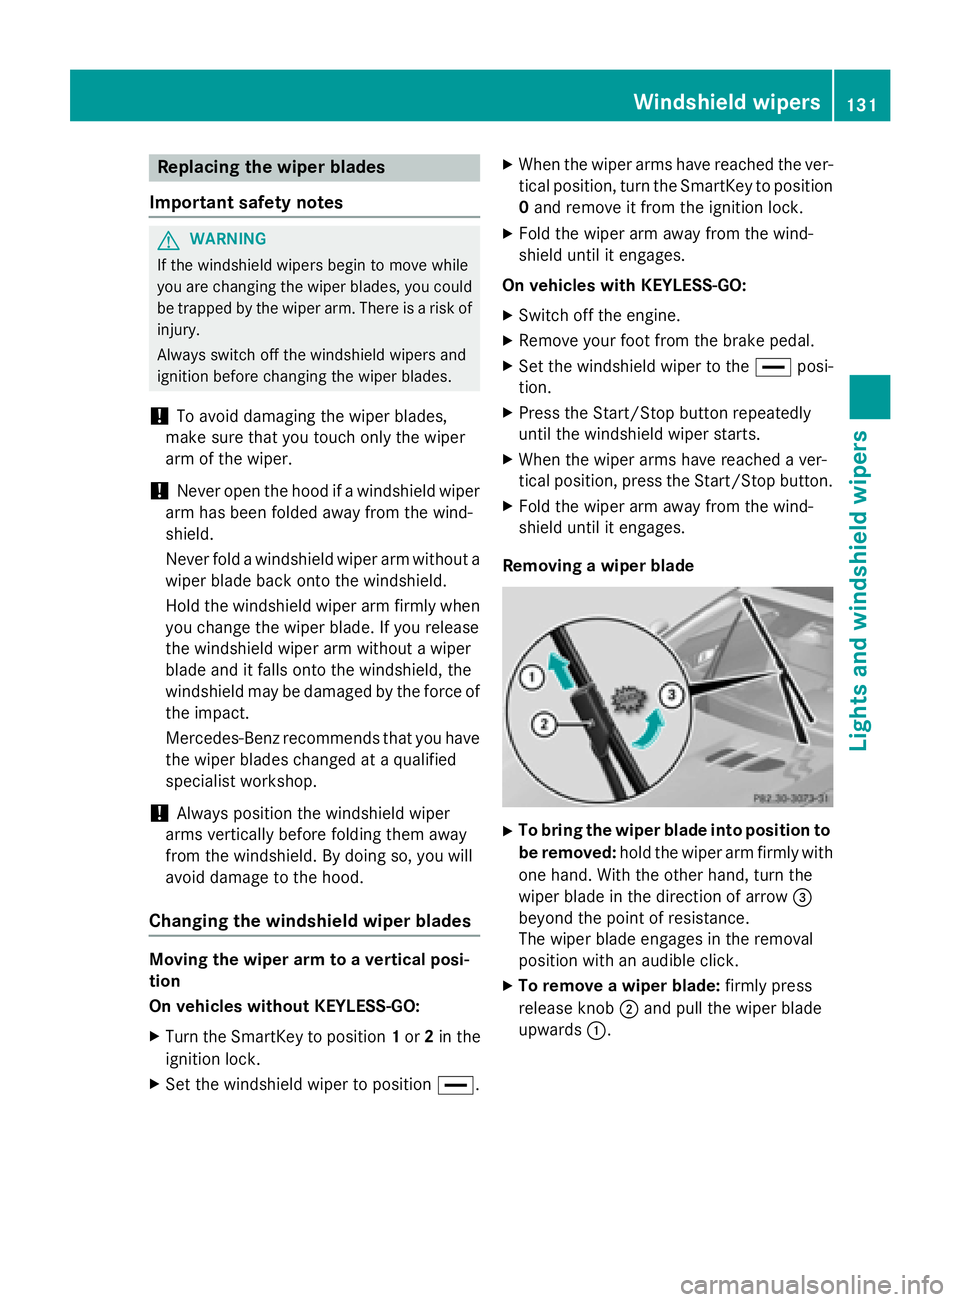
Removing a wiper blade
XTo bring the wiper blade into position to
be removed: hold the wiper arm firmly with
one hand. With the other hand, turn the
wiper blade in the direction of arrow =
beyond the point of resistance.
The wiper blade engages in the removal
position with an audible click.
XTo remove a wiper blade: firmly press
release knob ;and pull the wiper blade
upwards :.
Windshield wipers131
Lights and windshield wipers
Z
Page 135 of 614
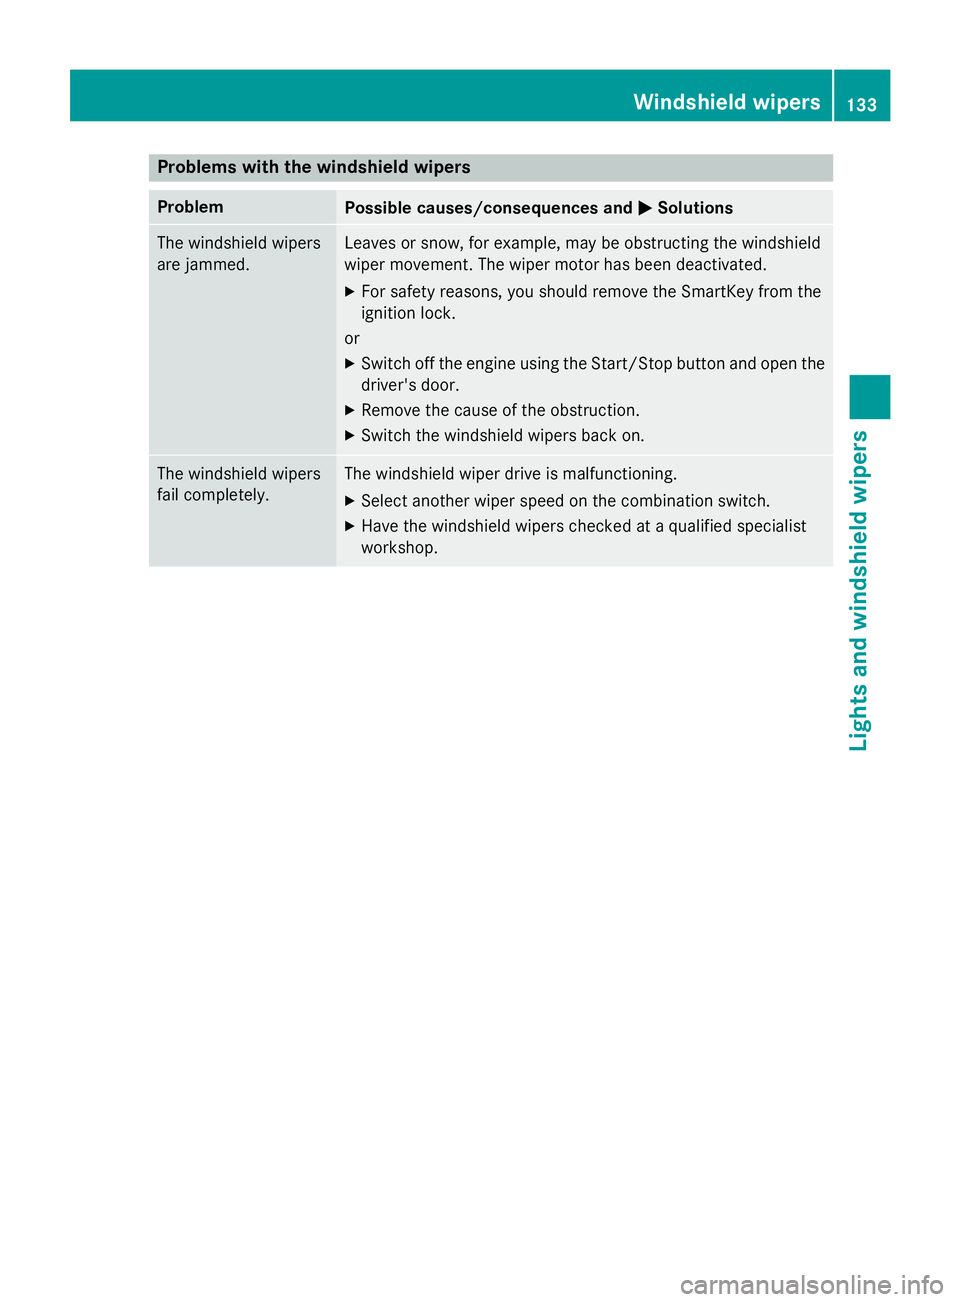
Problems with the windshield wipers
ProblemPossible causes/consequences andMSolutions
The windshield wipers
are jammed.Leaves or snow, for example, may be obstructing the windshield
wiper movement. The wiper motor has been deactivated.
XFor safety reasons, you should remove the SmartKey from the
ignition lock.
or
XSwitch off the engine using the Start/Stop button and open the driver's door.
XRemove the cause of the obstruction.
XSwitch the windshield wipers back on.
The windshield wipers
fail completely.The windshield wiper drive is malfunctioning.
XSelect another wiper speed on the combination switch.
XHave the windshield wipers checked at a qualified specialist
workshop.
Windshield wipers133
Lights and windshield wipers
Z
Page 138 of 614

Useful information
i
This Operator's Manual describes all
models and all standard and optional equip-
ment of your vehicle available at the time of
publication of the Operator's Manual.
Country-specific differences are possible.
Please note that your vehicle may not be
equipped with all features described. This
also applies to safety-related systems and
functions.
iRead the information on qualified special-
ist workshops (
Ypage 34).
Overview of climate control systems
General notes
Observe the settings recommended on the
following pages. The windows could other-
wise fog up.
To prevent the windows from fogging up:
Rswitch off climate control only briefly
Rswitch on air-recirculation mode only
briefly
Rswitch on the cooling with air dehumidifi-
cation function
Rswitch on the defrost windshield function
briefly, if required
Climate control regulates the temperature
and the humidity in the vehicle interior and
filters undesirable substances out of the air.
Climate control can only be operated when
the engine is running. Optimum operation is
only achieved with the side windows and roof closed.
The residual heat function can only be acti-
vated or deactivated with the ignition
switched off (
Ypage 146).
iWhen the weather is warm, ventilate the
vehicle for a brief period. This will speed up
the cooling process and the desired vehicle
interior temperature will be reached more
quickly.
iIt is possible that the dehumidification
function of the climate control system may be activated automatically an hour after the
SmartKey has been removed. The vehicle is
then ventilated for 30 minutes to dry the
air-conditioning system.
136Overview of climate control systems
Climate control
Page 141 of 614
RUse the ZONE function to adopt the tem-
perature settings on the driver's side for
the front-passenger side as well. The indi-
cator lamp in theábutton goes out.
RUse the residual heat function if you want to
heat or ventilate the vehicle interior when
the ignition is switched off. The residual
heat function can only be activated or deac-
tivated with the ignition switched off.
RVehicles with COMAND: if you change the
settings of the climate control system, the
climate status display appears for three
seconds at the bottom of the screen in the
COMAND display. See also the separate
COMAND operating instructions. You will
see the current settings of the various cli-
mate control functions.
ECO start/stop function
During automatic engine switch-off, the cli-
mate control only operates at a reduced capa-
city. If you require full climate control capa-
city, the ECO start/stop function can be
deactivated by pressing the ECO button
(
Ypage 156).
Operating the climate control sys-
tems
Activating/deactivating climate con-
trol
General notes
When the climate control is switched off, the
air supply and air circulation are also
switched off. The windows could fog up.
Therefore, switch off climate control only
briefly
iActivate climate control primarily using
the à button (
Ypage 141).
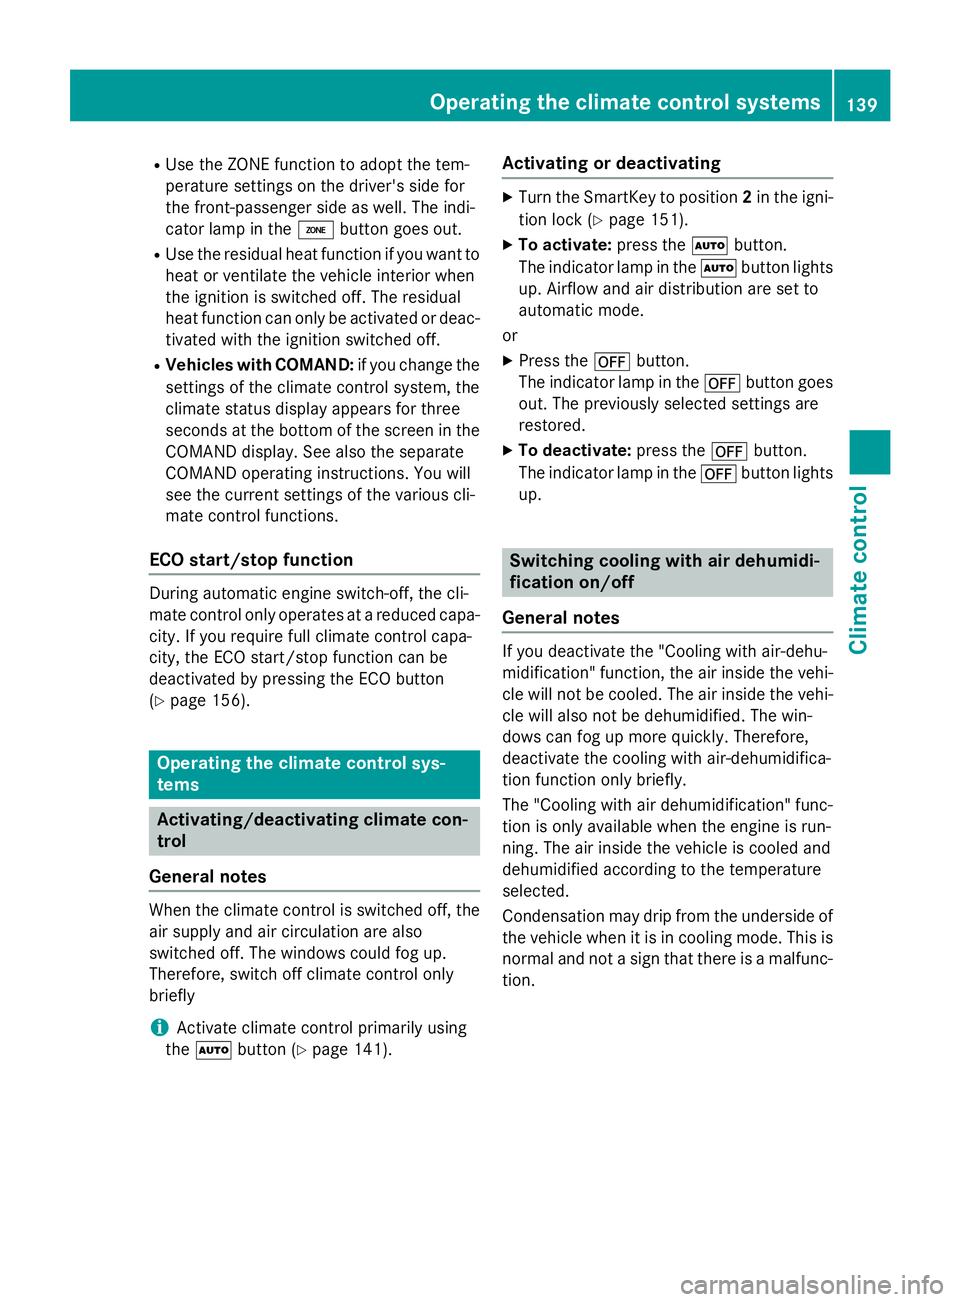
Activating or deactivating
XTurn the SmartKey to position 2in the igni-
tion lock (
Ypage 151).
XTo activate: press theÃbutton.
The indicator lamp in the Ãbutton lights
up. Airflow and air distribution are set to
automatic mode.
or
XPress the ^button.
The indicator lamp in the ^button goes
out. The previously selected settings are
restored.
XTo deactivate: press the^button.
The indicator lamp in the ^button lights
up.
Switching cooling with air dehumidi-
fication on/off
General notes
If you deactivate the "Cooling with air-dehu-
midification" function, the air inside the vehi- cle will not be cooled. The air inside the vehi-
cle will also not be dehumidified. The win-
dows can fog up more quickly. Therefore,
deactivate the cooling with air-dehumidifica-
tion function only briefly.
The "Cooling with air dehumidification" func-
tion is only available when the engine is run-
ning. The air inside the vehicle is cooled and
dehumidified according to the temperature
selected.
Condensation may drip from the underside of
the vehicle when it is in cooling mode. This is
normal and not a sign that there is a malfunc-
tion.
Operating the climate control systems139
Climate control
Page 149 of 614
The residual heat function is only available on
vehicles for Canada.
It is possible to make use of the residual heat
of the engine to continue heating the station-
ary vehicle for up to 30 minutesafter the
engine has been switched off. The heating
time depends on the set interior temperature.
Activating or deactivating
XTurn the SmartKey to position0in the igni-
tion lock or remove it (
Ypage 151).
XTo activate: press theÌbutton.
The indicator lamp in the Ìbutton lights
up.
iThe blower will run at a low speed regard-
less of the airflow setting.
iIf you activate the residual heat function
at high temperatures, only the ventilation
will be activated. The blower runs at
medium speed.
XTo deactivate: press theÌbutton.
The indicator lamp in the Ìbutton goes
out.
Residual heat is deactivated automatically:
Rafter approximately 30 minutes
Rwhen the ignition is switched on
Rif the battery voltage drops
Setting the air vents
Important safety notes
GWARNING
Very hot or very cold air can flow from the air
vents. This could result in burns or frostbite in
the immediate vicinity of the air vents. There
is a risk of injury.
Make sure that all vehicle occupants always
maintain a sufficient distance to the air out-
lets. If necessary, redirect the airflow to
another area of the vehicle interior.
GWARNING
When AIRSCARF is switched on, very hot air
can flow from the vents in the head restraints. This could result in burns in the immediate
vicinity of the air vents. There is a risk of injury.
Reduce the heater output before it becomes
too hot.
In order to ensure the direct flow of fresh air
through the air vents into the vehicle interior,
please observe the following notes:
Rkeep the air inlet grille on the hood and in
the engine compartment on the front-
passenger side free of blockages, such as
ice, snow or leaves.
Rnever cover the air vents or air intake grilles
in the vehicle interior.
iYou can move the adjusters for the air
vents vertically or horizontally to set the
direction of the airflow.
iFor optimal climate control in the vehicle,
open the air vents completely and set the
adjusters to the central position.
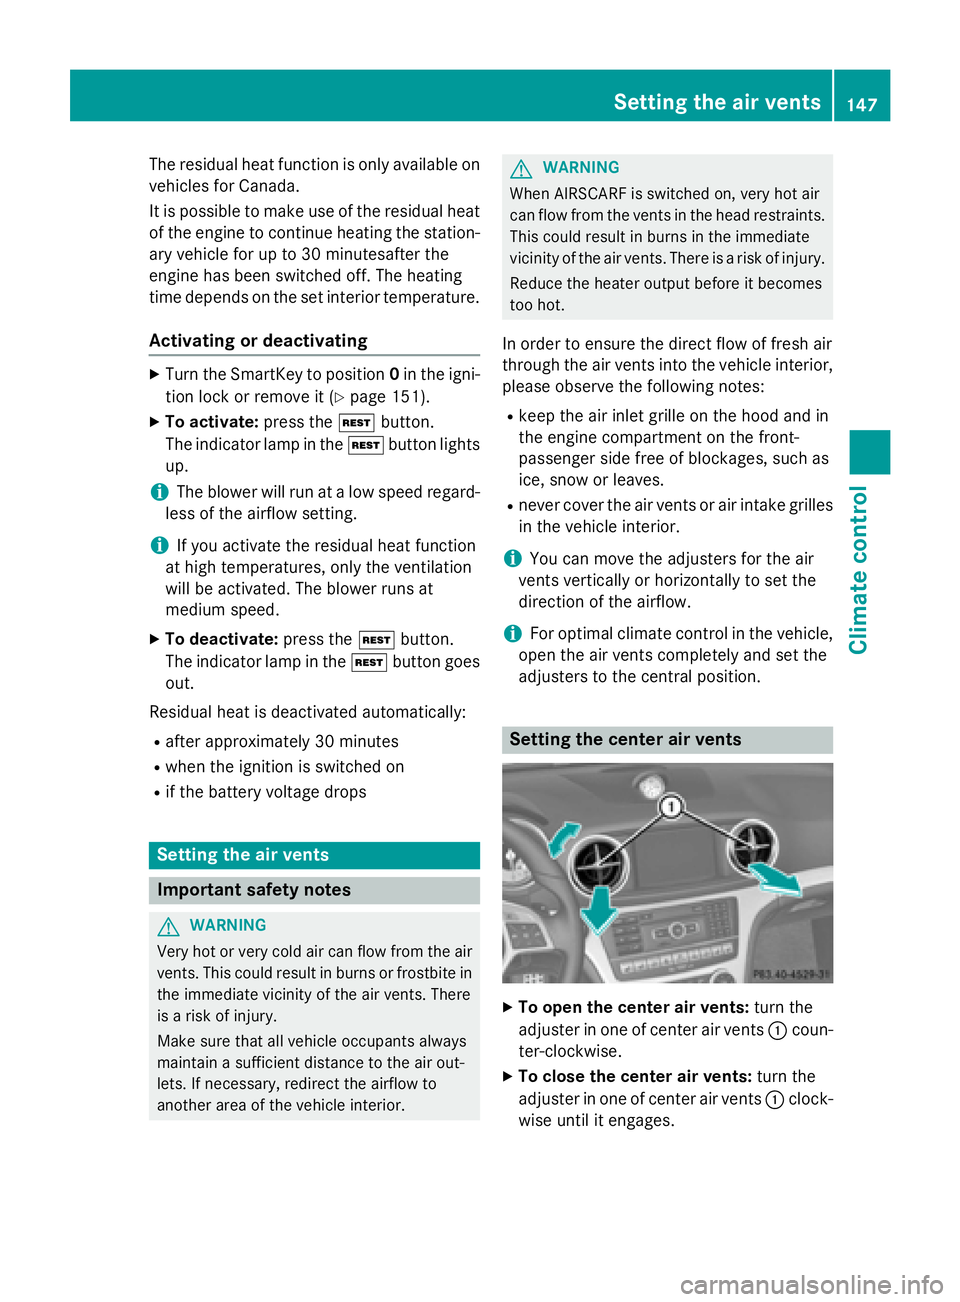
Setting the center air vents
XTo open the center air vents: turn the
adjuster in one of center air vents :coun-
ter-clockwise.
XTo close the center air vents: turn the
adjuster in one of center air vents :clock-
wise until it engages.
Setting the air vents147
Climate control
Z
Page 153 of 614
Driving
Important safet ynotes
GWARNING
Objects in th edriver's footwell can restric tth e
peda ltrave lor obstruct adepressed pedal.
The operatin gand road safet yof th evehicle is
jeopardized. There is aris kof an accident.
Mak esur ethat all objects in th evehicle are
stowed correctly, and that they canno tente r
th edriver's footwell. Install th efloormat s
securely and as specifie din order to ensur e
sufficien tclearanc efo rth epedals. Do no tuse
loose floormat sand do no tplac efloormat son
to pof on eanother.
GWARNING
Unsuitable footwear can hinder correc tusag e
of th epedals, e.g. :
Rshoes withthic ksoles
Rshoes wit hhig hheels
Rslipper s
There is aris kof an accident.
Wear suitable footwear to ensur ecorrec t
usag eof th epedals.
GWARNING
If you switch of fth eignition whil edriving,
safety-relevant function sare only available
wit hlimitations, or no tat all. Thi scould affect,
fo rexample, th epowe rsteerin gand th ebrake
boostin geffect .You will require considerably
more effort to steer and brake .There is aris k
of an accident.
Do no tswitch of fth eignition whil edriving.
GWARNING
If th eparking brake has no tbee nfull y
release dwhen driving, th eparking brake can :
Roverheat and cause afir e
Rlos eits hol dfunction .
There is aris kof fir eand an accident. Release
th eparking brake full ybefor edrivin goff.
!Do no twarm up th eengin ewit hth evehi-
cl e stationary. Drive of fimmediately. Avoid
hig hengin espeeds and drivin gat full throt-
tl e until th eengin ehas reached it soperat -
in g temperature .
Only shift th eautomatic transmissio nto
th edesire ddrive position when th evehicle
is stationary.
Where possible, avoid spinnin gth edrive
wheels when pulling away on slipper y
roads. You could otherwise damage th e
drive train .
!Mercedes-AMG vehicles :at low engin e
oil temperature sbelo w68 ‡(+2 0†), th e
maximum engin espeed is restricte din
order to protect th eengine. To protect th e
engin eand maintain smoot hengin eoper-
ation ,avoid drivin gat full throttle when th e
engin eis cold.
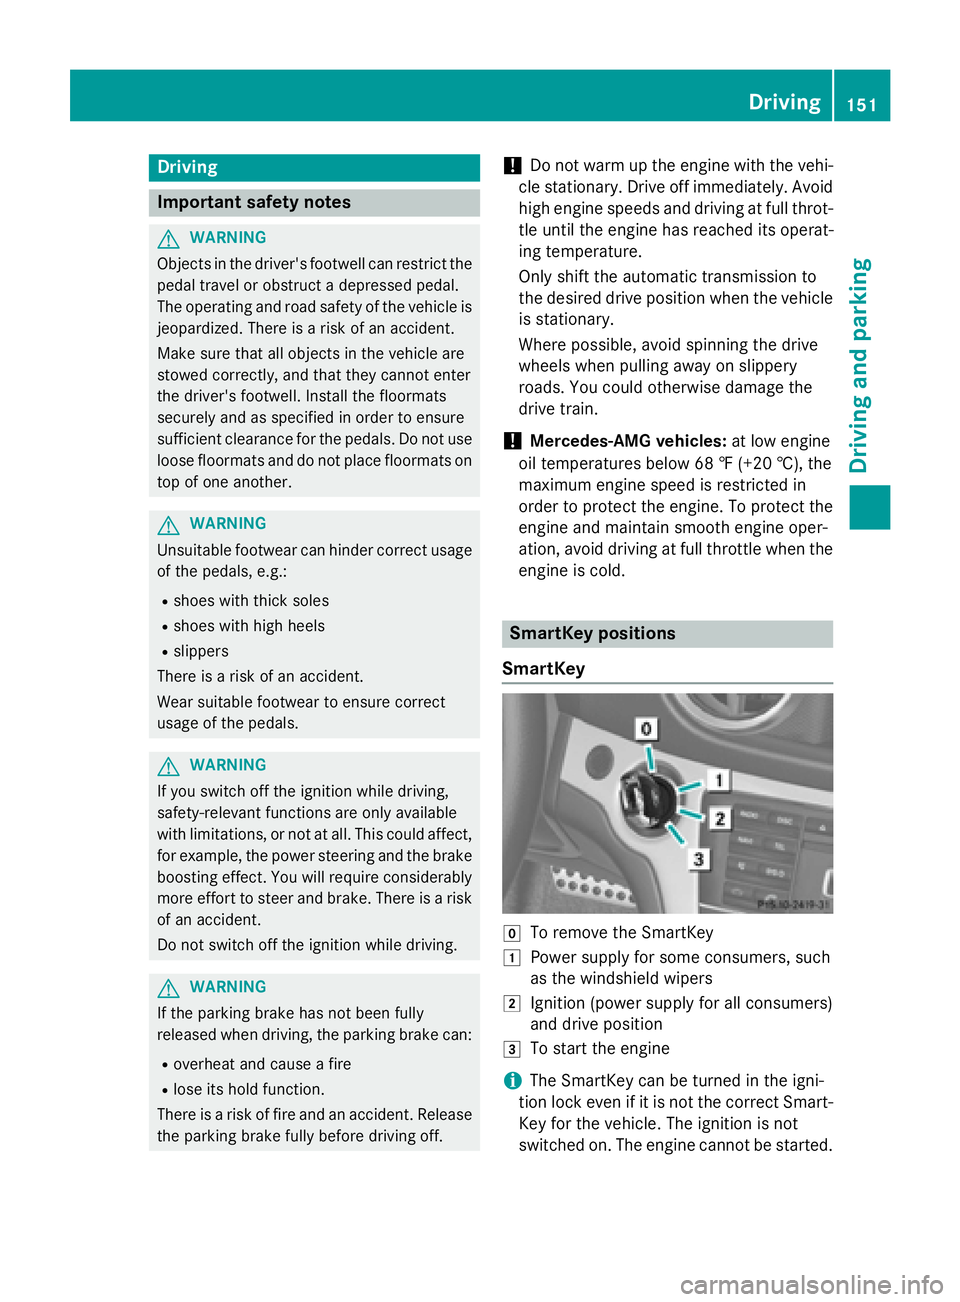
SmartKe ypositions
SmartKe y
gTo removeth eSmartKey
1Powe rsupply fo rsom econsumers ,suc h
as th ewindshield wipers
2Ignition (power supply fo rall consumers )
and drive position
3To start th eengin e
iThe SmartKey can be turned in th eigni-
tion loc keve nif it is no tth ecorrec tSmart -
Key fo rth evehicle. The ignition is no t
switched on .The engin ecanno tbe started.
Driving151
Driving and parking
Z