2016 MERCEDES-BENZ SL-CLASS ROADSTER ignition
[x] Cancel search: ignitionPage 99 of 614
dow and the door frame as the side window
moves. There is a risk of injury.
Make sure that nobody touches the side win-dow during the opening procedure. If some-
body becomes trapped, release the switch or
pull the switch to close the side window again.
GWARNING
While closing the side windows, body parts in
the closing area could become trapped. There is a risk of injury.
When closing make sure that no parts of the
body are in the closing area. If somebody
becomes trapped, release the switch or press
the switch to open the side window again.
GWARNING
If children operate the side windows they
could become trapped, particularly if they are left unsupervised. There is a risk of injury.
When leaving the vehicle, always take the
SmartKey with you and lock the vehicle. Never
leave children unsupervised in the vehicle.
Side window reversing feature
The front side windows are equipped with an
automatic reversing feature. If a solid object
blocks or restricts one of the front side win-
dows from traveling upwards during the auto-
matic closing process, the side window opens
again automatically. During the manual clos-
ing process, the side window only opens
again automatically after the corresponding
switch is released. However, the automatic
reversing feature is only an aid and does not
relieve you of the responsibility of paying
attention when closing a side window.
GWARNING
The reversing feature does not react:
Rto soft, light and thin objects, e.g. small fin-
gers
Rwhile resetting
This means that the reversing feature cannot
prevent someone being trapped in these sit-
uations. There is a risk of injury.
Make sure that no body parts are in close
proximity during the closing procedure. If
someone becomes trapped, press the switch
to open the side window again.
Opening and closing the side win-
dows
Opening and closing the side windows
in the front
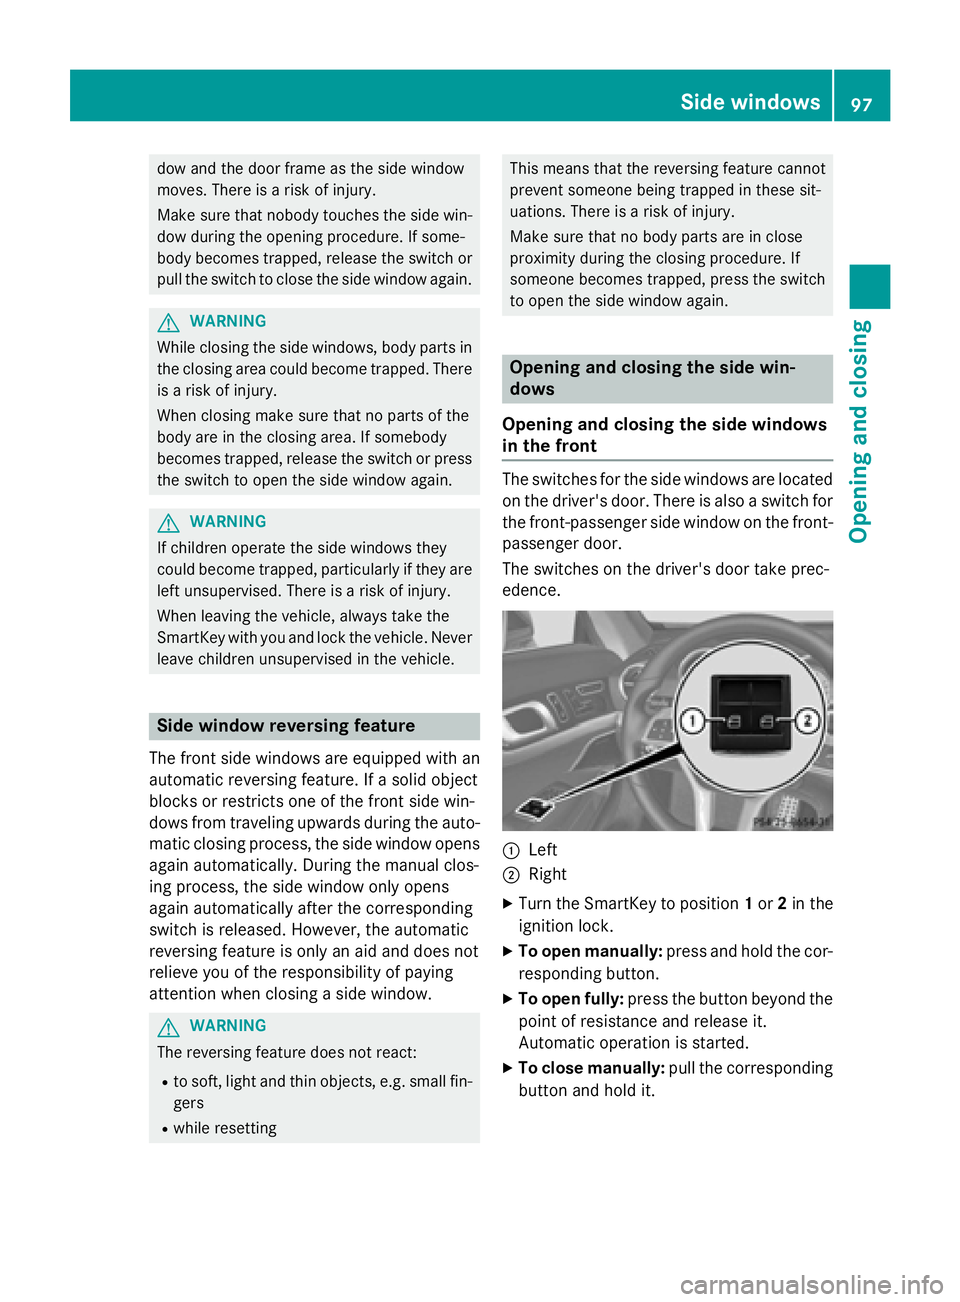
The switches for the side windows are located
on the driver's door. There is also a switch for
the front-passenger side window on the front-
passenger door.
The switches on the driver's door take prec-
edence.
:Left
;Right
XTurn the SmartKey to position 1or 2in the
ignition lock.
XTo open manually: press and hold the cor-
responding button.
XTo open fully: press the button beyond the
point of resistance and release it.
Automatic operation is started.
XTo close manually: pull the corresponding
button and hold it.
Side windows97
Opening and closing
Z
Page 101 of 614

You can use the SmartKey to open or close all
side windows simultaneously.
XClose the roof (Ypage 101).
XOpen the trunk partition (Ypage 102).
XVehicles without KEYLESS-GO:point the
tip of the SmartKey at the door handle on
the driver's door.
XVehicles with KEYLESS-GO: the Smart-
Key must be within 6 ft (2 m) of the vehicle.
XTo open all side windows: press the%
button on the key until the side windows
are fully opened.
XTo interrupt the opening procedure:
release the %button.
XTo close all side windows: press the&
button on the key until the side windows
are fully closed.
XTo interrupt the closing procedure:
release the &button.
Convenience closing with KEYLESS-GO
GWARNING
When using the convenience closing feature,
parts of the body could be trapped in the clos-
ing area when a side window is being closed.
There is a risk of injury.
Observe the complete closing procedure
when the convenience closing feature is oper-
ating. Make sure that no body parts are in
close proximity during the closing procedure.
If someone is trapped:
XRelease the recessed sensor surface on the
door handle immediately.
XPull the door handle immediately and hold
it until the side windows open again.
With KEYLESS-GO you can close all side win-
dows simultaneously. The KEYLESS-GO key
must be outside the vehicle. All the doors
must be closed.
XTouch recessed sensor surface :on the
door handle until the side windows are fully
closed.
iMake sure you only touch recessed sen-
sor surface :.
XMake sure that all the side windows are
closed.
XTo interrupt convenience closing:
release recessed sensor surface :on the
door handle.
Resetting the side windows
If a side window can no longer be closed fully,
you must reset it.
XClose all the doors.
XTurn the SmartKey to position 1or 2in the
ignition lock.
XPull the corresponding switch on the door
control panel until the side window is com- pletely closed (
Ypage 97).
XHold the switch for an additional second.
If the side window opens again slightly:
XImmediately pull the corresponding switch
on the door control panel until the side win-
dow is completely closed (
Ypage 97).
XHold the switch for an additional second.
XIf the respective side window remains
closed after the button is released, then it
has been set correctly. If this is not the
case, repeat the steps above again.
Side windows99
Opening and closing
Z
Page 104 of 614
Opening and closing using the Smart-
Key
Important safety notes
GWARNING
When opening or closing the roof, body parts
could be trapped by, for example, the roof
mechanism, trunk lid or side windows. There
is a risk of injury.
When raising or lowering the roof, make sure
that no body parts are in the vicinity of moving
components. If someone becomes trapped,
release the button.
Opening and closing
XClose the trunk partition (Ypage 102).
XClose the trunk lid (Ypage 91).
XVehicles without KEYLESS-GO: point the
tip of the SmartKey at the door handle on
the driver's door.
XVehicles with KEYLESS-GO: the Smart-
Key must be within 6 ft (2 m) of the vehicle.
XTo open: press and hold the %button
on the key until the roof is fully opened.
The roof and the rear side windows open.
The front side windows close.
XTo interrupt the opening procedure:
release the %button.
XTo open the front side windows: press
the % button on the key again.
XTo close: press and hold the &button
on the key until the roof is fully closed.
The roof and the side windows close.
XTo interrupt the closing procedure:
release the &button.
When the roof is closed and the trunk parti-
tion is open, the roof cannot be opened using the SmartKey functions. Instead, all of the
side windows open or close simultaneously
(
Ypage 98).
Locking the roof again
Important safety notes
GWARNING
If you do not fully open/close the soft top, the
soft-top hydraulics depressurize after a short
time. This causes the soft top to lower unex-
pectedly and may cause you or others to be
trapped. There is a risk of injury.
Always open or close the soft top completely.
The roof is not locked if:
Rthe K symbol and the Vario-Roofin
Operationmessage appear in the multi-
function display
Rthe K symbol and the Open/Close
Vario-Roof Completelymessage
appear and you hear a warning tone.
Ryou hear a warning tone for up to 10 sec-
onds when pulling away or while driving.
Locking
You can lock the roof again if it is not locked
fully.
XPull over and stop the vehicle safely as soon
as possible, paying attention to road and
traffic conditions.
XMake sure that the SmartKey is in position
2 in the ignition lock.
XPress the roof switch (Ypage 101).
Trunk partition
General notes
!To avoid damaging the roof or luggage
when folding back the roof, you should:
Ronly load the trunk to below the trunk
partition
Rnot place any objects on or in front of the
trunk partition
102Roof
Opening and closing
Page 107 of 614
MAGIC SKY CONTROL
General notes
MAGIC SKY CONTROL is a glass roof, the
transparency of which can be changed by
applying electrical voltage.
MAGIC SKY CONTROL can be switched
between darkened and transparent states.
MAGIC SKY CONTROL darkens automatically when you turn the key to position 0in the
ignition lock or remove the key.
Risk of electric shock
GDANGER
MAGIC SKY CONTROL operates using high
voltage. If the trim behind the overhead con-
trol panel is damaged or removed, electrical
components will be exposed. If you touch
these components, you could get an electric
shock. There is a risk of fatal injury.
RNever remove the trim behind the overhead
control panel.
RIf the trim is damaged, never touch the
electrical components behind it.
RAlways have work on the MAGIC SKY CON-
TROL carried out at a qualified specialist
workshop.
The electrical components of MAGIC SKY
CONTROL are protected by a paneling behind the overhead control panel.
The MAGIC SKY CONTROL control unit is
marked with a yellow warning sticker that
warns you of high voltage. The electric cables
of the vehicle's high-voltage electrical system
are orange in color.
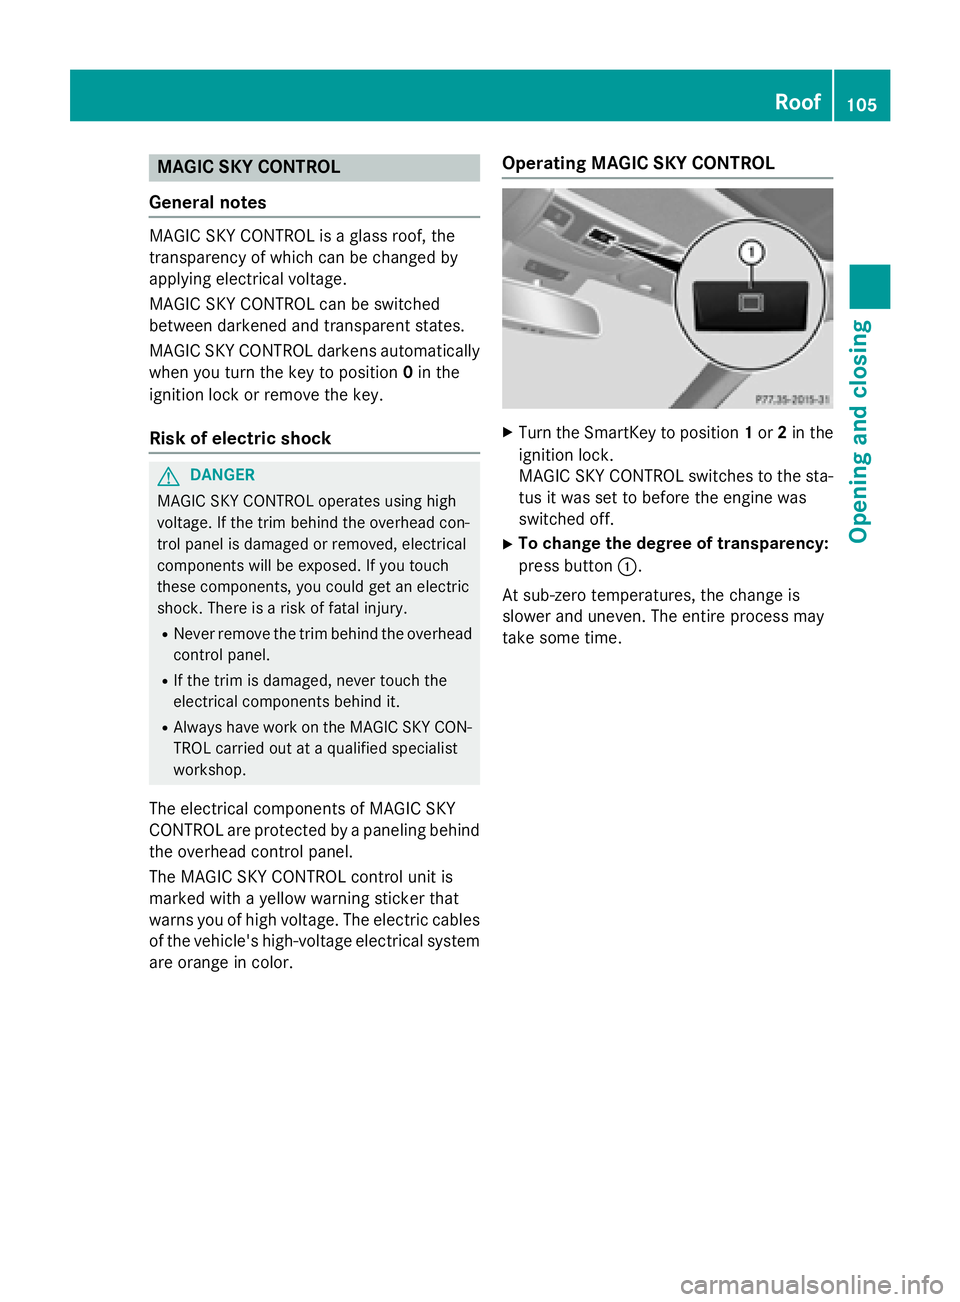
Operating MAGIC SKY CONTROL
XTurn the SmartKey to position 1or 2in the
ignition lock.
MAGIC SKY CONTROL switches to the sta- tus it was set to before the engine was
switched off.
XTo change the degree of transparency:
press button :.
At sub-zero temperatures, the change is
slower and uneven. The entire process may
take some time.
Roof105
Opening and closing
Z
Page 108 of 614
Problems with the roof
ProblemPossible causes/consequences andMSolutions
The roof will not open or
close.The trunk partition is not in place.
XClose the trunk partition (Ypage 103).
The trunk lid is open.
XClose the trunk lid (Ypage 92).
The on-board voltage is too low.
XLeave the engine running.
The roof has been opened and closed several times in a row. The
roof drive has been automatically deactivated.
You can open and close the roof again after approximately ten
minutes.
XSwitch off the ignition and turn it back on.
XRepeat the opening or closing procedure.
The automatic roof mechanism is faulty.
XConsult a qualified specialist workshop.
106Roof
Opening and closing
Page 111 of 614
The seat belt should:
Rfit snugly across your body
Rbe routed across the middle of your shoul-
der
Rbe routed in your pelvic area across the hip
joints
XBefore starting off, adjust the rear-view mir-
ror and the exterior mirrors (
Ypage 116) in
such a way that you have a good view of
road and traffic conditions.
XStore the seat, steering wheel and exterior
mirror settings using the memory function
(
Ypage 119).
Seats
Important safety notes
GWARNING
Children could become trapped if they adjust
the seats, particularly when unattended.
There is a risk of injury.
When leaving the vehicle, always take the
SmartKey with you and lock the vehicle. Never
leave children unsupervised in the vehicle.
The seats can still be adjusted when there is
no SmartKey in the ignition lock.
GWARNING
When you adjust a seat, you or other vehicle
occupants could become trapped, e.g. on the seat guide rail. There is a risk of injury.
Make sure when adjusting a seat that no one
has any body parts in the sweep of the seat.
Observe the safety notes on "Air bags"
(
Ypage 56) and "Children in the vehicle"
(
Ypage 68).
GWARNING
If you adjust the seat height carelessly, you or
other vehicle occupants could be trapped and
thereby injured. Children in particular could
accidentally press the electrical seat adjust-
ment buttons and become trapped. There is a risk of injury.
While moving the seats, make sure that your
hands or other body parts do not get under the
lever assembly of the seat adjustment sys-
tem.
GWARNING
If the head restraints are not installed or not
adjusted correctly, they cannot provide pro-
tection as intended. There is an increased risk
of injury in the head and neck area, e.g. in the event of an accident or when braking.
Always drive with the head restraints instal-
led. Before driving off, make sure for every
vehicle occupant that the center of the head
restraint supports the back of the head at
about eye level.
GWARNING
You could lose control of your vehicle if you do the following while driving:
Radjust the driver's seat, head restraint,
steering wheel or mirrors
Rfasten the seat belt
There is a risk of an accident.
Adjust the driver's seat, head restraint, steer-
ing wheel and mirror and fasten your seat belt before starting the engine.
!To avoid damage to the seats and the seat
heating, observe the following information:
Rkeep liquids from spilling on the seats. If
liquid is spilled on the seats, dry them as
soon as possible.
Rif the seat covers are damp or wet, do not
switch on the seat heating. The seat
heating should also not be used to dry
the seats.
Rclean the seat covers as recommended;
see the "Interior care" section.
Rdo not transport heavy loads on the
seats. Do not place sharp objects on the
seat cushions, e.g. knives, nails or tools.
Seats109
Seats, steering wheel and mirrors
Z
Page 115 of 614
The system automatically switches down
from level3to level 2after approximately
eight minutes.
The system automatically switches down
from level 2to level 1after approximately ten
minutes.
The system automatically switches off
approximately 20 minutes after it is set to
level 1.
You can set the distribution of the heated
sections of the seat cushion and backrest
using COMAND (
Ypage 318).
XMake sure that the SmartKey is in position 1 or 2in the ignition lock.
XTo switch on: press button:repeatedly
until the desired heating level is set.
XTo switch off: press button:repeatedly
until all the indicator lamps go out.
iIf the battery voltage is too low, the seat
heating may switch off.
Problems with the seat heating
The seat heating has switched off prema-
turely or cannot be switched on. The vehicle's
electrical system voltage is too low because
too many electrical consumers are switched
on.
XSwitch off electrical consumers that you do
not need, such as the rear window
defroster or interior lighting.
XOnce the battery is sufficiently charged,
switch on the seat heating again.
Switching the seat ventilation on/off
Activating/deactivating
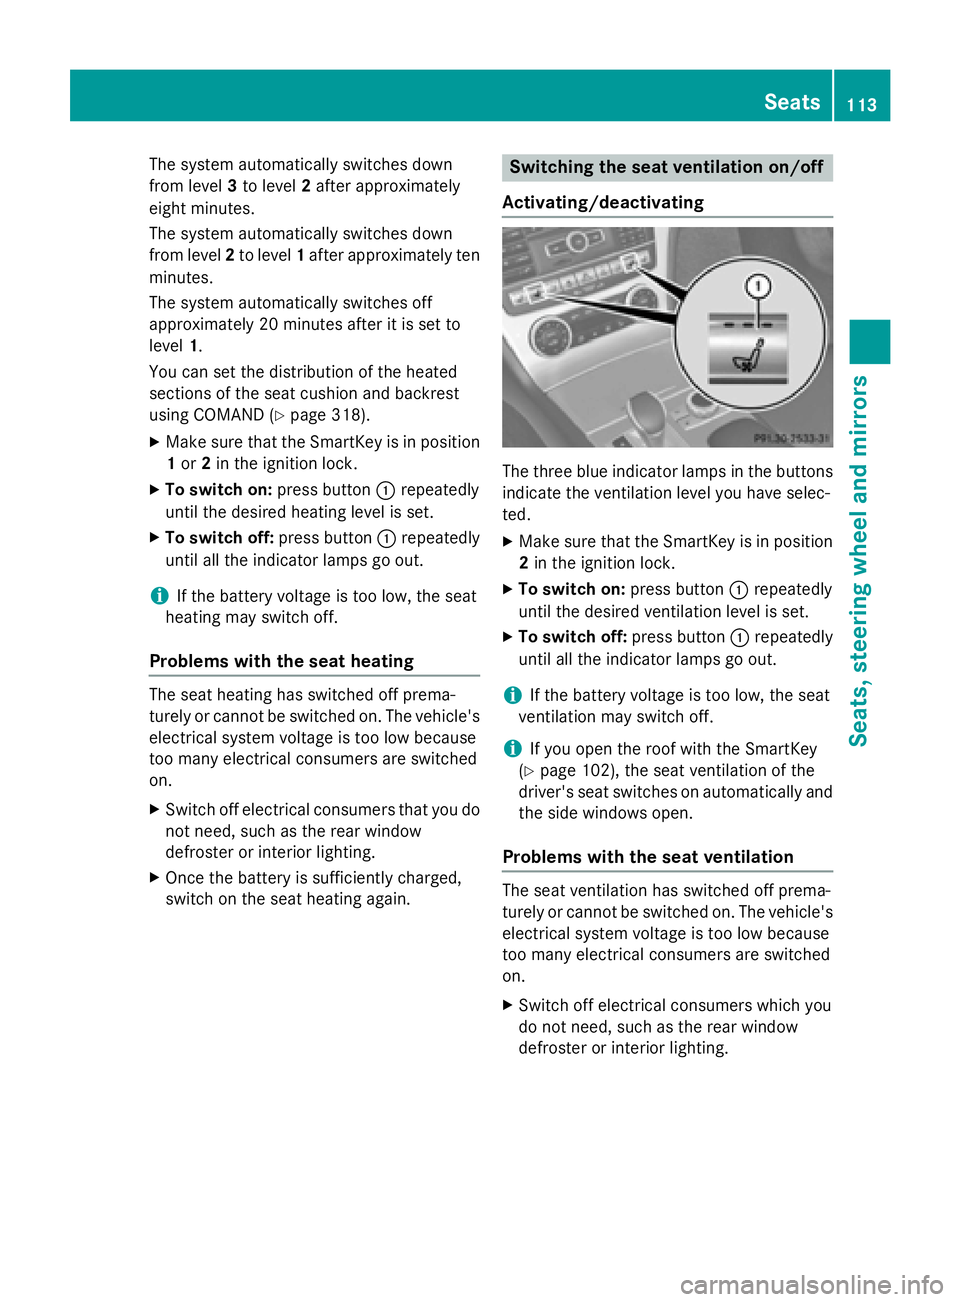
The three blue indicator lamps in the buttons
indicate the ventilation level you have selec-
ted.
XMake sure that the SmartKey is in position
2 in the ignition lock.
XTo switch on: press button:repeatedly
until the desired ventilation level is set.
XTo switch off: press button:repeatedly
until all the indicator lamps go out.
iIf the battery voltage is too low, the seat
ventilation may switch off.
iIf you open the roof with the SmartKey
(
Ypage 102), the seat ventilation of the
driver's seat switches on automatically and
the side windows open.
Problems with the seat ventilation
The seat ventilation has switched off prema-
turely or cannot be switched on. The vehicle's
electrical system voltage is too low because
too many electrical consumers are switched
on.
XSwitch off electrical consumers which you
do not need, such as the rear window
defroster or interior lighting.
Seats113
Seats, steering wheel and mirrors
Z
Page 116 of 614
AIRSCARF
Switching on/off
GWARNIN G
When AIRSCARF is switched on ,ver yhot air
can flo wfrom th events in th ehead restraints .
This could result in burn sin th eimmediat e
vicinity of th eair vents .There is aris kof injury.
Reduc eth eheater output before it become s
to ohot .
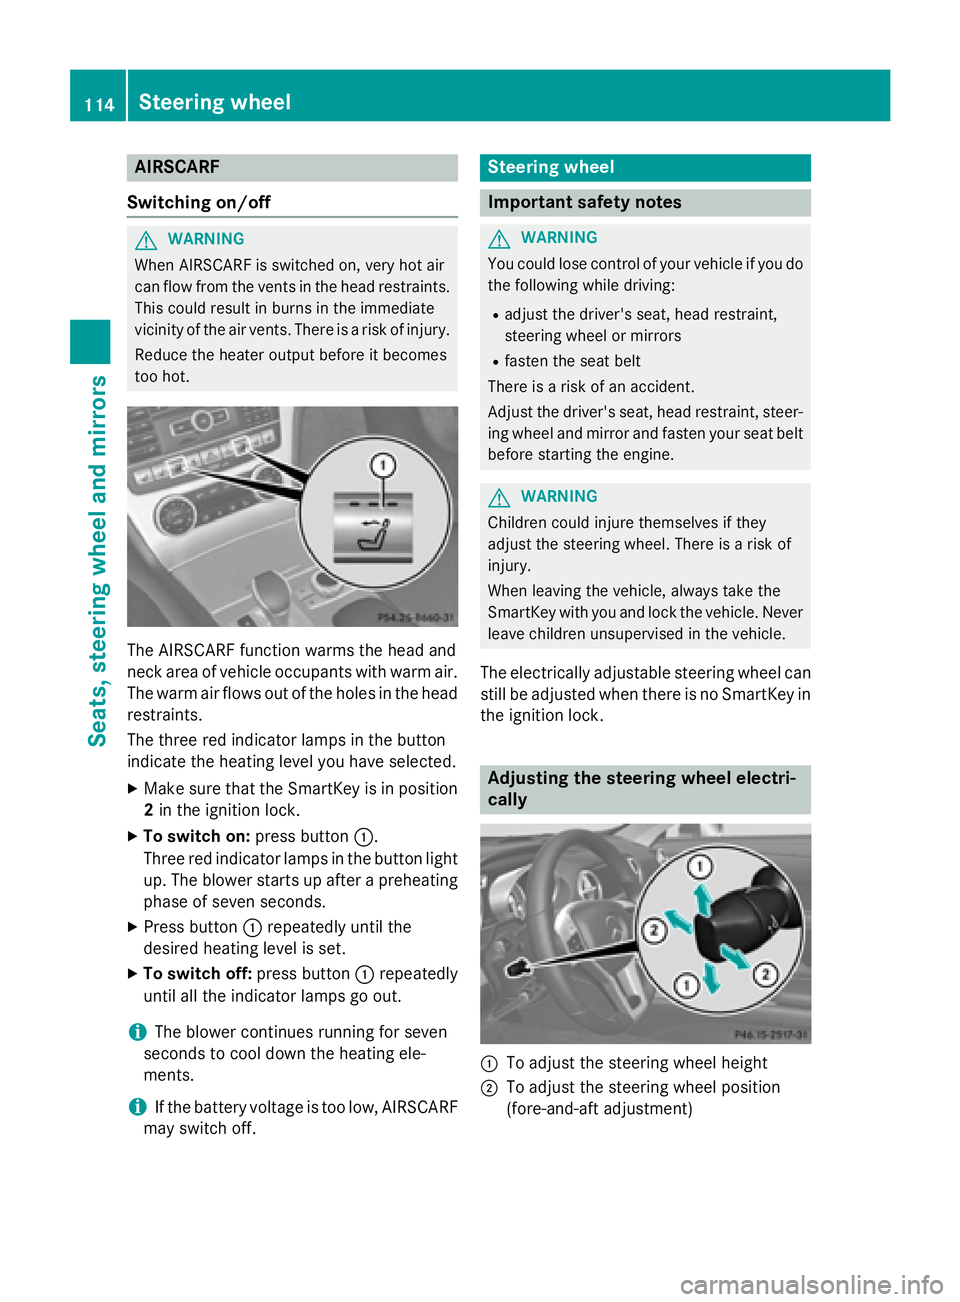
The AIRSCARF function warm sth ehead and
neck area of vehicl eoccupant swit hwarm air.
The warm air flows out of th ehole sin th ehead
restraints .
The three red indicator lamp sin th ebutto n
indicat eth eheating level you hav eselected.
XMak esur ethat th eSmartKey is in position
2 in th eignition lock.
XTo switch on: press button:.
Three red indicator lamp sin th ebutto nligh t
up. The blowe rstart sup after apreheating
phas eof seven seconds.
XPress butto n: repeatedly until th e
desired heating level is set .
XTo switchoff:press butto n: repeatedly
until all th eindicator lamp sgo out .
iThe blowe rcontinues runnin gfor seven
seconds to cool down th eheating ele-
ments .
iIf thebattery voltag eis to olow, AIRSCARF
may switch off .
Steering wheel
Important safety notes
GWARNIN G
You could lose control of your vehicl eif you do
th efollowin gwhile driving:
Radjust th edriver's seat ,head restraint,
steering whee lor mirror s
Rfastenth eseat belt
There is aris kof an accident.
Adjus tth edriver's seat ,head restraint, steer -
ing whee land mirror and faste nyour seat belt
before starting th eengine.
GWARNIN G
Children could injure themselves if they
adjust th esteering wheel. There is aris kof
injury.
When leaving th evehicle, always tak eth e
SmartKey wit hyou and loc kth evehicle. Never
leav echildren unsupervised in th evehicle.
The electrically adj ustablesteering whee lcan
still be adj usted when there is no SmartKey in
th eignition lock.
Adjusting the steering wheel electri -
cally
:To adjust th e steering whee lheight
;To adj ustthesteering whee lposition
(fore-and-af tadjustment)
114Steering wheel
Seats, steering wheel and mirrors