2016 MERCEDES-BENZ SL-CLASS ROADSTER warning
[x] Cancel search: warningPage 485 of 614
Overview
Important safety notes
GWARNING
The CD/DVD drive is a class 1 laser product.
If you open the housing of the CD/DVD drive,
there is a risk of exposure to invisible laser
radiation. This laser radiation could damage
your retina. There is a risk of injury.
Never open the housing. Always have main-
tenance and repair work carried out at a quali- fied specialist workshop.
GWARNING
If objects such as headphones/headsets or
external audio/video sources are not secured
in the passenger compartment, they can be
flung around and hit vehicle occupants. There
is a risk of injury, for example in the event of
sudden braking or a sudden change in direc-
tion.
Always stow these items or similar objects
carefully so that they cannot be flung around,
for example in a lockable vehicle stowage
compartment.
equipment
Observe that a range of Rear Seat Entertain-
ment Systems are available for Mercedes-
Benz vehicles. In this Operator's Manual, the
Rear Seat Entertainment System Code 864 is
used for illustration purposes. If you have a
different Rear Seat Entertainment System in
your vehicle, please refer to the separate prin-
ted operating instructions .
Components
The Rear Seat Entertainment System
includes:
Rtwo screens for the rear behind the front-
seat head restraints
Rtwo remote controls
Ra CD/DVD drive
RAUX jacks on both screens (AUX display)
and on the CD/DVD drive (AUX drive)
Rtwo sets of cordless headphones
Rear Seat Entertainment System483
COMAND
Z
Page 489 of 614
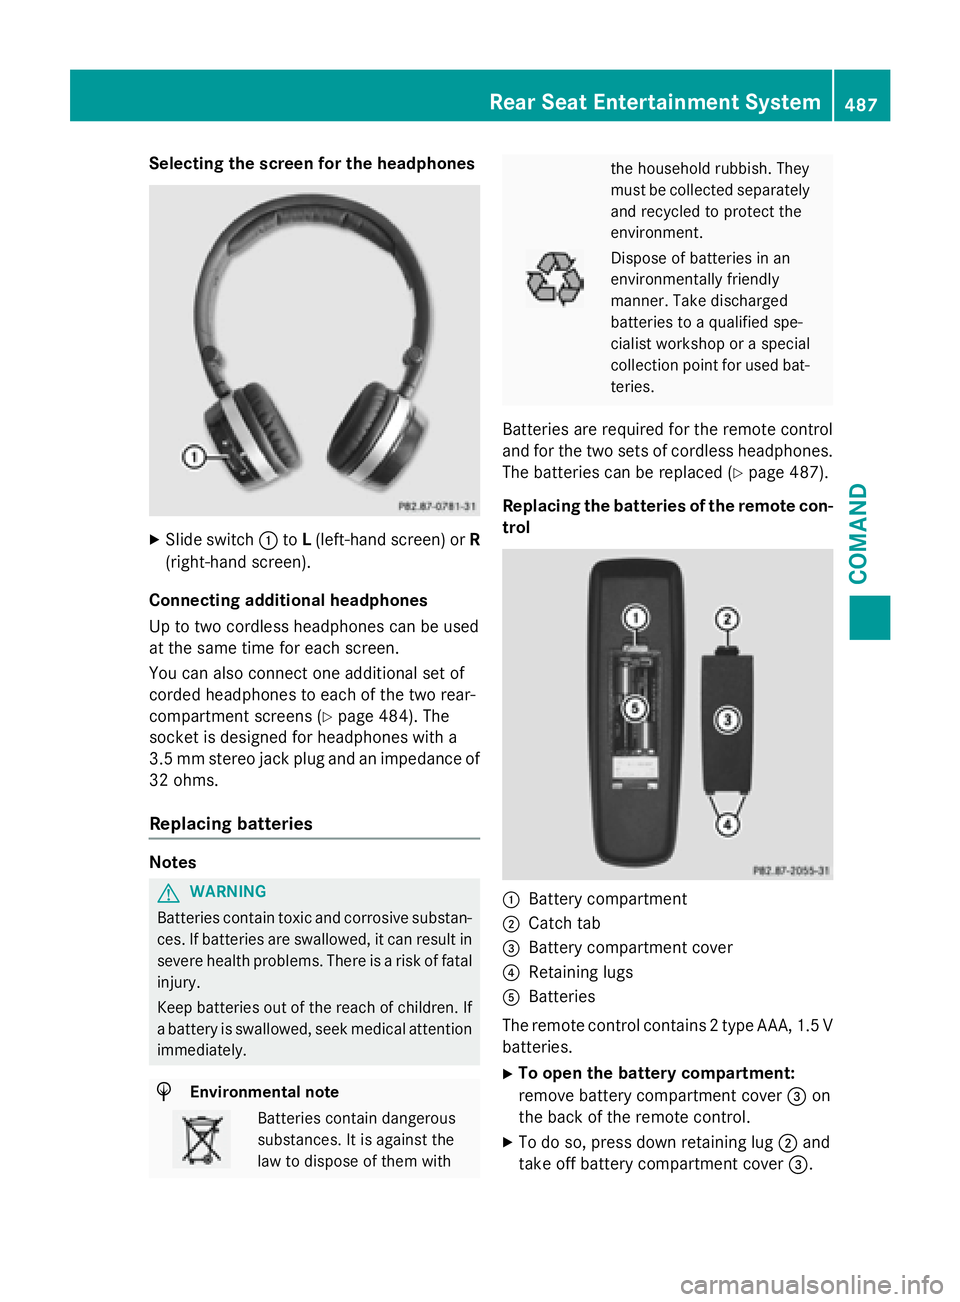
Selecting the screen for the headphones
XSlide switch:toL(left-hand screen) or R
(right-hand screen).
Connecting additional headphones
Up to two cordless headphones can be used
at the same time for each screen.
You can also connect one additional set of
corded headphones to each of the two rear-
compartment screens (
Ypage 484). The
socket is designed for headphones with a
3.5 mm stereo jack plug and an impedance of
32 ohms.
Replacing batteries
Notes
GWARNING
Batteries contain toxic and corrosive substan- ces. If batteries are swallowed, it can result in
severe health problems. There is a risk of fatalinjury.
Keep batteries out of the reach of children. If
a battery is swallowed, seek medical attention immediately.
HEnvironmental note
Batteries contain dangerous
substances. It is against the
law to dispose of them with
the household rubbish. They
must be collected separatelyand recycled to protect the
environment.
Dispose of batteries in an
environmentally friendly
manner. Take discharged
batteries to a qualified spe-
cialist workshop or a special
collection point for used bat-
teries.
Batteries are required for the remote control
and for the two sets of cordless headphones.
The batteries can be replaced (
Ypage 487).
Replacing the batteries of the remote con- trol
:Battery compartment
;Catch tab
=Battery compartment cover
?Retaining lugs
ABatteries
The remote control contains 2 type AAA, 1.5 V
batteries.
XTo open the battery compartment:
remove battery compartment cover =on
the back of the remote control.
XTo do so, press down retaining lug ;and
take off battery compartment cover =.
Rear Seat Entertainment System487
COMAND
Z
Page 493 of 614
Showing/hiding the picture
XTo hide the picture:selectDisplay Off
in the system menu using the :;
buttons on the remote control and press
the 9button to confirm.
The picture is hidden.
XTo display the picture: press the9but-
ton.
CD/audio DVD and MP3 mode
Important safety notes
GWARNING
The CD/DVD drive is a class 1 laser product.
If you open the housing of the CD/DVD drive,
there is a risk of exposure to invisible laser
radiation. This laser radiation could damage
your retina. There is a risk of injury.
Never open the housing. Always have main-
tenance and repair work carried out at a quali- fied specialist workshop.
General notes
You will find information on the following top-
ics in the Audio section:
Rnotes on CDs/DVDs (Ypage 454)
Rnotes on MP3 mode (Ypage 453)
Rnotes on copyright (Ypage 454)
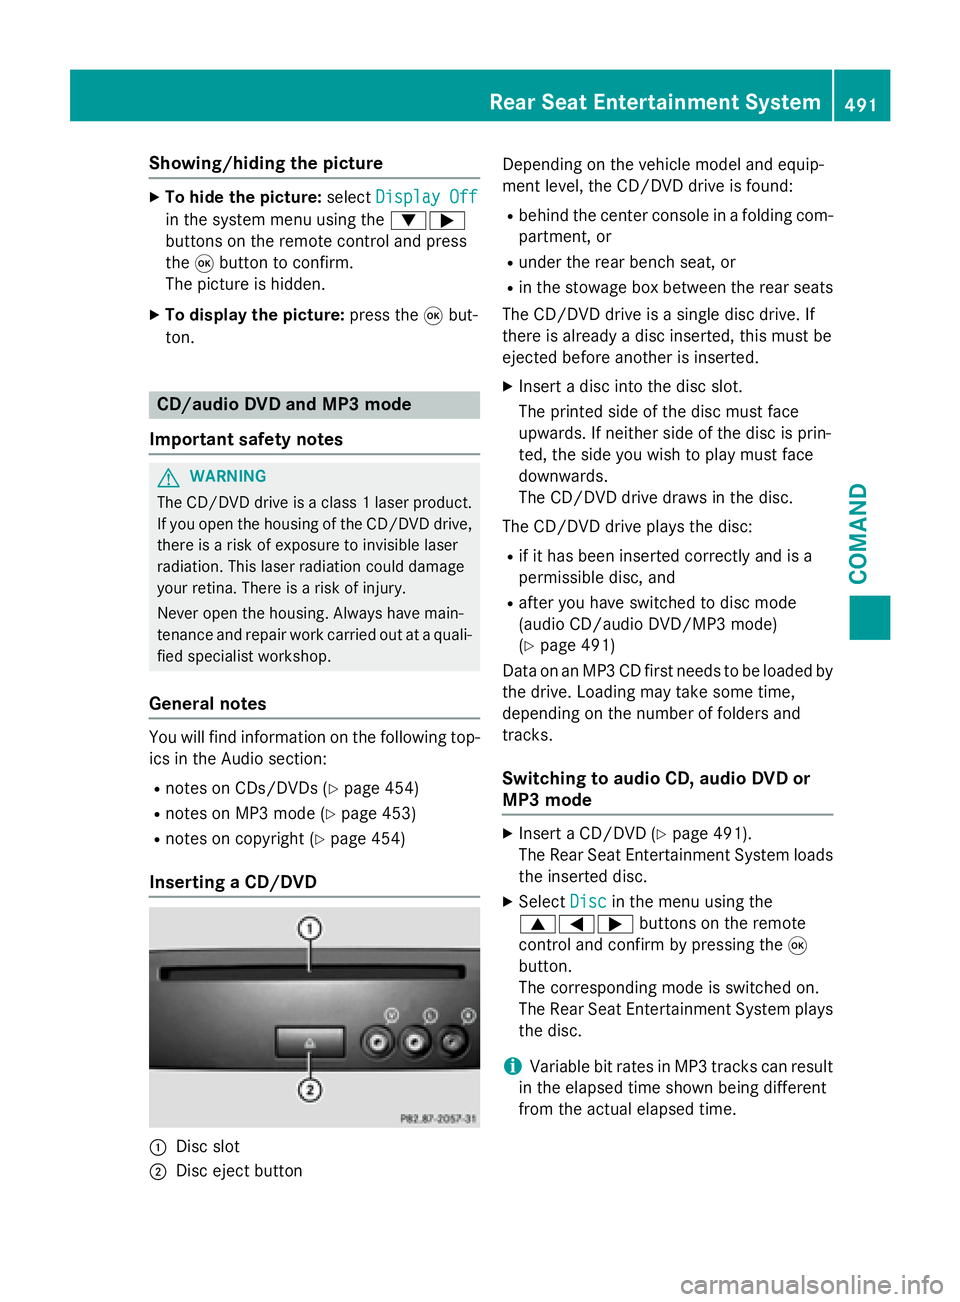
Inserting a CD/DVD
:Disc slot
;Disc eject button Depending on the vehicle model and equip-
ment level, the CD/DVD drive is found:
Rbehind the center console in a folding com-
partment, or
Runder the rear bench seat, or
Rin the stowage box between the rear seats
The CD/DVD drive is a single disc drive. If
there is already a disc inserted, this must be
ejected before another is inserted.
XInsert a disc into the disc slot.
The printed side of the disc must face
upwards. If neither side of the disc is prin-
ted, the side you wish to play must face
downwards.
The CD/DVD drive draws in the disc.
The CD/DVD drive plays the disc:
Rif it has been inserted correctly and is a
permissible disc, and
Rafter you have switched to disc mode
(audio CD/audio DVD/MP3 mode)
(
Ypage 491)
Data on an MP3 CD first needs to be loaded by
the drive. Loading may take some time,
depending on the number of folders and
tracks.
Switching to audio CD, audio DVD or
MP3 mode
XInsert a CD/DVD (Ypage 491).
The Rear Seat Entertainment System loads
the inserted disc.
XSelect Discin the menu using the
9=; buttons on the remote
control and confirm by pressing the 9
button.
The corresponding mode is switched on.
The Rear Seat Entertainment System plays
the disc.
iVariable bit rates in MP3 tracks can result
in the elapsed time shown being different
from the actual elapsed time.
Rear Seat Entertainment System491
COMAND
Z
Page 496 of 614
XSelect an audio format using the9:
buttons and press the 9button to confirm.
XTo exit the menu: press the=or;
button.
Playback options
Further information on playback options is
available in the "Audio" section (
Ypage 452).
XSelect CD,DVD-Audioor MP3using
the :=; buttons on the remote
control and press the 9button to confirm.
The options list appears. The #dot indi-
cates the option currently selected.
XSelect NormalTrackSequence,Random
Tracksor Random Folderusing the
9: buttons and press the 9button
to confirm.
The option is switched on. For all options
except Normal Track Sequence
, you will
see a corresponding display in the display/
selection window.
iIf you switch the data carrier which you
are currently listening to, the Normal
Track Sequenceoption is activated auto-
matically. If an option is selected, it
remains selected after the Rear Seat Enter- tainment System is switched on or off.
Switching track information on/off
(MP3 mode only)
If the function is switched on, folder and track
names are displayed.
If the function is switched off, disc and file
names are displayed.
XSelect MP3using the :=; but-
tons on the remote control and press the
9 button to confirm.
XSelect Display Track Information
using the 9: buttons and press the
9 button to confirm.
The function is switched on Oor off ª,
depending on the previous status.
Video DVD mode
Important safety notes
GWARNING
The CD/DVD drive is a class 1 laser product.
If you open the housing of the CD/DVD drive,
there is a risk of exposure to invisible laser
radiation. This laser radiation could damage
your retina. There is a risk of injury.
Never open the housing. Always have main-
tenance and repair work carried out at a quali- fied specialist workshop.
General notes
DVD playback conditions
Playback problems may occur when playing
copied discs. There is a large variety of discs,
DVD authoring software, writing software and
writers available. This variety means that
there is no guarantee that the Rear Seat
Entertainment System will be able to play
video DVDs that you have copied yourself.
Further information can be found under video
(
Ypage 476). Information regarding
COMAND also applies to the Rear Seat Enter-
tainment System.
Function restrictions
Depending on the DVD, it is possible that cer- tain functions or actions described in this
section will be temporarily blocked or may not
function at all. As soon as you try to activate
these functions or actions, you will see the K
symbol in the display.
Switching to video DVD mode
XInsert a video DVD (Ypage 491).
The Rear Seat Entertainment System loads
the disc.
If disc mode was the last mode selected, it
will now be active.
494Rear Seat Entertainment System
COMAND
Page 516 of 614
Useful information
i
This Operator's Manual describes all
models and all standard and optional equip-
ment of your vehicle available at the time of
publication of the Operator's Manual.
Country-specific differences are possible.
Please note that your vehicle may not be
equipped with all features described. This
also applies to safety-related systems and
functions.
iRead the information on qualified special-
ist workshops (
Ypage 34).
Stowage areas
Stowage spaces
Important safety notes
GWARNING
If you do not correctly store objects in the
vehicle interior, they can slip or be flung
around, thus striking vehicle occupants.
There is a risk of injury, especially when brak- ing or abruptly changing directions.
RAlways store objects so that they cannot be
flung around in these or in similar situa-
tions.
RAlways make sure that objects do not pro-
trude from stowage compartments, parcel
nets or stowage nets.
RClose lockable stowage compartments
while driving.
RStow and secure objects that are heavy,
hard, pointy, sharp-edged, fragile or too
large in the trunk.
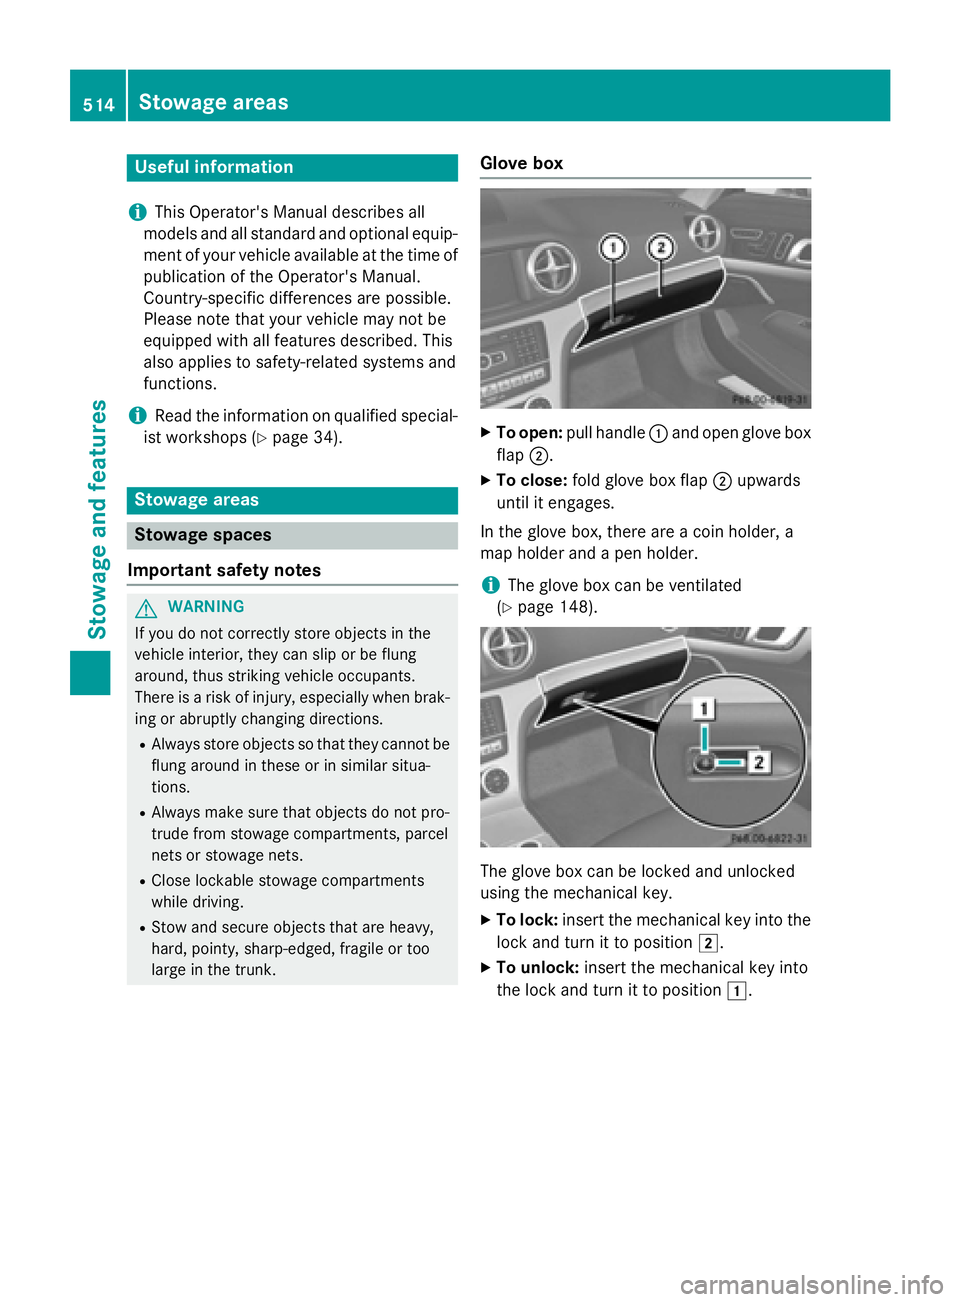
Glove box
XTo open: pull handle :and open glove box
flap ;.
XTo close: fold glove box flap ;upwards
until it engages.
In the glove box, there are a coin holder, a
map holder and a pen holder.
iThe glove box can be ventilated
(
Ypage 148).
The glove box can be locked and unlocked
using the mechanical key.
XTo lock: insert the mechanical key into the
lock and turn it to position 2.
XTo unlock:insert the mechanical key into
the lock and turn it to position 1.
514Stowage areas
Stowage and features
Page 518 of 614
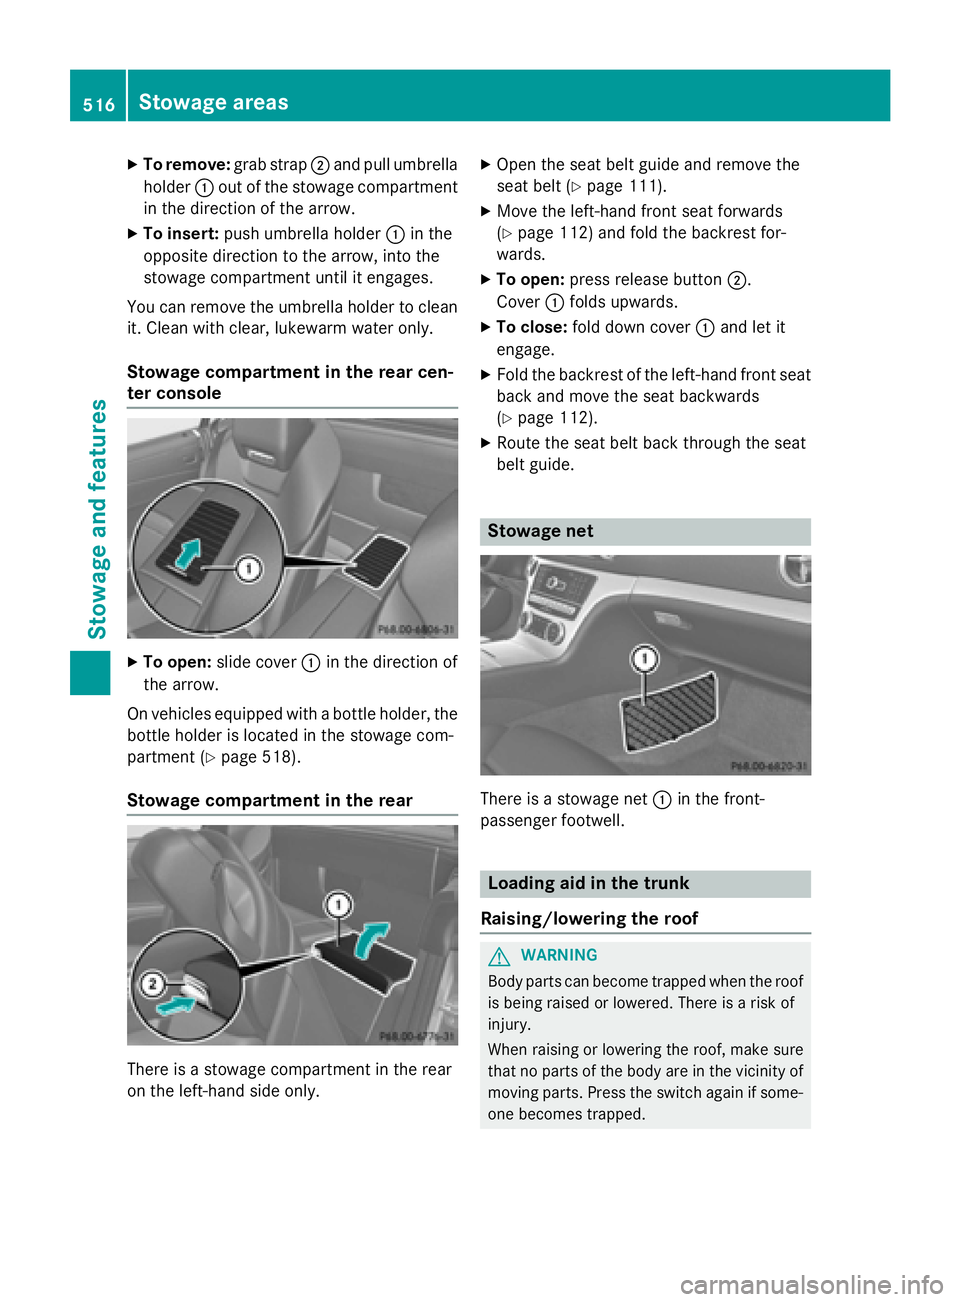
XTo remove:grab strap;and pull umbrella
holder :out of the stowage compartment
in the direction of the arrow.
XTo insert: push umbrella holder :in the
opposite direction to the arrow, into the
stowage compartment until it engages.
You can remove the umbrella holder to clean
it. Clean with clear, lukewarm water only.
Stowage compartment in the rear cen-
ter console
XTo open: slide cover :in the direction of
the arrow.
On vehicles equipped with a bottle holder, the
bottle holder is located in the stowage com-
partment (
Ypage 518).
Stowage compartment in the rear
There is a stowage compartment in the rear
on the left-hand side only.
XOpen the seat belt guide and remove the
seat belt (
Ypage 111).
XMove the left-hand front seat forwards
(
Ypage 112) and fold the backrest for-
wards.
XTo open: press release button ;.
Cover :folds upwards.
XTo close: fold down cover :and let it
engage.
XFold the backrest of the left-hand front seat
back and move the seat backwards
(
Ypage 112).
XRoute the seat belt back through the seat
belt guide.
Stowage net
There is a stowage net :in the front-
passenger footwell.
Loading aid in the trunk
Raising/lowering the roof
GWARNING
Body parts can become trapped when the roof
is being raised or lowered. There is a risk of
injury.
When raising or lowering the roof, make sure
that no parts of the body are in the vicinity of
moving parts. Press the switch again if some-
one becomes trapped.
516Stowage areas
Stowag ean d features
Page 519 of 614
!Only close the trunk once the roof is low-
ered completely. Otherwise, you could
damage the roof.
If you close the trunk lid before the roof is
lowered completely, the loading aid switch
lights up and a warning tone sounds.
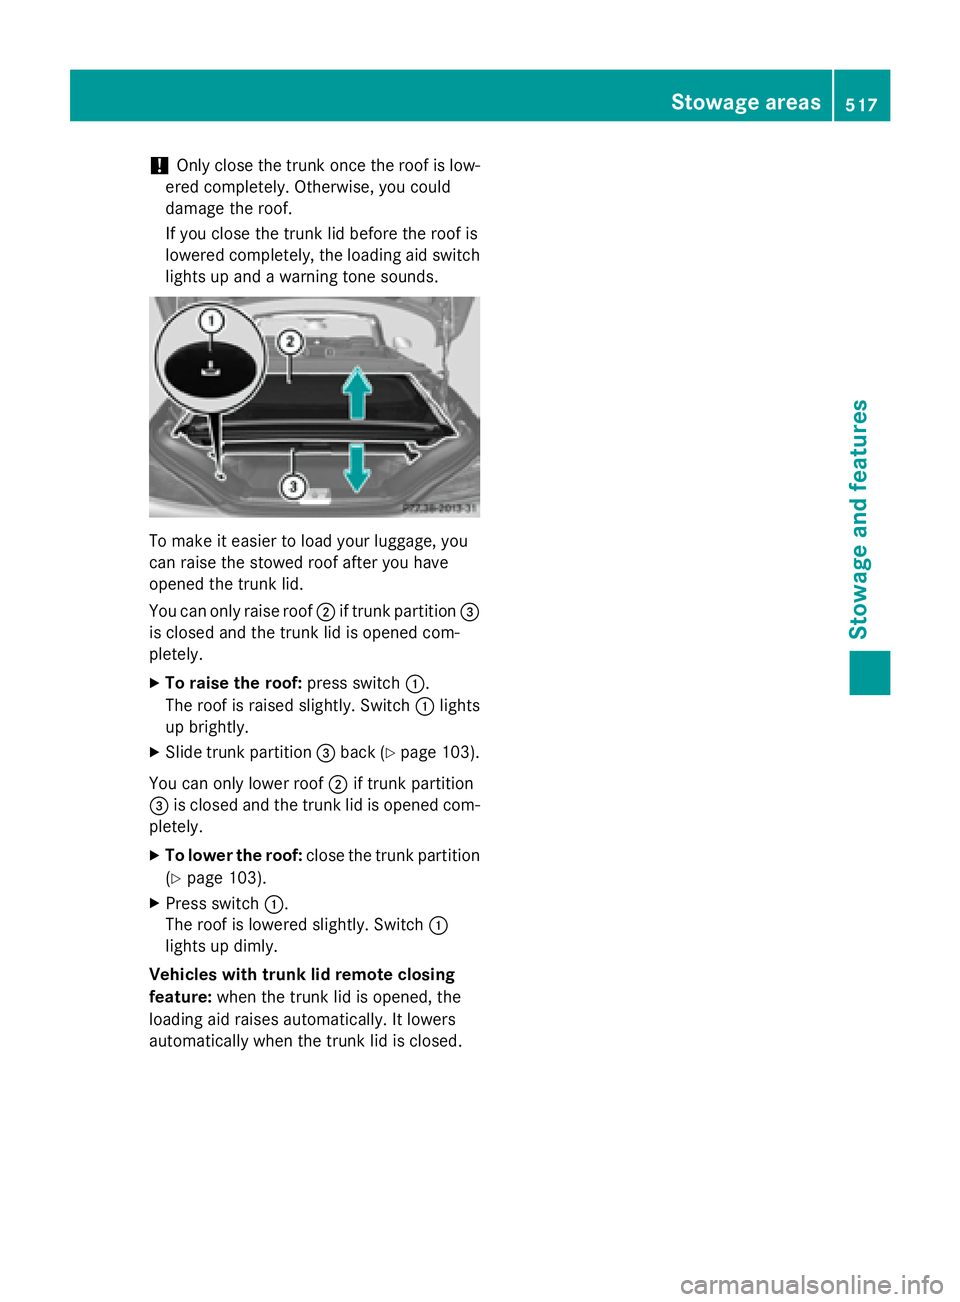
To make it easier to load your luggage, you
can raise the stowed roof after you have
opened the trunk lid.
You can only raise roof ;if trunk partition =
is closed and the trunk lid is opened com-
pletely.
XTo raise the roof: press switch:.
The roof is raised slightly. Switch :lights
up brightly.
XSlide trunk partition =back (Ypage 103).
You can only lower roof ;if trunk partition
= is closed and the trunk lid is opened com-
pletely.
XTo lower the roof: close the trunk partition
(
Ypage 103).
XPress switch :.
The roof is lowered slightly. Switch :
lights up dimly.
Vehicles with trunk lid remote closing
feature: when the trunk lid is opened, the
loading aid raises automatically. It lowers
automatically when the trunk lid is closed.
Stowage areas517
Stowage and features
Z
Page 520 of 614
Problems with the loading aid
ProblemPossible causes/consequences andMSolutions
It is no longer possible
to lower the stowed
roof in the trunk using
the loading aid.You cannot close the trunk any more.
XCall a qualified specialist workshop.
Stowage well under the trunk floor
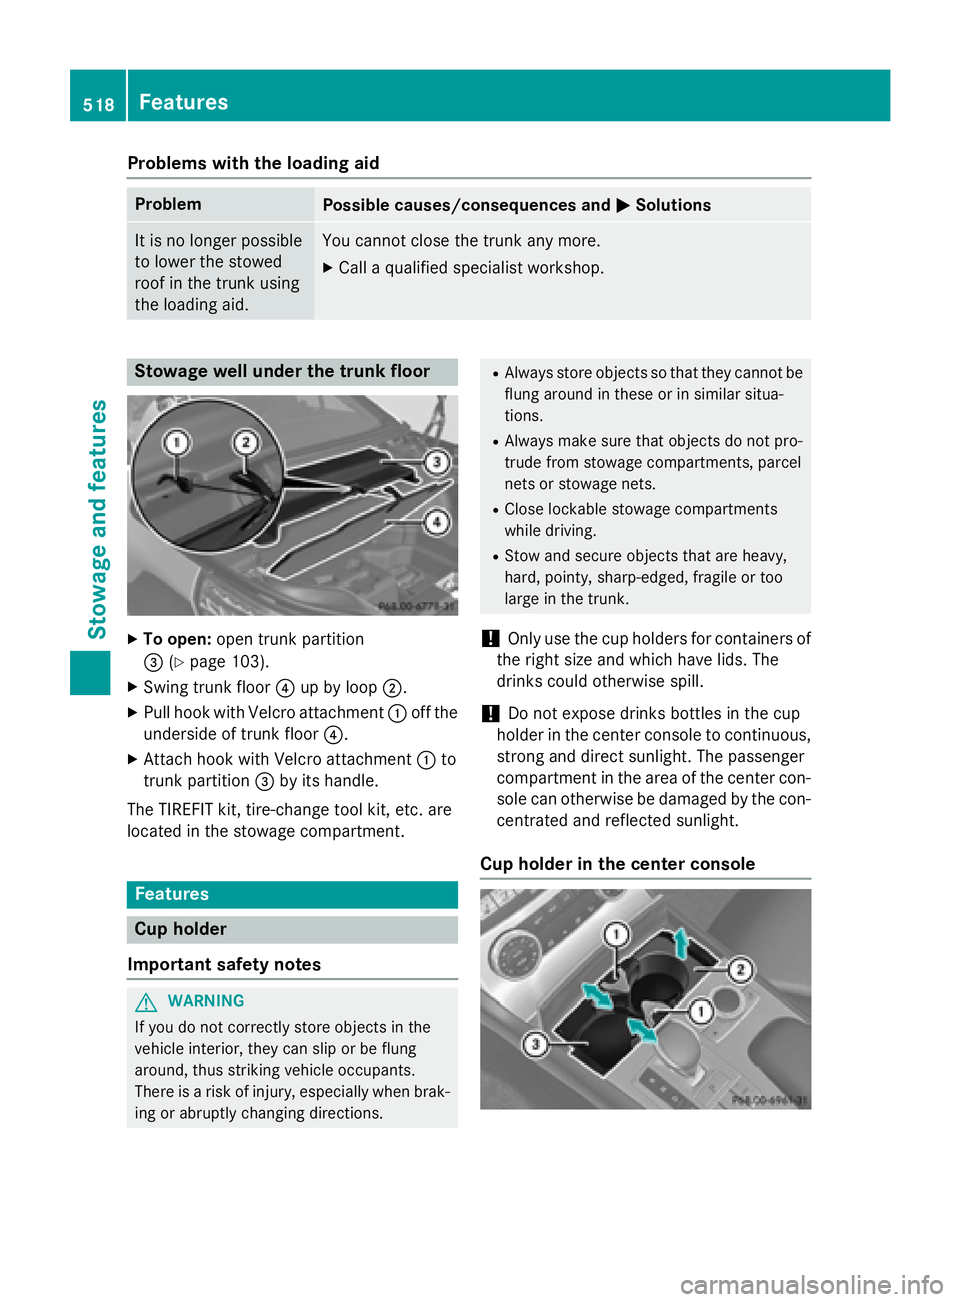
XTo open:open trunk partition
= (
Ypage 103).
XSwing trunk floor ?up by loop ;.
XPull hook with Velcro attachment :off the
underside of trunk floor ?.
XAttach hook with Velcro attachment :to
trunk partition =by its handle.
The TIREFIT kit, tire-change tool kit, etc. are
located in the stowage compartment.
Features
Cup holder
Important safety notes
GWARNING
If you do not correctly store objects in the
vehicle interior, they can slip or be flung
around, thus striking vehicle occupants.
There is a risk of injury, especially when brak- ing or abruptly changing directions.
RAlways store objects so that they cannot be
flung around in these or in similar situa-
tions.
RAlways make sure that objects do not pro-
trude from stowage compartments, parcel
nets or stowage nets.
RClose lockable stowage compartments
while driving.
RStow and secure objects that are heavy,
hard, pointy, sharp-edged, fragile or too
large in the trunk.
!Only use the cup holders for containers of
the right size and which have lids. The
drinks could otherwise spill.
!Do not expose drinks bottles in the cup
holder in the center console to continuous,
strong and direct sunlight. The passenger
compartment in the area of the center con- sole can otherwise be damaged by the con-
centrated and reflected sunlight.
Cup holder in the center console
518Features
Stowage and features