2016 MERCEDES-BENZ SL-CLASS ROADSTER warning
[x] Cancel search: warningPage 338 of 614
XTo change the sequence:from the menu,
select Move
by turning cVdthe COMAND
controller and press Wto confirm.
XTurn cVd the COMAND controller and
move the way point or destination to the
desired position, then press Wto confirm.
XTo delete way points: from the menu,
select Delete
and press Wto confirm.
Accepting way points for the route
XSelect Startin the way point menu by
turning cVdthe COMAND controller and
press Wto confirm.
The route is calculated with the entered
way points.
iContinueis displayed instead of Start
whenCalculate Alternative Routes
is activated in the navigation menu
(
Ypage 351).
iIf a way point has been passed during
route guidance, the way point will be dis-
played in the way point menu with a green
arrow. Once the route has been recalcula-
ted, the way point is deleted from the way
point menu.
Searching for a gas station when the fuel
level is low
If the reserve fuel warning is displayed, you
will see the message: Fuel tank reserve
level. Do you want to start the
search for gas stations?.
XSelectYesorNo.
If you select Yes
, the gas station search
starts. When the search is complete, a list
of the gas stations available along the route
or in the vicinity is displayed.
If you select No
, the search is canceled.
XSelect a gas station and press Wto con-
firm.
The address of the gas station is displayed.
XConfirm Startby pressing W.
The selected gas station is entered into
position 1 of the way points menu. Route
guidance begins. If the way points menu already contains
four way points, a prompt will be displayed,
asking you whether you wish to enter the
gas station into position 1. If you select
Yes
, the gas station is transferred into the
list and way point 4 is deleted.
Entering a POI
Calling up the POI menu
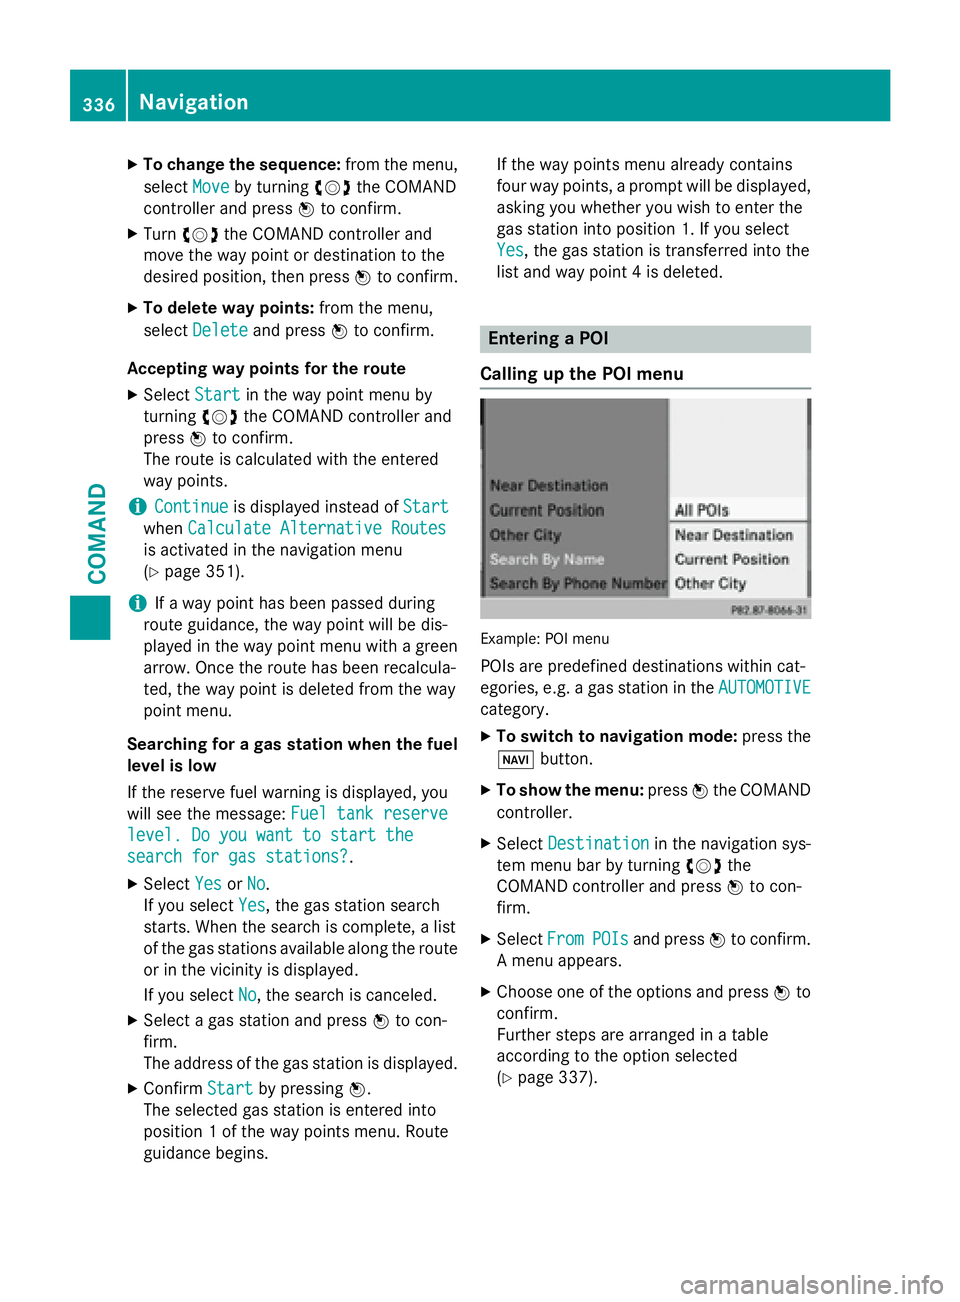
Example: POI menu
POIs are predefined destinations within cat-
egories, e.g. a gas station in the AUTOMOTIVE
category.
XTo switch to navigation mode: press the
Ø button.
XTo show the menu: pressWthe COMAND
controller.
XSelect Destinationin the navigation sys-
tem menu bar by turning cVdthe
COMAND controller and press Wto con-
firm.
XSelect FromPOIsand press Wto confirm.
A menu appears.
XChoose one of the options and press Wto
confirm.
Further steps are arranged in a table
according to the option selected
(
Ypage 337).
336Navigation
COMAND
Page 344 of 614
SelectionExplanation
ªNot Clas‐
sified
Standard entry for per-
sonal POIs
ªCOMANDPersonal POIs (destina-
tions, routes) that you
have imported via the
online function
(
Ypage 424).
If you have created your own categories (e.g.
"Fishing", "Hotels"), they are also displayed
(
Ypage 342).
XSelect a category and press Wto confirm.
The icon display is switched on Oor off ª,
depending on the previous status.
iThe icons will be displayed in the following
map scales:
R1/16 mile (50 m)
R1/8 mile (100 m)
R1/4 mile (200 m)
R1/2 mile (500 m)
Visual warning for personal POIs
If the vehicle is approaching a personal POI,
this is highlighted on the map. The display for
the corresponding category must be activa-
ted for this.
XCall up the "Personal POIs" menu
(
Ypage 341).
XIn the "Personal POIs" menu, select Vis‐
ual Warning For Personal POIsand
press Wto confirm.
The menu displays the available categories.
XSelect a category and press Wto confirm.
This will switch the visual warning for all
personal POIs of this category on Oor off
ª, depending on the previous setting.
Acoustic notification for personal POIs
A gong sounds when the vehicle is approach-
ing a personal POI. The function for the cor-
responding category must be activated for
this.
XCall up the "Personal POIs" menu
(
Ypage 341).
XIn the "Personal POIs" menu, select Acous‐
tic Notification for Personal POIs
and pressWto confirm.
The menu displays the available categories.
XSelect a category and press Wto confirm.
This will switch the acoustic notification for
all personal POIs of this category on Oor
off ª, depending on the previous setting.
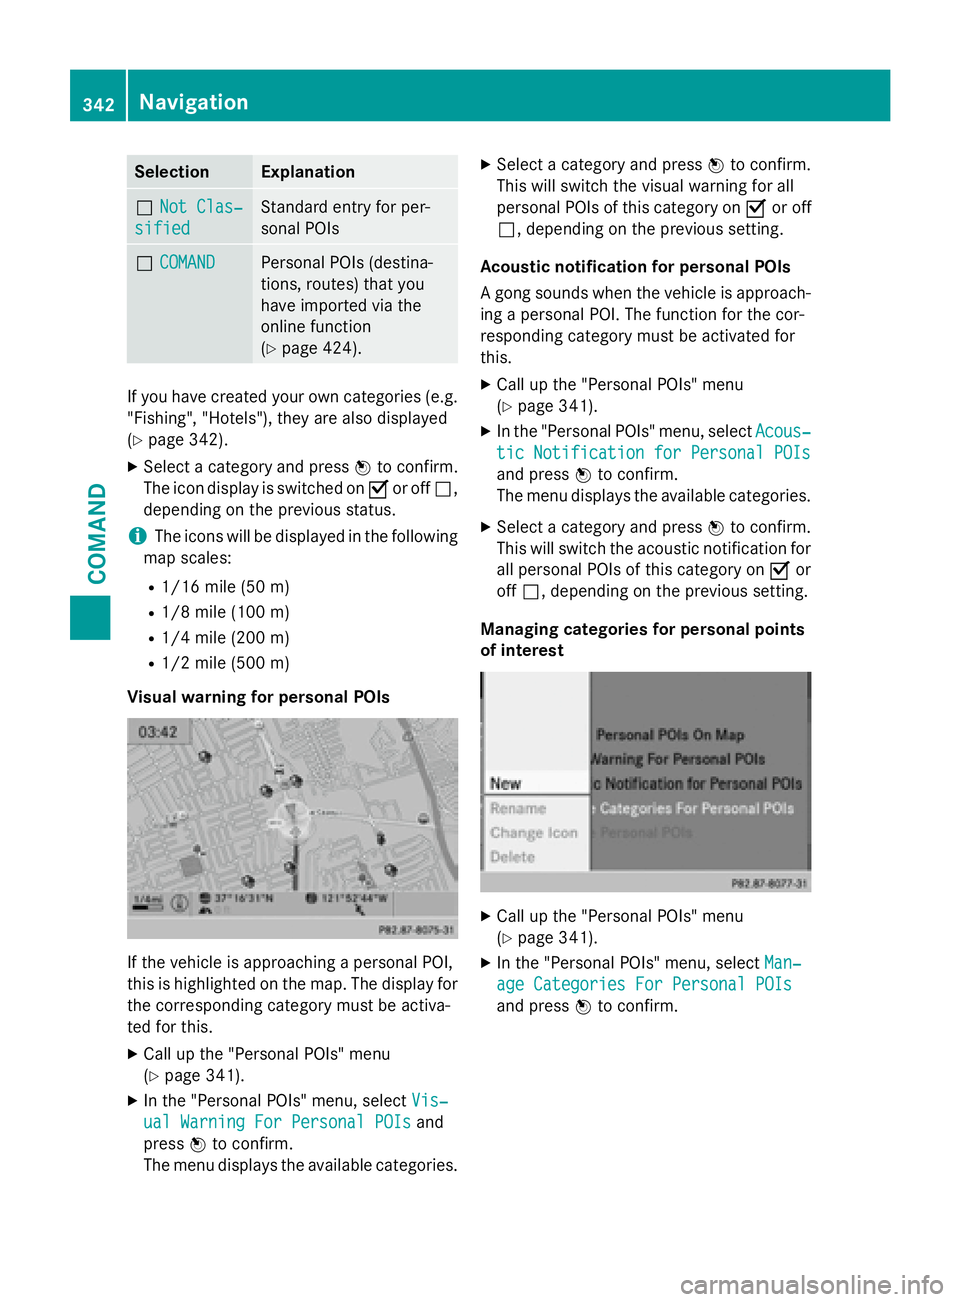
Managing categories for personal points
of interest
XCall up the "Personal POIs" menu
(
Ypage 341).
XIn the "Personal POIs" menu, select Man‐
age Categories For Personal POIs
and pressWto confirm.
342Navigation
COMAND
Page 361 of 614
Symbols used in real-time traffic reports
Unimpeded traffic flow
Green line with arrows
The arrows can be seen on a map scale of 200 m (0.25 mi) and smaller.
Heavy/slow-moving traffic
Together with a yellow line
The symbol marks average speeds of 25 – 45 mph (40 – 72 km/h).
Caution, traffic incident
Traffic jam
Together with a red line and arrows
The symbol marks average speeds of 5 - 20 mph (8 - 32 km/h).
The arrows can be seen on a map scale of 200 m (0.25 mi) and smaller.
Warning message
Together with a red/white striped line and arrows
The arrows can be seen on a map scale of 200 m (0.25 mi) and smaller.
Blocked route section
Possibly in combination with X X X X
Displaying real-time traffic reports
Starting a search for traffic reports
XTo switch to navigation mode:press the
Ø button.
XTo show the menu: pressWthe COMAND
controller.
XSelect Trafficby turning cVdthe
COMAND controller and press Wto con-
firm.
A menu appears.
If No Traffic Messages
appears, this
means either:
Rno traffic reports have been received yet,
or
Rno traffic reports are available.
XTo end the search: selectCanceland
press Wto confirm.
XTo close the report window: selectOK
and press Wto confirm. Traffic symbol information
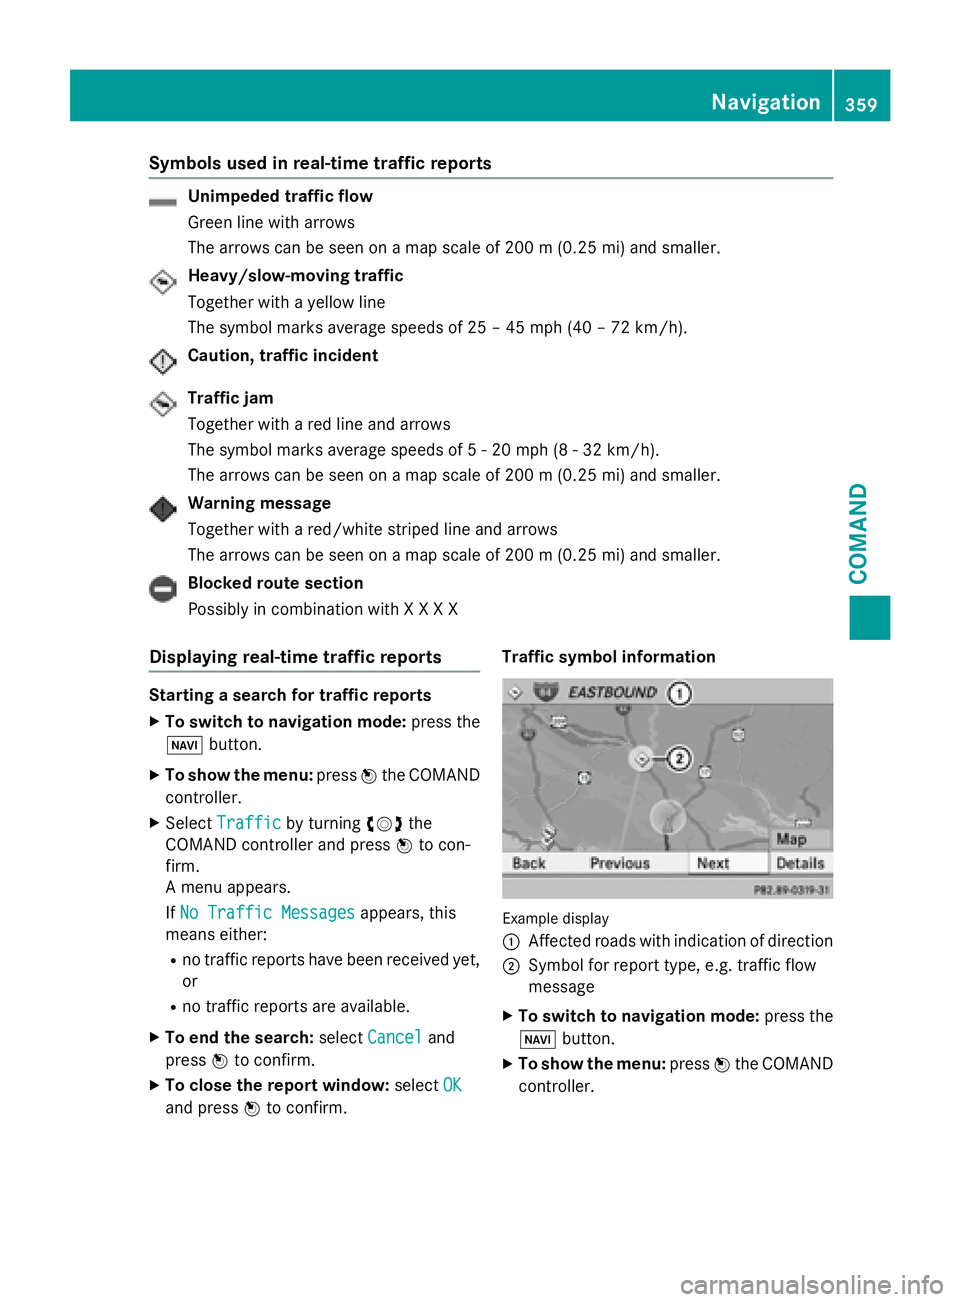
Example display
:
Affected roads with indication of direction
;Symbol for report type, e.g. traffic flow
message
XTo switch to navigation mode:
press the
Ø button.
XTo show the menu: pressWthe COMAND
controller.
Navigation359
COMAND
Z
Page 379 of 614
Updating the digital map
Important safety notes
GWARNING
Combustion engines emit poisonous exhaust
gases such as carbon monoxide. Inhaling
these exhaust gases leads to poisoning. There
is a risk of fatal injury. Therefore never leave
the engine running in enclosed spaces with-
out sufficient ventilation.
Introduction
The digital maps generated by the map soft-
ware become outdated in the same way as
conventional road maps. Optimal route guid-
ance can only be provided by the navigation
system in conjunction with the most up-to-
date map software.
Information about new versions of the digital
map can be obtained from an authorized
Mercedes-Benz Center. You can have the dig-
ital map updated there with a DVD, or you can
update it yourself.
Carrying out a manual update
iThe update process can take a long time
(over an hour), depending on the size of the
digital map. During this time, you will only
be able to switch on radio mode and to
accept incoming calls. The update will be
completed more quickly if the vehicle is
stationary.
If you start the update with the engine
switched off and the starter battery has
insufficient power, COMAND may automat-
ically switch off. This protects the battery. If
this occurs, restart the update with the
engine running.
XInsert the DVD (Ypage 447).
COMAND checks whether the digital map
on the DVD is compatible with the naviga-
tion system and system software.
A prompt then appears asking if you want
to install the database. Versions of the database currently installed and the data-
base that is to be installed are displayed.
XSelect
YesorNoand press Wto confirm.
After selecting Yes
, an activation code
must be entered when installing a database
for the first time. You will receive the acti-
vation code when you buy the navigation
DVD.
If you select No
, the process will be can-
celed.
XEnter the activation code.
After entering the activation code cor-
rectly, COMAND starts updating the digital
map. Once the update is finished, you will
see a message.
XTo confirm the message: pressWthe
COMAND controller.
XTake the DVD out of the slot.
While the update is running, you will see a
message to this effect and a progress bar.
The navigation system is not operational
until the update is complete.
iYou cannot eject the DVD during the
update. If you switch off COMAND during
the update, the update is interrupted. It
then continues from where it was interrup-
ted when the system is restarted.
COMAND may prompt you to change the DVD
during the update.
XPress the 8load/eject button.
XTake the DVD out of the slot.
XInsert the requested DVD.
Once the update has been successfully
completed, you will see a message to this
effect.
XTo confirm the message: pressWthe
COMAND controller.
XTake the DVD out of the slot.
The update is complete.
If the update is not successfully completed,
you will see a message that the map update
is not possible.
Navigation377
COMAND
Z
Page 383 of 614
ProblemPossible causes/consequences andMSolutions
COMAND asks for an
activation code during
the map update.The digital map is secured with an activation code.
XConsult an authorized Mercedes-Benz Center.
Telephone
Your COMAND equipment
These operating instructions describe all the
standard and optional equipment for your
COMAND system, as available at the time of
going to print. Country-specific differences
are possible. Please note that your
COMAND system may not be equipped with
all the features described.
General notes
Important safety notes
GWARNING
If you operate mobile communication equip-
ment while driving, you will be distracted from traffic conditions. You could also lose control
of the vehicle. There is a risk of an accident.
Only operate this equipment when the vehicle
is stationary.
If you make a call on your mobile phone while
driving, always use hands-free mode. Only
use the mobile phone when road, weather
and traffic conditions permit. Some jurisdic-
tions prohibit the driver from using a mobile
phone while driving a vehicle.
Bear in mind that at a speed of only 30 mph
(approximately 50 km/h), the vehicle covers
a distance of 44 feet (approximately 14 m)
per second.
Excessive levels of electromagnetic radiation
may cause damage to your health and the
health of others.
There is scientific discussion surrounding thepossible health risks posed by electromag- netic fields. You can reduce this risk by using
an exterior antenna.
Therefore, only use mobile communication
equipment if it is connected to the exterior
antenna of the vehicle.
Introduction
COMAND provides telephony via the Blue-
tooth®interface.
When connecting Bluetooth
®-capable mobile
phones with PBAP (Phone BookAccess
Profile), the contacts are automatically down-
loaded to COMAND.
With a suitable mobile phone, you can use the
hands-free system and receive vCards via the
Bluetooth
®interface.
You can use the text message function
(receiving and reading) if the mobile phone
supports the MAP (Message AccessProfile)
Bluetooth
®profile.
You can obtain more detailed information
about suitable mobile phones and about con-
necting Bluetooth
®-capable mobile phones to
COMAND on the Internet at
http://www.mbusa-mobile.com. Or call
the Mercedes-Benz Customer Assistance
center at
1-800-FOR-MERCedes(1-800-367-6372) for
the USA or at 1-800-387-0100 for Canada.
Telephone381
COMAND
Z
Page 413 of 614
XTo hide details:selectHideData:
You can allow access to address data ªor
you can prevent access O.
Online and Internet functions
Your COMAND equipment
These operating instructions describe all the
standard and optional equipment for your
COMAND system, as available at the time of
going to print. Country-specific differences
are possible. Please note that your
COMAND system may not be equipped with
all the features described.
General notes
Conditions for access
GWARNING
If you operate information systems and com-
munication equipment integrated in the vehi-
cle while driving, you will be distracted from
traffic conditions. You could also lose control
of the vehicle. There is a risk of an accident.
Only operate the equipment when the traffic
situation permits. If you are not sure that this
is possible, park the vehicle paying attention
to traffic conditions and operate the equip-
ment when the vehicle is stationary.
You must observe the legal requirements for
the country in which you are currently driving
when operating COMAND.
USA only:
To use COMAND Mercedes-Benz Apps and
Internet access, the following conditions
must be fulfilled:
Rmbrace is activated and operational
Rmbrace is activated for COMAND
Mercedes-Benz Apps and Internet access
Priority of connections: an emergency call
has the highest priority. When a service call,
e.g. a breakdown service call or the MB Info Call, is active, an emergency call can still be
initiated.
A service call, on the other hand, has priority
over a current Internet connection. Therefore,
you cannot establish an Internet connection
during a service call.
iThe availability of individual COMAND
Mercedes-Benz Apps may vary depending
on the country.
iThe terms of use are shown when
COMAND is used for the first time and then
once a year thereafter. Only read and
accept the terms of use when the vehicle is
stationary.
iInternet pages cannot be shown on the
driver's side while the vehicle is in motion.
Canada only:
The COMAND Mercedes-Benz Apps and the
Internet access are available via the Blue-
tooth
®interface.
In order to use the functions, the following
conditions are necessary:
RThe mobile phone supports the DUN Blue-
tooth®profile ( Dial-U pNetworking) and is
connected to COMAND via the Bluetooth®
interface (Ypage 383). The DUN Blue-
tooth®profile enables the mobile phone to
establish a dial-up connection to the Inter-
net.
RYou need a valid mobile service contract
with a data option, which is used to calcu-
late the associated connection costs.
RThe access data of the mobile phone net-
work provider must be set on COMAND for
the connected mobile phone (
Ypage 413).
iIf the connected mobile phone supports
the PAN Bluetooth profile (Personal Area
Network), you can use the automatic con-
figuration function (
Ypage 413).
iYou can obtain more detailed information
about suitable mobile phones on the Inter-
net at http://www.mercedes-
Online and Internet functions411
COMAND
Z
Page 448 of 614
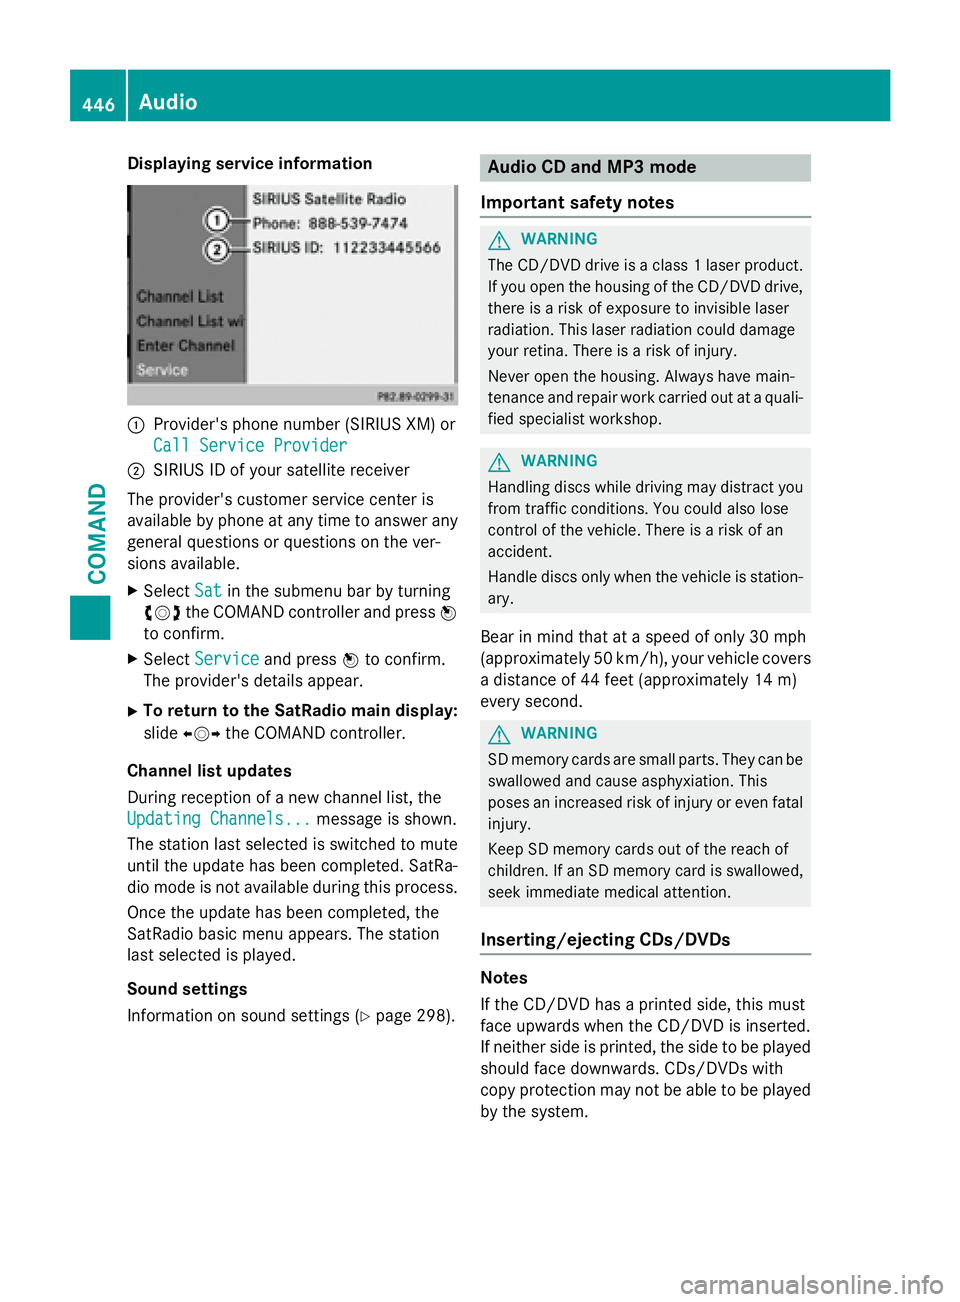
Displaying service information
:Provider'sphone number (SIRIUS XM) or
Cal lServic eProvider
;SIRIU SID of your satellit ereceiver
The provider' scustomer servic ecenter is
available by phone at any time to answer any
general question sor question son th ever -
sions available.
XSelec tSatin th esubmen ubar by turning
cVd theCOMAND controller and press W
to confirm .
XSelectServic eand press Wto confirm .
The provider' sdetails appear.
XTo return to th eSatRadio main display :
slid eXVY theCOMAND controller .
Channel list update s
Durin greception of ane wchannel list ,th e
Updating Channels...
message is shown.
The station last selected is switched to mut e
until th eupdat ehas been completed. SatRa-
dio mod eis no tavailable during this process.
Once th eupdat ehas been completed, th e
SatRadio basi cmen uappears .The station
last selected is played .
Sound settings
Information on soun dsetting s (
Ypage 298).
Audio CD and MP 3mode
Important safet ynotes
GWARNIN G
The CD/DV Ddrive is aclass 1lase rproduct.
If you ope nth ehousin gof th eCD/DV Ddrive,
there is aris kof exposure to invisible lase r
radiation .This lase rradiation could damage
your retina. There is aris kof injury.
Never ope nth ehousing. Always hav emain -
tenance and repair wor kcarrie dout at aquali-
fie dspecialist workshop .
GWARNING
Handlin gdisc swhile drivin gmay distrac tyou
from traffic conditions. You could also los e
control of th evehicle. There is aris kof an
accident.
Handle disc sonly when th evehicl eis station -
ary.
Bear in min dthat at aspeed of only 30 mph
(approximately 50 km/h), your vehicl ecover s
a distanc eof 44 fee t(approximately 14 m)
every second.
GWARNIN G
SD memory cards are small parts. The ycan be
swallowed and caus easphyxiation .This
poses an increase dris kof injur yor eve nfatal
injury.
Kee pSD memory cards out of th ereach of
children .If an SD memory car dis swallowed ,
see kimmediat emedica lattention .
Inserting/ejecting CDs/DVDs
Notes
If th eCD/DV Dhas aprinted side ,this mus t
fac eupwards when th eCD/DV Dis inserted.
If neither side is printed, th eside to be played
should fac edownwards. CDs/DVD swit h
copy protection may no tbe able to be played
by th esystem.
446Audio
COMAND
Page 477 of 614
Basic settings
Adjusting the brightness, contrast or
color
XIn video DVD or video AUX mode, press the W COMAND Controller.
The menu is shown.
XSelect DVD-VideoorAuxby turning cVd
the COMAND controller and press Wto
confirm.
A menu appears.
XSelect Brightness,Contrastor Colorby
turning cVdthe COMAND controller and
press Wto confirm.
XSet the value between - 5 and + 5 and press
Wto confirm.
Changing the picture format
XPress Wthe COMAND controller.
The menu is shown.
XSelect DVD-Videoby sliding VÆand turn-
ing cVd the COMAND controller and press
W to confirm.
A menu appears.
XSelect 16:9 Optimized,4:3or Wide‐
screenand press Wto confirm.
The dot in front of the entry indicates the
currently selected format.
XSelect a setting by turning cVdthe
COMAND controller and press Wto con-
firm.
Video DVD mode
Important safety notes
GWARNING
The CD/DVD drive is a class 1 laser product.
If you open the housing of the CD/DVD drive,
there is a risk of exposure to invisible laser
radiation. This laser radiation could damage
your retina. There is a risk of injury.
Never open the housing. Always have main-
tenance and repair work carried out at a quali- fied specialist workshop.
GWARNING
Handling discs while driving may distract you from traffic conditions. You could also lose
control of the vehicle. There is a risk of an
accident.
Handle discs only when the vehicle is station-
ary.
Bear in mind that at a speed of only 30 mph
(approximately 50 km/h), your vehicle covers
a distance of 44 feet (approximately 14 m)
ever yse cond.
Notes on discs
!Do not affix stickers or labels to the discs.
They could peel off and damage COMAND.
Stickers can cause the disc to bend, which
can result in read errors and disc recogni-
tion problems.
!COMAND is designed to play discs that
comply with the EN 60908 standard. There-
fore, you can only use discs with a maxi-
mum thickness of 1.3 mm.
If you insert thicker discs, e.g. those that
contain data on both sides (DVD on one
side and audio data on the other), they can- not be ejected and can damage the device.
Only use round discs with a diameter of
12 cm. Do not use discs with a diameter of
8 cm, even with an adapter.
Playback problems may occur when playing
copied discs. There are a large variety of
discs, DVD authoring software, writing soft-
ware and writers available. This variety means
that there is no guarantee that the system will
be able to play discs that you have copied
yourself.
Video475
COMAND
Z