2016 MERCEDES-BENZ SL-CLASS ROADSTER center console
[x] Cancel search: center consolePage 100 of 614
XTo close fully:pull the button beyond the
point of resistance and release it.
Automatic operation is started.
XTo interrupt automatic operation: press
or pull the corresponding button again.
iYou can continue to operate the side win-
dows after you switch off the engine. This
function is available for up to five minutes
or until the driver's or front-passenger door
is opened.
Opening/closing the rear side windows
XTo open: open the front side window on the
corresponding side (
Ypage 97).
XPress the corresponding switch again and
release.
The corresponding rear side window opens
fully.
XTo stop the rear side windows: briefly
pull the corresponding switch up and
release.
XTo close: close the front side window on
the corresponding side (
Ypage 97).
XPull the respective switch and hold it.
The corresponding rear side window will
continue to close until you release the
switch.
Opening and closing all side windows
Using the switch on the center console
You can use the switch on the center console
to close all side windows simultaneously.
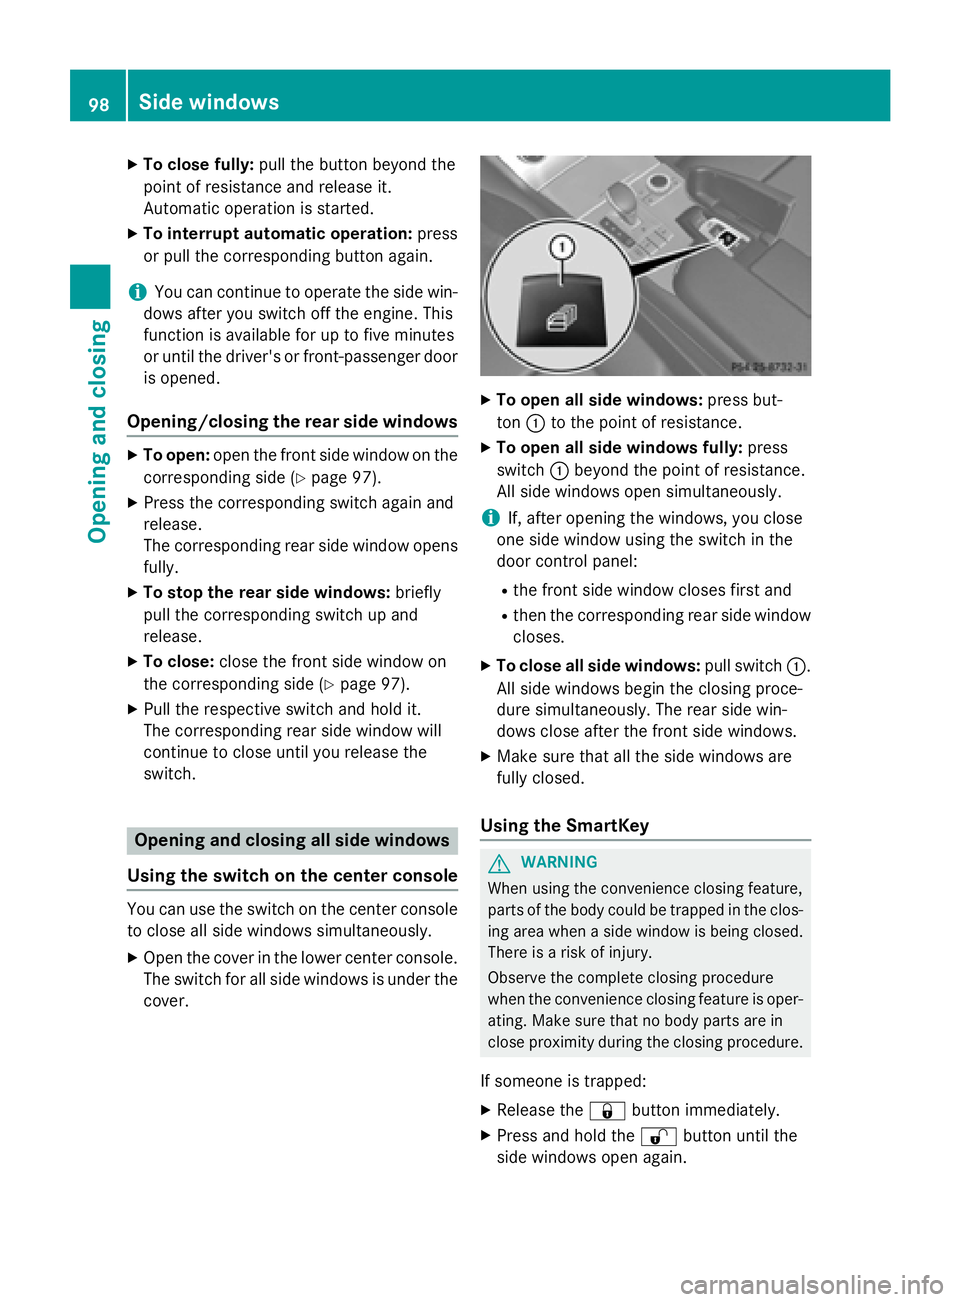
XOpen the cover in the lower center console.
The switch for all side windows is under the
cover.
XTo open all side windows: press but-
ton :to the point of resistance.
XTo open all side windows fully: press
switch :beyond the point of resistance.
All side windows open simultaneously.
iIf, after opening the windows, you close
one side window using the switch in the
door control panel:
Rthe front side window closes first and
Rthen the corresponding rear side window
closes.
XTo close all side windows: pull switch:.
All side windows begin the closing proce-
dure simultaneously. The rear side win-
dows close after the front side windows.
XMake sure that all the side windows are
fully closed.
Using the SmartKey
GWARNING
When using the convenience closing feature,
parts of the body could be trapped in the clos-
ing area when a side window is being closed.
There is a risk of injury.
Observe the complete closing procedure
when the convenience closing feature is oper-
ating. Make sure that no body parts are in
close proximity during the closing procedure.
If someone is trapped:
XRelease the &button immediately.
XPress and hold the %button until the
side windows open again.
98Side windows
Opening and closing
Page 103 of 614
Rthere is sufficient clearance, as the roof
swings upwards.
Rthere is sufficient clearance behind the
vehicle, as the trunk lid swings back-
wards beyond the bumper.
Rthe trunk is only loaded to below the
trunk partition.
Rthe trunk partition is not pushed up by
the load.
Rthe trunk partition is closed.
Rthe trunk lid is closed.
Rthe outside temperature is above 5 ‡
(Ò15 †).
You could otherwise damage the roof,
trunk and other parts of the vehicle.
iVehicle dimensions when opening/clos-
ing the roof (
Ypage 608).
iMake sure that the roof and rear window
are clean and dry before opening the roof.
Otherwise, water or dirt could enter the
vehicle interior or trunk.
Opening and closing using the roof
switch
Important safety notes
GWARNING
When opening or closing the roof, body parts
could be trapped by, for example, the roof
mechanism, trunk lid or side windows. There
is a risk of injury.
When raising or lowering the roof, make sure
that no body parts are in the vicinity of moving
components. If someone becomes trapped,
release the button.
Opening and closing
XSecure the vehicle against rolling away
(
Ypage 171).
XClose the trunk partition (Ypage 103).
XClose the trunk lid.
XTurn the SmartKey to position 2in the igni-
tion lock.
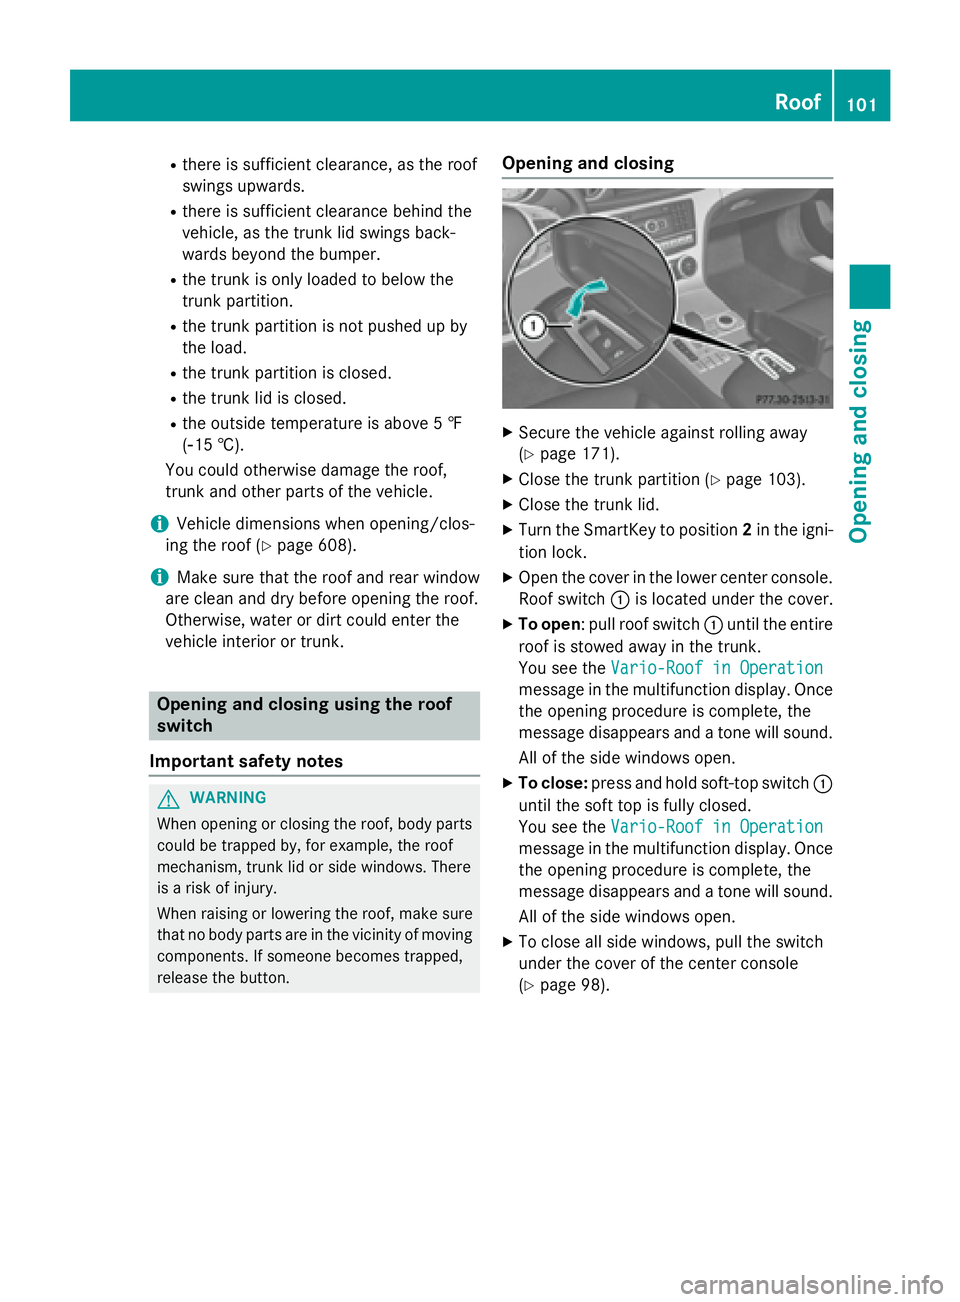
XOpen the cover in the lower center console.
Roof switch :is located under the cover.
XTo open : pull roof switch :until the entire
roof is stowed away in the trunk.
You see the Vario-Roof in Operation
message in the multifunction display. Once
the opening procedure is complete, the
message disappears and a tone will sound.
All of the side windows open.
XTo close: press and hold soft-top switch :
until the soft top is fully closed.
You see the Vario-Roof in Operation
message in the multifunction display. Once
the opening procedure is complete, the
message disappears and a tone will sound.
All of the side windows open.
XTo close all side windows, pull the switch
under the cover of the center console
(
Ypage 98).
Roof101
Opening and closing
Z
Page 106 of 614
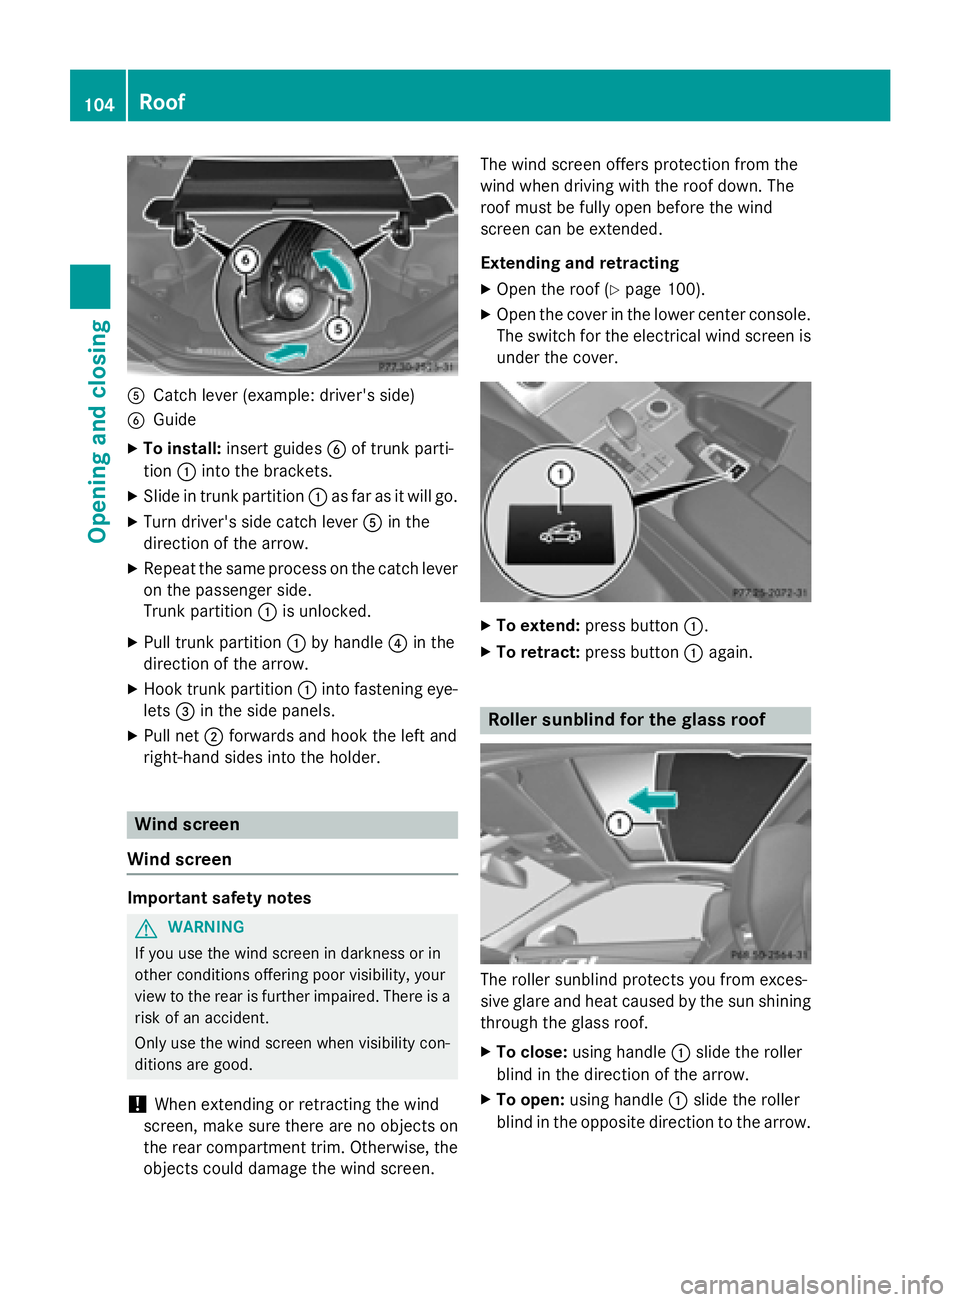
ACatch lever (example: driver's side)
BGuide
XTo install:insert guides Bof trunk part i-
tion :into the brackets.
XSlide in trunk partition :as far as it will go.
XTurn driver's side catch lever Ain the
dire ction of the arrow.
XRepeat the same process on the catch lever
on the passenger side.
Trunk part ition :isunlocked.
XPull trunk partition :by handle ?in the
dire ction of the arrow.
XHook trunk part ition :into fastening eye-
lets =inthe side panels.
XPull net ;forwards and hook the left and
right-hand sides into the holder.
Wind screen
Wind screen
Import ant safety notes
GWARNIN G
If you use th ewin dscree nin darkness or in
other condition sofferin gpoor visibility, your
view to th erear is further impaired .Ther eis a
ris kof an accident.
Only use th ewin dscree nwhen visibilit ycon-
dition sare good .
!When extending or retracting the wind
screen, make sure there are no objects on
the rear compartment trim. Otherwise, the
objects could damage the wind screen. The wind screen offers protection from the
wind when driving with the roof down. The
roof must
befully open before the wind
screen can beextended.
Extending and ret racting
XOpen the roof (Ypage 100).
XOpen the cover inthe lower center console.
The switch for the electrical wind screen is
under the cover.
XTo extend: press button :.
XTo retract: press button :again.
Roller sunblind for the glass roof
The roller sunblin d protects you from exces-
sive glare and heat caused bythe sun shining
through the glass roof.
XTo close: using handle :slide the roller
blin din the direction of the arrow.
XTo open: using handle :slide the roller
blin din the opposite direction to the arrow.
104Roof
Opening and closing
Page 162 of 614
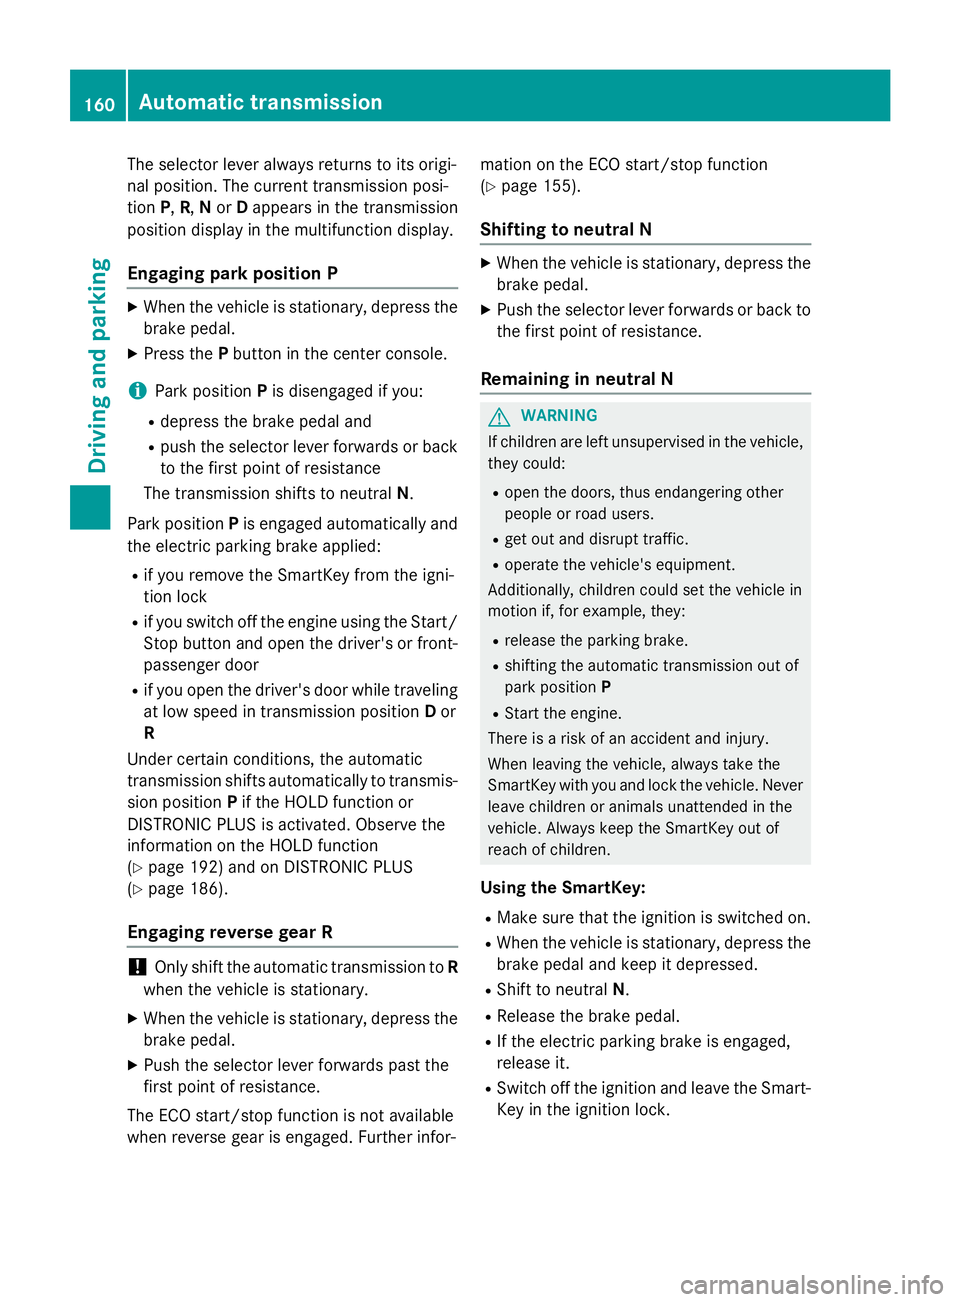
The selector lever always returns to its origi-
nal position. The current transmission posi-
tionP,R, Nor Dappears in the transmission
position display in the multifunction display.
Engaging park position P
XWhen the vehicle is stationary, depress the
brake pedal.
XPress the Pbutton in the center console.
iPark position Pis disengaged if you:
Rdepress the brake pedal and
Rpush the selector lever forwards or back
to the first point of resistance
The transmission shifts to neutral N.
Park position Pis engaged automatically and
the electric parking brake applied:
Rif you remove the SmartKey from the igni-
tion lock
Rif you switch off the engine using the Start/
Stop button and open the driver's or front-
passenger door
Rif you open the driver's door while traveling
at low speed in transmission position Dor
R
Under certain conditions, the automatic
transmission shifts automatically to transmis-
sion position Pif the HOLD function or
DISTRONIC PLUS is activated. Observe the
information on the HOLD function
(
Ypage 192) and on DISTRONIC PLUS
(
Ypage 186).
Engaging reverse gear R
!Only shift the automatic transmission to R
when the vehicle is stationary.
XWhen the vehicle is stationary, depress the
brake pedal.
XPush the selector lever forwards past the
first point of resistance.
The ECO start/stop function is not available
when reverse gear is engaged. Further infor- mation on the ECO start/stop function
(
Ypage 155).
Shifting to neutral N
XWhen the vehicle is stationary, depress the
brake pedal.
XPush the selector lever forwards or back to
the first point of resistance.
Remaining in neutral N
GWARNING
If children are left unsupervised in the vehicle,
they could:
Ropen the doors, thus endangering other
people or road users.
Rget out and disrupt traffic.
Roperate the vehicle's equipment.
Additionally, children could set the vehicle in
motion if, for example, they:
Rrelease the parking brake.
Rshifting the automatic transmission out of
park position P
RStart the engine.
There is a risk of an accident and injury.
When leaving the vehicle, always take the
SmartKey with you and lock the vehicle. Never
leave children or animals unattended in the
vehicle. Always keep the SmartKey out of
reach of children.
Using the SmartKey:
RMake sure that the ignition is switched on.
RWhen the vehicle is stationary, depress the
brake pedal and keep it depressed.
RShift to neutral N.
RRelease the brake pedal.
RIf the electric parking brake is engaged,
release it.
RSwitch off the ignition and leave the Smart-
Key in the ignition lock.
160Automatic transmission
Driving and parking
Page 239 of 614
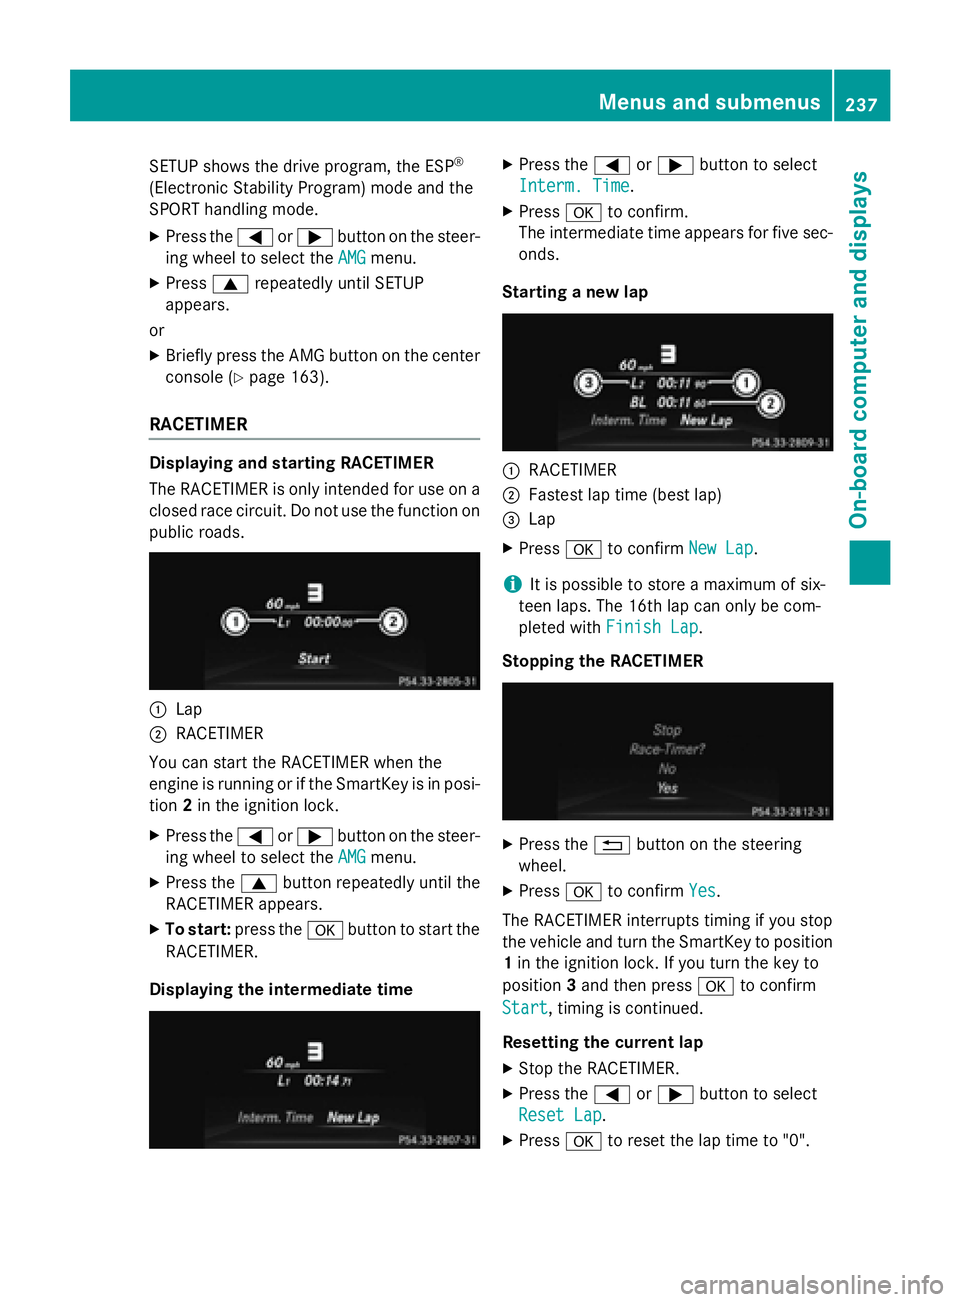
SETUP shows the drive program, the ESP®
(Electronic Stability Program) mode and the
SPORT handling mode.
XPress the=or; button on the steer-
ing wheel to select the AMG
menu.
XPress9repeatedly until SETUP
appears.
or
XBriefly press the AMG button on the center
console (
Ypage 163).
RACETIMER
Displaying and starting RACETIMER
The RACETIMER is only intended for use on a
closed race circuit. Do not use the function on
public roads.
:Lap
;RACETIMER
You can start the RACETIMER when the
engine is running or if the SmartKey is in posi-
tion 2in the ignition lock.
XPress the =or; button on the steer-
ing wheel to select the AMG
menu.
XPress the9button repeatedly until the
RACETIMER appears.
XTo start: press the abutton to start the
RACETIMER.
Displaying the intermediate time
XPress the =or; button to select
Interm. Time
.
XPress ato confirm.
The intermediate time appears for five sec- onds.
Starting a new lap
:RACETIMER
;Fastest lap time (best lap)
=Lap
XPress ato confirm New Lap.
iIt is possible to store a maximum of six-
teen laps. The 16th lap can only be com-
pleted with Finish Lap
.
Stopping the RACETIMER
XPress the %button on the steering
wheel.
XPress ato confirm Yes.
The RACETIMER interrupts timing if you stop
the vehicle and turn the SmartKey to position
1 in the ignition lock. If you turn the key to
position 3and then press ato confirm
Start
, timing is continued.
Resetting the current lap
XStop the RACETIMER.
XPress the =or; button to select
Reset Lap
.
XPress ato reset the lap time to "0".
Menus and submenus237
On-board computer and displays
Z
Page 252 of 614
Display messagesPossible causes/consequences andMSolutions
Front Passenger
Airbag Disabled
SeeOperator'sMan‐
ual
The front-passenger air bag and front-passenger knee bag are
deactivated during th ejourney, although:
Ran adult
or
Raperson of th ecorrespondin gstature is on th efront-passenger
seat
If additional forces are applied to th eseat ,th esystem may inter-
pre tth eoccupant's weight as lowe rthan it actually is.
GWARNIN G
The front-passenger fron tair bag and fron tpassenger knee bag
may no tbe triggered in th eevent of an accident.
There is an increase dris kof injury.
XPull ove rand stop th evehicl esafely as soo nas possible, payin g
attention to roa dand traffic conditions.
XSecur eth evehicl eagainst rollin gaway (Ypage 171).
XSwitchth eignition off.
XHav eth eoccupant get out of th evehicle.
XKee pth eseat unoccupied ,close th efront-passenger doo rand
switch on th eignition .
XObserveth ePASSENGER AI RBA Gindicato rlamp sin th ecenter
console and th emultifunction display and chec kth efollowing :
Seat unoccupied and ignition switched on :
RthePASSENGER AI RBA GOF Fand PASSENGER AI RBA GON
indicato rlamp smus tligh tup simultaneousl yfo rapprox -
imately six seconds
Rth ePASSENGER AI RBA GO FF indicato rlamp mus tthen ligh t
up and remain lit .If th eindicato rlamp is on ,OCS has disabled
th efront-passenger fron tair bag (
Ypage 59)
RtheFrontPassengerAirbagEnable dSeeOperator' s
ManualorFrontPassengerAirbagDisabledSeeOper‐
ator's Manualdisplay message smus tno tbe shown in th e
multifunction display
XWait fo r aperiod of at leas t60 seconds until th enecessar ysys-
te m checks hav ebeen completed.
XMak esur ethat th edisplay message sdo no tappea rin th emul-
tifunction display.
If these condition sare fulfilled ,th efront-passenger seat can be
occupied again .Whether th ePASSENGER AI RBA GOF For ON
indicato rlamp remain slit or goe sout depend son how OCS clas-
sifies th eoccupant .
250Display messages
On-board computer and displays
Page 253 of 614
Display messagesPossible causes/consequences andMSolutions
If thecondition sare no tfulfilled ,th esystem is no toperating cor-
rectly.
XVisit aqualified specialist workshop immediately.
Observ eth eadditional information on OCS (
Ypage 59).
Front Passenger
AirbagEnabledSee
Operator' sManual
The front-passenger air bag and front-passenger knee bag are
enabled during th ejourney, eve nthough :
Rachild, asmall adult or an objec tweighin gless than th esys-
tem' sweight threshold is locate don th efront-passenger seat
or
Rth efront-passenger seat is unoccupied
The automati cfront-passenger fron tair bag deactivation system
may detec tobjects or forces that are addin gto th eweight applied
to th eseat .
GWARNIN G
The front-passenger fron tair bag and th efront-passenger knee
bag may be triggered unintentionally.
There is an increase dris kof injury.
XPull ove rand stop th evehicl esafely as soo nas possible, payin g
attention to roa dand traffic conditions.
XSecur eth evehicl eagainst rollin gaway (Ypage 171).
XSwitchth eignition off.
XOpe nth efront-passenger door.
XRemove th echild and th echild restrain tsystem from th efront-
passenger seat .
XMakesur ethat there are no objects on th eseat addin gto th e
weight .
The system may otherwise detec tth eadditional weight and
interpret th eseat occupant's weight as greate rthan it actually
is.
XKee pth eseat unoccupied ,close th efront-passenger doo rand
swit ch o
n th eignition .
XObserveth ePASSENGER AI RBA Gindicato rlamp sin th ecenter
console and th emultifunction display and chec kth efollowing :
Seat unoccupied and ignition switched on :
RthePASSENGER AI RBA GOF Fand PASSENGER AI RBA GON
indicato rlamp smus tligh tup simultaneousl yfo rapprox -
imately six seconds
Rth ePASSENGER AI RBA GOF Findicato rlamp mus tthen ligh t
up and remain lit .If th eindicato rlamp is on ,OCS (Occupant
Display messages25 1
On-board computer and displays
Z
Page 449 of 614

iIf a medium contains other files in addi-
tion to music files, the loading time before
the first track starts to play may be longer.
Inserting
XPress the 8button.
If there is a disc already inserted, it will be
ejected.
XTake the disc out of the slot.
XInsert a disc into the slot.
When a suitable data carrier is correctly
inserted, the drive draws it in and plays it.
Removing
XPress the 8button.
XTake the disc out of the slot.
If you do not take the disc out of the slot, it
is drawn in again automatically after a short
while and reloaded.
Inserting and ejecting an SD memory
card
General information
COMAND supports SD memory cards
(Secure Digital), SDHC memory cards
(Secure Digital HighCapacity) and SDXC
memory cards (Secure Digital eXtended
Capacity.
iNot all memory cards available on the
market are designed for the temperatures
which may be reached in the vehicle.
If the SD memory card is no longer in use,
you should remove it from COMAND. High
temperatures can damage the card.
Due to the wide range of SD memory cards
available on the market, playback cannot
be guaranteed for all brands of SD memory
card.
The readable storage capacity depends on
the memory card used. You can obtain fur-
ther information at any authorized
Mercedes-Benz Center. Inserting an SD memory card
XInsert the memory card into the slot on the
control panel until it engages in place. The
side with the contacts must face down-
wards and point towards the slot.
If no MP3 tracks can be found, you will see
a message to this effect.
The first 100 MP3 tracks are loaded. The
first MP3 track is then played. Further
tracks are loaded in the background; this is
indicated by an hourglass symbol.
Ejecting an SD memory card
XPress the memory card.
The memory card is ejected.
XRemove the memory card from slot.
Connecting a USB device
The USB port is located in the stowage com-
partment in the center console.
Electrical consumption at this connection
must not exceed a continuous current of
500 mA. If the electrical consumption is
higher, use a separate source to provide
power for the USB device (e.g.
12 V power supply).
XConnect the USB device (e.g. USB stick) to
the USB port.
If no MP3 tracks can be found, you will see
a message to this effect.
The first 100 MP3 tracks are loaded. The
first MP3 track is then played. Further
tracks are loaded in the background; this is
indicated by an hourglass symbol.
iDue to the wide range of USB devices
available on the market, playback cannot
be guaranteed for all brands of USB device.
Information about suitable USB devices
can be obtained from an authorized
Mercedes-Benz Center.
MP3 players must support Media Transfer
Protocol (MTP). The MTP mode must be
active.
Audio447
COMAND
Z