2016 MERCEDES-BENZ SL-CLASS ROADSTER audio
[x] Cancel search: audioPage 491 of 614
Selecting sound settings
You can select the sound settings in the CD/
MP3, video DVD and AUX modes.
XSwitch on an operating mode (e.g. audio
CD mode) (
Ypage 491).
XSelectTrebleorBassusing
the :=; buttons on the remote
control and press the 9button to confirm.
An adjustment scale appears.
XSelect a setting using the 9:but-
tons and press the 9button to confirm.
Multiple users
Simultaneous use of the rear-compart-
ment disc drive
The two rear-compartment screens can be
operated almost entirely independently from
one another. However, there can be a conflict
in some menus if the two screens are used
simultaneously.
If the rear-compartment disc drive is being
used for both screens simultaneously, select-
ing certain menus or settings on one of the
screens also affects the other screen.
The following functions affect both screens:
Rchanging playback options
Rselecting a track (from a track list or folder)
Rusing the play, pause and stop functions
Rfast forwarding/rewinding or scrolling
Rcalling up the DVD menu and navigating
within it
Rsetting the language, subtitles and camera
angle
Rcalling up interactive DVD content
The following functions affect only one
screen:
Raudio and video functions as well as picture
settings
Rswitching between full screen and the
menu Switching between operating modes
When you exit an operating mode (e.g. audio
CD mode), the current setting is saved. If you
call up this operating mode again later, there
are two possibilities:
Rthe operating mode has been changed on
the other screen.
Rthe operating mode has not been changed.
In the first case, the operating mode appears as it is on the other screen.
In the second case, the setting appears on the
screen as it was when you last exited the
operating mode.
Picture settings
Overview
You can select picture settings in video DVD
and AUX mode (
Ypage 500).
Adjusting the brightness, contrast and
color
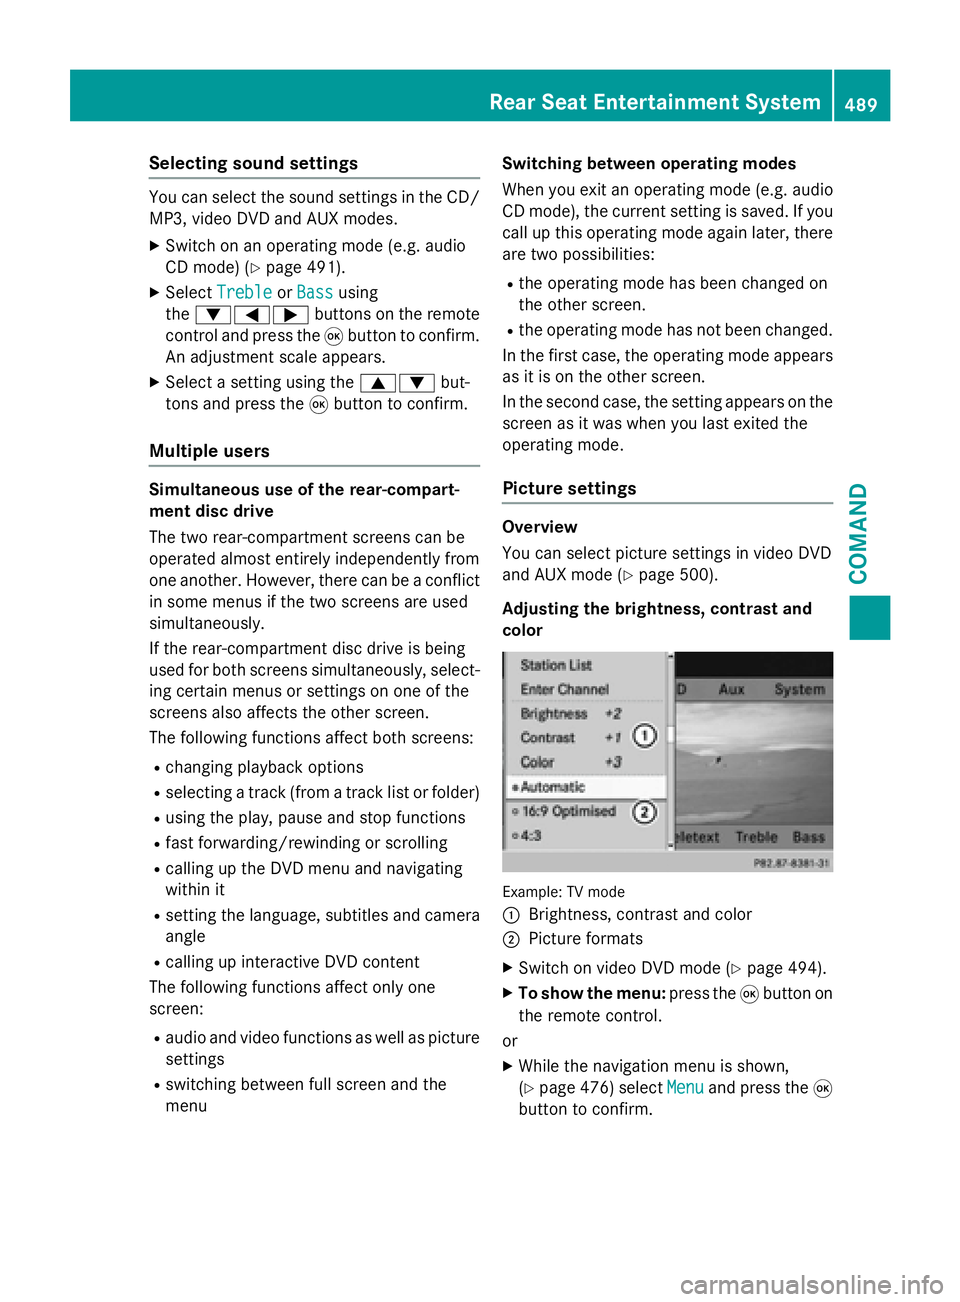
Example: TV mode
:
Brightness, contrast and color
;Picture formats
XSwitch on video DVD mode (Ypage 494).
XTo show the menu: press the9button on
the remote control.
or
XWhile the navigation menu is shown,
(
Ypage 476) select Menuand press the9
button to confirm.
Rear Seat Entertainment System489
COMAND
Z
Page 493 of 614
Showing/hiding the picture
XTo hide the picture:selectDisplay Off
in the system menu using the :;
buttons on the remote control and press
the 9button to confirm.
The picture is hidden.
XTo display the picture: press the9but-
ton.
CD/audio DVD and MP3 mode
Important safety notes
GWARNING
The CD/DVD drive is a class 1 laser product.
If you open the housing of the CD/DVD drive,
there is a risk of exposure to invisible laser
radiation. This laser radiation could damage
your retina. There is a risk of injury.
Never open the housing. Always have main-
tenance and repair work carried out at a quali- fied specialist workshop.
General notes
You will find information on the following top-
ics in the Audio section:
Rnotes on CDs/DVDs (Ypage 454)
Rnotes on MP3 mode (Ypage 453)
Rnotes on copyright (Ypage 454)
Inserting a CD/DVD
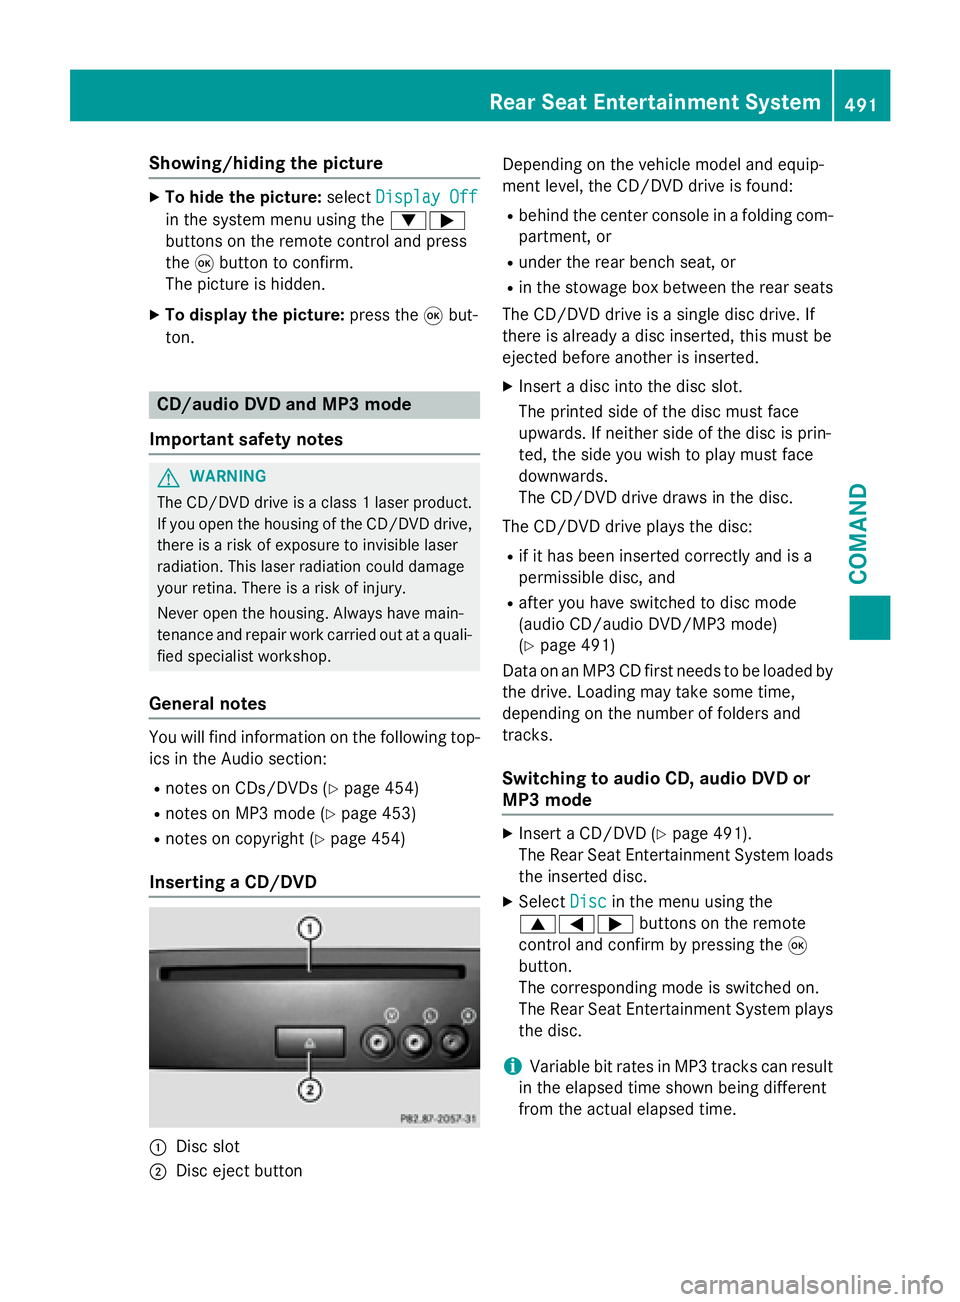
:Disc slot
;Disc eject button Depending on the vehicle model and equip-
ment level, the CD/DVD drive is found:
Rbehind the center console in a folding com-
partment, or
Runder the rear bench seat, or
Rin the stowage box between the rear seats
The CD/DVD drive is a single disc drive. If
there is already a disc inserted, this must be
ejected before another is inserted.
XInsert a disc into the disc slot.
The printed side of the disc must face
upwards. If neither side of the disc is prin-
ted, the side you wish to play must face
downwards.
The CD/DVD drive draws in the disc.
The CD/DVD drive plays the disc:
Rif it has been inserted correctly and is a
permissible disc, and
Rafter you have switched to disc mode
(audio CD/audio DVD/MP3 mode)
(
Ypage 491)
Data on an MP3 CD first needs to be loaded by
the drive. Loading may take some time,
depending on the number of folders and
tracks.
Switching to audio CD, audio DVD or
MP3 mode
XInsert a CD/DVD (Ypage 491).
The Rear Seat Entertainment System loads
the inserted disc.
XSelect Discin the menu using the
9=; buttons on the remote
control and confirm by pressing the 9
button.
The corresponding mode is switched on.
The Rear Seat Entertainment System plays
the disc.
iVariable bit rates in MP3 tracks can result
in the elapsed time shown being different
from the actual elapsed time.
Rear Seat Entertainment System491
COMAND
Z
Page 494 of 614
Selecting a track
Selecting by skipping to a track
XTo skip forwards or backwards to a
track:press the =or; button on
the remote control.
or
XPress the EorF button.
The skip forward function skips to the next
track.
If the elapsed track time has passed 8 sec-
onds, the function skips back to the begin-
ning of the track. If the elapsed time is
shorter, it will skip to the start of the pre-
vious track.
If the Random Tracks
orRandom Folder
playback option has been selected, the
track order is random.
Selecting by track list
In audio CD mode, the track list contains all
tracks on the disc currently playing. In audio
DVD mode, the track list contains all tracks in the currently active group.
In MP3 mode, the track list shows all tracks in
the currently active folder as well as the folder
structure, allowing you to select any track on
the MP3 CD.
XSelect Track List(audio CD/DVD mode)
or Folder
(MP3 mode) using
the :=; buttons on the remote
control, and confirm by pressing the 9
button.
or
XPress the 9button when the display/
selection window is active.
The track list appears. The #dot indicates
the current track.
XSelect a track using the 9:buttons
and press the 9button to confirm. Making a selection by entering the track
number directly
XPress the
hbutton on the remote con-
trol.
The track entry display appears.
Example: track 2
XPress number button 2.
Example: track 12
XPress the corresponding number keys in
rapid succession.
XWait for approximately three seconds after
making the entry.
You will hear the track which has been
entered. The corresponding basic menu
then reappears.
iIt is not possible to enter numbers that
exceed the number of tracks on the CD or in
the currently active folder.
Fast forwarding/rewinding
XWith the display/selection window active,
press the =or; button on the
remote control repeatedly until you reach
the desired position.
or
XPress and hold the EorF button
until the desired position is reached.
Selecting a folder
This function is only available in MP3 mode.
XSelect Folderin MP3 mode using
the :=; buttons on the remote
control and press the 9button to confirm.
or
XPress the 9button when the display/
selection window is active.
The folder content appears.
492Rear Seat Entertainment System
COMAND
Page 495 of 614
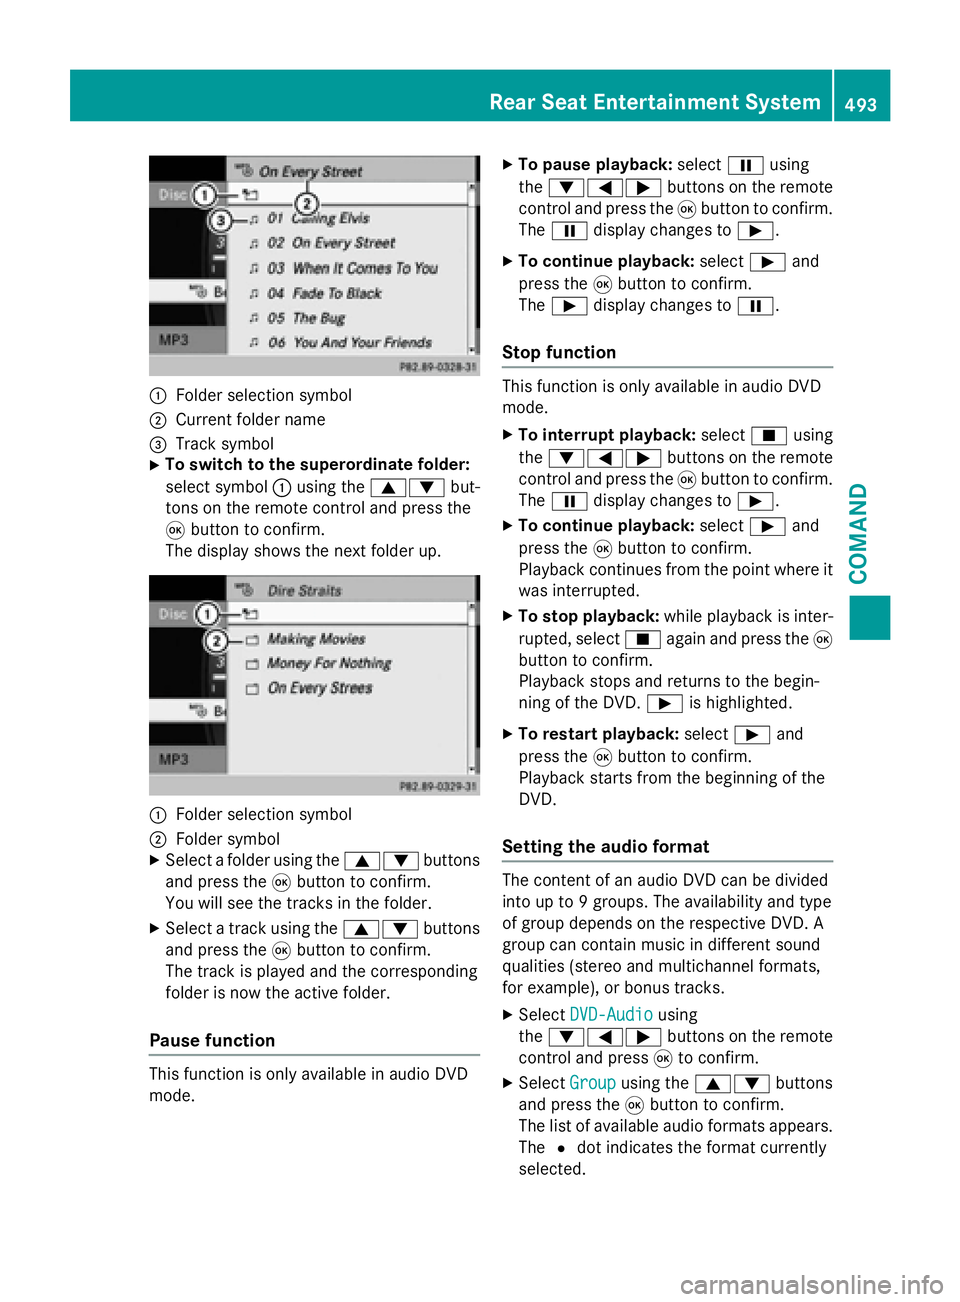
:Folder selection symbol
;Current folder name
=Track symbol
XTo switch to the superordinate folder:
select symbol:using the 9: but-
tons on the remote control and press the
9 button to confirm.
The display shows the next folder up.
:Folder selection symbol
;Folder symbol
XSelect a folder using the 9:buttons
and press the 9button to confirm.
You will see the tracks in the folder.
XSelect a track using the 9:buttons
and press the 9button to confirm.
The track is played and the corresponding
folder is now the active folder.
Pause function
This function is only available in audio DVD
mode.
XTo pause playback: selectËusing
the :=; buttons on the remote
control and press the 9button to confirm.
The Ë display changes to Ì.
XTo continue playback: selectÌand
press the 9button to confirm.
The Ì display changes to Ë.
Stop function
This function is only available in audio DVD
mode.
XTo interrupt playback: selectÉusing
the :=; buttons on the remote
control and press the 9button to confirm.
The Ë display changes to Ì.
XTo continue playback: selectÌand
press the 9button to confirm.
Playback continues from the point where it
was interrupted.
XTo stop playback: while playback is inter-
rupted, select Éagain and press the 9
button to confirm.
Playback stops and returns to the begin-
ning of the DVD. Ìis highlighted.
XTo restart playback: selectÌand
press the 9button to confirm.
Playback starts from the beginning of the
DVD.
Setting the audio format
The content of an audio DVD can be divided
into up to 9 groups. The availability and type
of group depends on the respective DVD. A
group can contain music in different sound
qualities (stereo and multichannel formats,
for example), or bonus tracks.
XSelect DVD-Audiousing
the :=; buttons on the remote
control and press 9to confirm.
XSelect Groupusing the 9: buttons
and press the 9button to confirm.
The list of available audio formats appears.
The #dot indicates the format currently
selected.
Rear Seat Entertainment System493
COMAND
Z
Page 496 of 614
XSelect an audio format using the9:
buttons and press the 9button to confirm.
XTo exit the menu: press the=or;
button.
Playback options
Further information on playback options is
available in the "Audio" section (
Ypage 452).
XSelect CD,DVD-Audioor MP3using
the :=; buttons on the remote
control and press the 9button to confirm.
The options list appears. The #dot indi-
cates the option currently selected.
XSelect NormalTrackSequence,Random
Tracksor Random Folderusing the
9: buttons and press the 9button
to confirm.
The option is switched on. For all options
except Normal Track Sequence
, you will
see a corresponding display in the display/
selection window.
iIf you switch the data carrier which you
are currently listening to, the Normal
Track Sequenceoption is activated auto-
matically. If an option is selected, it
remains selected after the Rear Seat Enter- tainment System is switched on or off.
Switching track information on/off
(MP3 mode only)
If the function is switched on, folder and track
names are displayed.
If the function is switched off, disc and file
names are displayed.
XSelect MP3using the :=; but-
tons on the remote control and press the
9 button to confirm.
XSelect Display Track Information
using the 9: buttons and press the
9 button to confirm.
The function is switched on Oor off ª,
depending on the previous status.
Video DVD mode
Important safety notes
GWARNING
The CD/DVD drive is a class 1 laser product.
If you open the housing of the CD/DVD drive,
there is a risk of exposure to invisible laser
radiation. This laser radiation could damage
your retina. There is a risk of injury.
Never open the housing. Always have main-
tenance and repair work carried out at a quali- fied specialist workshop.
General notes
DVD playback conditions
Playback problems may occur when playing
copied discs. There is a large variety of discs,
DVD authoring software, writing software and
writers available. This variety means that
there is no guarantee that the Rear Seat
Entertainment System will be able to play
video DVDs that you have copied yourself.
Further information can be found under video
(
Ypage 476). Information regarding
COMAND also applies to the Rear Seat Enter-
tainment System.
Function restrictions
Depending on the DVD, it is possible that cer- tain functions or actions described in this
section will be temporarily blocked or may not
function at all. As soon as you try to activate
these functions or actions, you will see the K
symbol in the display.
Switching to video DVD mode
XInsert a video DVD (Ypage 491).
The Rear Seat Entertainment System loads
the disc.
If disc mode was the last mode selected, it
will now be active.
494Rear Seat Entertainment System
COMAND
Page 500 of 614
Back to the film
XPress thekbutton repeatedly until you
see the movie.
or
XSelect any menu item in the DVD menu and
press 9to confirm.
XSelect the Back (to the movie)menu
item in the menu and press the 9button to
confirm.
Setting the audio format
This function is not available on all DVDs. If it
is available, you can set the audio language or
the audio format. The number of settings is
determined by the DVD content. It may also
be possible to access the settings from the
DVD menu.
XPress the 9button on the remote control
and show the menu.
XSelect DVD-Videoand press the 9button
on the remote control to confirm.
XSelect DVD Functionsand press the 9
button to confirm.
XSelect Audio Languageand press the 9
button to confirm.
A menu appears after a short while. The #
dot in front of an entry indicates the cur-
rently selected language.
XSelect a language using the 9:but-
tons and press the 9button to confirm.
XTo exit the menu: press the=or;
button.
Subtitles and camera angle
These functions are not available on all DVDs.
The number of subtitle languages and camera
angles available depends on the content of
the DVD. It may also be possible to access the
settings from the DVD menu.
XPress the 9button on the remote control
and show the menu.
XSelect DVD-Videoand press the 9button
on the remote control to confirm.
XSelect DVD Functionsand press the 9
button to confirm.
XSelect SubtitlesorCamera Angleand
press the 9button to confirm.
In both cases, a menu appears after a few
seconds. The #dot in front of an entry
indicates the current setting.
XSelect a setting using the 9:but-
tons and press the 9button to confirm.
XTo exit the menu: press the=or;
button.
Interactive content
DVDs can also contain interactive content
(e.g. a video game). In a video game, you may
be able to influence events by selecting and
triggering actions. The type and number of
actions depend on the DVD.
XSelect an action using the
9;:= buttons on the
remote control and press the 9button to
execute it.
A menu appears and the first entry, Select
,
is highlighted.
XPress the 9button.
Operation with an active COMAND
source
Switching the function on/off in
COMAND
You can transfer an audio or video source
selected in COMAND to the Rear Seat Enter-
tainment System. If you subsequently switch
modes in COMAND, the new source will not
be transmitted to the Rear Seat Entertain-
ment System.
XTo switch on the function in COMAND:
switch to the desired audio mode in
COMAND, e.g. CD mode (
Ypage 448), or
show the menu in video DVD mode
(
Ypage 476).
XSelect the menu item at the bottom left,
e.g. CD
in audio CD mode, by sliding VÆ
498Rear Seat Entertainment System
COMAND
Page 501 of 614
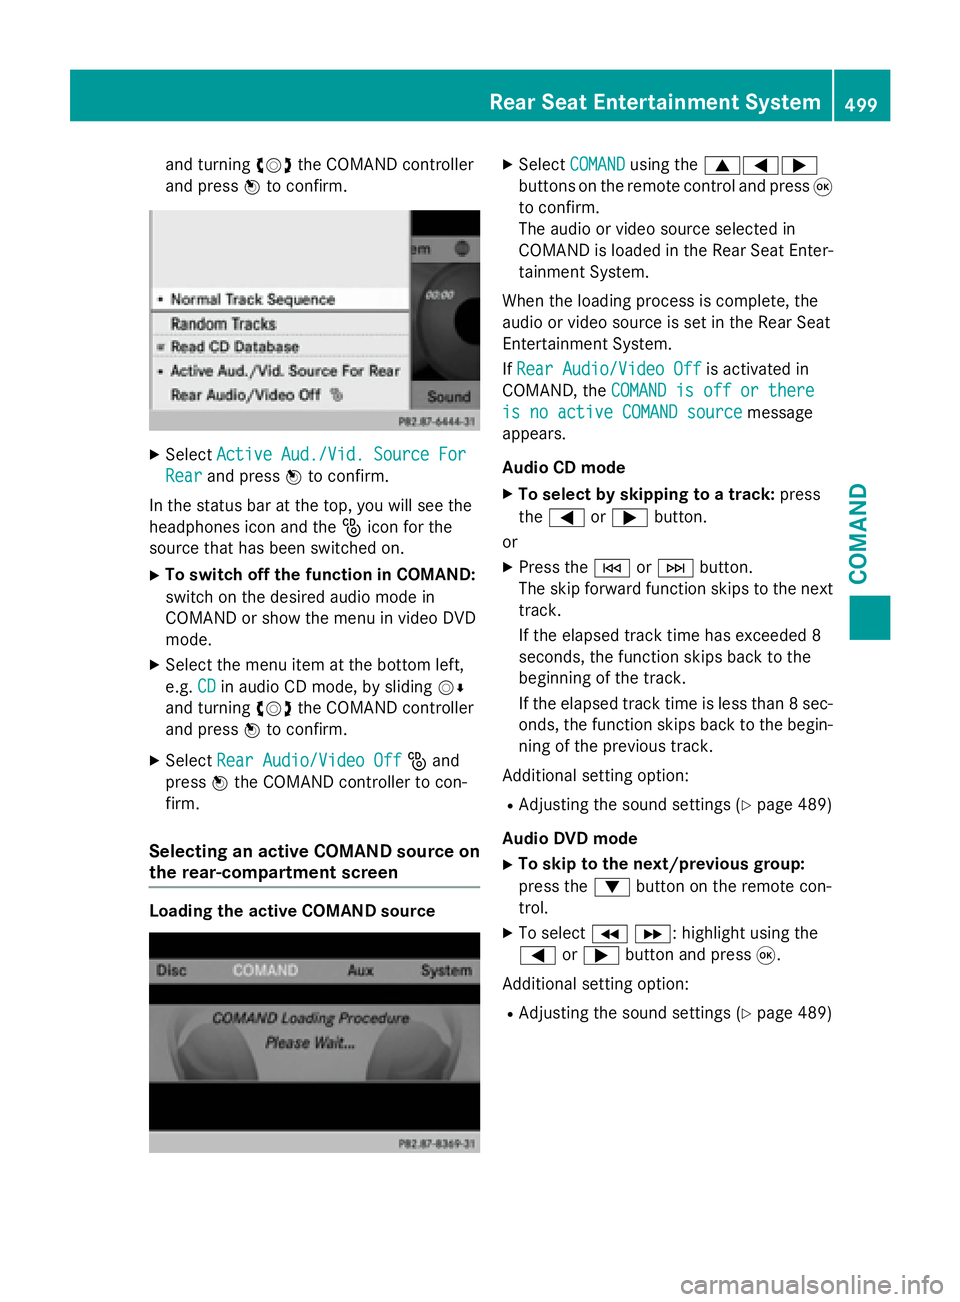
and turningcVdthe COMAND controller
and press Wto confirm.
XSelect Active Aud./Vid. Source For
Rearand press Wto confirm.
In the status bar at the top, you will see the
headphones icon and the _icon for the
source that has been switched on.
XTo switch off the function in COMAND:
switch on the desired audio mode in
COMAND or show the menu in video DVD
mode.
XSelect the menu item at the bottom left,
e.g. CD
in audio CD mode, by sliding VÆ
and turning cVdthe COMAND controller
and press Wto confirm.
XSelect Rear Audio/Video Off_and
press Wthe COMAND controller to con-
firm.
Selecting an active COMAND source on
the rear-compartment screen
Loading the active COMAND source
XSelect COMANDusing the 9=;
buttons on the remote control and press 9
to confirm.
The audio or video source selected in
COMAND is loaded in the Rear Seat Enter- tainment System.
When the loading process is complete, the
audio or video source is set in the Rear Seat
Entertainment System.
If Rear Audio/Video Off
is activated in
COMAND, the COMAND is off or there
is no active COMAND sourcemessage
appears.
Audio CD mode
XTo select by skipping to a track: press
the = or; button.
or
XPress the EorF button.
The skip forward function skips to the next
track.
If the elapsed track time has exceeded 8
seconds, the function skips back to the
beginning of the track.
If the elapsed track time is less than 8 sec-
onds, the function skips back to the begin-
ning of the previous track.
Additional setting option:
RAdjusting the sound settings (Ypage 489)
Audio DVD mode
XTo skip to the next/previous group:
press the :button on the remote con-
trol.
XTo select KL : highlight using the
= or; button and press 9.
Additional setting option:
RAdjusting the sound settings (Ypage 489)
Rear Seat Entertainment System499
COMAND
Z
Page 502 of 614
MP3 mode
XTo select a track by skipping to a track:
press the=or; button on the
remote control.
or
XPress the EorF button.
The skip forward function skips to the next
track.
If the elapsed track time has exceeded 8
seconds, the function skips back to the
beginning of the track.
If the elapsed track time is less than 8 sec-
onds, the function skips back to the begin-
ning of the previous track.
XTo select a folder: press the:button
on the remote control.
XHighlight one of the two folder symbols
with the =or; button and press 9
to confirm.
Depending on your selection, the previous
or next folder is selected and the first track
is played.
Additional setting option:
RAdjusting the sound settings (Ypage 489)
Video DVD mode
XTo hide a menu: confirmMenuwith the 9
button.
The video image is played in full screen
mode.
Additional setting options:
RAdjusting the brightness, contrast and
color (
Ypage 489)
RChanging the picture format (Ypage 490)
RAdjusting the sound settings (Ypage 489)
AUX mode
Introduction
You can connect one external video source to
each of the displays of the Rear Seat Enter-
tainment System (AUX display) and also one
external video source to the rear-compart- ment CD/DVD drive (AUX drive) with a sound
and video signal.
Please see the corresponding operating
instructions for information on how to oper-
ate the external video source.
For further details about external video sour-
ces, please consult an authorized Mercedes-
Benz Center.
Connecting AUX equipment
AUX drive
The AUX drive jacks are located on the
CD/DVD drive next to the CD/DVD eject but-
ton (
Ypage 485).
Displaying AUX
The AUX display jacks are on the side of the
screen (
Ypage 484).
Audio and video connection
XInsert the audio plugs for the left and right
signals into the corresponding Land R
jacks.
XInsert the video plug into the Vjack.
Activating AUX mode
AUX drive
XSelect Auxin the menu using the
9=; buttons on the remote
control and press the 9button to confirm.
The AUX menu appears.
XSelect Sourcefrom the AUX menu and
press the 9button to confirm.
XSelect Disc Drive Auxand press the 9
button to confirm.
You will hear and see the content of the
external video source if it is connected to
the CD/DVD drive and switched to play-
back. If no video image is available from the
AUX source connected, you will see an
audio menu.
500Rear Seat Entertainment System
COMAND