2016 MERCEDES-BENZ SL-Class display
[x] Cancel search: displayPage 338 of 614

XTo change the sequence:from the menu,
select Move
by turning cVdthe COMAND
controller and press Wto confirm.
XTurn cVd the COMAND controller and
move the way point or destination to the
desired position, then press Wto confirm.
XTo delete way points: from the menu,
select Delete
and press Wto confirm.
Accepting way points for the route
XSelect Startin the way point menu by
turning cVdthe COMAND controller and
press Wto confirm.
The route is calculated with the entered
way points.
iContinueis displayed instead of Start
whenCalculate Alternative Routes
is activated in the navigation menu
(
Ypage 351).
iIf a way point has been passed during
route guidance, the way point will be dis-
played in the way point menu with a green
arrow. Once the route has been recalcula-
ted, the way point is deleted from the way
point menu.
Searching for a gas station when the fuel
level is low
If the reserve fuel warning is displayed, you
will see the message: Fuel tank reserve
level. Do you want to start the
search for gas stations?.
XSelectYesorNo.
If you select Yes
, the gas station search
starts. When the search is complete, a list
of the gas stations available along the route
or in the vicinity is displayed.
If you select No
, the search is canceled.
XSelect a gas station and press Wto con-
firm.
The address of the gas station is displayed.
XConfirm Startby pressing W.
The selected gas station is entered into
position 1 of the way points menu. Route
guidance begins. If the way points menu already contains
four way points, a prompt will be displayed,
asking you whether you wish to enter the
gas station into position 1. If you select
Yes
, the gas station is transferred into the
list and way point 4 is deleted.
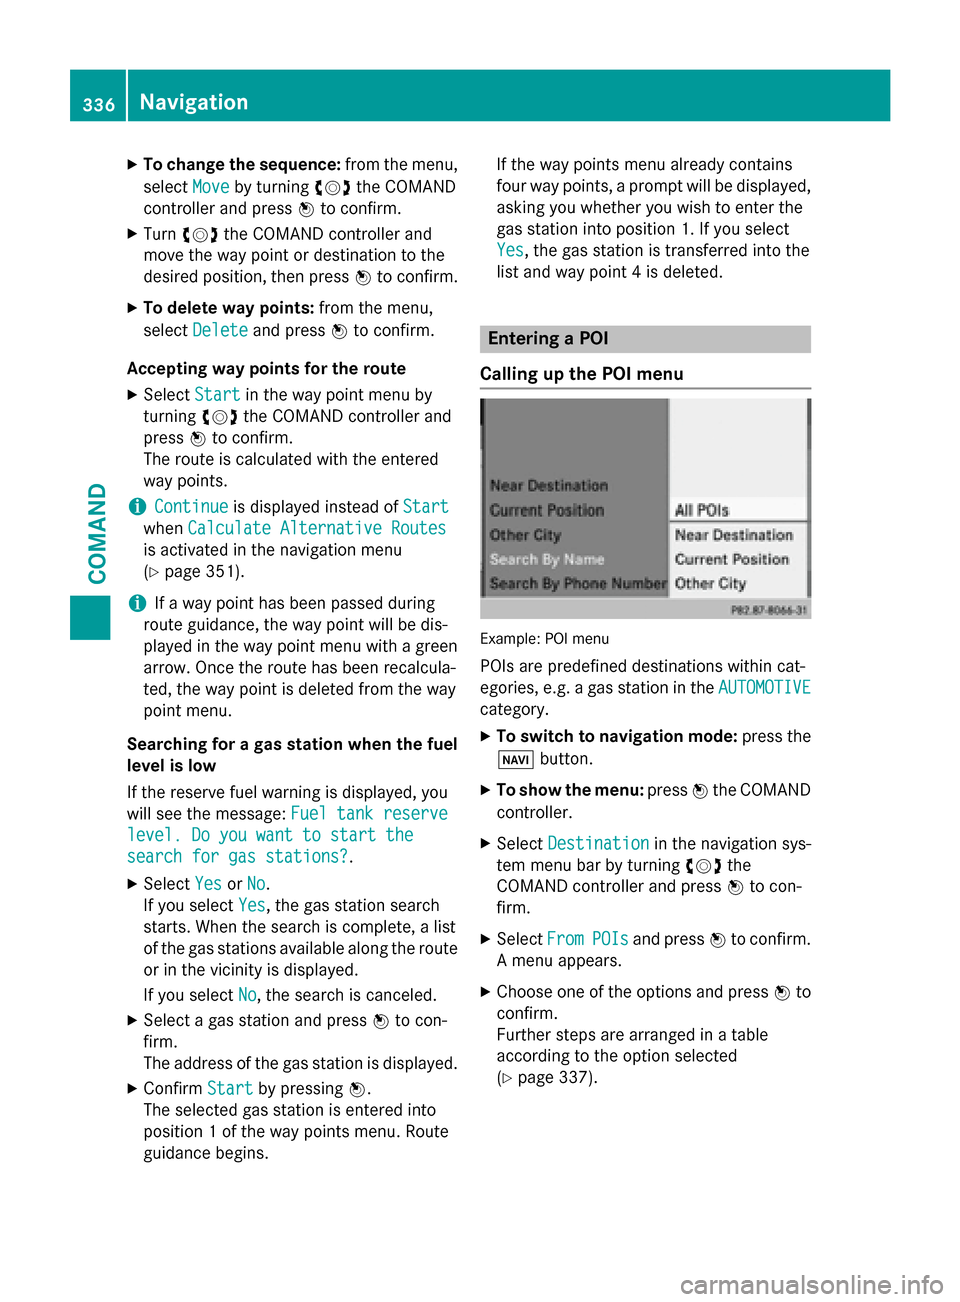
Entering a POI
Calling up the POI menu
Example: POI menu
POIs are predefined destinations within cat-
egories, e.g. a gas station in the AUTOMOTIVE
category.
XTo switch to navigation mode: press the
Ø button.
XTo show the menu: pressWthe COMAND
controller.
XSelect Destinationin the navigation sys-
tem menu bar by turning cVdthe
COMAND controller and press Wto con-
firm.
XSelect FromPOIsand press Wto confirm.
A menu appears.
XChoose one of the options and press Wto
confirm.
Further steps are arranged in a table
according to the option selected
(
Ypage 337).
336Navigation
COMAND
Page 340 of 614

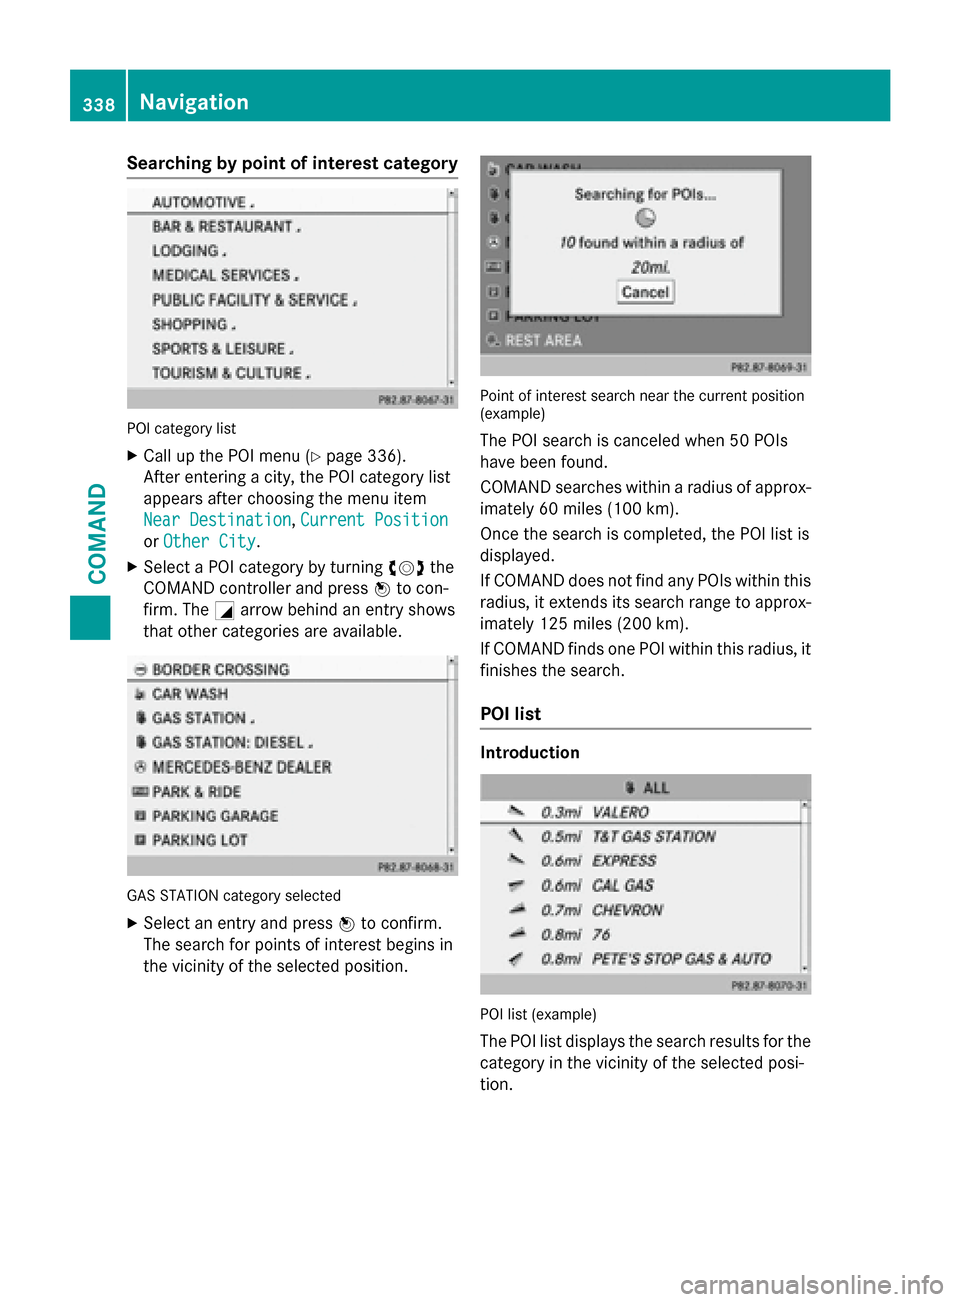
Searching by point of interest category
POI category list
XCall up the POI menu (Ypage 336).
After entering a city, the POI category list
appears after choosing the menu item
Near Destination
, Current Position
or Other City.
XSelect a POI category by turning cVdthe
COMAND controller and press Wto con-
firm. The Garrow behind an entry shows
that other categories are available.
GAS STATION category selected
XSelect an entry and press Wto confirm.
The search for points of interest begins in
the vicinity of the selected position.
Point of interest search near the current position
(example)
The POI search is canceled when 50 POIs
have been found.
COMAND searches within a radius of approx-
imately 60 miles (100 km).
Once the search is completed, the POI list is
displayed.
If COMAND does not find any POIs within this
radius, it extends its search range to approx-
imately 125 miles (200 km).
If COMAND finds one POI within this radius, it
finishes the search.
POI list
Introduction
POI list (example)
The POI list displays the search results for the
category in the vicinity of the selected posi-
tion.
338Navigation
COMAND
Page 341 of 614

The search results display the following infor-
mation:
Ran arrow that shows the linear direction to
the point of interest
Rthe linear distance to the POI
Rthe name of the POI
iThe arrow and linear distance to the des-
tination are not visible if you have entered a POI after entering another city.
The arrow is also not shown when search-
ing for a POI in the vicinity of the destina-
tion.
Depending on the POI selected, COMAND
uses different reference points in deter-
mining the linear distance to the destina-
tion:
Rvicinity of current position: the linear dis-tance is the distance of the point of inter-
est from the current vehicle position.
Rvicinity of destination: the linear distance
is the distance from the destination
entered to the point of interest.
Selecting a POI
:Point of interest with address
;To start route calculation
=To store an address in the destination
memory
?To display details
ATo make a call (when available)
BTo cancel selection
CTo display a point of interest's position on
the map Further information on searching via POI cat-
egories (
Ypage 338).
XSelect the POI in the POI list by turning
cVd
the COMAND controller and press W
to confirm.
The complete address of the point of inter-
est selected is shown.
XTo start route calculation: select
Start
; and press Wto confirm.
XTo store an address in the destination
memory: selectSave
=and press Wto
confirm. You can now select storing
options (
Ypage 364).
XTo show the detailed view: select
Details
? and press Wto confirm.
XTo make a call: selectCallAand press
W to confirm. COMAND switches to tele-
phone mode (
Ypage 389).
iThis menu item is available if the POI has
a telephone number and a mobile phone is
connected to COMAND (
Ypage 383).
XTo call up the map: selectMapCand
press Wto confirm.
XYou can move the map and select the des-
tination (
Ypage 331).
POI list with character bar
Search by name in the vicinity of the destination
(example)
If you have selected Search By Namein the
POI menu and then defined the position for
the search (
Ypage 337), the POI list with
character bar appears.
Navigation339
COMAND
Z
Page 342 of 614

Depending on your selection, you can select
all available points of interest on the digital
map or the points of interest in the vicinity of
the selected position.
XProceed as described in "Searching for a
phone book entry" (
Ypage 394).
If COMAND can assign the characters
entered to one entry unambiguously, the
address entry appears automatically.
XTo start route calculation: selectStart
and press Wto confirm.
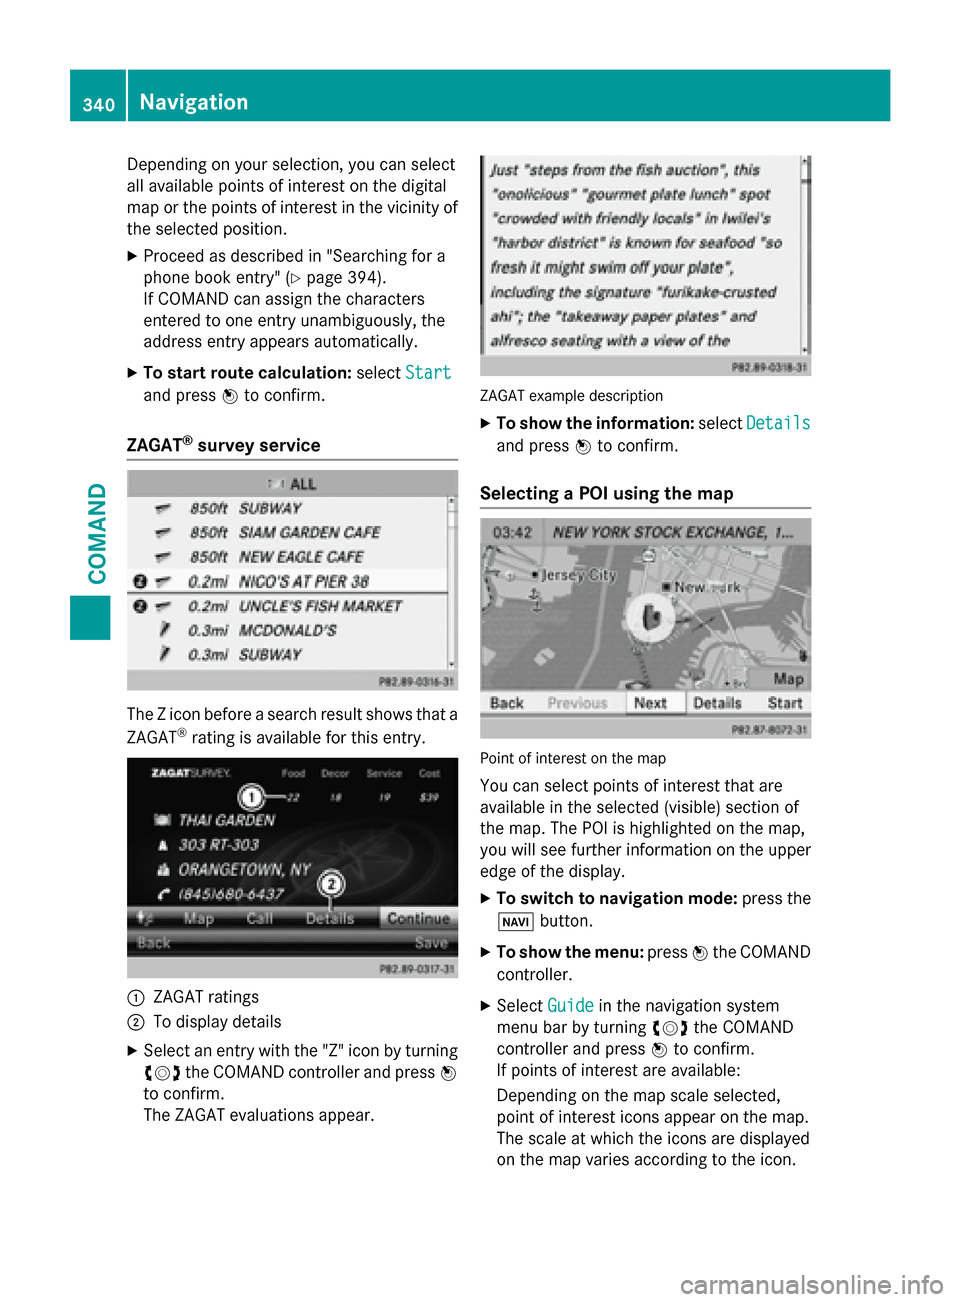
ZAGAT®survey service
The Z icon before a search result shows that a
ZAGAT®rating is available for this entry.
:ZAGAT ratings
;To display details
XSelect an entry with the "Z" icon by turning
cVd the COMAND controller and press W
to confirm.
The ZAGAT evaluations appear.
ZAGAT example description
XTo show the information: selectDetails
and press Wto confirm.
Selecting a POI using the map
Point of interest on the map
You can select points of interest that are
available in the selected (visible) section of
the map. The POI is highlighted on the map,
you will see further information on the upper
edge of the display.
XTo switch to navigation mode: press the
Ø button.
XTo show the menu: pressWthe COMAND
controller.
XSelect Guidein the navigation system
menu bar by turning cVdthe COMAND
controller and press Wto confirm.
If points of interest are available:
Depending on the map scale selected,
point of interest icons appear on the map.
The scale at which the icons are displayed
on the map varies according to the icon.
340Navigation
COMAND
Page 343 of 614

You can select the icons that you want
COMAND to display.
If no points of interest are available, you will
see a message to this effect.
iYou also see this message if you have
selected the No
Symbolsmenu item under
"Map display" (
Ypage 369).
XTo confirm the message: pressWthe
COMAND controller.
XTo select a POI: selectNextorPrevious
and press Wto confirm.
XTo show details for the selection: select
Details
and press Wto confirm.
XTo change to the map: slideZVthe
COMAND controller.
You can move the map and select the map
section.
XTo start route calculation: selectStart
and press Wto confirm.
A prompt appears asking whether the point
of interest should be used as the destina-
tion.
XSelect YesorNoand press Wto confirm.
iCont.is displayed instead of Startwhen
Calculate Alternative Routes
is acti-
vated in the navigation menu (
Ypage 351).
Personal POIs
General notes
iThe use of personal POIs for displaying
traffic surveillance equipment is not per-
mitted in every country. Please observe the
country-specific regulations and adapt
your speed accordingly when driving.
Settings
Calling up the "Personal POIs" menu
XTo switch to navigation mode: press the
Ø button.
XTo show the menu: pressWthe COMAND
controller.
XSelect Naviin the main function bar by
sliding ZVand turning cVdthe COMAND
controller and press Wto confirm.
XSelect Personal POIsand press Wto
confirm.
Displaying personal POIs on the map
The personal POIs are shown on the map with
an icon according to their category.
XCall up the "Personal POIs" menu
(
Ypage 341).
XSelect Display Personal POIs On Map
in the menu and press Wto confirm.
You can select different categories.
Navigation341
COMAND
Z
Page 344 of 614

SelectionExplanation
ªNot Clas‐
sified
Standard entry for per-
sonal POIs
ªCOMANDPersonal POIs (destina-
tions, routes) that you
have imported via the
online function
(
Ypage 424).
If you have created your own categories (e.g.
"Fishing", "Hotels"), they are also displayed
(
Ypage 342).
XSelect a category and press Wto confirm.
The icon display is switched on Oor off ª,
depending on the previous status.
iThe icons will be displayed in the following
map scales:
R1/16 mile (50 m)
R1/8 mile (100 m)
R1/4 mile (200 m)
R1/2 mile (500 m)
Visual warning for personal POIs
If the vehicle is approaching a personal POI,
this is highlighted on the map. The display for
the corresponding category must be activa-
ted for this.
XCall up the "Personal POIs" menu
(
Ypage 341).
XIn the "Personal POIs" menu, select Vis‐
ual Warning For Personal POIsand
press Wto confirm.
The menu displays the available categories.
XSelect a category and press Wto confirm.
This will switch the visual warning for all
personal POIs of this category on Oor off
ª, depending on the previous setting.
Acoustic notification for personal POIs
A gong sounds when the vehicle is approach-
ing a personal POI. The function for the cor-
responding category must be activated for
this.
XCall up the "Personal POIs" menu
(
Ypage 341).
XIn the "Personal POIs" menu, select Acous‐
tic Notification for Personal POIs
and pressWto confirm.
The menu displays the available categories.
XSelect a category and press Wto confirm.
This will switch the acoustic notification for
all personal POIs of this category on Oor
off ª, depending on the previous setting.
Managing categories for personal points
of interest
XCall up the "Personal POIs" menu
(
Ypage 341).
XIn the "Personal POIs" menu, select Man‐
age Categories For Personal POIs
and pressWto confirm.
342Navigation
COMAND
Page 345 of 614

XTo create a new category:selectNewand
press Wto confirm.
XEnter the name of the category. Character
entry (
Ypage 301).
XSelect the ¬icon and press Wto con-
firm.
A list with icons appears. You can assign an
icon to the category.
XSelect a symbol by turning cVdthe
COMAND controller and press Wto con-
firm.
You have created a new category with a
name and icon. This category appears
when selecting the display on the map or
when selecting the destination.
XTo rename a category, to change an
icon: select Rename
orChange Iconand
press Wto confirm.
XProceed as described under "To create a
new category".
XTo delete a category: selectDeleteand
press Wto confirm.
A prompt appears asking whether the cat-
egory should be deleted.
iIf you delete a category, all points of inter-
est of this category are also deleted.
XSelect Yesand press Wto confirm.
If you select Yes
, the category will be
deleted.
If you select No
, the process will be can-
celed. Managing personal POIs
XCall up the "Personal POIs" menu
(
Ypage 341).
XSelect
Manage Categories for Per‐
sonal POIsin the menu and press Wto
confirm.
XSelect Not Classified,COMANDor your
own category and press Wto confirm.
XSelect a personal POI and press Wto con-
firm.
The personal point of interest is displayed.
For further information on managing personal
POI categories (
Ypage 344):
RRenaming
RChanging the category
RDeleting
Saving personal POIs
There are three ways to save personal points
of interest. You must insert an SD memory
card to do so. The No
MemoryCardmessage
otherwise appears.
Personal POIs and routes are saved on the
memory card in the same data format in
which the geographical data is stored. This
format is based on the open GPX ( GPS
Exchange) format.
Option 1
XInsert the SD memory card (Ypage 447).
XTo switch to navigation mode: press the
Ø button.
XHide the menu to show the map in full
screen mode (
Ypage 322).
XPress Wthe COMAND controller for longer
than two seconds.
The current position of the vehicle is saved
as a personal POI on the SD memory card in
the Not Classified
category.
iThe crosshair position is saved in the
scrolling map function (
Ypage 367).
Navigation343
COMAND
Z
Page 347 of 614

In the example, theCoffee Shopscategory
is selected.
The personal points of interest for this cate-
gory are shown.
XSelect a personal POI and press Wto con-
firm.
XTo rename a personal POI: selectRename
and press Wto confirm.
XTo change the category: selectChange
Categoryand press Wto confirm.
XTo change to the map: selectMapand
press Wto confirm.
The position of the personal point of inter-
est is shown in the map.
iA symbol is displayed according to the
"Displaying personal POIs on the map" set- ting (
Ypage 341).
XTo start route calculation: selectStart
and press Wto confirm.
If route guidance has been activated, a
prompt will appear asking whether you
wish to accept the personal point of inter-
est as the destination. If route guidance has not been activated,
route calculation for the personal point of
interest will start immediately.
XSelect
YesorNoand press Wto confirm.
If you select Yes
, the personal POI is accep-
ted as the destination.
If you select No
, the process will be can-
celed.
XTo make a call: selectCalland press Wto
confirm. COMAND switches to telephone
mode (
Ypage 390).
iCallis available if the personal POI has a
telephone number and a mobile phone is
connected to COMAND (
Ypage 383).
XTo delete a personal POI: selectDelete
and press Wto confirm.
A prompt appears asking whether you wish
to delete the point of interest.
XSelect YesorNoand press Wto confirm.
If you select Yes
, the personal POI is
deleted.
If you select No
, the process will be can-
celed.
Search & Send
Notes
iTo use Search & Send, your vehicle needs
to be equipped with mbrace, a navigation
system and a valid mbrace subscription.
Search & Send is a service assisting you in
entering destinations for the navigation sys-
tem. This mbrace service can send a destina- tion address directly from the Google Maps
®
website to the navigation system of your vehi-
cle.
Selecting and sending a destination
address
Please also refer to the notes about address
entry online: maps.google.com.
Navigation345
COMAND
Z