2016 MERCEDES-BENZ GLE-Class key
[x] Cancel search: keyPage 231 of 450

Switching on Blind Spot Assist
XMake sure that Blind Spot Assist is activated
in the on-board computer (Ypage 272).
XTurn the SmartKey to position2in the ignition
lock.
Warning lamps :in the exterior mirrors light
up red for approximately 1.5 seconds and
then turn yellow.
Towing a trailer
When you attach a trailer, make sure you have
correctly established the electrical connection.
This can be accomplished by checking the trailer
lighting. In this event, Blind Spot Assist is deac-
tivated. The indicator lamp lights up yellow in
the exterior mirrors and the Blind Spot
Assist Not Available When Towing aTrailer See Operator's Manualmessage
appears in the multifunction display.
iYou can deactivate the indicator lamps in
the exterior mirrors.
To do so, switch off Blind Spot Assist when:
Rthe SmartKey is in position 2in the ignition
lock
Rthe engine is not running
Lane Keeping Assist
General notes
:Lane Keeping Assist camera
Lane Keeping Assist monitors the area in front of
your vehicle with camera :, which is mounted
at the top of the windshield. Active Lane Keeping
Assist detects lane markings on the road and
can warn you before you leave your lane unin-
tentionally.
This function is available in the range between
40 mph and 120 mph (60 km/h and 200 km/h). A warning may be given if a front wheel passes
over a lane marking. It will warn you by means of
intermittent vibration in the steering wheel for
up to 1.5 seconds.
Important safety notes
GWARNING
Lane Keeping Assist may not always clearly
recognize lane markings.
In this case, Lane Keeping Assist may:
Rgive an unnecessary warning
Rnot give a warning
There is a risk of an accident.
Always pay particular attention to the traffic
situation and stay in lane, in particular if
warned by Lane Keeping Assist.
GWARNING
The Lane Keeping Assist warning does not
return the vehicle to the original lane. There is
a risk of an accident.
You should always steer, brake or accelerate
yourself, in particular if warned by Lane Keep-
ing Assist.
If you fail to adapt your driving style, Lane Keep-
ing Assist can neither reduce the risk of an acci-
dent nor override the laws of physics. Lane
Keeping Assist cannot take into account the
road, traffic and weather conditions. Lane Keep- ing Assist is merely an aid. You are responsible
for the distance to the vehicle in front, for vehi-
cle speed, for braking in good time and for stay-
ing in your lane.
The Lane Keeping Assist does not keep the vehi-
cle in the lane.
The system may be impaired or may not function
if:
Rthere is poor visibility, e.g. due to insufficient
illumination of the road, or due to snow, rain,
fog or spray
Rthere is glare, e.g. from oncoming traffic, the
sun or reflections (e.g. when the road surface
is wet)
Rthe windshield is dirty, fogged up, damaged or
covered, for instance by a sticker, in the vicin-
ity of the camera
Driving systems229
Driving and parking
Z
Page 235 of 450

Ra driving safety system intervenes, e.g. ESP®
or PRE-SAFE®Brake.
RESP®is switched off.
Rthe offroad program is activated (vehicles
without the Offroad Engineering package).
Rthe Offroad or Offroad Plus drive program is
activated (vehicles with the Off-Road Engi-
neering package).
Rthe LOW RANGE offroad gear is activated
(vehicles with the Offroad Engineering pack-
age).
Ra loss of tire pressure or a defective tire is
detected.
Switching on Active Blind Spot Assist
XMake sure that Active Blind Spot Assist is
activated in the on-board computer
(
Ypage 272).
XTurn the SmartKey to position2in the ignition
lock.
Warning lamps :in the exterior mirrors light
up red for approximately 1.5 seconds and
then turn yellow.
Towing a trailer
When you attach a trailer, make sure you have
correctly established the electrical connection.
This can be accomplished by checking the trailer
lighting. Active Blind Spot Assist is then deacti-
vated. The indicator lamp lights up yellow in the
exterior mirrors and the Active Blind Spot
Asst. Not Available When Towing aTrailer See Operator's Manualmessage
appears in the multifunction display.
Active Lane Keeping Assist
General notes
Active Lane Keeping Assist monitors the area in
front of your vehicle by means of multifunction
camera :at the top of the windshield. Various
different areas to the front, rear and side of your
vehicle are also monitored with the aid of the
radar sensor system. Active Lane Keeping
Assist detects lane markings on the road and
can warn you before you leave your lane unin-
tentionally. If you do not react to the warning, a
lane-correcting application of the brakes can
bring the vehicle back into the original lane.
This function is available in a speed range
between 40 mph and 120 mph (60 km/h and
200 km/h).
For Active Lane Keeping Assist to assist you
when driving, the radar sensor system must be
operational.
Important safety notes
If you fail to adapt your driving style, Active Lane
Keeping Assist can neither reduce the risk of
accident nor override the laws of physics. Active
Lane Keeping Assist cannot take into account
road, weather or traffic conditions. Active Lane
Keeping Assist is only an aid. You are responsi-
ble for the distance to the vehicle in front, for
vehicle speed, for braking in good time and for
staying in your lane.
Active Lane Keeping Assist cannot continuously
keep your vehicle in its lane.
GWARNING
Active Lane Keeping Assist cannot always
clearly detect lane markings.
In such cases, Active Lane Keeping Assist
can:
Rgive an unnecessary warning and then
make a course-correcting brake application
to the vehicle
Rnot give a warning or intervene
There is a risk of an accident.
Always pay particular attention to the traffic
situation and keep within the lane, especially
if Active Lane Keeping Assist alerts you. Ter-
minate the intervention in a non-critical driv-
ing situation.
Driving systems233
Driving and parking
Z
Page 249 of 450

If manual gearshifting is deactivated, the auto-
matic transmission shifts:
Rinto the drive program that was last selected,
and
Rinto the driving mode that was last selected
If you change the drive program, the operating
mode that was last selected is stored for approx-
imately 60 seconds. After this time, the HYBRID
operating mode is automatically activated.
Operating the on-board computer
You can display the current operating condition
of the hybrid drive system in the multifunction
display and the multimedia system in the form of
an energy flow display (
Ypage 247).
In the multimedia system display, you can also
call up a graphic display of the fuel consumption
and generated electricity (
Ypage 250).
Menus and submenus
Selecting displays in the display of the
multimedia system
XPress the Øbutton on the multimedia sys-
tem.
The vehicle menu is displayed.
XTo select Energy flow: turn and press the
controller.
The energy flow is displayed.
or
XTo select Consumption: turn and press the
controller.
Fuel consumption and the generated electric
energy are displayed.
XTo exit the display: press the %button on
the controller.
Selecting the energy flow display in the
multifunction display
XPress the =or; button on the steering
wheel to select the Tripmenu.
XUse: or9 to select Energy flow.
XConfirm by pressing aon the steering
wheel.
The active components of the hybrid drive
system are highlighted in the energy flow dis- play.
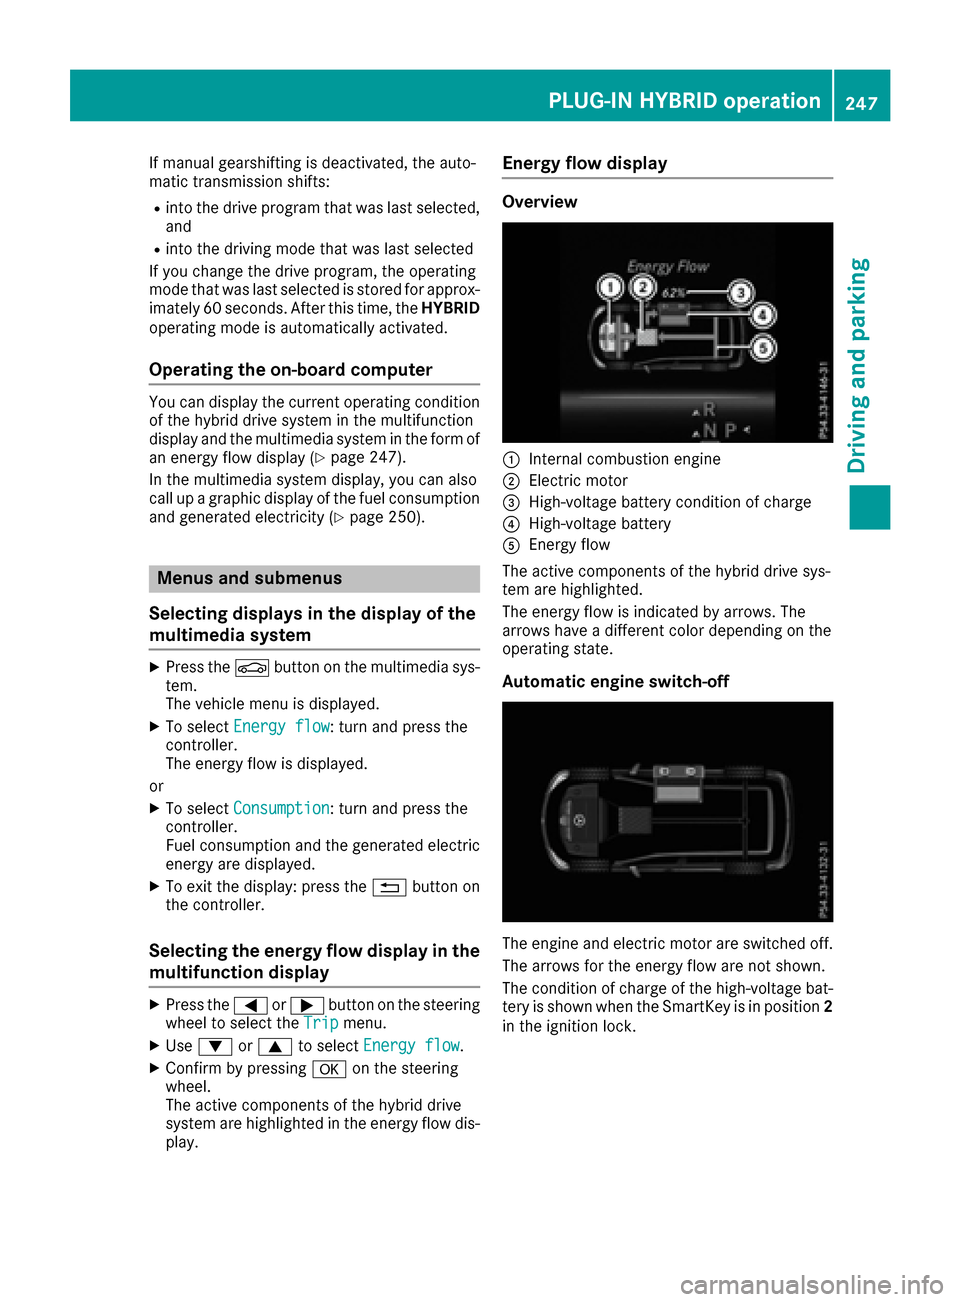
Energy flow display
Overview
:Internal combustion engine
;Electric motor
=High-voltage battery condition of charge
?High-voltage battery
AEnergy flow
The active components of the hybrid drive sys-
tem are highlighted.
The energy flow is indicated by arrows. The
arrows have a different color depending on the
operating state.
Automatic engine switch-off
The engine and electric motor are switched off.
The arrows for the energy flow are not shown.
The condition of charge of the high-voltage bat-
tery is shown when the SmartKey is in position 2
in the ignition lock.
PLUG-IN HYBRID operation247
Driving and parking
Z
Page 253 of 450

XSwitch on the ignition.
XDepress the brake pedal.
XObserve the notes on starting the engine
(Ypage 147).
XStart the vehicle (Ypage 147).
The vehicle is operational when READY indi-
cator :lights up.
Pulling away
XDepress the brake pedal and keep it
depressed.
XShift the transmission to position Dor R.
XIf the Apply Brake to Shift from 'P'display message appears in the multifunction
display, depress the brake pedal more firmly
and select the desired transmission position.
XRelease the brake pedal.
XCarefully depress the accelerator pedal.
For further information on pulling away
(
Ypage 148).
Driving
DYNAMIC SELECT controller
Drive programs
Use the DYNAMIC SELECT controller to change
the drive program. Depending on the drive pro-
gram selected the following vehicle character-
istics will change:
Rthe drive (engine and transmission manage-
ment)
Rthe suspension
Rthe steering
Rthe energy management
Each time you start the engine with the ignition SmartKey or the Start/Stop button, the Com-
fort drive program is activated. For further infor-
mation about starting the engine, see
(
Ypage 147).
XTurn DYNAMIC SELECT controller :as many
times as necessary until the desired drive
program is selected.
The status icon of the selected drive program
is shown in the multifunction display.
In addition, the current drive program settings are displayed briefly in the multimedia system
display.
Available drive programs:
IndividualRIndividual settings
SportRSporty driving style with
increased boost mode
RElectric-only operation is
not possible
ComfortRComfortable, economical
driving style
RElectric-only operation is
possible
SlipperyROptimal driving charac-
teristics on slippery or
snow-covered roads
RElectric-only operation is
possible
Additional information for drive programs
(Ypage 158).
Using the steering wheel paddle shifters, you
can temporarily change gears yourself. For fur-
ther information on the manual drive program
(
Ypage 251).
Manual gear shifting
Using the steering wheel paddle shifters, you
can temporarily change gears yourself. The
transmission must be in position D. During man-
ual gearshifting, the combustion engine is
always switched on.
PLUG-IN HYBRID operation251
Driving and parking
Z
Page 266 of 450

Outside temperature display
You should pay special attention to road condi-
tions when temperatures are around freezing
point.
Bear in mind that the outside temperature dis-
play indicates the temperature measured and
does not record the road temperature.
The outside temperature display is in the multi-function display (
Ypage 265).
There is a short delay before a change in outside
temperature appears in the multifunction dis-
play.
Coolant temperature display
GWARNING
Opening the hood when the engine is over-
heated or when there is a fire in the engine
compartment could expose you to hot gases
or other service products. There is a risk of
injury.
Let an overheated engine cool down before
opening the hood. If there is a fire in the
engine compartment, keep the hood closed
and contact the fire department.
!A display message is shown if the coolant
temperature is too high.
If the coolant temperature is over 248 ‡
(120 †), do not continue driving. The engine
will otherwise be damaged.
All vehicles except PLUG-IN HYBRID vehicles:
the coolant temperature gauge is in the instru-
ment cluster on the right-hand side (
Ypage 34).
PLUG-IN HYBRID vehicles: the multifunction dis-
play shows the coolant temperature in the
Coolant
(Ypage 273) submenu.
Under normal operating conditions and with the
specified coolant level, the coolant temperature
may rise to 248 ‡ (120 †).
Operating the on-board computer
Overview
:Multifunction display
;Right control panel
=Left control panel
XTo activate the on-board computer: turn
the SmartKey to position 1in the ignition lock.
You can control the multifunction display and
the settings in the on-board computer using the
buttons on the multifunction steering wheel.
In vehicles with the COMAND multimedia sys-
tem, you can find further information on the
Voice Control System in the separate operating
instructions.
In vehicles with the multimedia system
Audio 20, you can find further information on
voice-controlled navigation in the separate man-
ufacturer's operating instructions.
264Displays and operation
On-board computer and displays
Page 278 of 450

XUsing:or9, select the EasyEntry/Exitfunction.
If the EasyEntry/Exitfunction is activated,
the vehicle steering wheel is displayed in
orange in the multifunction display.
XPress the abutton to save the setting.
Further information on the EASY-ENTRY/EXIT
feature (
Ypage 109).
Switching the belt adjustment on/off
XPress the =or; button on the steering
wheel to select the Settingsmenu.
XPress the:or9 button to select the
Conveniencesubmenu.
XPress ato confirm.
XPress the :or9 button to select the
Belt Adjustmentfunction.
If the BeltAdjustmentfunction is activated,
the vehicle seat belt is shown in orange in the
multifunction display.
XPress the abutton to save the setting.
For further information on belt adjustment, see
(
Ypage 48).
Switching the fold-in mirrors when lock-
ing feature on/off
This function is only available when the vehicle is
equipped with the electrical fold-in function.
When you activate the Auto.
MirrorFoldingfunction, the exterior mirrors are folded in when
the vehicle is locked. The exterior mirrors fold
out automatically again as soon as you unlock
the vehicle.
XPress the=or; button on the steering
wheel to select the Sett.menu.
XPress the:or9 button to select the
Conveniencesubmenu.
XPress ato confirm.
XPress the :or9 button to select the
Auto. Mirror Foldingfunction.
If the Auto. Mirror Foldingfunction is
switched on, the multifunction display shows
the exterior mirror in orange.
XPress the abutton to save the setting.
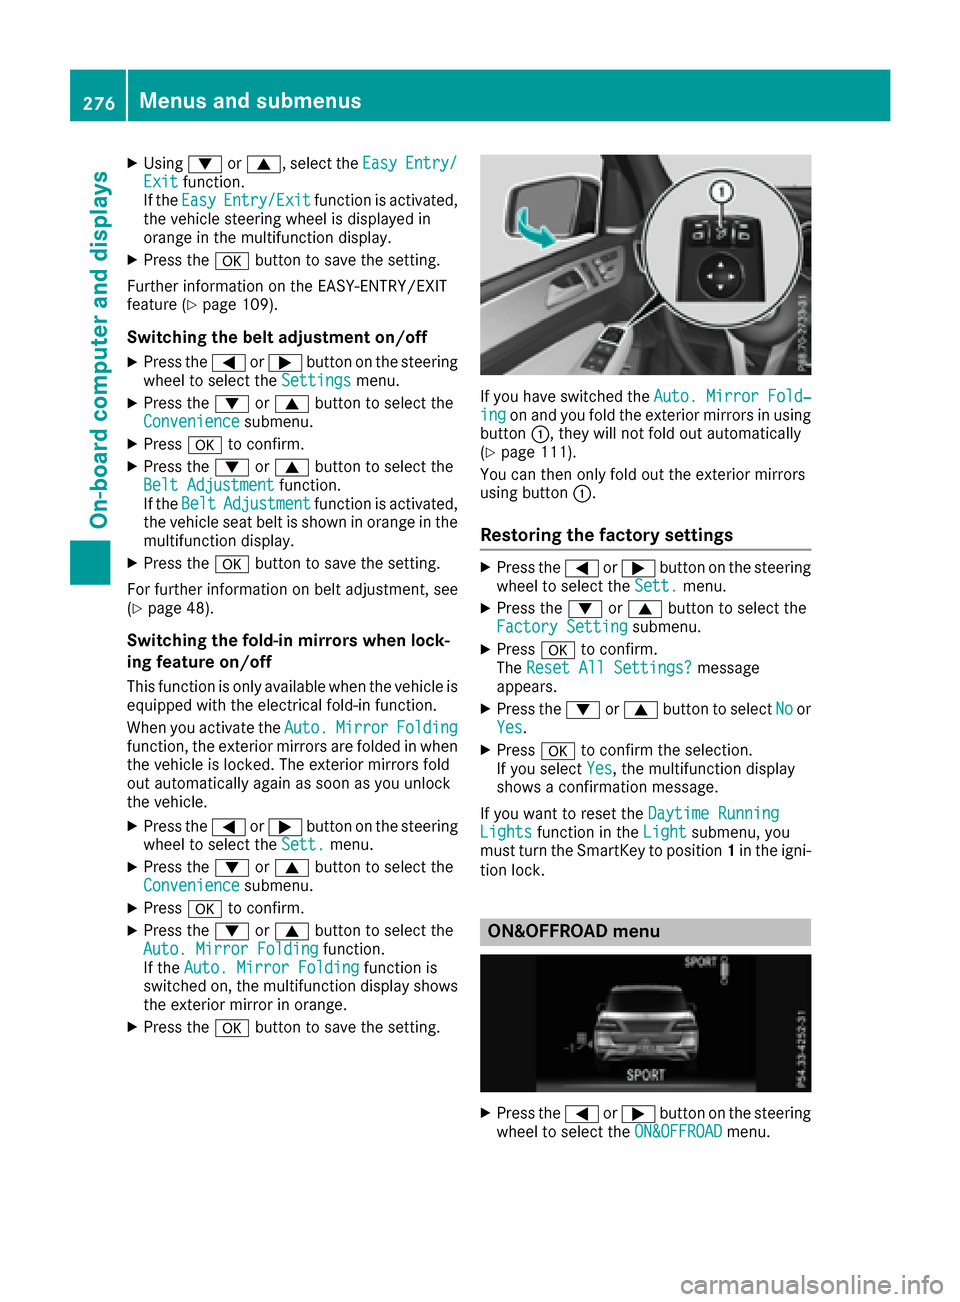
If you have switched the Auto. Mirror Fold‐ingon and you fold the exterior mirrors in using
button :, they will not fold out automatically
(
Ypage 111).
You can then only fold out the exterior mirrors
using button :.
Restoring the factory settings
XPress the=or; button on the steering
wheel to select the Sett.menu.
XPress the:or9 button to select the
Factory Settingsubmenu.
XPress ato confirm.
The Reset All Settings?message
appears.
XPress the :or9 button to select Noor
Yes.
XPress ato confirm the selection.
If you select Yes, the multifunction display
shows a confirmation message.
If you want to reset the Daytime Running
Lightsfunction in theLightsubmenu, you
must turn the SmartKey to position 1in the igni-
tion lock.
ON&OFFROAD menu
XPress the =or; button on the steering
wheel to select the ON&OFFROADmenu.
276Menus and submenus
On-board computer and displays
Page 280 of 450

You can start the RACETIMER when the engine is
running or if the SmartKey is in position2in the
ignition lock.
XPress the =or; button on the steering
wheel to select the AMGmenu.
XPress the9button repeatedly until the
RACETIMER is shown.
XTo start: press the abutton to start the
RACETIMER.
Displaying the intermediate time
XPress the =or; button to select
Interm. Time.
XPress ato confirm.
The intermediate time is displayed for five
seconds.
Starting a new lap
:RACETIMER
;Fastest lap time (best lap)
=Lap
XPress ato confirm New Lap.
iIt is possible to store a maximum of sixteen
laps. The 16th lap can only be completed with
Finish Lap
.
Stopping the RACETIMER
XPress the %button on the steering wheel.
XConfirm Yeswitha.
The RACETIMER interrupts timing if you stop the
vehicle and turn the SmartKey to position 1in
the ignition lock. If you turn the SmartKey to
position 3and then press ato confirm
Start
, timing is continued.
Resetting the current lap
XStop the RACETIMER.
XPress the =or; button to select
Reset Lap.
XPress ato reset the lap time to "0".
Deleting all laps
If you switch off the engine, the RACETIMER is
reset to "0" after 30 seconds. All laps are
deleted.
You cannot delete individual stored laps. If you
have stopped 16 laps, the current lap does not
have to be reset.
XReset the current lap.
XPress ato confirm Reset.
Reset Race Timer?appears in the multi-
function display.
XPress the :button to select Yesand press
the a button to confirm.
All laps are deleted.
Overall statistics
:RACETIMER overall evaluation
;Total time driven
=Average speed
?Distance covered
AMaximum speed
278Menus and submenus
On-board computer and displays
Page 286 of 450

Display messagesPossible causes/consequences andMSolutions
F(USA
only)
!( Canada
only)
Tur nOn the Igni‐
tio ntoReleas etheParkingBrake
The red F(USAonly) or !(Canada only) indicator lamp lights
up.
You attempte dto release th eelectric parking brak ewhile th eignition
was switched off .
XSmartKey:tur nth eSmartKey to position 1in th eignition lock.
XKEYLESS-GO: switch on theignition .
F(USA
only)
!( Canada
only)
Please
Releas ePark‐ing Brake
The red F(USAonly) or !(Canada only) indicator lamp flashes
and awarning tone sounds. Acondition for automatic release of th e
electric parking brak eis no tfulfilled (
Ypage 179).
You are drivin gwit hth eelectric parking brak eapplied.
XReleas eth eelectric parking brak emanually.
The red F(USAonly) or !(Canada only) indicator lamp flashes
and awarning tone sounds.
You are usin gth eelectric parking brak efor emergenc ybraking
(
Ypage 179).
F(USA
only)
!( Canada
only)
Parkin gBrake See
Operator' sManual
The yellow !warning lamp lights up.
The electric parking brak eis malfunctioning .
To apply :
XSwitchth eignition off .
XPress theelectric parking brak ehandle for at least te nseconds.
XShift th etransmission to position P.
XConsultaqualified specialist workshop .
The yellow!warning lamp and th ered F (USAonly) or !
(Canada only) indicator lamp ligh tup.
The electric parking brak eis malfunctioning .
To release:
XSwitc hoff th eignition and tur nit bac kon .
XReleas eth eelectric parking brak emanually.
or
XReleas eth eelectric parking brak eautomatically (Ypage 179).
If th eelectric parking brak estill canno tbe released:
XDo no tdrive on .
XConsult aqualified specialist workshop .
284Display messages
On-board computer and displays