2016 MERCEDES-BENZ GLE-CLASS COUPE reset
[x] Cancel search: resetPage 227 of 382
No route could be calculated to the selected
destination.
RO
You have reached the destination or an inter-
mediate destination.
Audio menu
Selecting a radio station
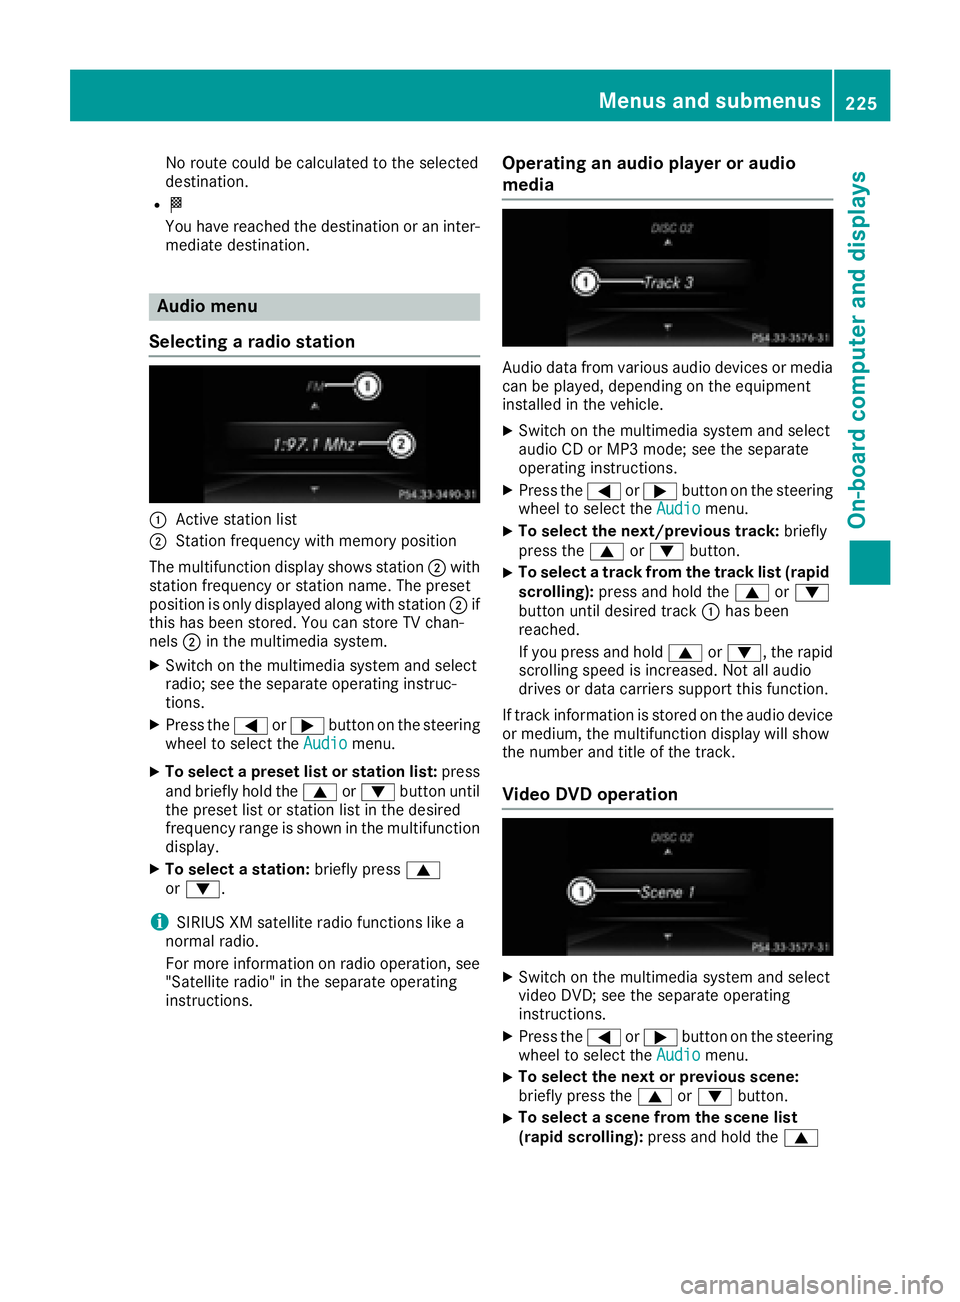
:Active station list
;Station frequency with memory position
The multifunction display shows station ;with
station frequency or station name. The preset
position is only displayed along with station ;if
this has been stored. You can store TV chan-
nels ;in the multimedia system.
XSwitch on the multimedia system and select
radio; see the separate operating instruc-
tions.
XPress the =or; button on the steering
wheel to select the Audiomenu.
XTo select a preset list or station list: press
and briefly hold the 9or: button until
the preset list or station list in the desired
frequency range is shown in the multifunction
display.
XTo select a station: briefly press9
or :.
iSIRIUS XM satellite radio functions like a
normal radio.
For more information on radio operation, see
"Satellite radio" in the separate operating
instructions.
Operating an audio player or audio
media
Audio data from various audio devices or media
can be played, depending on the equipment
installed in the vehicle.
XSwitch on the multimedia system and select
audio CD or MP3 mode; see the separate
operating instructions.
XPress the =or; button on the steering
wheel to select the Audiomenu.
XTo select the next/previous track: briefly
press the 9or: button.
XTo select a track from the track list (rapid
scrolling): press and hold the 9or:
button until desired track :has been
reached.
If you press and hold 9or:, the rapid
scrolling speed is increased. Not all audio
drives or data carriers support this function.
If track information is stored on the audio device
or medium, the multifunction display will show
the number and title of the track.
Video DVD operation
XSwitch on the multimedia system and select
video DVD; see the separate operating
instructions.
XPress the =or; button on the steering
wheel to select the Audiomenu.
XTo select the next or previous scene:
briefly press the9or: button.
XTo select a scene from the scene list
(rapid scrolling): press and hold the 9
Menus and submenus225
On-board computer and displays
Z
Page 233 of 382

For further information on belt adjustment, see
(Ypage 42).
Switching the fold-in mirrors when lock-
ing feature on/off
This function is only available when the vehicle is
equipped with the electrical fold-in function.
When you activate theAuto.
MirrorFoldingfunction, the exterior mirrors are folded in when
the vehicle is locked. The exterior mirrors fold
out automatically again as soon as you unlock
the vehicle.
XPress the =or; button on the steering
wheel to select the Sett.menu.
XPress the:or9 button to select the
Conveniencesubmenu.
XPress ato confirm.
XPress the :or9 button to select the
Auto. Mirror Foldingfunction.
If the Auto. Mirror Foldingfunction is
switched on, the multifunction display shows
the exterior mirror in orange.
XPress the abutton to save the setting.
If you have switched the Auto. Mirror Fold‐ingon and you fold the exterior mirrors in using
button :, they will not fold out automatically
(
Ypage 105).
You can then only fold out the exterior mirrors
using button :.
Restoring the factory settings
XPress the=or; button on the steering
wheel to select the Sett.menu.
XPress the:or9 button to select the
Factory Settingsubmenu.
XPress ato confirm.
The Reset All Settings?message
appears.
XPress the :or9 button to select Noor
Yes.
XPress ato confirm the selection.
If you select Yes, the multifunction display
shows a confirmation message.
If you want to reset the Daytime Running
Lightsfunction in theLightsubmenu, you
must turn the SmartKey to position 1in the igni-
tion lock.
AMG menu (Mercedes-AMG vehicles)
WARMUP
:Digital speedometer
;Gear indicator
=Upshift indicator
?Engine oil temperature
ACoolant temperature
BTransmission fluid temperature
XPress the =or; button on the steering
wheel to select the AMGmenu.
Upshift indicator: upshift indicatorUp=
indicates that the engine has reached the
overrevving range when in the manual drive
program.
Engine/transmission oil temperature:
when the engine and transmission are at nor-
mal operating temperature, oil tempera-
ture ?and Bare displayed in white in the
multifunction display.
If the multifunction display shows oil temper-
ature ?orB in blue, the engine or the
transmission are not yet at normal operating
temperature. Avoid driving at full engine out-
put during this time.
Menus and submenus231
On-board computer and displays
Z
Page 235 of 382
XPress the%button on the steering wheel.
XConfirm Yeswitha.
The RACETIMER interrupts timing if you stop the
vehicle and turn the SmartKey to position 1in
the ignition lock. If you turn the SmartKey to
position 3and then press ato confirm
Start
, timing is continued.
Resetting the current lap
XStop the RACETIMER.
XPress the =or; button to select
Reset Lap.
XPress ato reset the lap time to "0".
Deleting all laps
If you switch off the engine, the RACETIMER is
reset to "0" after 30 seconds. All laps are
deleted.
You cannot delete individual stored laps. If you
have stopped 16 laps, the current lap does not
have to be reset.
XReset the current lap.
XPress ato confirm Reset.
Reset Race Timer?appears in the multi-
function display.
XPress the :button to select Yesand press
the a button to confirm.
All laps are deleted.
Overall statistics
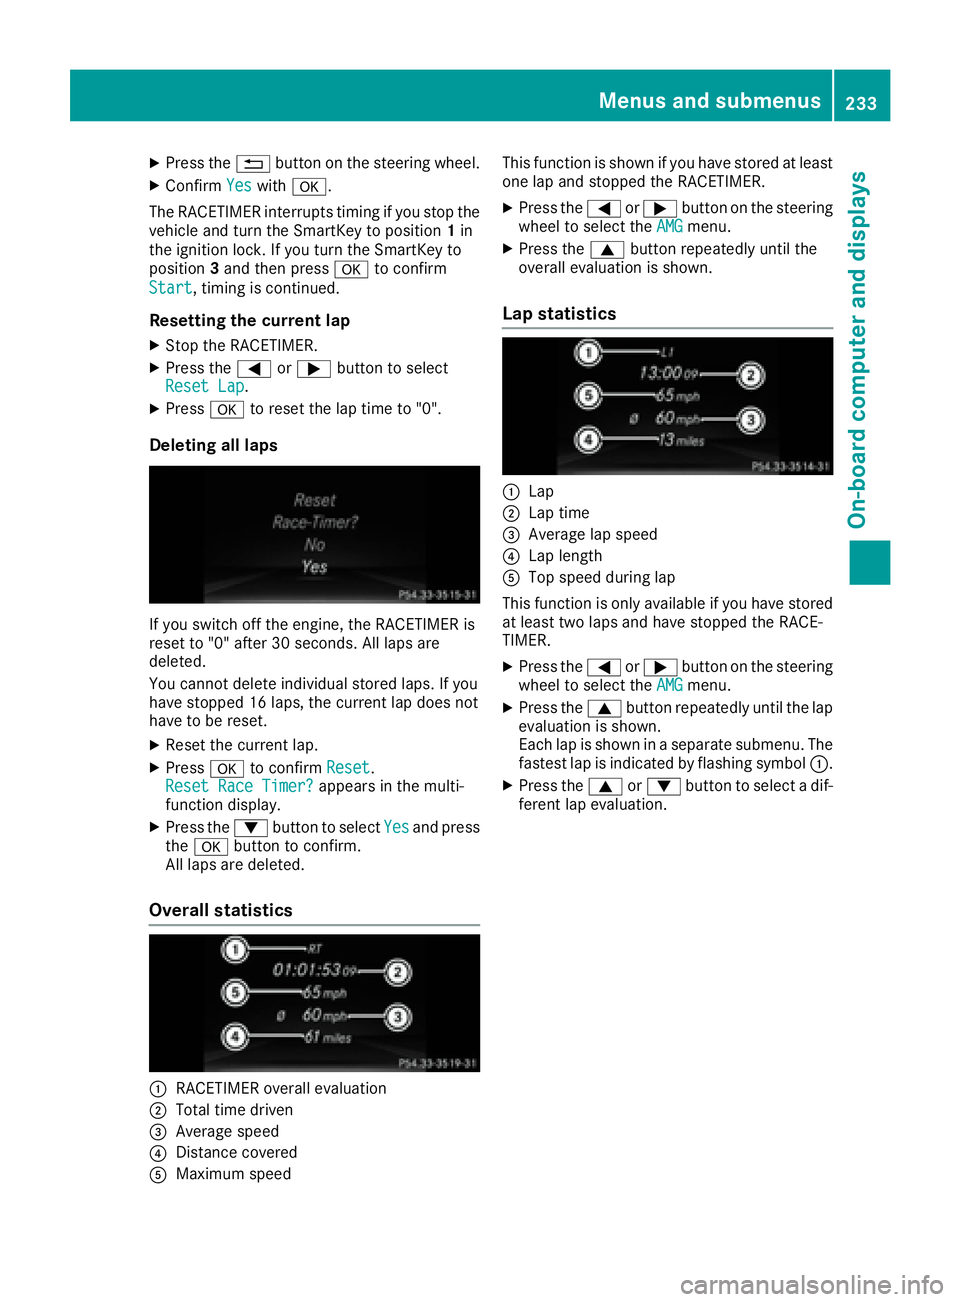
:RACETIMER overall evaluation
;Total time driven
=Average speed
?Distance covered
AMaximum speed This function is shown if you have stored at least
one lap and stopped the RACETIMER.
XPress the
=or; button on the steering
wheel to select the AMGmenu.
XPress the9button repeatedly until the
overall evaluation is shown.
Lap statistics
:Lap
;Lap time
=Average lap speed
?Lap length
ATop speed during lap
This function is only available if you have stored
at least two laps and have stopped the RACE-
TIMER.
XPress the =or; button on the steering
wheel to select the AMGmenu.
XPress the9button repeatedly until the lap
evaluation is shown.
Each lap is shown in a separate submenu. The
fastest lap is indicated by flashing symbol :.
XPress the9or: button to select a dif-
ferent lap evaluation.
Menus and submenus233
On-board computer and displays
Z
Page 308 of 382
Make sure that no windshield washer con-
centrate is spilled next to the filler neck.
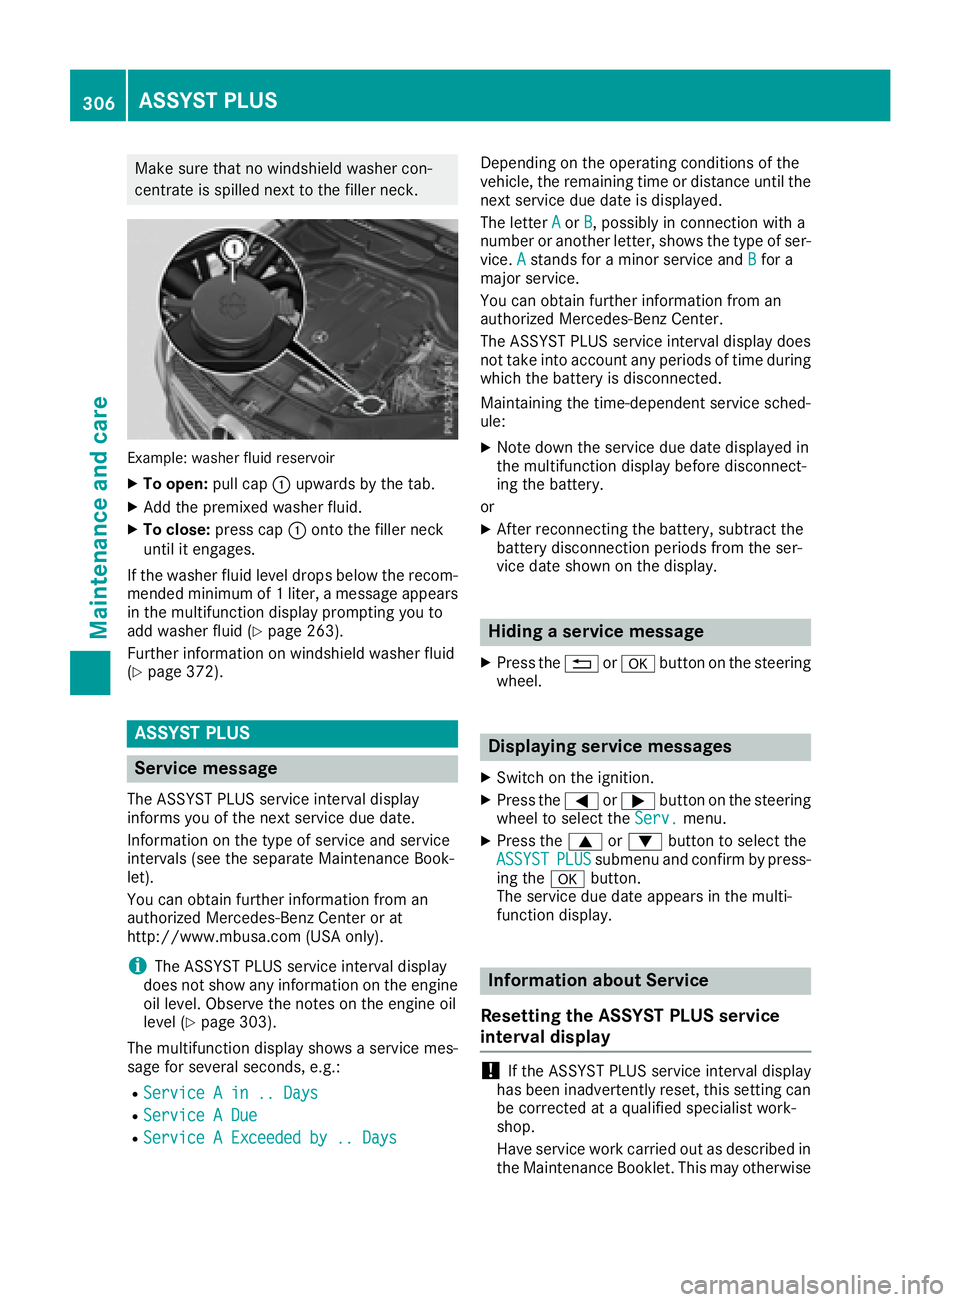
Example: washer fluid reservoir
XTo open:pull cap:upwards by the tab.
XAdd the premixed washer fluid.
XTo close: press cap :onto the filler neck
until it engages.
If the washer fluid level drops below the recom-
mended minimum of 1 liter, a message appears
in the multifunction display prompting you to
add washer fluid (
Ypage 263).
Further information on windshield washer fluid
(
Ypage 372).
ASSYST PLUS
Service message
The ASSYST PLUS service interval display
informs you of the next service due date.
Information on the type of service and service
intervals (see the separate Maintenance Book-
let).
You can obtain further information from an
authorized Mercedes-Benz Center or at
http://www.mbusa.com (USA only).
iThe ASSYST PLUS service interval display
does not show any information on the engine
oil level. Observe the notes on the engine oil
level (
Ypage 303).
The multifunction display shows a service mes-
sage for several seconds, e.g.:
RService A in .. Days
RService A Due
RService A Exceeded by .. Days
Depending on the operating conditions of the
vehicle, the remaining time or distance until the
next service due date is displayed.
The letter A
orB, possibly in connection with a
number or another letter, shows the type of ser-
vice. A
stands for a minor service and Bfor a
major service.
You can obtain further information from an
authorized Mercedes-Benz Center.
The ASSYST PLUS service interval display does
not take into account any periods of time during
which the battery is disconnected.
Maintaining the time-dependent service sched-
ule:
XNote down the service due date displayed in
the multifunction display before disconnect-
ing the battery.
or
XAfter reconnecting the battery, subtract the
battery disconnection periods from the ser-
vice date shown on the display.
Hiding a service message
XPress the %ora button on the steering
wheel.
Displaying service messages
XSwitch on the ignition.
XPress the =or; button on the steering
wheel to select the Serv.menu.
XPress the9or: button to select the
ASSYSTPLUSsubmenu and confirm by press-
ing the abutton.
The service due date appears in the multi-
function display.
Information about Service
Resetting the ASSYST PLUS service
interval display
!If the ASSYST PLUS service interval display
has been inadvertently reset, this setting can
be corrected at a qualified specialist work-
shop.
Have service work carried out as described in
the Maintenance Booklet. This may otherwise
306ASSYST PLUS
Maintenance and care
Page 309 of 382
lead to increased wear and damage to the
major assemblies or the vehicle.
A qualified specialist workshop, e.g. an author-
ized Mercedes-Benz Center, will reset the
ASSYST PLUS service interval display after the
service work has been carried out. You can also
obtain further information on maintenance
work, for example.
Special service requirements
The specified maintenance interval takes only
the normal operation of the vehicle into
account. Under arduous operating conditions or
increased load on the vehicle, maintenance
work must be carried out more frequently, for
example:
Rregular city driving with frequent intermediate
stops
Rif the vehicle is primarily used to travel short
distances
Ruse in mountainous terrain or on poor road
surfaces
Rif the engine is often left idling for long periods
Under these or similar conditions, have, for
example, the air filter, engine oil and oil filter
replaced or changed more frequently. Under
arduous operating conditions, the tires must be
checked more often. Further information can be
obtained at a qualified specialist workshop, e.g.
an authorized Mercedes-Benz Center.
Driving abroad
An extensive Mercedes-Benz Service network is also available in other countries. You can obtain
further information from any authorized
Mercedes-Benz Center.
Care
General notes
HEnvironmental note
Dispose of empty packaging and cleaning
cloths in an environmentally responsible man-
ner.
!For cleaning your vehicle, do not use any of
the following:
Rdry, rough or hard cloths
Rabrasive cleaning agents
Rsolvents
Rcleaning agents containing solvents
Do not scrub.
Do not touch the surfaces or protective films
with hard objects, e.g. a ring or ice scraper.
You could otherwise scratch or damage the
surfaces and protective film.
!Do not park the vehicle for an extended
period straight after cleaning it, particularly
after having cleaned the wheels with wheel
cleaner. Wheel cleaners could cause
increased corrosion of the brake discs and
brake pads/linings. For this reason, you
should drive for a few minutes after cleaning.
Braking heats the brake discs and the brake
pads/linings, thus drying them. The vehicle
can then be parked.
Regular care of your vehicle is a condition for
retaining the quality in the long term.
Use care products and cleaning agents recom-
mended and approved by Mercedes-Benz.
Washing the vehicle and cleaning the
paintwork
Automatic car wash
GWARNING
Braking efficiency is reduced after washing
the vehicle. There is a risk of an accident.
After the vehicle has been washed, brake
carefully while paying attention to the traffic
conditions until full braking power is restored.
!Before driving into an automatic car wash,
make sure that it is suitable for the dimen-
sions of the vehicle. In particular, make sure
that:
Rthere is enough ground clearance between
the vehicle underbody and the guide rails of
the automatic car wash.
Rthe clearance width of the automatic car
wash, in particular the width of the guide
rails, is adequate (for further information on
Care307
Maintenance and care
Z
Page 324 of 382
The vehicle will then use very little energy, thus
conserving battery power.
If the power supply has been interrupted, e.g. ifyou reconnect the battery, you will have to:
Rset the clock. Information on setting the clock
can be found in the Digital Operator's Manual.
On vehicles with a multimedia system and
navigation system, the clock is set automati-
cally.
Rreset the function for folding the exterior mir-
rors in/out automatically, by folding the mir-
rors out once (
Ypage 105).
Charging the 12 V battery
GWARNING
During charging and jump-starting, explosive
gases can escape from the battery. There is a risk of an explosion.
Particularly avoid fire, open flames, creating
sparks and smoking. Ensure there is sufficient
ventilation while charging and jump-starting.
Do not lean over a battery.
GWARNING
Battery acid is caustic. There is a risk of injury.
Avoid contact with skin, eyes or clothing. Do
not inhale any battery gases. Do not lean over
the battery. Keep children away from batter-
ies. Wash away battery acid immediately with
plenty of clean water and seek medical atten-
tion.
GWARNING
A discharged battery can freeze at tempera-
tures below freezing point. When jump-start-
ing the vehicle or charging the battery, gases can escape from the battery. There is a risk of
an explosion.
Allow the frozen battery to thaw out before
charging it or jump-starting.
!Only use battery chargers with a maximum
charging voltage of 14.8 V.
!Only charge the battery using the jump-
starting connection point. The jump-starting connection point is in the
engine compartment (
Ypage 323).
XOpen the hood.
XConnect the battery charger to the positive
terminal and ground point in the same order
as when connecting the donor battery in the
jump-starting procedure (
Ypage 323).
Keep away from fire and open flames. Do not
lean over a battery. Never charge the battery if it
is still installed in the vehicle, unless you use a
battery charger which has been tested and
approved by Mercedes-Benz. A battery charger
unit specially adapted for Mercedes-Benz vehi-
cles and tested and approved by Mercedes-
Benz is available as an accessory. It permits the
charging of the battery in its installed position.
Contact an authorized Mercedes-Benz Center
for further information and availability. Read the
battery charger's operating instructions before
charging the battery.
If, at low temperatures, the indicator lamps/
warning lamps in the instrument cluster do not
light up, it is highly likely that the discharged
battery has frozen. In this case you may neither
jump-start the vehicle nor charge the battery.
The service life of a thawed-out battery may be
shorter. The starting characteristics can be
impaired, particularly at low temperatures. Have
the thawed-out battery checked at a qualified
specialist workshop.
322Battery (vehicle)
Breakdown assitance
Page 329 of 382
In order to ensure that the automatic transmis-
sion stays in positionNwhen towing the vehicle,
you must observe the following points:
XMake sure that the vehicle is stationary.
XTurn the SmartKey to position 2in the ignition
lock.
XDepress and hold the brake pedal.
XShift the automatic transmission to position
N.
XLeave the SmartKey in position 2in the igni-
tion lock.
XRelease the brake pedal.
XRelease the electric parking brake.
XSwitch on the hazard warning lamps
(Ypage 110).
In order to signal a change of direction when
towing the vehicle with the hazard warning
lamps switched on, use the combination switch
as usual. In this case, only the indicator lamps
for the direction of travel flash. After resetting
the combination switch, the hazard warning
lamp starts flashing again.
Transporting the vehicle
4MATIC vehicles/vehicles with auto-
matic transmission
!When the vehicle is loaded for transport, the
front and rear axles must be stationary and on the same transportation vehicle. Positioning
over the connection point of the transport
vehicle is not permitted. The drive train may
otherwise be damaged.
All vehicles
!You may only secure the vehicle by the
wheels, not by parts of the vehicle such as
axle or steering components. Otherwise, the
vehicle could be damaged.
The towing eye can be used to pull the vehicle
onto a trailer or transporter for transporting pur-
poses.
XTurn the SmartKey to position 2in the ignition
lock.
XShift the automatic transmission to position
N.
As soon as the vehicle has been loaded:
XPrevent the vehicle from rolling away by
applying the electric parking brake.
XShift the automatic transmission to posi-
tion P.
XTurn the SmartKey to position 0in the ignition
lock and remove it.
XSecure the vehicle.
Information on 4MATIC vehicles
!
Vehicles with 4MATIC must not be towed
with either the front or the rear axle raised, as
doing so will damage the transmission.
Vehicles with 4MATIC may either be towed away with both axles on the ground or be loaded up
and transported.
If the vehicle's transmission, front, or rear axle is
damaged, have the vehicle transported on a
truck or trailer.
In the event of damage to the electrical sys-
tem: if the battery is defective, the automatic
transmission will be locked in position P. To shift
the automatic transmission to position N, you
must provide power to the vehicle's electrical
system in the same way as when jump-starting
(
Ypage 323).
Have the vehicle transported on a transporter or
trailer.
Tow-starting (emergency engine
starting)
!
Vehicles with automatic transmission must
not be tow-started. You could otherwise dam-
age the automatic transmission.
Towing and tow-starting327
Breakdown assitance
Z
Page 337 of 382
If the tire pressures have been set to the lower
values for lighter loads and/or lower road
speeds, the pressures should be reset to the
higher values:
Rif you want to drive with an increased load
and/or
Rif you want to drive at higher road speeds
The tire pressures for increased loads and/or
higher road speeds, shown in the tire pressure
table, may have a negative effect on driving
comfort.
If the tire pressure is not set correctly, this can
lead to an excessive build up of heat and a sud-
den loss of pressure.
For more information, contact a qualified spe-
cialist workshop.
Important notes on tire pressure
GWARNING
If the tire pressure drops repeatedly, the
wheel, valve or tire may be damaged. Tire
pressure that is too low may result in a tire
blow-out. There is a risk of an accident.
RCheck the tire for foreign objects.
RCheck whether the wheel is losing air or the valve is leaking.
If you are unable to rectify the damage, con-
tact a qualified specialist workshop.
GWARNING
If you fit unsuitable accessories onto tire
valves, the tire valves may be overloaded and
malfunction, which can cause tire pressure
loss. Due to their design, retrofitted tire pres- sure monitors keep the tire valve open. This
can also result in tire pressure loss. There is a
risk of an accident.
Only screw the standard valve cap or other
valve caps approved by Mercedes-Benz for
your vehicle onto the tire valve.
Use a suitable pressure gauge to check the tire
pressure. The outer appearance of a tire does
not permit any reliable conclusion about the tire pressure. On vehicles equipped with the elec-
tronic tire pressure monitor, the tire pressure
can be checked in the on-board computer. The tire temperature and pressure increase
when the vehicle is in motion. This is dependent
on the driving speed and the load.
Therefore, you should only correct tire pres-
sures when the tires are cold.
The tires are cold:
Rif the vehicle has been parked with the tires
out of direct sunlight for at least three hours
and
Rif the vehicle has not been driven further than
1 mile (1.6 km)
The tire temperature changes depending on the
outside temperature, the vehicle speed and the
tire load. If the tire temperature changes by
18 ‡ (10 †), the tire pressure changes by
approximately 10 kPa (0.1 bar/1.5 psi). Take
this into account when checking the pressure of
warm tires. Only correct the tire pressure if it is
too low for the current operating conditions. If
you check the tire pressure when the tires are
warm, the resulting value will be higher than if
the tires were cold. This is normal. Do not
reduce the tire pressure to the value specified
for cold tires. The tire pressure would otherwise
be too low.
Observe the recommended tire pressures for
cold tires:
Ron the Tire and Loading Information placard
on the B-pillar on the driver's side
Rin the tire pressure table in the fuel filler flap
(Ypage 152)
Rprinted in yellow on the rim of the emer-
gency
/collapsible spare wheel (depending on
vehicle equipment)
Underinflated or overinflated tires
Underinflated tires
GWARNING
Tires with pressure that is too low can over-
heat and burst as a consequence. In addition, they also suffer from excessive and/or irreg-
ular wear, which can severely impair the brak-
ing properties and the driving characteristics.
There is a risk of an accident.
Avoid tire pressures that are too low in all the
tires, including the spare wheel.
Tire pressure335
Wheels and tires
Z