2016 MERCEDES-BENZ GLE-CLASS COUPE climate control
[x] Cancel search: climate controlPage 129 of 382
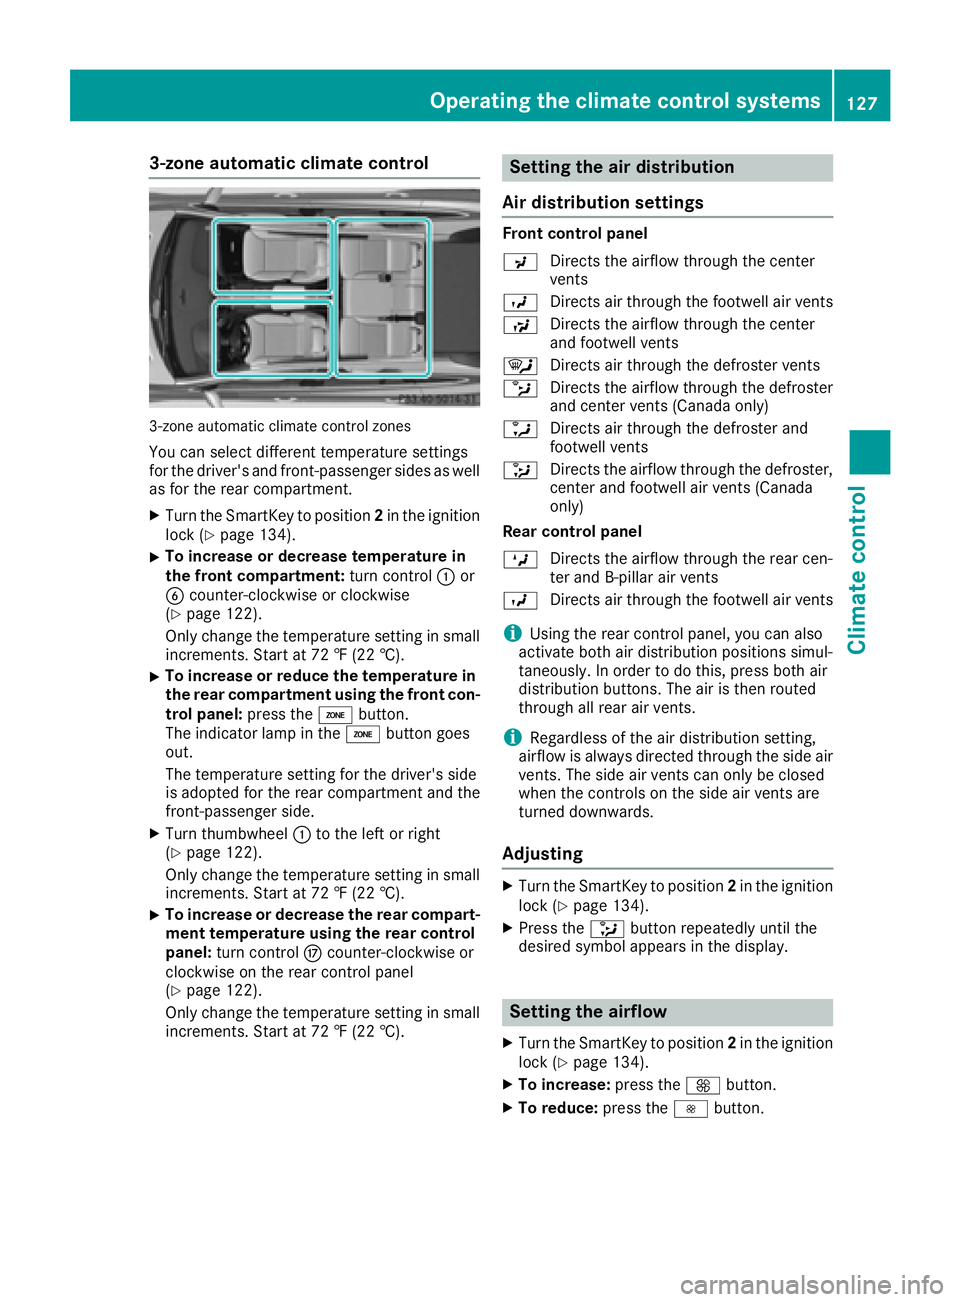
3-zone automatic climate control
3-zone automatic climate control zones
You can select different temperature settings
for the driver's and front-passenger sides as well
as for the rear compartment.
XTurn the SmartKey to position2in the ignition
lock (Ypage 134).
XTo increase or decrease temperature in
the front compartment: turn control:or
B counter-clockwise or clockwise
(
Ypage 122).
Only change the temperature setting in small
increments. Start at 72 ‡ (22 †).
XTo increase or reduce the temperature in the rear compartment using the front con-
trol panel: press theábutton.
The indicator lamp in the ábutton goes
out.
The temperature setting for the driver's side
is adopted for the rear compartment and the
front-passenger side.
XTurn thumbwheel :to the left or right
(Ypage 122).
Only change the temperature setting in small
increments. Start at 72 ‡ (22 †).
XTo increase or decrease the rear compart- ment temperature using the rear control
panel: turn control Mcounter-clockwise or
clockwise on the rear control panel
(
Ypage 122).
Only change the temperature setting in small
increments. Start at 72 ‡ (22 †).
Setting the air distribution
Air distribution settings
Front control panel
P Directs the airflow through the center
vents
O Directs air through the footwell air vents
S Directs the airflow through the center
and footwell vents
¯ Directs air through the defroster vents
b Directs the airflow through the defroster
and center vents (Canada only)
a Directs air through the defroster and
footwell vents
_ Directs the airflow through the defroster,
center and footwell air vents (Canada
only)
Rear control panel
M Directs the airflow through the rear cen-
ter and B-pillar air vents
O Directs air through the footwell air vents
iUsing the rear control panel, you can also
activate both air distribution positions simul-
taneously. In order to do this, press both air
distribution buttons. The air is then routed
through all rear air vents.
iRegardless of the air distribution setting,
airflow is always directed through the side air
vents. The side air vents can only be closed
when the controls on the side air vents are
turned downwards.
Adjusting
XTurn the SmartKey to position 2in the ignition
lock (Ypage 134).
XPress the _button repeatedly until the
desired symbol appears in the display.
Setting the airflow
XTurn the SmartKey to position 2in the ignition
lock (Ypage 134).
XTo increase: press theKbutton.
XTo reduce: press theIbutton.
Operating the climate control systems127
Climate control
Page 130 of 382
iYou can use 3-zone automatic climate con-
trol to set the airflow in the rear compartment
separately.
Switching the ZONE function on/off
XTo activate: press theábutton.
The indicator lamp above the ábutton
lights up.
Dual-zone automatic climate control: the tem-
perature setting for the driver's side is not
adopted for the front-passenger side.
3-zone automatic climate control: the tem-
perature setting for the driver's side is not
adopted for the front-passenger side and the rear compartment.
XTo deactivate: press theábutton.
The indicator lamp above the ábutton
goes out.
Dual-zone automatic climate control: the tem-
perature setting for the driver's side is adop-
ted for the front-passenger side.
3-zone automatic climate control: the tem-
perature setting for the driver's side is adop-
ted for the front-passenger side and the rear
compartment.
Defrosting the windshield
General notes
You can use this function to defrost the wind-
shield or to clear a fogged up windshield or front
side windows on the inside.
Switch off the "Windshield defrosting" function
as soon as the windshield is clear again.
Switching on/off
XTurn the SmartKey to position 2in the ignition
lock (Ypage 134).
XTo activate: press the¬button.
The indicator lamp in the ¬button lights
up.
The climate control system switches to the
following functions:
Rhigh airflow
Rhigh temperature
Rair distribution to the windshield and front
side windows
Rair-recirculation mode off
XTo deactivate: press the¬button.
The indicator lamp in the ¬button goes
out. The previously selected settings are
restored. Air-recirculation mode remains
deactivated.
or
XPress the Ãbutton.
The indicator lamp in the ¬button goes
out. Airflow and air distribution are set to
automatic mode.
or
XTurn control :orB counter-clockwise or
clockwise:
Dual-zone automatic climate control
(
Ypage 119)
3-zone automatic climate control
(
Ypage 122)
or
XPress the KorI button.
MAX COOL maximum cooling
The MAX COOL function is only available in vehi-
cles for the USA.
MAX COOL is only operational when the engine
is running.
XTo activate: press theÙbutton.
The indicator lamp in the Ùbutton lights
up.
XTo deactivate: press theÙbutton.
The indicator lamp in the Ùbutton goes
out. The previously selected settings are
restored.
When you activate MAX COOL, climate control
switches to the following functions:
Rmaximum cooling
Rmaximum airflow
Rair-recirculation mode on
128Operating the climate control systems
Climate control
Page 131 of 382
Defrosting thewindows
Windows fogged up on th einside
XActivat eth e¿ orÁ coolin gwit hair
dehumidification function .
XActivateautomatic mode Ã.
XIf thewindows continue to fo gup, activat eth e
"windshield defrosting" function
(
Ypage 128).
iYou should only selec tthis setting until th e
windshield is clear again .
Windows fogged up on th eoutsid e
XActivat eth ewindshield wipers .
XPress the_ buttonrepeatedly until th e
P orO symbol appears in th edisplay.
iYou should only selec tthis setting until th e
windshield is clear again .
iIf you clean thewindows regularly, they do
no tfo gup so quickly.
Rea rwindow defroster
General notes
The rea rwindow defroster has ahig hcurren t
draw. You should therefore switch it of fas soo n
as th erea rwindow is clear .Otherwise ,th erea r
window defroster switches of fautomatically
after severa lminutes.
If th ebattery voltage is to olow, th erea rwindow
defroster may switch off.
Switchin gon/of f
XTurnth eSmartKey to position 2in th eignition
loc k (Ypage 134).
XPress th e¤ button.
The indicator lamp in th e¤ buttonlights
up or goe sout .
Operating the climate control systems129
Climate control
Page 132 of 382
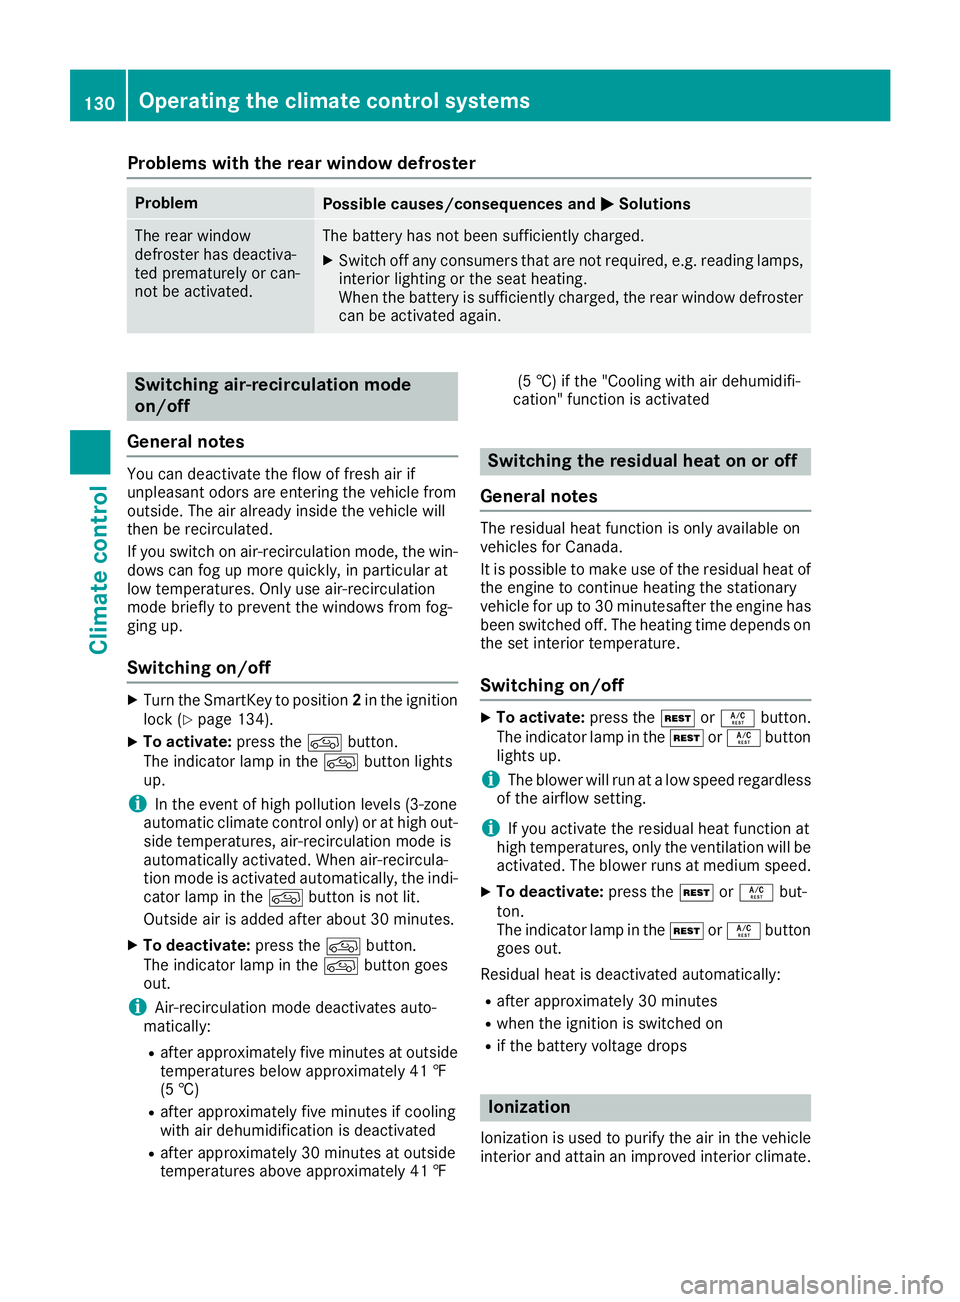
Problems with the rear window defroster
ProblemPossible causes/consequences andMSolutions
The rear window
defroster has deactiva-
ted prematurely or can-
not be activated.The battery has not been sufficiently charged.
XSwitch off any consumers that are not required, e.g. reading lamps,
interior lighting or the seat heating.
When the battery is sufficiently charged, the rear window defroster
can be activated again.
Switching air-recirculation mode
on/off
General notes
You can deactivate the flow of fresh air if
unpleasant odors are entering the vehicle from
outside. The air already inside the vehicle will
then be recirculated.
If you switch on air-recirculation mode, the win-
dows can fog up more quickly, in particular at
low temperatures. Only use air-recirculation
mode briefly to prevent the windows from fog-
ging up.
Switching on/off
XTurn the SmartKey to position 2in the ignition
lock (Ypage 134).
XTo activate: press thedbutton.
The indicator lamp in the dbutton lights
up.
iIn the event of high pollution levels (3-zone
automatic climate control only) or at high out-
side temperatures, air-recirculation mode is
automatically activated. When air-recircula-
tion mode is activated automatically, the indi-
cator lamp in the dbutton is not lit.
Outside air is added after about 30 minutes.
XTo deactivate: press thedbutton.
The indicator lamp in the dbutton goes
out.
iAir-recirculation mode deactivates auto-
matically:
Rafter approximately five minutes at outside
temperatures below approximately 41 ‡
(5 †)
Rafter approximately five minutes if cooling
with air dehumidification is deactivated
Rafter approximately 30 minutes at outside
temperatures above approximately 41 ‡ (5 †) if the "Cooling with air dehumidifi-
cation" function is activated
Switching the residual heat on or off
General notes
The residual heat function is only available on
vehicles for Canada.
It is possible to make use of the residual heat of
the engine to continue heating the stationary
vehicle for up to 30 minutesafter the engine has
been switched off. The heating time depends on
the set interior temperature.
Switching on/off
XTo activate: press theÌorÁ button.
The indicator lamp in the ÌorÁ button
lights up.
iThe blower will run at a low speed regardless
of the airflow setting.
iIf you activate the residual heat function at
high temperatures, only the ventilation will be
activated. The blower runs at medium speed.
XTo deactivate: press theÌorÁ but-
ton.
The indicator lamp in the ÌorÁ button
goes out.
Residual heat is deactivated automatically:
Rafter approximately 30 minutes
Rwhen the ignition is switched on
Rif the battery voltage drops
Ionization
Ionization is used to purify the air in the vehicle
interior and attain an improved interior climate.
130Operating the climate control systems
Climate control
Page 133 of 382
The ionization of the interior air is odorless and
cannot be perceived directly in the vehicle inte-
rior.
You can switch ionization on and off via the mul-
timedia system (see the separate operating
instructions).
Ionization can only be operated when the auto-
matic climate control is switched on. The side air
vent on the driver's side must be open.
Setting the air vents
Important safety notes
GWARNING
Very hot or very cold air can flow from the air
vents. This could result in burns or frostbite in
the immediate vicinity of the air vents. There
is a risk of injury.
Make sure that all vehicle occupants always
maintain a sufficient distance to the air out-
lets. If necessary, redirect the airflow to
another area of the vehicle interior.
In order to ensure the direct flow of fresh air
through the air vents into the vehicle interior,
please observe the following notes:
Rkeep the air inlet grille on the hood and in the
engine compartment on the front-passenger
side free of blockages, such as ice, snow or
leaves.
Rnever cover the air vents or air intake grilles in
the vehicle interior.
iFor virtually draft-free ventilation, adjust the
sliders of the air vents to the center position.
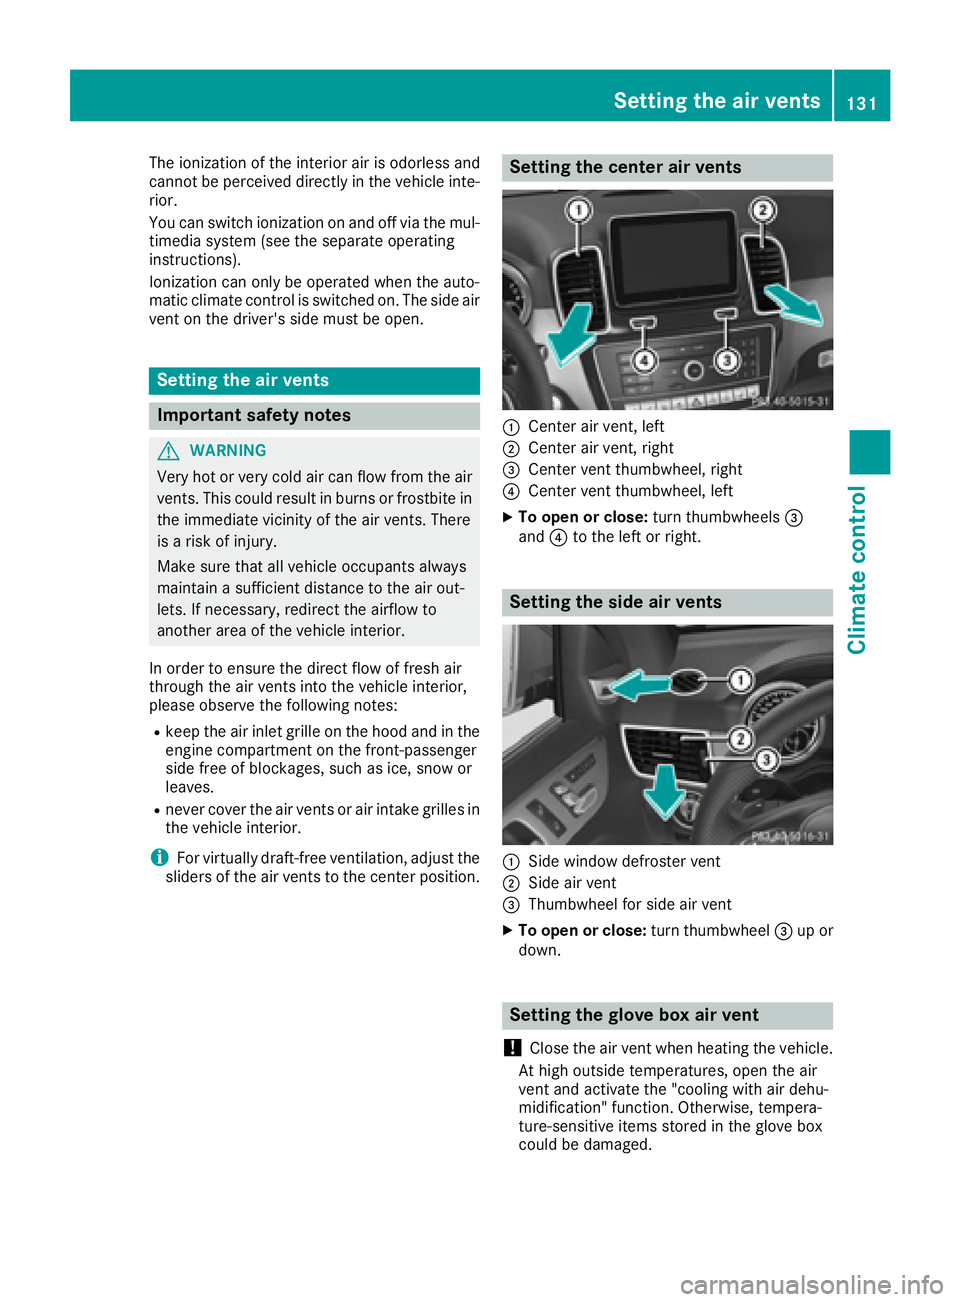
Setting the center air vents
:Center air vent, left
;Center air vent, right
=Center vent thumbwheel, right
?Center vent thumbwheel, left
XTo open or close: turn thumbwheels=
and ?to the left or right.
Setting the side air vents
:Side window defroster vent
;Side air vent
=Thumbwheel for side air vent
XTo open or close: turn thumbwheel=up or
down.
Setting the glove box air vent
!
Close the air vent when heating the vehicle.
At high outside temperatures, open the air
vent and activate the "cooling with air dehu-
midification" function. Otherwise, tempera-
ture-sensitive items stored in the glove box
could be damaged.
Setting the air vents131
Climate control
Z
Page 134 of 382
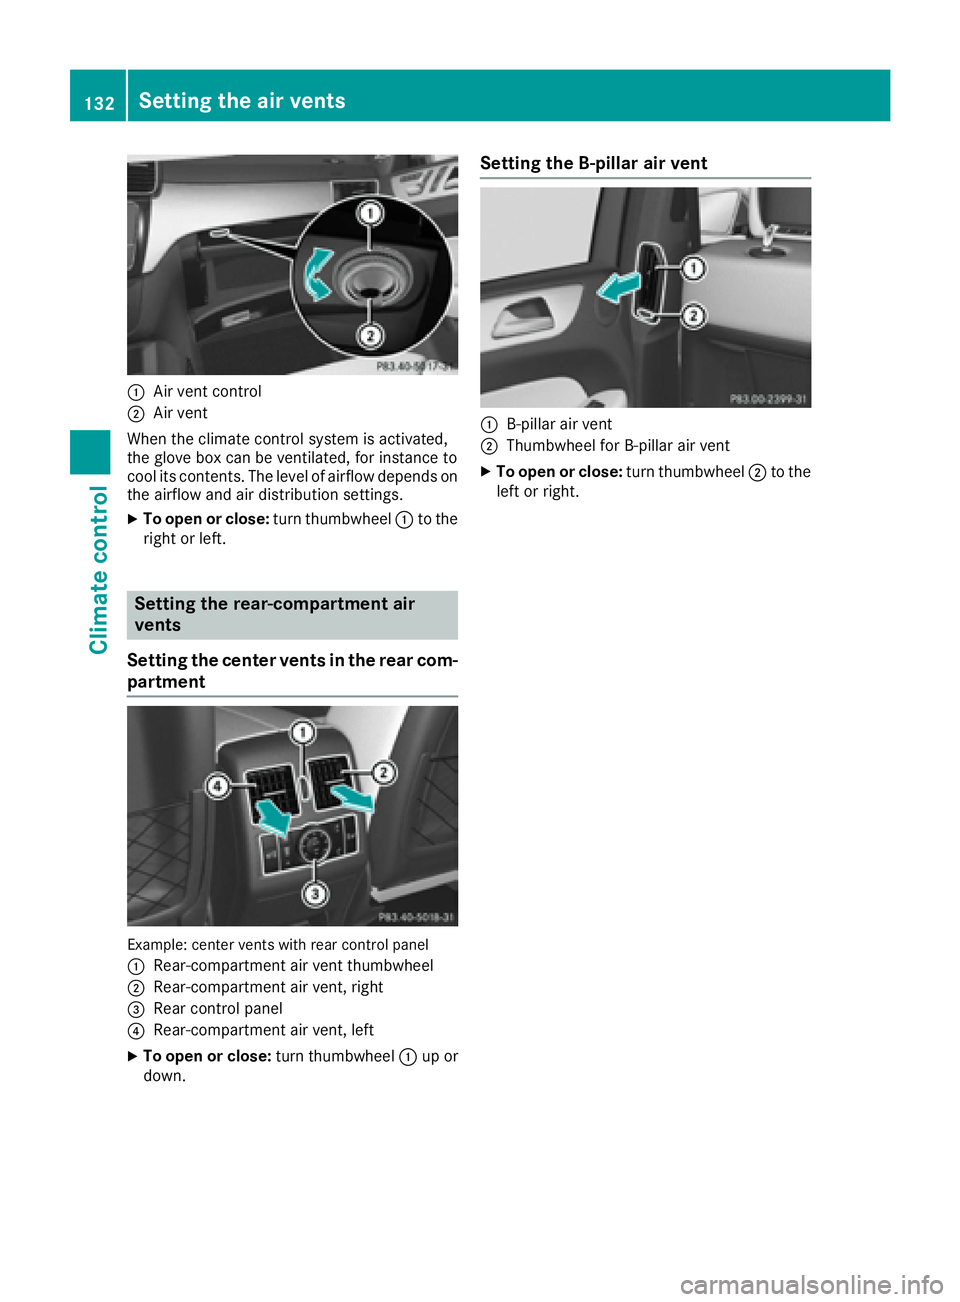
:Air vent control
;Air vent
When the climate control system is activated,
the glove box can be ventilated, for instance to
cool its contents. The level of airflow depends on the airflow and air distribution settings.
XTo open or close: turn thumbwheel:to the
right or left.
Setting the rear-compartment air
vents
Setting the center vents in the rear com-
partment
Example: center vents with rear control panel
:
Rear-compartment air vent thumbwheel
;Rear-compartment air vent, right
=Rear control panel
?Rear-compartment air vent, left
XTo open or close: turn thumbwheel:up or
down.
Setting the B-pillar air vent
:B-pillar air vent
;Thumbwheel for B-pillar air vent
XTo open or close: turn thumbwheel;to the
left or right.
132Setting the air vents
Climate control
Page 139 of 382
You can also start your engine via your smart-
phone from outside the vehicle. In this case, the
previously selected climate control setting is
activated. In this way you can cool or heat the
interior of the vehicle before starting the jour-
ney.
Only start the engine via your smartphone if it is
safe to start and run the engine where your vehi-
cle is parked.
Observe the legal stipulations in the area where your vehicle is parked. Engine start via smart-
phone may be limited to certain countries or
regions.
You can execute a maximum of two consecutive
starting attempts via your smartphone. If you
insert the key into the ignition lock, you can
carry out two more starting attempts.
Once you have started the engine, you can
switch the engine off via your smartphone at any
time.
You can only start the engine via your smart-
phone if:
Rthe key is in the ignition lock
Rpark position Pis selected
Rthe accelerator pedal is not depressed
Rthe anti-theft alarm system is not activated
Rthe panic alarm is not activated
Rthe hazard warning lamps are switched off
Rthe hood is closed.
Rthe doors are closed and locked
Rthe windows and sliding sunroof are closed
Also make sure that:
Rthe fuel tank is sufficiently filled
Rthe starter battery is sufficiently charged
GWARNING
Limbs could be crushed or trapped if the
engine is started unintentionally during ser-
vice or maintenance work. There is a risk of
injury.
Always secure the engine against uninten-
tional starting before carrying out mainte-
nance or repair work. Make sure that the engine cannot be started via
your smartphone before carrying out mainte-
nance or repairs. You can prevent an engine
start via your smartphone, for example, if you:
Rswitch on the hazard warning lamps
Rdo not lock the doors
Ropen the hood
Pulling away
General notes
GWARNING
If the engine speed is above the idling speed
and you engage transmission position Dor R,
the vehicle could pull away suddenly. There is
a risk of an accident.
When engaging transmission position Dor R,
always firmly depress the brake pedal and do not simultaneously accelerate.
Depress the accelerator carefully when pulling
away.
The vehicle locks centrally once you have pulled
away. The locking knobs in the doors drop down.
You can open the doors from the inside at any
time.
You can also deactivate the automatic locking
feature (
Ypage 230).
It is only possible to shift the transmission from
position Pto the desired position if you depress
the brake pedal. Only then is the parking lock
released. If you do not depress the brake pedal,
the DIRECT SELECT lever can still be moved but the parking lock remains engaged.
iUpshifts take place at higher engine speeds
after a cold start. This helps the catalytic con-
verter to reach its operating temperature
more quickly.
Information on the automatic release of the
electric parking brake (
Ypage 158).
Driving137
Driving and parking
Z
Page 369 of 382
from the data shown here. You can find the
data applicable to your vehicle on the vehicle
identification plate.
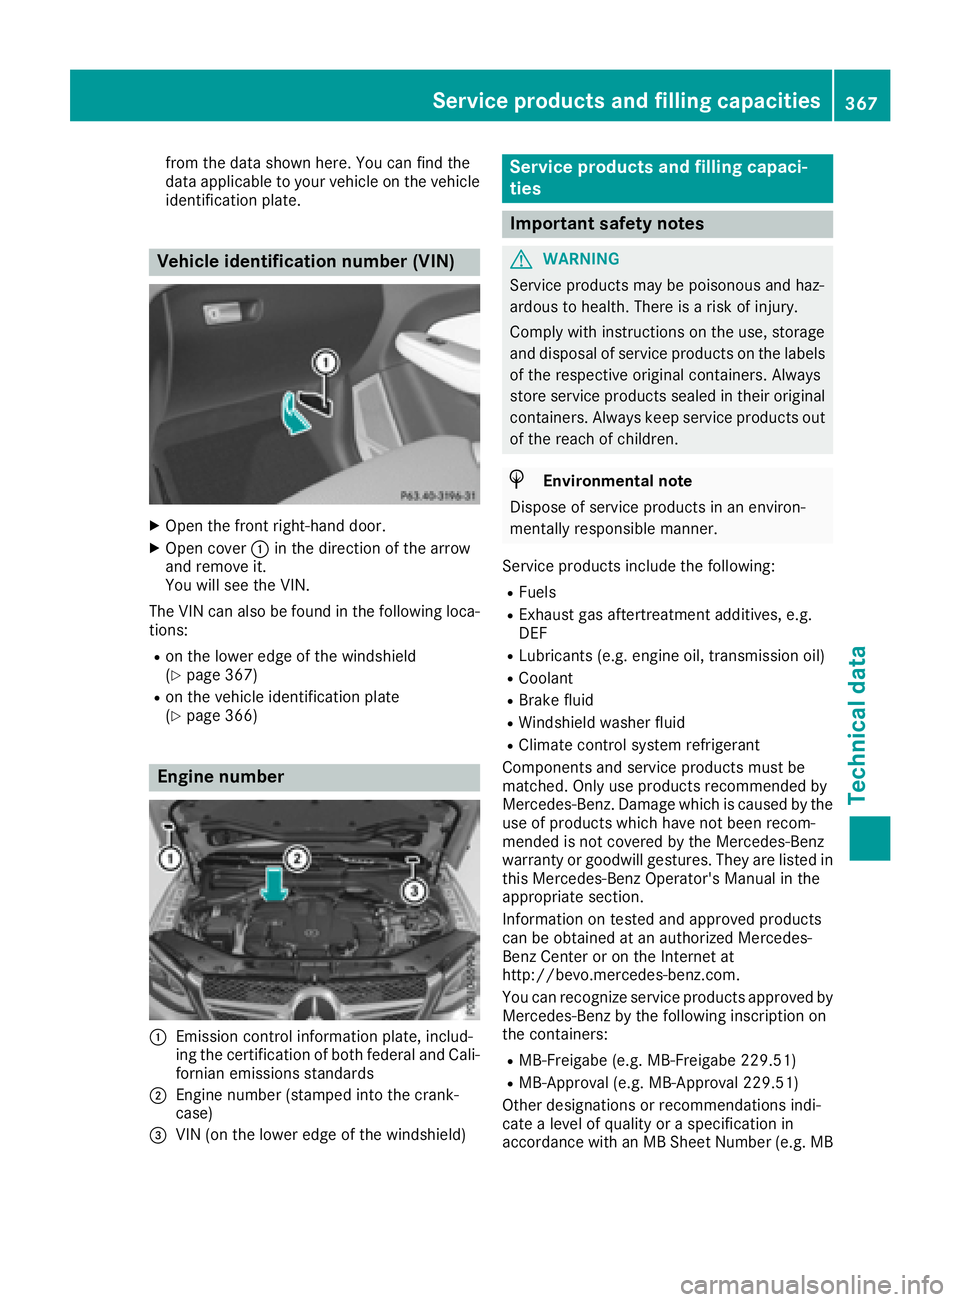
Vehicle identification number (VIN)
XOpen the front right-hand door.
XOpen cover:in the direction of the arrow
and remove it.
You will see the VIN.
The VIN can also be found in the following loca-
tions:
Ron the lower edge of the windshield
(Ypage 367)
Ron the vehicle identification plate
(Ypage 366)
Engine number
:Emission control information plate, includ-
ing the certification of both federal and Cali-
fornian emissions standards
;Engine number (stamped into the crank-
case)
=VIN (on the lower edge of the windshield)
Service products and filling capaci-
ties
Important safety notes
GWARNING
Service products may be poisonous and haz-
ardous to health. There is a risk of injury.
Comply with instructions on the use, storage
and disposal of service products on the labels
of the respective original containers. Always
store service products sealed in their original
containers. Always keep service products out
of the reach of children.
HEnvironmental note
Dispose of service products in an environ-
mentally responsible manner.
Service products include the following:
RFuels
RExhaust gas aftertreatment additives, e.g.
DEF
RLubricants (e.g. engine oil, transmission oil)
RCoolant
RBrake fluid
RWindshield washer fluid
RClimate control system refrigerant
Components and service products must be
matched. Only use products recommended by
Mercedes-Benz. Damage which is caused by the
use of products which have not been recom-
mended is not covered by the Mercedes-Benz
warranty or goodwill gestures. They are listed in
this Mercedes-Benz Operator's Manual in the
appropriate section.
Information on tested and approved products
can be obtained at an authorized Mercedes-
Benz Center or on the Internet at
http://bevo.mercedes-benz.com.
You can recognize service products approved by
Mercedes-Benz by the following inscription on
the containers:
RMB-Freigabe (e.g. MB-Freigabe 229.51)
RMB-Approval (e.g. MB-Approval 229.51)
Other designations or recommendations indi-
cate a level of quality or a specification in
accordance with an MB Sheet Number (e.g. MB
Service products and filling capacities367
Technical data
Z