2016 MERCEDES-BENZ GLC COUPE service reset
[x] Cancel search: service resetPage 8 of 389

Setting ........................................... 141
Setting the centre air vents ........... 141
Setting the side air vents ............... 141
Air-conditioning system
see Climate control
Airbag
Automatic front-passenger front
airbag deactivation .......................... 49
Introduction ..................................... 46
PASSENGER AIR BAG indicator
lamps ............................................... 42
Airbags
Display message ............................ 259
Front airbag (driver, front
passenger) ....................................... 47
Important safety guidelines ............. 46
Kneebag ........................................... 48
Sidebag ............................................ 48
Triggering ......................................... 53
Windowbag ...................................... 48
Alarm
ATA (Anti-Theft Alarm system) ......... 79
Switching off (ATA) .......................... 79
Switching the function on/off
(ATA) ................................................ 79
Alarm system
see ATA (Anti-Theft Alarm system)
AMG
Performance Seat .......................... 106
AMG menu (on-board computer) ..... 245
AMG Performance exhaust system
can be selected ................................. 150
Anti-glare film .................................... 324
Anti-lock braking system
see ABS (Anti-lock Braking System)
Aquaplaning ....................................... 173
Armrest
Stowage compartment .................. 307
Ashtray ............................................... 317
Assistance display (on-board com-
puter) .................................................. 239
Assistance menu (on-board com-
puter) .................................................. 240
ASSYST PLUS
Displaying a service message ........ 330
Driving abroad ............................... 331
Hiding a service message .............. 330 Resetting the service interval dis-
play ................................................ 330
Service message ............................ 330
Special service requirements ......... 331
ATA (Anti-Theft Alarm system)
Activating/deactivating ................... 79
Function ........................................... 79
Switching off the alarm .................... 79
ATTENTION ASSIST
Activating/deactivating ................. 242
Display message ............................ 266
Function/note s............................. 207
Authorised workshop
see Qualified specialist workshop
AUTO lights
Display message ............................ 261
see Lights
Automatic engine start (ECO start/
stop function) .................................... 148
Automatic engine switch-off (ECO
start/stop function) .......................... 148
Automatic front-passenger front
airbag deactivation
Display message ............................ 259
Automatic front-passenger front
airbag deactivation system
Operation ......................................... 49
Problems ......................................... 53
System self-test ............................... 52
Automatic headlamp mode .............. 115
Automatic transmission
Accelerator pedal position ............. 156
Changing gear ............................... 156
DIRECT SELECT lever ..................... 154
Display message ............................ 275
Double-clutch function .................. 156
Drive program display .................... 155
Drive programs .............................. 157
Driving tip s.................................... 156
DYNAMIC SELECT switch .............. 152
Emergency running mod e.............. 161
Engaging drive position .................. 155
Engaging neutral ............................ 154
Engaging park position automati-
cally ............................................... 154
Engaging reverse gear ................... 154
Engaging the park position ............ 154
Gearshift recommendation ............ 160 Index
5
Page 241 of 389

X
Press :or9 to select the correspond-
ing DVD single drive or disc.
X Press ato confirm.
X To open the scene list: press the:or
9 button briefly.
X To select the next or previous scene in the
scene list: press the:or9 button
briefly.
X To select a scene from the scene list using
rapid scrolling: press and hold:or9
until desired scene :is reached.
X Press ato confirm your selection.
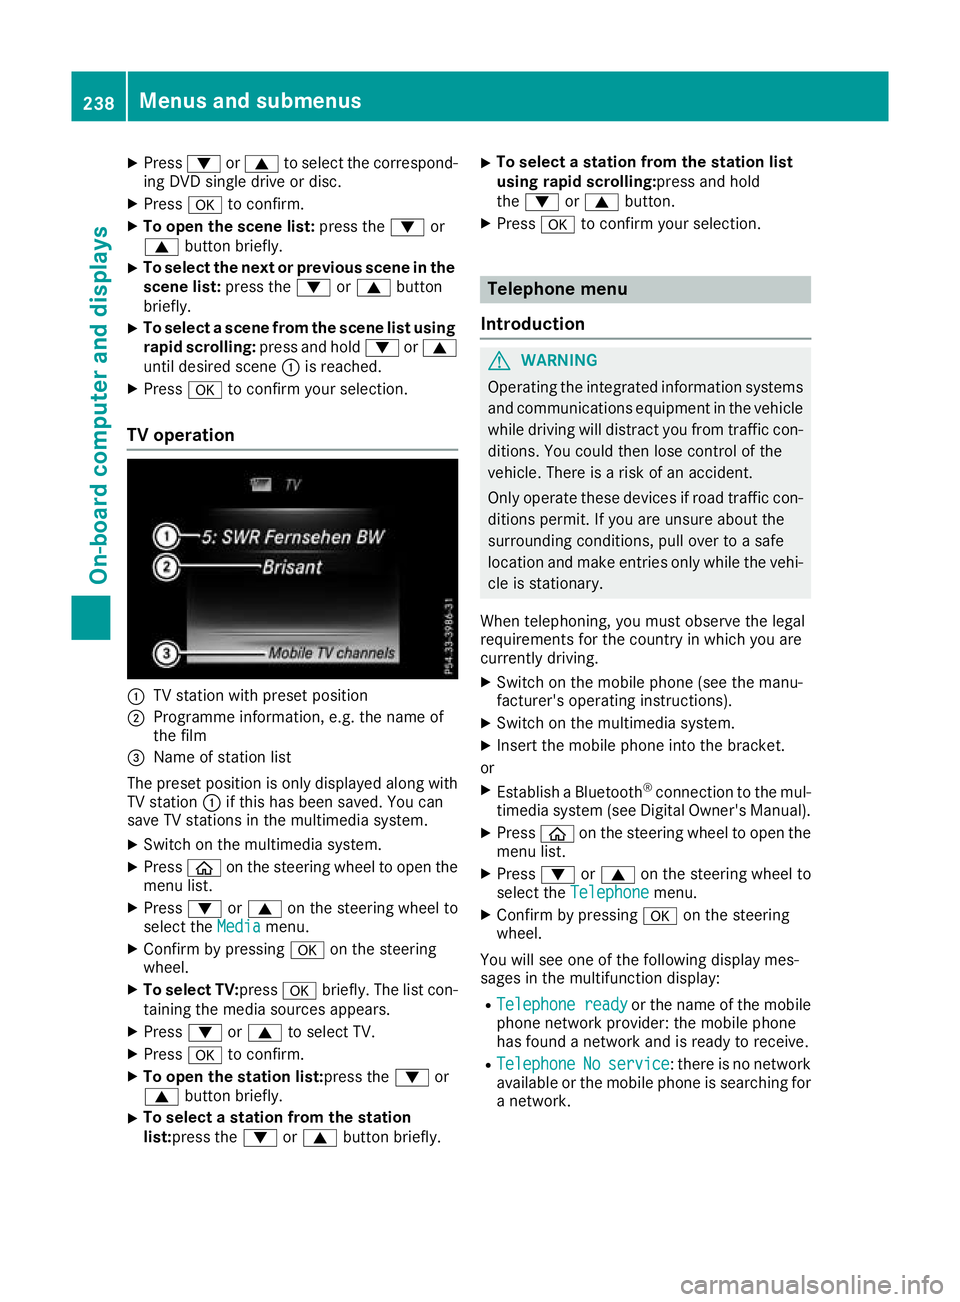
TV operation :
TV station with preset position
; Programme information, e.g. the name of
the film
= Name of station list
The preset position is only displayed along with TV station :if this has been saved. You can
save TV stations in the multimedia system.
X Switch on the multimedia system.
X Press òon the steering wheel to open the
menu list.
X Press :or9 on the steering wheel to
select the Media
Mediamenu.
X Confirm by pressing aon the steering
wheel.
X To select TV: pressabriefly. The list con-
taining the media sources appears.
X Press :or9 to select TV.
X Press ato confirm.
X To open the station list:press the :or
9 button briefly.
X To select a station from the station
list:press the
:or9 button briefly. X
To select a station from the station list
using rapid scrolling:press and hold
the
: or9 button.
X Press ato confirm your selection. Telephone menu
Introduction G
WARNING
Operating the integrated information systems and communications equipment in the vehicle
while driving will distract you from traffic con-
ditions. You could then lose control of the
vehicle. There is a risk of an accident.
Only operate these devices if road traffic con-
ditions permit. If you are unsure about the
surrounding conditions, pull over to a safe
location and make entries only while the vehi-
cle is stationary.
When telephoning, you must observe the legal
requirements for the country in which you are
currently driving. X Switch on the mobile phone (see the manu-
facturer's operating instructions).
X Switch on the multimedia system.
X Insert the mobile phone into the bracket.
or X Establish a Bluetooth ®
connection to the mul-
timedia system (see Digital Owner's Manual).
X Press òon the steering wheel to open the
menu list.
X Press :or9 on the steering wheel to
select the Telephone Telephone menu.
X Confirm by pressing aon the steering
wheel.
You will see one of the following display mes-
sages in the multifunction display:
R Telephone ready Telephone ready or the name of the mobile
phone network provider: the mobile phone
has found a network and is ready to receive.
R Telephone
Telephone No
Noservice
service: there is no network
available or the mobile phone is searching for
a network. 238
Menus and submenusOn-board computer and displays
Page 333 of 389

X
To open: pull cap:upwards by the tab and
open.
X Top up with the premixed washer fluid.
X To close: press cap :onto the filler neck
until it engages.
If the washer fluid level drops below the recom- mended minimum of 1.0 l, a message appears
on the multifunction display prompting you to
top up the washer fluid (Y page 279).
Further information on washer fluid
(Y page 378). ASSYST PLUS
Service message
The ASSYST PLUS service interval display
informs you of the next service due date.
Information on the type of service and service
intervals (see the separate Service Booklet).
Further information can be obtained at a quali-
fied specialist workshop, e.g. a Mercedes-Benz
Service Centre.
i The ASSYST PLUS service interval display
does not show any information on the engine oil level. Observe the notes on the engine oil
level (Y page 327).
The multifunction display shows a service mes-
sage for a few seconds, e.g.:
R Service A in XX days
Service A in XX days
R Service A due Service A due
R Service A overdue by XX days
Service A overdue by XX days
Depending on the operating conditions of the
vehicle, the remaining time or distance until the next service due date is displayed.
The letter indicates which service is due. A
A
stands for a minor service and B Bfor a major ser-
vice. A number or another letter may be dis-
played after the letter.
For certain countries only: the position after the
letter A Aor B
Bindicates any necessary additional
maintenance work. If you notify a qualified spe-
cialist workshop of this display, you will receive a statement on the associated costs.
The ASSYST PLUS service interval display does
not take into account any periods of time during
which the battery is disconnected. Maintaining the time-dependent service sched-
ule:
X Note down the service due date displayed in
the multifunction display before disconnect-
ing the battery.
or X After reconnecting the battery, subtract the
battery disconnection periods from the ser-
vice date shown on the display. Hiding service messages
X Press the aor% button on the steering
wheel. Displaying service messages
X Switch the ignition on.
X Use ò on the steering wheel to call up the
list of menus.
X Press 9or: on the steering wheel to
select the Service Servicemenu and confirm with
a.
X Press 9or: on the steering wheel to
select the ASSYST PLUS
ASSYST PLUS submenu and con-
firm with a.
The service due date appears in the multi-
function display. Information about service
Resetting the ASSYST PLUS service
interval display !
If the ASSYST PLUS service interval display
has been inadvertently reset, this setting can
be corrected at a qualified specialist work-
shop.
Have service work carried out as described in the Service Booklet. This may otherwise lead
to increased wear and damage to the major
assemblies or the vehicle.
A qualified specialist workshop, e.g. a
Mercedes-Benz Service Centre, will reset the
ASSYST PLUS service interval display after the
service work has been carried out. You can also
obtain further information on maintenance
work, for example. 330
ASSYST PLUSMaintenance and care