2016 MERCEDES-BENZ GLC COUPE fuel consumption
[x] Cancel search: fuel consumptionPage 15 of 389
Exterior lighting
Cleaning ........................................ .334
Settings options ............................ .115
see Lights
Exterior mirrors
Adjusting ....................................... 111
Anti-dazzle mode (automatic) ....... .112
Folding in/out (automatically) ....... 112
Folding in/out (electrically) ........... 111
Out of position (troubleshooting) ... 112
Parking position ............................. 112
Resetting ....................................... 111
Storing settings (memory func-
tion) ............................................... 113 F
Fault message see Display messages
Favourites
Overview ........................................ 295
Features ............................................. 315
Filler cap
see Fuel filler flap
Fire extinguisher ............................... 339
First-aid kit ......................................... 339
Fitting a wheel
Fitting a wheel ............................... 367
Lowering the vehicle ...................... 368
Preparing the vehicle ..................... 365
Raising the vehicl e......................... 366
Removing a whee l.......................... 367
Securing the vehicle against roll-
ing away ........................................ 365
Fitting/removing
front wheel arch cover ................... 123
Flat tyre
Changing a wheel/fitting the
spare whee l................................... 364
MOExtended tyre s......................... 341
Preparing the vehicle ..................... 341
TIREFIT kit ...................................... 342
see Emergency spare wheel
Floormat ............................................. 324
Foglamps (extended range) .............. 118
Frequencies
Mobile phone ................................. 371
Two-way radio ................................ 371 Front-passenger front airbag deac-
tivation
Display message ............................ 259
Front-passenger front airbag deac-
tivation system
Operation ......................................... 49
Problems ......................................... 53
System self-test ............................... 52
Fuel
Additives ........................................ 375
Consumption statistics .................. 233
Displaying the current consump-
tion ................................................ 233
Displaying the rang e...................... 233
Driving tips .................................... 170
E10 ................................................ 374
Fuel gaug e....................................... 34
Grade (petrol) ................................ 374
Important safety notes .................. 374
Low outside temperature s............. 376
Notes for GLC 300 4MATIC
Coupé, Mercedes-AMG GLC 43
4MATIC Coup é............................... 375
Problem (malfunction) ................... 164
Quality (diesel )............................... 375
Refuelling ....................................... 161
Tank content/reserve fue l............. 374
Fuel filler flap
Closing ........................................... 163
Opening ......................................... 162
Fuel filter (white display message) .. 265
Fuel level
Calling up the range (on-board
computer) ...................................... 233
Gaug e.............................................. 34
Fuel tank
Capacity ........................................ 374
Problem (malfunction) ................... 164
Fuses
Allocation chart ............................. 355
Before changing ............................. 354
Dashboard fuse box ....................... 354
Fuse box in the engine compart-
ment .............................................. 355
Fuse box in the front-passenger
footwell .......................................... 354
Fuse box in the luggage compart-
ment .............................................. 355 12
Index
Page 29 of 389
Environmental protection
General notes
H
Environmental note
Daimler's declared policy is one of compre-
hensive environmental protection.
Our objectives are to use the natural resour-
ces which form the basis of our existence on
this planet sparingly and in a manner which
takes the requirements of both nature and
humanity into consideration.
You too can help to protect the environment
by operating your vehicle in an environmen-
tally-responsible manner.
Fuel consumption and the rate of engine,
transmission, brake and tyre wear depend on
the following factors:
R operating conditions of your vehicle
R your personal driving style
You can influence both factors. Therefore,
please bear the following in mind:
Operating conditions:
R avoid short trips, as these increase fuel
consumption.
R observe the correct tyre pressure.
R do not carry any unnecessary weight in the
vehicle.
R remove the roof rack once you no longer
need it.
R a regularly serviced vehicle will contribute
to environmental protection. You should
therefore adhere to the service intervals.
R all maintenance work should be carried out
at a qualified specialist workshop.
Personal driving style:
R do not depress the accelerator pedal when
starting the engine.
R do not warm up the engine when the vehicle
is stationary.
R drive carefully and maintain a safe distance
from the vehicle in front.
R avoid frequent, sudden acceleration and
braking. R
change gear in good time and use each gear
only up to Ôof its maximum engine speed.
R switch off the engine in stationary traffic.
R monitor the vehicle's fuel consumption. Returning an end-of-life vehicle
EU countries only:
Mercedes-Benz will take back your end-of-life
vehicle for environmentally-friendly disposal in
accordance with the European Union (EU) End-
Of-Life Vehicles Directive.
A network of vehicle take-back points and dis-
mantlers has been established for you to return
your vehicle. You can leave it at any of these
points free of charge. This makes an important
contribution to closing the recycling circle and
conserving resources.
For further information about the recycling and
disposal of end-of-life, and the take-back con-
ditions, please visit the national Mercedes-Benz
website for your country. Genuine Mercedes-Benz parts
H
Environmental note
Daimler AG also supplies reconditioned
assemblies and parts which are of the same
quality as new parts. For these, the same war- ranty applies as for new parts.
! Airbags and seat belt tensioners, as well as
control units and sensors for these restraint
systems, may be installed in the following
areas of your vehicle:
R doors
R door pillars
R door sills
R seats
R dashboard
R instrument cluster
R centre console
Do not install accessories such as audio sys-
tems in these areas. Do not carry out repairs
or welding. You could impair the operating
efficiency of the restraint systems. 26
Genuine Mercedes-Benz partsIntroduction
Page 161 of 389
Drive program S+ (Sport Plus)
Drive program
S+is characterised by the fol-
lowing:
R the vehicle exhibits particularly sporty driving
characteristics
R the vehicle pulls away in first gear
R the automatic transmission shifts up later,
fuel consumption may be higher as a result of
the later automatic transmission shift points
R the suspension exhibits particularly firm
springing and damping settings (vehicles with
AIR BODY CONTROL)
R gliding mode is not available
R the ECO start/stop function is not available
Drive program S (Sport) Drive program
Sis characterised by the follow-
ing:
R the vehicle exhibits sporty driving character-
istics
R the vehicle pulls away in first gear
R the automatic transmission shifts up later,
fuel consumption may be higher as a result of
the later automatic transmission shift points
R the suspension exhibits particularly firm
springing and damping settings (vehicles with
AIR BODY CONTROL)
R gliding mode is not available
R the ECO start/stop function is not available
Drive program C (Comfort) Drive program
Cis characterised by the follow-
ing:
R the vehicle exhibits comfortable, economical
driving characteristics
R the vehicle pulls away more gently in forward
and reverse gears unless the accelerator
pedal is depressed fully
R the vehicle has improved driving stability, e.g.
on slippery road surfaces
R optimal fuel consumption resulting from the
automatic transmission shifting up sooner,
the vehicle is driven in the low engine speed
range and the wheels are less likely to spin
R gliding mode is not available (except
Mercedes-AMG vehicles) Drive program E (Economy) Drive program
Eis characterised by the follow-
ing:
R the vehicle exhibits particularly economical
driving characteristics
R the vehicle pulls away more gently in forward
and reverse gears unless the accelerator
pedal is depressed fully
R the vehicle has improved driving stability, e.g.
on slippery road surfaces
R optimal fuel consumption resulting from the
automatic transmission shifting up sooner,
the vehicle is driven in the low engine speed
range and the wheels are less likely to spin
R during deceleration, the engine is disconnec-
ted from the drive train – The vehicle uses
kinetic energy and consumes less fuel (over-
run mode)
R the cooling and heating output of the climate
control system has been reduced Manual gearshifting
General notes You can shift gears yourself using the steering
wheel gearshift paddles. The transmission must
be in position Dto do this.
Depending on which steering wheel gearshift
paddle is pulled, the automatic transmission
immediately shifts to the next gear up or down,
if permitted.
Mercedes-AMG vehicles: to use manual gear-
shifting, you have two options:
R temporary setting
R permanent setting
If you activate manual gearshifting, the multi-
function display will show the current gear
instead of transmission position D.
If you deactivate manual gearshifting, the gears will be shifted automatically again. 158
Automatic transmissionDriving and pa
rking
Page 173 of 389
Emergency braking
The vehicle can also be braked during an emer-
gency by using the electric parking brake.
X While driving, press handle :of the electric
parking brake (Y page 169).
The vehicle is braked as long as you keep
handle :of the electric parking brake
depressed. The longer electric parking brake
handle :is depressed, the greater the brak-
ing force.
During braking:
R a warning tone sounds
R the Release parking brake
Release parking brake display mes-
sage appears
R red indicator lamp !on the instrument
cluster flashes
When the vehicle has been braked to a stand-
still, the electric parking brake is applied. Parking up the vehicle
If you leave the vehicle parked up for longer than
four weeks, the battery may be damaged by
exhaustive discharging.
If you leave the vehicle parked up for longer than
six weeks, it may suffer from lack of use.
X Contact a qualified specialist workshop and
seek advice.
i You can obtain information on trickle charg-
ers from a qualified specialist workshop.
Hybrid vehicles: observe the notes on the high-
voltage battery in the separate Owner's Manual. Driving tips
General driving tips
Important safety notes G
WARNING
If you switch off the ignition while driving,
safety-relevant functions are only available
with limitations, or not at all. This could affect, for example, the power steering and the brake
boosting effect. You will require considerably
more effort to steer and brake. There is a risk of an accident. Do not switch off the ignition while driving.
Drive sensibly – save fuel Observe the following tips to save fuel:
X The tyres should always be inflated to the rec-
ommended tyre pressure.
X Remove unnecessary loads.
X Remove roof racks when they are not needed.
X Warm up the engine at low engine speeds.
X Avoid frequent acceleration or braking.
X Have all maintenance work carried out as
indicated by the service intervals in the Ser-
vice Booklet or by the service interval display.
Fuel consumption also increases when driving in
cold weather, in stop-start traffic, on short jour- neys and in hilly terrain. ECO display
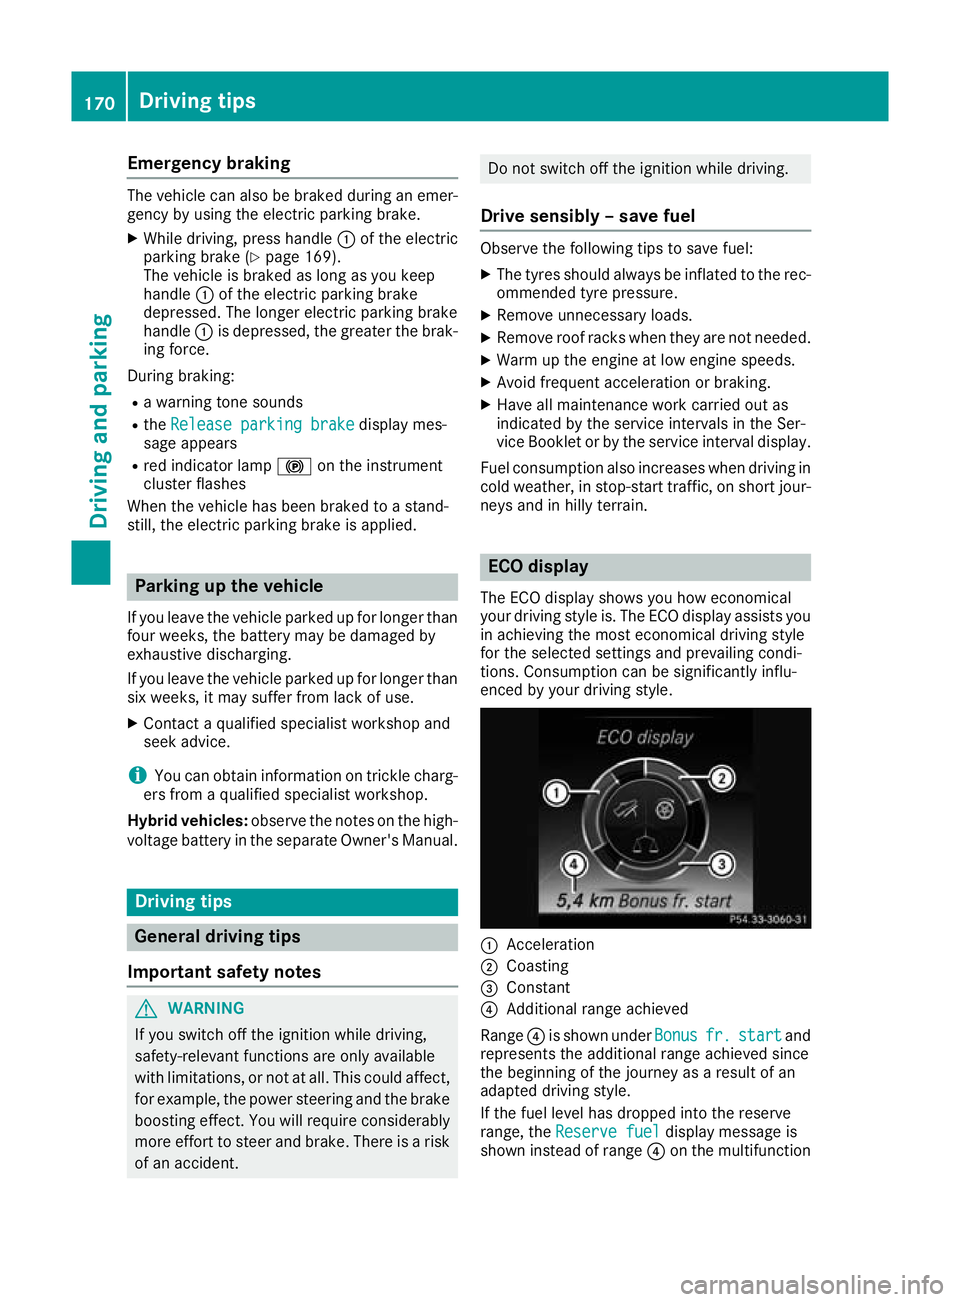
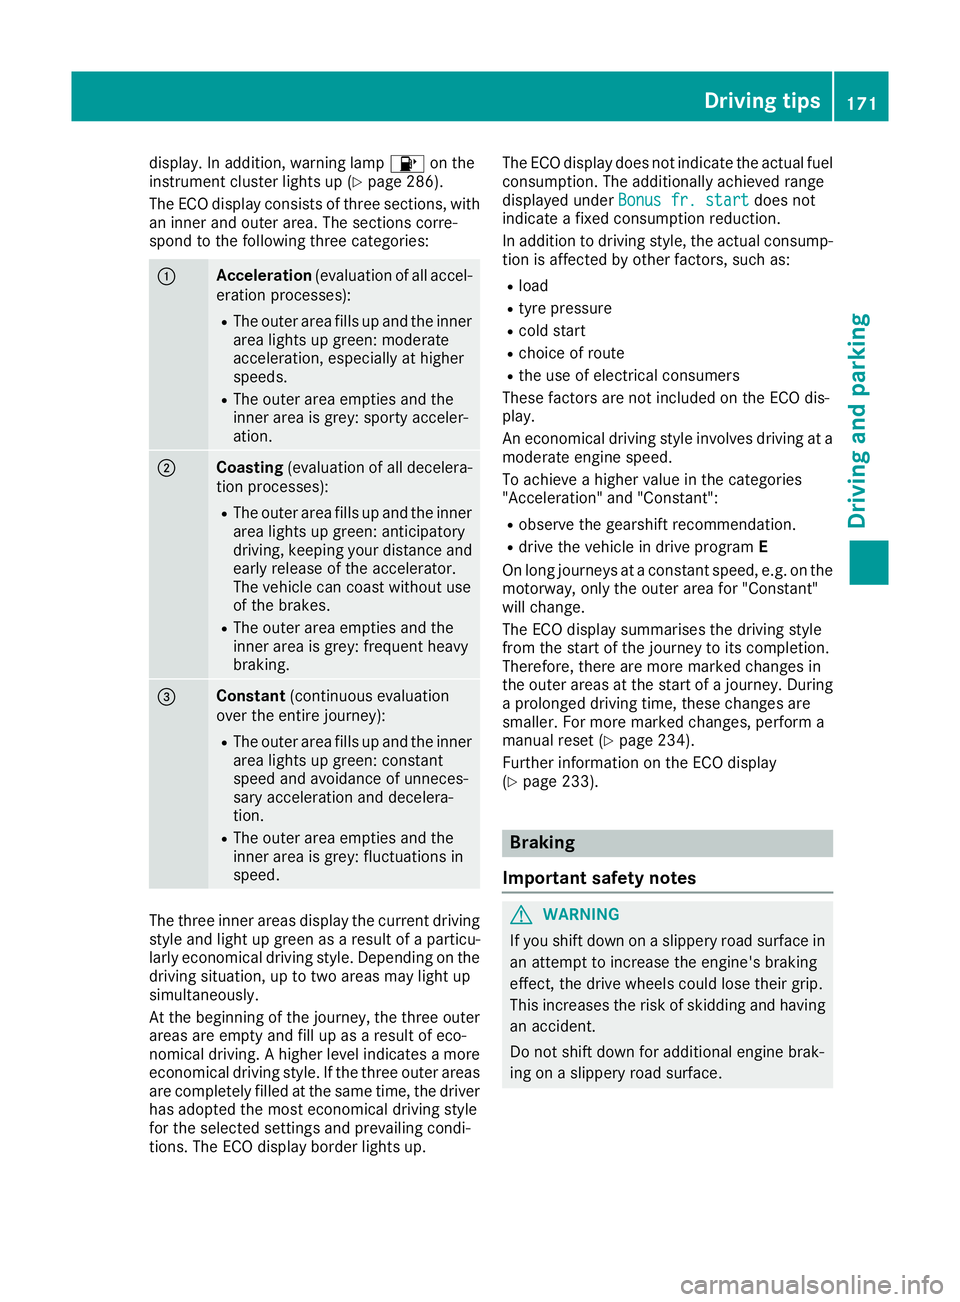
The ECO display shows you how economical
your driving style is. The ECO display assists you in achieving the most economical driving style
for the selected settings and prevailing condi-
tions. Consumption can be significantly influ-
enced by your driving style. :
Acceleration
; Coasting
= Constant
? Additional range achieved
Range ?is shown under Bonus Bonusfr. fr.start
start and
represents the additional range achieved since
the beginning of the journey as a result of an
adapted driving style.
If the fuel level has dropped into the reserve
range, the Reserve fuel Reserve fuel display message is
shown instead of range ?on the multifunction 170
Driving tipsDriving and parking
Page 174 of 389
display. In addition, warning lamp
8on the
instrument cluster lights up (Y page 286).
The ECO display consists of three sections, with an inner and outer area. The sections corre-
spond to the following three categories: :
Acceleration
(evaluation of all accel-
eration processes):
R The outer area fills up and the inner
area lights up green: moderate
acceleration, especially at higher
speeds.
R The outer area empties and the
inner area is grey: sporty acceler-
ation. ;
Coasting
(evaluation of all decelera-
tion processes):
R The outer area fills up and the inner
area lights up green: anticipatory
driving, keeping your distance and early release of the accelerator.
The vehicle can coast without use
of the brakes.
R The outer area empties and the
inner area is grey: frequent heavy
braking. =
Constant
(continuous evaluation
over the entire journey):
R The outer area fills up and the inner
area lights up green: constant
speed and avoidance of unneces-
sary acceleration and decelera-
tion.
R The outer area empties and the
inner area is grey: fluctuations in
speed. The three inner areas display the current driving
style and light up green as a result of a particu-
larly economical driving style. Depending on the driving situation, up to two areas may light up
simultaneously.
At the beginning of the journey, the three outer
areas are empty and fill up as a result of eco-
nomical driving. A higher level indicates a more
economical driving style. If the three outer areas
are completely filled at the same time, the driver
has adopted the most economical driving style
for the selected settings and prevailing condi-
tions. The ECO display border lights up. The ECO display does not indicate the actual fuel
consumption. The additionally achieved range
displayed under Bonus fr. start
Bonus fr. start does not
indicate a fixed consumption reduction.
In addition to driving style, the actual consump- tion is affected by other factors, such as:
R load
R tyre pressure
R cold start
R choice of route
R the use of electrical consumers
These factors are not included on the ECO dis-
play.
An economical driving style involves driving at a moderate engine speed.
To achieve a higher value in the categories
"Acceleration" and "Constant":
R observe the gearshift recommendation.
R drive the vehicle in drive program E
On long journeys at a constant speed, e.g. on the motorway, only the outer area for "Constant"
will change.
The ECO display summarises the driving style
from the start of the journey to its completion.
Therefore, there are more marked changes in
the outer areas at the start of a journey. During
a prolonged driving time, these changes are
smaller. For more marked changes, perform a
manual reset (Y page 234).
Further information on the ECO display
(Y page 233). Braking
Important safety notes G
WARNING
If you shift down on a slippery road surface in an attempt to increase the engine's braking
effect, the drive wheels could lose their grip.
This increases the risk of skidding and having
an accident.
Do not shift down for additional engine brak-
ing on a slippery road surface. Driving tips
171Driving and parking Z
Page 236 of 389
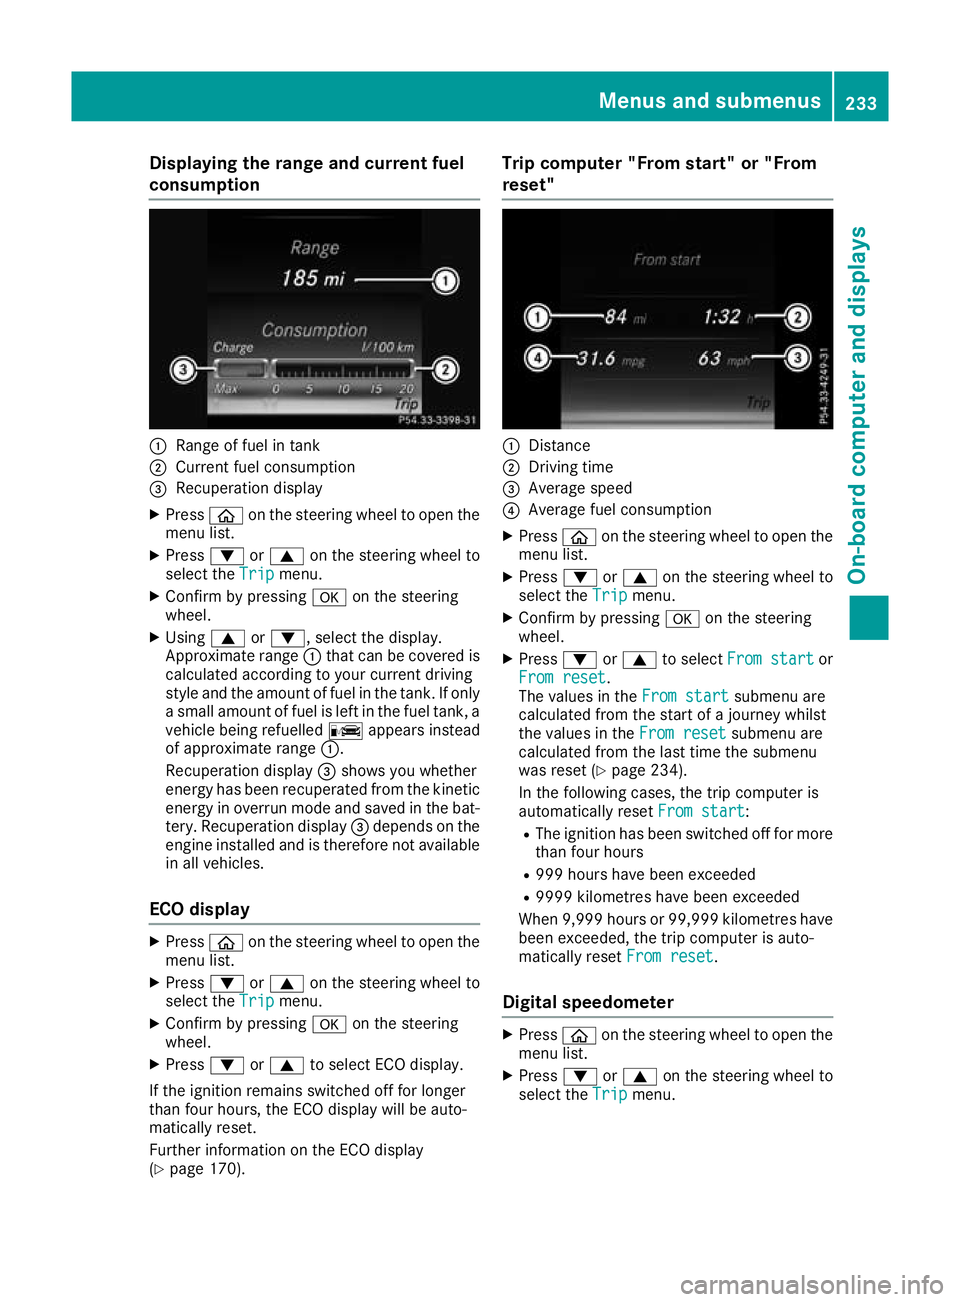
Displaying the range and current fuel
consumption :
Range of fuel in tank
; Current fuel consumption
= Recuperation display
X Press òon the steering wheel to open the
menu list.
X Press :or9 on the steering wheel to
select the Trip
Tripmenu.
X Confirm by pressing aon the steering
wheel.
X Using 9or:, select the display.
Approximate range :that can be covered is
calculated according to your current driving
style and the amount of fuel in the tank. If only a small amount of fuel is left in the fuel tank, a
vehicle being refuelled Cappears instead
of approximate range :.
Recuperation display =shows you whether
energy has been recuperated from the kinetic energy in overrun mode and saved in the bat-
tery. Recuperation display =depends on the
engine installed and is therefore not available in all vehicles.
ECO display X
Press òon the steering wheel to open the
menu list.
X Press :or9 on the steering wheel to
select the Trip
Trip menu.
X Confirm by pressing aon the steering
wheel.
X Press :or9 to select ECO display.
If the ignition remains switched off for longer
than four hours, the ECO display will be auto-
matically reset.
Further information on the ECO display
(Y page 170). Trip computer "From start" or "From
reset"
:
Distance
; Driving time
= Average speed
? Average fuel consumption
X Press òon the steering wheel to open the
menu list.
X Press :or9 on the steering wheel to
select the Trip
Trip menu.
X Confirm by pressing aon the steering
wheel.
X Press :or9 to select From start From start or
From reset
From reset.
The values in the From start From startsubmenu are
calculated from the start of a journey whilst
the values in the From reset From resetsubmenu are
calculated from the last time the submenu
was reset (Y page 234).
In the following cases, the trip computer is
automatically reset From start From start:
R The ignition has been switched off for more
than four hours
R 999 hours have been exceeded
R 9999 kilometres have been exceeded
When 9,999 hour sor 99,999 kilometres have
been exceeded, the trip computer is auto-
matically reset From reset
From reset.
Digital speedometer X
Press òon the steering wheel to open the
menu list.
X Press :or9 on the steering wheel to
select the Trip
Tripmenu. Menus and submenus
233On-board computer and displays Z
Page 300 of 389
Switching the ionisation on/off
The ionisation has a cleansing effect on the air in the vehicle interior. For further information, see (Y page 137).
X Call up the climate control menu
(Y page 296).
X To select Ionisation Ionisation: turn and press the
controller.
The setting element is active.
X To switch the ionisation on or off: turn the
controller.
X To exit the menu: press the%button.
Activating or deactivating pre-entry cli-
mate control via the key
This function is available for PLUG ‑IN HYBRID
vehicles.
Before getting in, the driver's seat area or the
whole vehicle interior is briefly warmed or ven-
tilated. The air from the vents is pre-cooled.
X Call up the climate control menu
(Y page 296).
X To select Pre-entry climate control
Pre-entry climate control
via key via key: turn and press the controller.
X To activate or deactivate: turn the control-
ler.
X To exit the menu: press the%button.
Activating or deactivating pre-entry cli-
mate control at departure time
This function is available for PLUG ‑IN HYBRID
vehicles.
The driver's seat and the vehicle interior are
heated or cooled prior to the set departure time.
X Call up the climate control menu
(Y page 296).
X To select Pre-entry climate control Pre-entry climate control
at depart. time
at depart. time: turn and press the con-
troller.
A rotary menu appears.
X To select the setting: turn the controller.
X To exit the menu: press the%button. Settings in the bottom bar of the cli-
mate control menu Activating/deactivating cooling with air
dehumidification
X Call up the climate control menu
(Y page 296).
X Slide 6the controller repeatedly until the
bottom bar is activated.
X To select O OA/C
A/C: turn and press the control-
ler.
X Switch cooling with air dehumidification on
O or off ª.
i The current status of the cooling function is
displayed in the climate control bar: A/C ON
– activated, A/C OFF – deactivated.
i Deactivating the cooling with air dehumidi-
fication function reduces fuel consumption.
Synchronising the climate control set-
tings Use O
O Sync. Sync. (synchronisation) to select the
climate control setting for all zones together O
or separately ª.
X Call up the climate control menu
(Y page 296).
X Slide 6the controller repeatedly until the
bottom bar is activated.
X To select O OSync. Sync.: turn and press the con-
troller.
X Switch the synchronisation function on Oor
off ª.
For further information on synchronising cli-
mate control settings, see (Y page 132). Navigation mode
Important safety notes G
WARNING
Operating the integrated information systems and communications equipment in the vehicle
while driving will distract you from traffic con-
ditions. You could then lose control of the
vehicle. There is a risk of an accident.
Only operate these devices if road traffic con-
ditions permit. If you are unsure about the Operating system
297Multimedia system
Z
Page 363 of 389
If you are unable to rectify the damage, con-
tact a qualified specialist workshop. H
Environmental note
Check the tyre pressure regularly, at least
every 14 days.
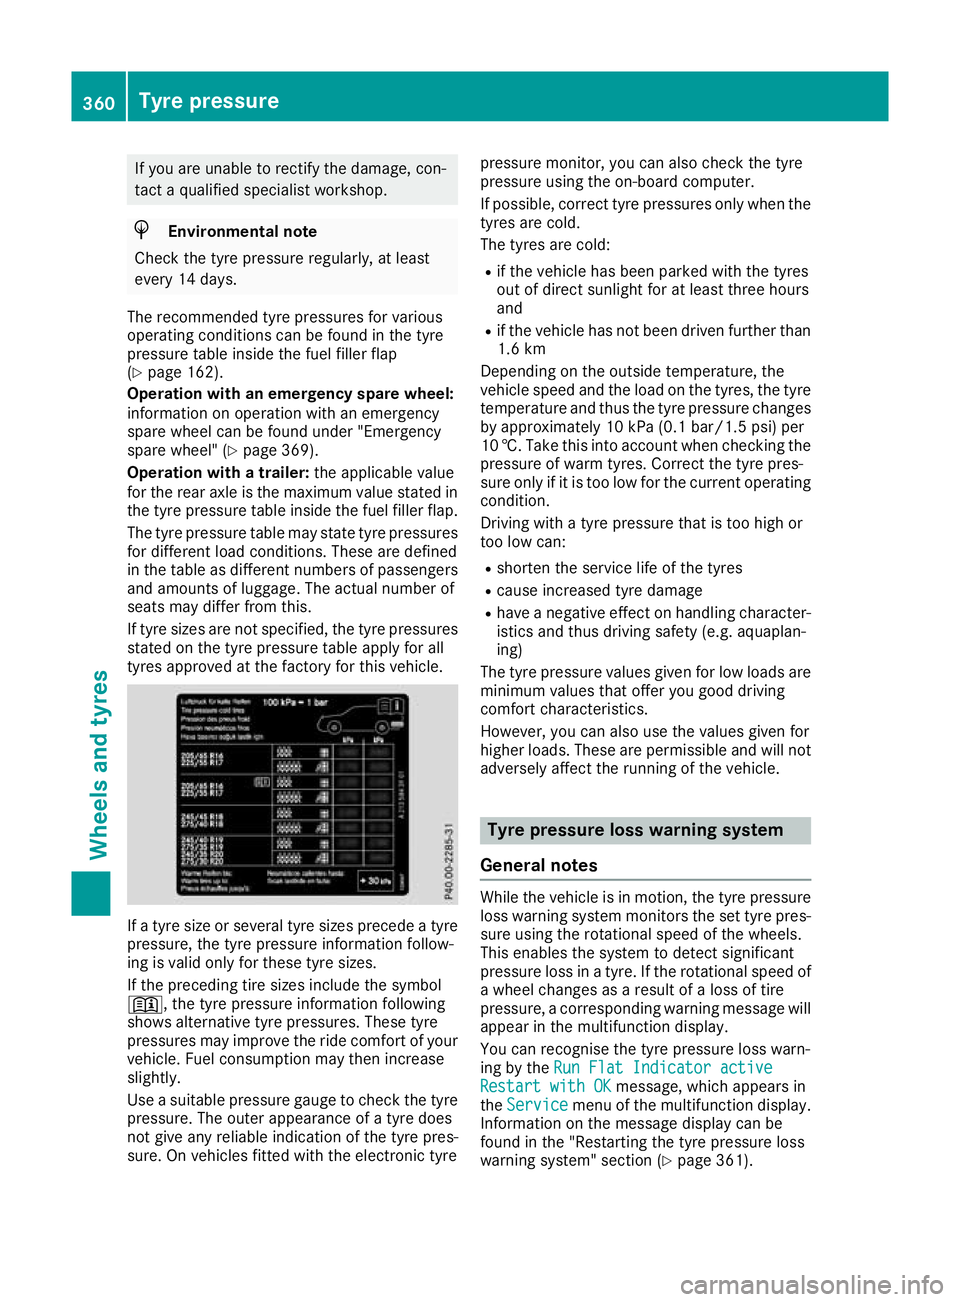
The recommended tyre pressures for various
operating conditions can be found in the tyre
pressure table inside the fuel filler flap
(Y page 162).
Operation with an emergency spare wheel:
information on operation with an emergency
spare wheel can be found under "Emergency
spare wheel" (Y page 369).
Operation with a trailer: the applicable value
for the rear axle is the maximum value stated in the tyre pressure table inside the fuel filler flap.
The tyre pressure table may state tyre pressures for different load conditions. These are defined
in the table as different numbers of passengers and amounts of luggage. The actual number of
seats may differ from this.
If tyre sizes are not specified, the tyre pressures
stated on the tyre pressure table apply for all
tyres approved at the factory for this vehicle. If a tyre size or several tyre sizes precede a tyre
pressure, the tyre pressure information follow-
ing is valid only for these tyre sizes.
If the preceding tire sizes include the symbol
+, the tyre pressure information following
shows alternative tyre pressures. These tyre
pressures may improve the ride comfort of your
vehicle. Fuel consumption may then increase
slightly.
Use a suitable pressure gauge to check the tyre
pressure. The outer appearance of a tyre does
not give any reliable indication of the tyre pres-
sure. On vehicles fitted with the electronic tyre pressure monitor, you can also check the tyre
pressure using the on-board computer.
If possible, correct tyre pressures only when the
tyres are cold.
The tyres are cold:
R if the vehicle has been parked with the tyres
out of direct sunlight for at least three hours
and
R if the vehicle has not been driven further than
1.6 km
Depending on the outside temperature, the
vehicle speed and the load on the tyres, the tyre temperature and thus the tyre pressure changes by approximately 10 kPa (0.1 bar/1.5 psi) per
10 †. Take this into account when checking the
pressure of warm tyres. Correct the tyre pres-
sure only if it is too low for the current operating
condition.
Driving with a tyre pressure that is too high or
too low can:
R shorten the service life of the tyres
R cause increased tyre damage
R have a negative effect on handling character-
istics and thus driving safety (e.g. aquaplan-
ing)
The tyre pressure values given for low loads are
minimum values that offer you good driving
comfort characteristics.
However, you can also use the values given for
higher loads. These are permissible and will not
adversely affect the running of the vehicle. Tyre pressure loss warning system
General notes While the vehicle is in motion, the tyre pressure
loss warning system monitors the set tyre pres-
sure using the rotational speed of the wheels.
This enables the system to detect significant
pressure loss in a tyre. If the rotational speed of
a wheel changes as a result of a loss of tire
pressure, a corresponding warning message will appear in the multifunction display.
You can recognise the tyre pressure loss warn-
ing by the Run Flat Indicator active Run Flat Indicator active
Restart with OK
Restart with OK message, which appears in
the Service
Service menu of the multifunction display.
Information on the message display can be
found in the "Restarting the tyre pressure loss
warning system" section (Y page 361).360
Tyre pressureWheels and tyres