2016 MERCEDES-BENZ GLC COUPE transmission
[x] Cancel search: transmissionPage 200 of 389
ing procedure will be cancelled. A sensible
parking position can no longer be achieved
from this position.
Exiting a parking space In order that Active Parking Assist can support
you when you are exiting a parking space:
R the border of the parking space must be high
enough at the front and the rear. A kerb, for
example, is too small.
R the border of the parking space must not be
too wide. Your vehicle can be manoeuvred
into the parking space at a maximum angle of
45° to the starting position.
R a manoeuvring distance of at least 1.0 mmust
be available.
Active Parking Assist can assist you with exiting
a parking space as well only if you have parked
the vehicle parallel to the direction of travel
using Active Parking Assist.
i If PARKTRONIC detects obstacles, Active
Parking Assist brakes automatically whilst the vehicle is exiting the parking space. You are
responsible for braking in good time.
X Start the engine.
X Release the electric parking brake.
X Switch on the turn signal in the direction in
which you intend to pull away.
X Shift the transmission to position Dor R.
The Start
Start Park ParkAssist?
Assist? Yes:
Yes:OK
OKNo:
No: %
message appears on the multifunction dis-
play.
X To cancel the procedure: press the%
button on the multifunction steering wheel or pull away.
or
X To exit a parking space with assistance
from Active Parking Assist: press thea
button on the multifunction steering wheel.
The Park Assist active Accelerate Park Assist active Accelerate
and brake
and brake Observe surroundings
Observe surroundings mes-
sage appears on the multifunction display.
X Release the multifunction steering wheel.
X Pull away, being ready to brake at all times. Do
not exceed a speed of approximately
10 km/h when exiting a parking space. Oth-
erwise, Active Parking Assist will be cancel-
led. X
Depending on the message or as required,
shift the transmission to position Dor R.
Active Parking Assist immediately steers in
the other direction. The Park Assist
Park Assist
active Accelerate and brake active Accelerate and brake Observe
Observe
surroundings
surroundings message appears on the mul-
tifunction display.
i You will achieve the best results in exiting a
parking space if you wait for the steering pro- cedure to complete before pulling away.
If you reverse after activation, the steering
wheel is moved to the straight-ahead posi-
tion.
X Drive forwards and reverse as prompted by
the PARKTRONIC warning displays, several
times if necessary.
Once you have exited the parking space com-
pletely, the steering wheel is moved to the
straight-ahead position. You hear a tone and the
Park Park Assist
Assist switched
switched off
offmessage appears
on the multifunction display. You will then have to steer and merge into traffic on your own.
PARKTRONIC is still available. You can take over
the steering again before the vehicle has exited the parking space completely. This is useful if
you recognise that it is already possible to pull
out of the parking space.
Cancelling Active Parking Assist X
Stop the movement of the multifunction
steering wheel or steer yourself.
Active Parking Assist will be cancelled at
once. The Park Assist cancelled Park Assist cancelled mes-
sage appears in the multifunction display.
or
X Press the PARKTRONIC button (Y page 193).
PARKTRONIC is switched off and Active Park- ing Assist is immediately cancelled. The
Park Assist cancelled Park Assist cancelled message appears
in the multifunction display.
Active Parking Assist is cancelled automatically
if:
R the electric parking brake is applied
R transmission position Pis selected
R parking using Active Parking Assist is no lon-
ger possible
R you are driving faster than 10 km/h
R a wheel spins and ESP ®
intervenes or fails.
The ÷ warning lamp lights up in the instru-
ment cluster. Driving systems
197Driving and parking Z
Page 202 of 389
The image from the reversing camera is avail-
able throughout the manoeuvring process.
X To switch the function mode for vehicles
with trailer tow hitch:using the controller,
select symbol :for the "Reverse parking"
function or symbol ;for "Coupling up a
trailer".
The symbol of the selected function is high-
lighted.
X To deactivate: shift transmission to position
P.
or X Drive forwards at a speed greater than
12 km/h.
Multimedia system display The reversing camera may show a distorted view
of obstacles, show them incorrectly or not at all.
Obstacles are not shown by the reversing cam-
era in the following locations:
R very close to the rear bumper
R under the rear bumper
R in the area immediately above the recessed
tailgate handle
! Objects not at ground level may appear to
be further away than they actually are, e.g.:
R the bumper of a parked vehicle
R the drawbar of a trailer
R the ball coupling of a trailer tow hitch
R the rear section of an HGV
R a slanted post
Use the guidelines only for orientation.
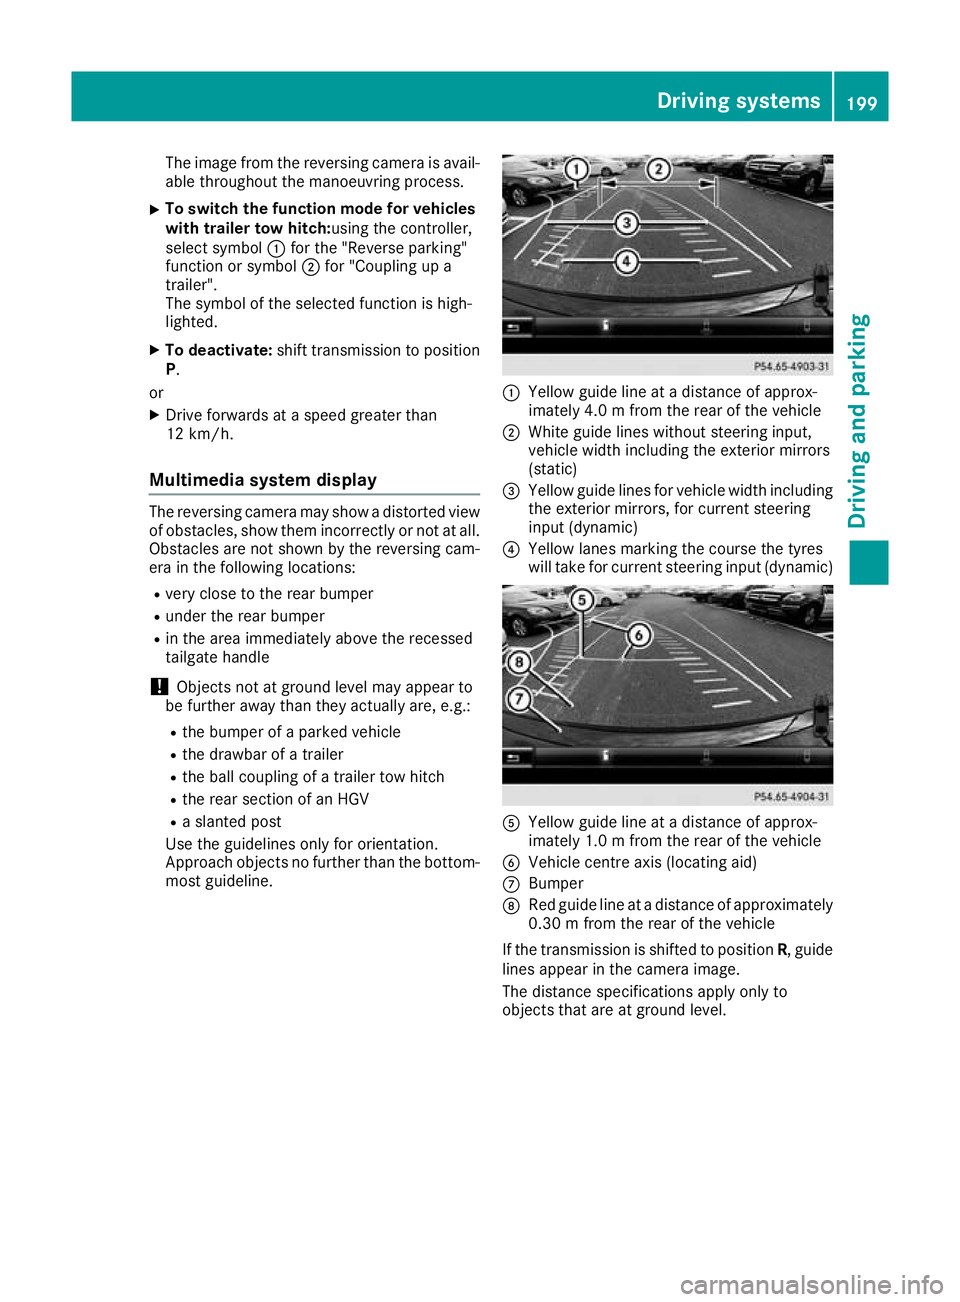
Approach objects no further than the bottom- most guideline. :
Yellow guide line at a distance of approx-
imately 4.0 m from the rear of the vehicle
; White guide lines without steering input,
vehicle width including the exterior mirrors
(static)
= Yellow guide lines for vehicle width including
the exterior mirrors, for current steering
input (dynamic)
? Yellow lanes marking the course the tyres
will take for current steering input (dynamic) A
Yellow guide line at a distance of approx-
imately 1.0 m from the rear of the vehicle
B Vehicle centre axis (locating aid)
C Bumper
D Red guide line at a distance of approximately
0.30 m from the rear of the vehicle
If the transmission is shifted to position R, guide
lines appear in the camera image.
The distance specifications apply only to
objects that are at ground level. Driving systems
199Driving and parking Z
Page 205 of 389
X
Select symbol ?using the multimedia sys-
tem controller.
The "Coupling up a trailer" function is selec-
ted. The distance specifications now apply
only to objects that are at the same level as
the ball coupling.
X Reverse carefully, making sure that trailer
drawbar locating aid =points approximately
in the direction of trailer drawbar ;.
X Reverse carefully until trailer drawbar ;rea-
ches red guide line B.
The distance between trailer drawbar ;and
red guide line Bis now approximately
0.30 m.
X Couple up the trailer (Y page 222).
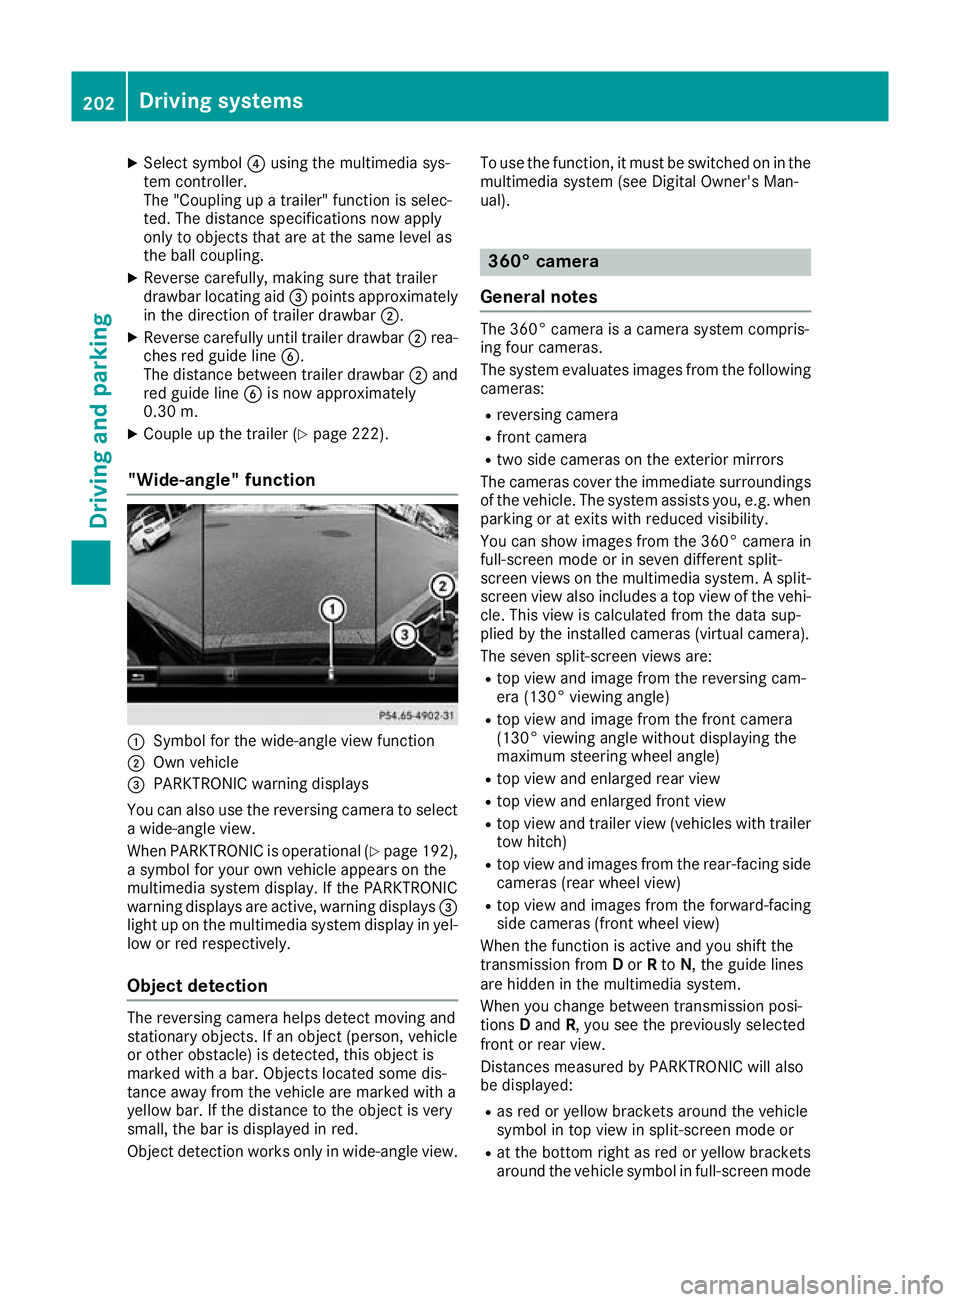
"Wide-angle" function :
Symbol for the wide-angle view function
; Own vehicle
= PARKTRONIC warning displays
You can also use the reversing camera to select
a wide-angle view.
When PARKTRONIC is operational (Y page 192),
a symbol for your own vehicle appears on the
multimedia system display. If the PARKTRONIC
warning displays are active, warning displays =
light up on the multimedia system display in yel- low or red respectively.
Object detection The reversing camera helps detect moving and
stationary objects. If an object (person, vehicle
or other obstacle) is detected, this object is
marked with a bar. Objects located some dis-
tance away from the vehicle are marked with a
yellow bar. If the distance to the object is very
small, the bar is displayed in red.
Object detection works only in wide-angle view. To use the function, it must be switched on in the
multimedia system (see Digital Owner's Man-
ual). 360° camera
General notes The 360° camera is a camera system compris-
ing four cameras.
The system evaluates images from the following
cameras:
R reversing camera
R front camera
R two side cameras on the exterior mirrors
The cameras cover the immediate surroundings
of the vehicle. The system assists you, e.g. when
parking or at exits with reduced visibility.
You can show images from the 360° camera in
full-screen mode or in seven different split-
screen views on the multimedia system. A split-
screen view also includes a top view of the vehi- cle. This view is calculated from the data sup-
plied by the installed cameras (virtual camera).
The seven split-screen views are:
R top view and image from the reversing cam-
era (130° viewing angle)
R top view and image from the front camera
(130° viewing angle without displaying the
maximum steering wheel angle)
R top view and enlarged rear view
R top view and enlarged front view
R top view and trailer view (vehicles with trailer
tow hitch)
R top view and images from the rear-facing side
cameras (rear wheel view)
R top view and images from the forward-facing
side cameras (front wheel view)
When the function is active and you shift the
transmission from Dor Rto N, the guide lines
are hidden in the multimedia system.
When you change between transmission posi-
tions Dand R, you see the previously selected
front or rear view.
Distances measured by PARKTRONIC will also
be displayed:
R as red or yellow brackets around the vehicle
symbol in top view in split-screen mode or
R at the bottom right as red or yellow brackets
around the vehicle symbol in full-screen mode 202
Driving systemsDriving an
d parking
Page 208 of 389
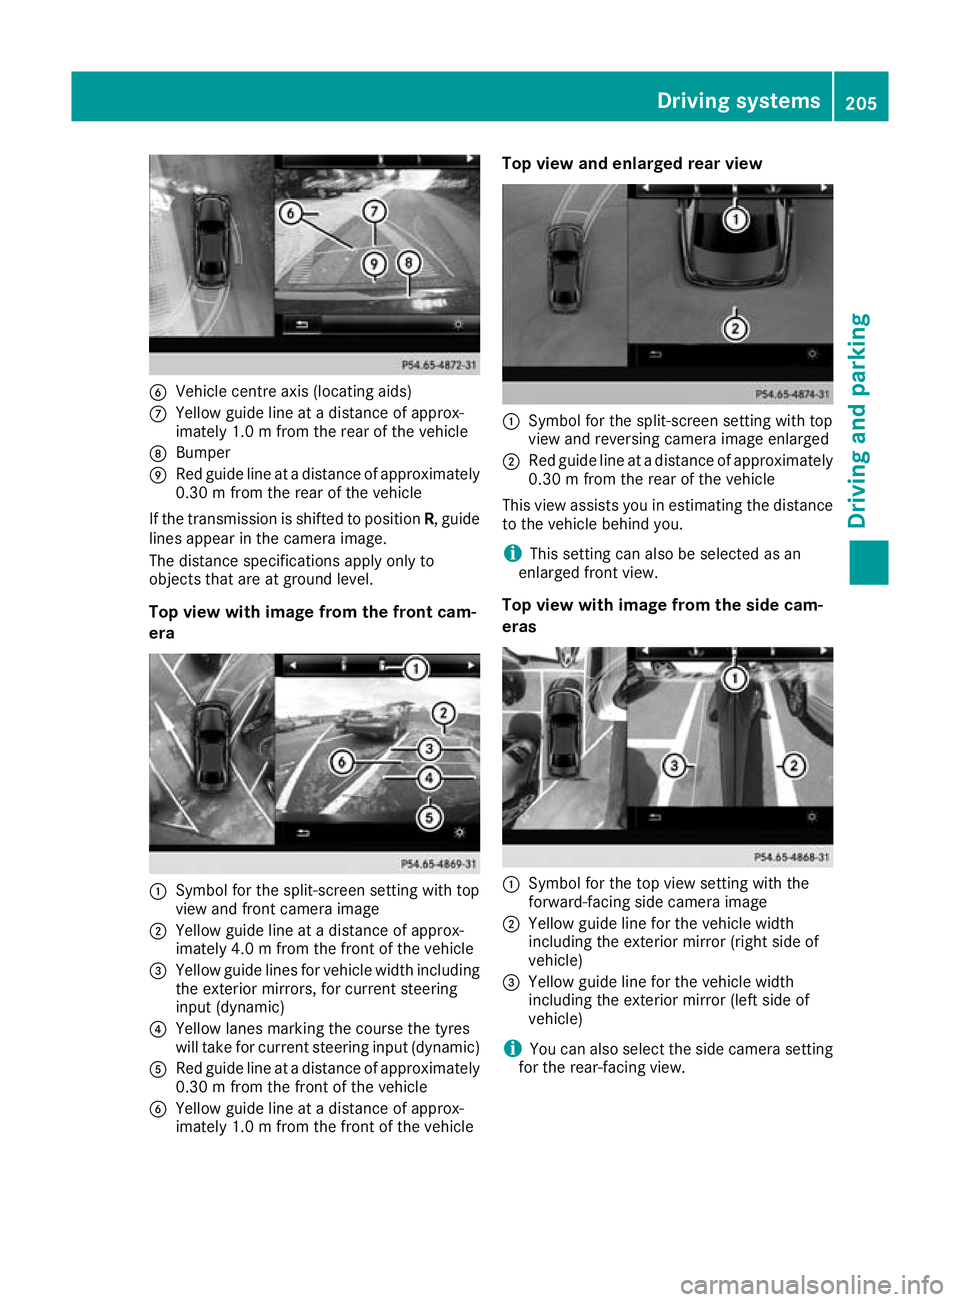
B
Vehicle centre axis (locating aids)
C Yellow guide line at a distance of approx-
imately 1.0 m from the rear of the vehicle
D Bumper
E Red guide line at a distance of approximately
0.30 m from the rear of the vehicle
If the transmission is shifted to position R, guide
lines appear in the camera image.
The distance specifications apply only to
objects that are at ground level.
Top view with image from the front cam-
era :
Symbol for the split-screen setting with top
view and front camera image
; Yellow guide line at a distance of approx-
imately 4.0 m from the front of the vehicle
= Yellow guide lines for vehicle width including
the exterior mirrors, for current steering
input (dynamic)
? Yellow lanes marking the course the tyres
will take for current steering input (dynamic)
A Red guide line at a distance of approximately
0.30 m from the front of the vehicle
B Yellow guide line at a distance of approx-
imately 1.0 m from the front of the vehicle Top view and enlarged rear view
:
Symbol for the split-screen setting with top
view and reversing camera image enlarged
; Red guide line at a distance of approximately
0.30 m from the rear of the vehicle
This view assists you in estimating the distance to the vehicle behind you.
i This setting can also be selected as an
enlarged front view.
Top view with image from the side cam-
eras :
Symbol for the top view setting with the
forward-facing side camera image
; Yellow guide line for the vehicle width
including the exterior mirror (right side of
vehicle)
= Yellow guide line for the vehicle width
including the exterior mirror (left side of
vehicle)
i You can also select the side camera setting
for the rear-facing view. Driving systems
205Driving and parking Z
Page 209 of 389

"Coupling up a trailer" function
:
Vehicle centre point on the yellow guide line
at a distance of approximately 1.0 m from
the rear of the vehicle
; Trailer drawbar
= Red guide line at a distance of approximately
0.30 m from the rear of the vehicle
X Set the height of trailer drawbar ;so that it
is slightly higher than the ball coupling.
X Position the vehicle centrally in front of trailer
drawbar ;. For technical reasons, the ball coupling
Bof
the trailer tow hitch on the multimedia system
display is either only partially visible or not visi-
ble at all.
X Select symbol ?using the controller.
The "Coupling up a trailer" function is selec-
ted. The distance specifications now apply
only to objects that are at the same level as
the ball coupling.
X Reverse carefully, making sure that trailer
drawbar locating aid Apoints approximately
in the direction of the trailer drawbar. X
Reverse carefully until the trailer drawbar rea-
ches red guide line C.
The distance between the trailer drawbar and
red guide line Cis now approximately
0.30 m.
X Couple up the trailer (Y page 222).
The lines are shown at the level of the trailer tow hitch.
180° view :
Symbol for the full-screen setting with the
reversing camera image
; Own vehicle
= PARKTRONIC warning displays
i 180° view can also be selected as front
view.
Select this view when you are driving out of an
exit and the view of crossing traffic is restricted,
for example.
If you select the %symbol on the display and
confirm with the controller, the split-screen view appears.
Stopping the 360° camera display X
Shift the transmission to position P.
or X Drive forwards at a speed greater than
10 km/h.
The 360° camera display is stopped.
The view that was active before the 360°
camera was displayed appears on the multi-
media system display. You can stop the 360°
camera from the split-screen view by select-
ing the %symbol on the display and con-
firming with the controller.
You cannot stop the 360° camera display if
transmission position Ris selected. 206
Driving systemsDriving and parking
Page 220 of 389
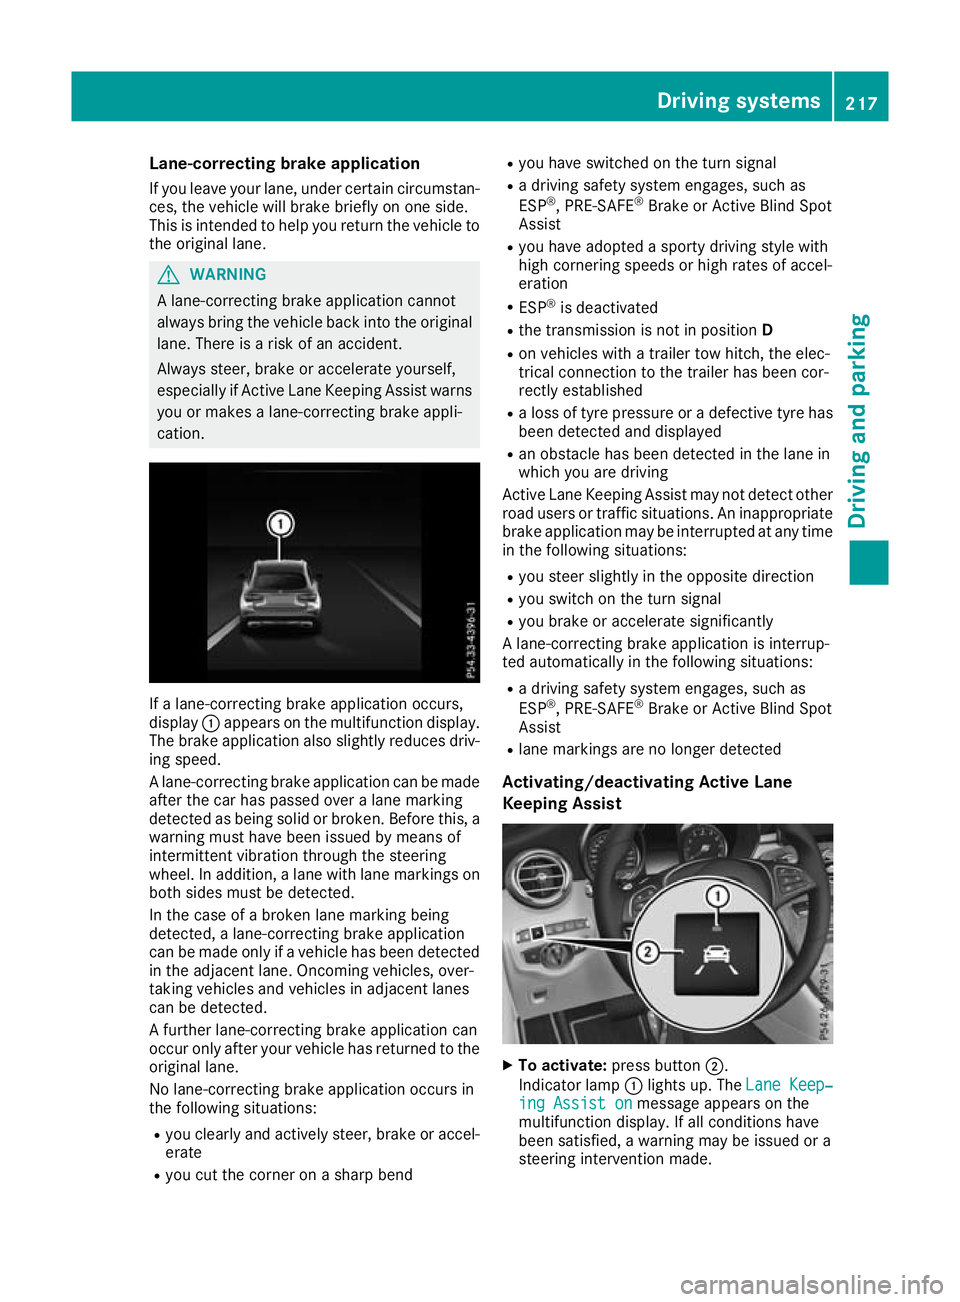
Lane-correcting brake application
If you leave your lane, under certain circumstan-
ces, the vehicle will brake briefly on one side.
This is intended to help you return the vehicle to the original lane. G
WARNING
A lane-correcting brake application cannot
always bring the vehicle back into the original lane. There is a risk of an accident.
Always steer, brake or accelerate yourself,
especially if Active Lane Keeping Assist warns
you or makes a lane-correcting brake appli-
cation. If a lane-correcting brake application occurs,
display :appears on the multifunction display.
The brake application also slightly reduces driv- ing speed.
A lane-correcting brake application can be made
after the car has passed over a lane marking
detected as being solid or broken. Before this, a warning must have been issued by means of
intermittent vibration through the steering
wheel. In addition, a lane with lane markings on
both sides must be detected.
In the case of a broken lane marking being
detected, a lane-correcting brake application
can be made only if a vehicle has been detected
in the adjacent lane. Oncoming vehicles, over-
taking vehicles and vehicles in adjacent lanes
can be detected.
A further lane-correcting brake application can
occur only after your vehicle has returned to the original lane.
No lane-correcting brake application occurs in
the following situations:
R you clearly and actively steer, brake or accel-
erate
R you cut the corner on a sharp bend R
you have switched on the turn signal
R a driving safety system engages, such as
ESP ®
, PRE-SAFE ®
Brake or Active Blind Spot
Assist
R you have adopted a sporty driving style with
high cornering speeds or high rates of accel-
eration
R ESP ®
is deactivated
R the transmission is not in position D
R on vehicles with a trailer tow hitch, the elec-
trical connection to the trailer has been cor-
rectly established
R a loss of tyre pressure or a defective tyre has
been detected and displayed
R an obstacle has been detected in the lane in
which you are driving
Active Lane Keeping Assist may not detect other road users or traffic situations. An inappropriate
brake application may be interrupted at any time
in the following situations:
R you steer slightly in the opposite direction
R you switch on the turn signal
R you brake or accelerate significantly
A lane-correcting brake application is interrup-
ted automatically in the following situations:
R a driving safety system engages, such as
ESP ®
, PRE-SAFE ®
Brake or Active Blind Spot
Assist
R lane markings are no longer detected
Activating/deactivating Active Lane
Keeping Assist X
To activate: press button ;.
Indicator lamp :lights up. The Lane Keep‐ Lane Keep‐
ing Assist on
ing Assist on message appears on the
multifunction display. If all conditions have
been satisfied, a warning may be issued or a
steering intervention made. Driving systems
217Driving and parking Z
Page 223 of 389
This will use the braking effect of the engine, so
less braking will be required to maintain the
vehicle speed. This relieves the load on the
brake system and prevents the brakes from
overheating and wearing too quickly. If you need additional braking, depress the brake pedal
repeatedly rather than continuously.
Driving tips R
Maintain a greater distance to the vehicle in
front than when driving without a trailer.
R Avoid braking abruptly. If possible, brake gen-
tly at first to allow the trailer to run on. Then,
increase the braking force rapidly.
R The values given for gradient-climbing capa-
bilities from a standstill refer to sea level.
When driving in mountainous areas, note that
the power output of the engine, and conse-
quently the vehicle's gradient-climbing capa-
bility from a standstill, decrease with increas- ing altitude.
If the trailer swings from side to side:
X Do not accelerate under any circumstances.
X Do not countersteer.
X Brake, if necessary. Swivelling the ball coupling in/out
Important safety notes G
WARNING
If the ball coupling is not engaged, the trailer
may come loose. There is a risk of an accident.
Make sure that the ball coupling is securely
engaged and locked in position.
! Do not attempt to speed the up the swing-
out procedure by applying additional pressure
with your foot. The system could otherwise be
mechanically damaged.
In order to tow a trailer with the vehicle, you
must swivel the ball coupling out.
You can swivel the ball coupling out by means of the switch on the driver's door or the tailgate.
The trailer socket is integrated in the ball cou-
pling and swivels out with it.
Swivel the ball coupling in or out only when the
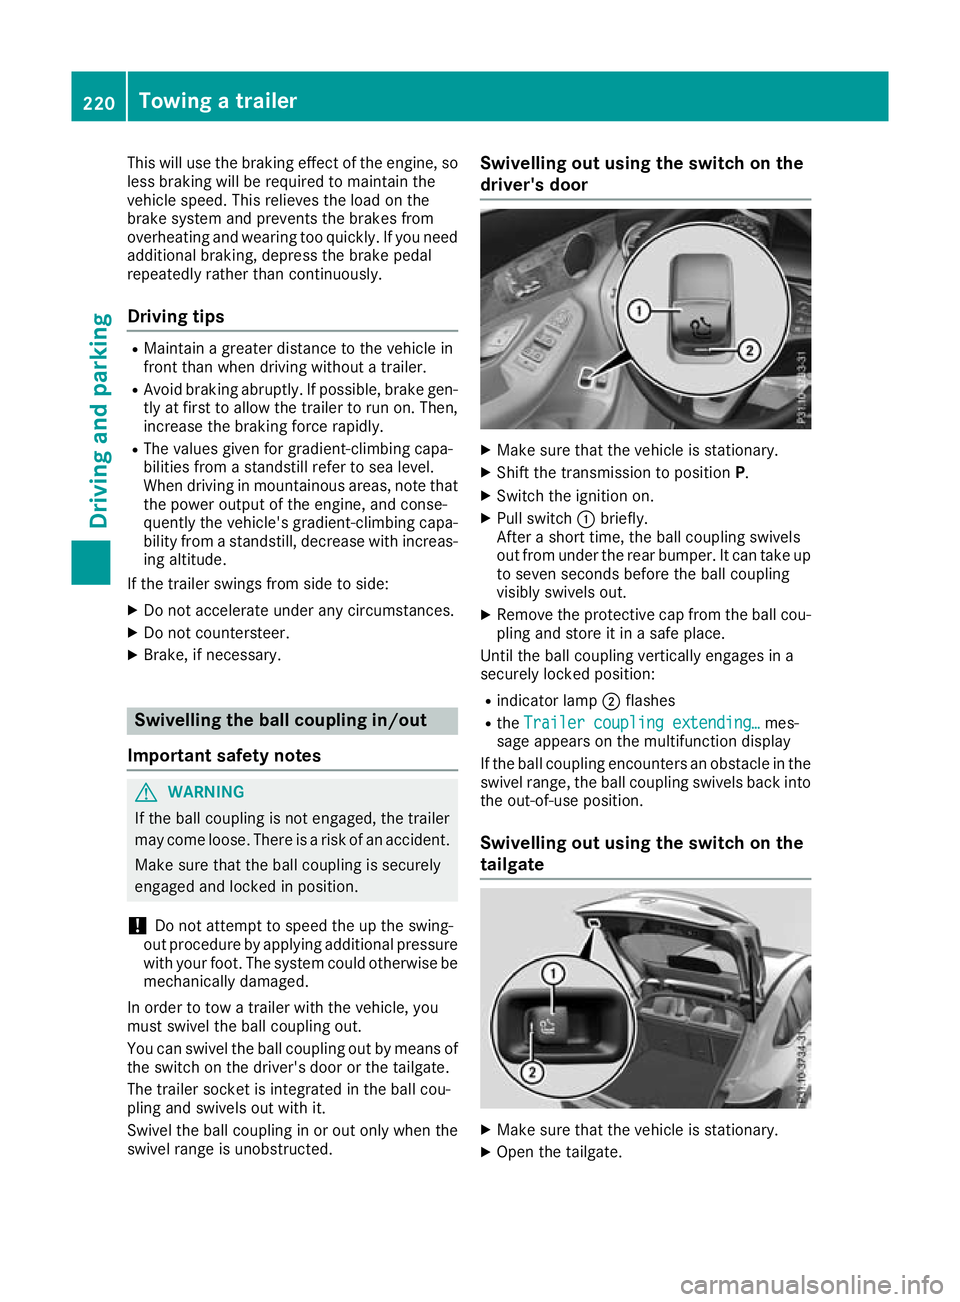
swivel range is unobstructed. Swivelling out using the switch on the
driver's door
X
Make sure that the vehicle is stationary.
X Shift the transmission to position P.
X Switch the ignition on.
X Pull switch :briefly.
After a short time, the ball coupling swivels
out from under the rear bumper. It can take up to seven seconds before the ball coupling
visibly swivels out.
X Remove the protective cap from the ball cou-
pling and store it in a safe place.
Until the ball coupling vertically engages in a
securely locked position:
R indicator lamp ;flashes
R the Trailer coupling extending…
Trailer coupling extending… mes-
sage appears on the multifunction display
If the ball coupling encounters an obstacle in the
swivel range, the ball coupling swivels back into
the out-of-use position.
Swivelling out using the switch on the
tailgate X
Make sure that the vehicle is stationary.
X Open the tailgate. 220
Towing a trailerDriving and parking
Page 224 of 389
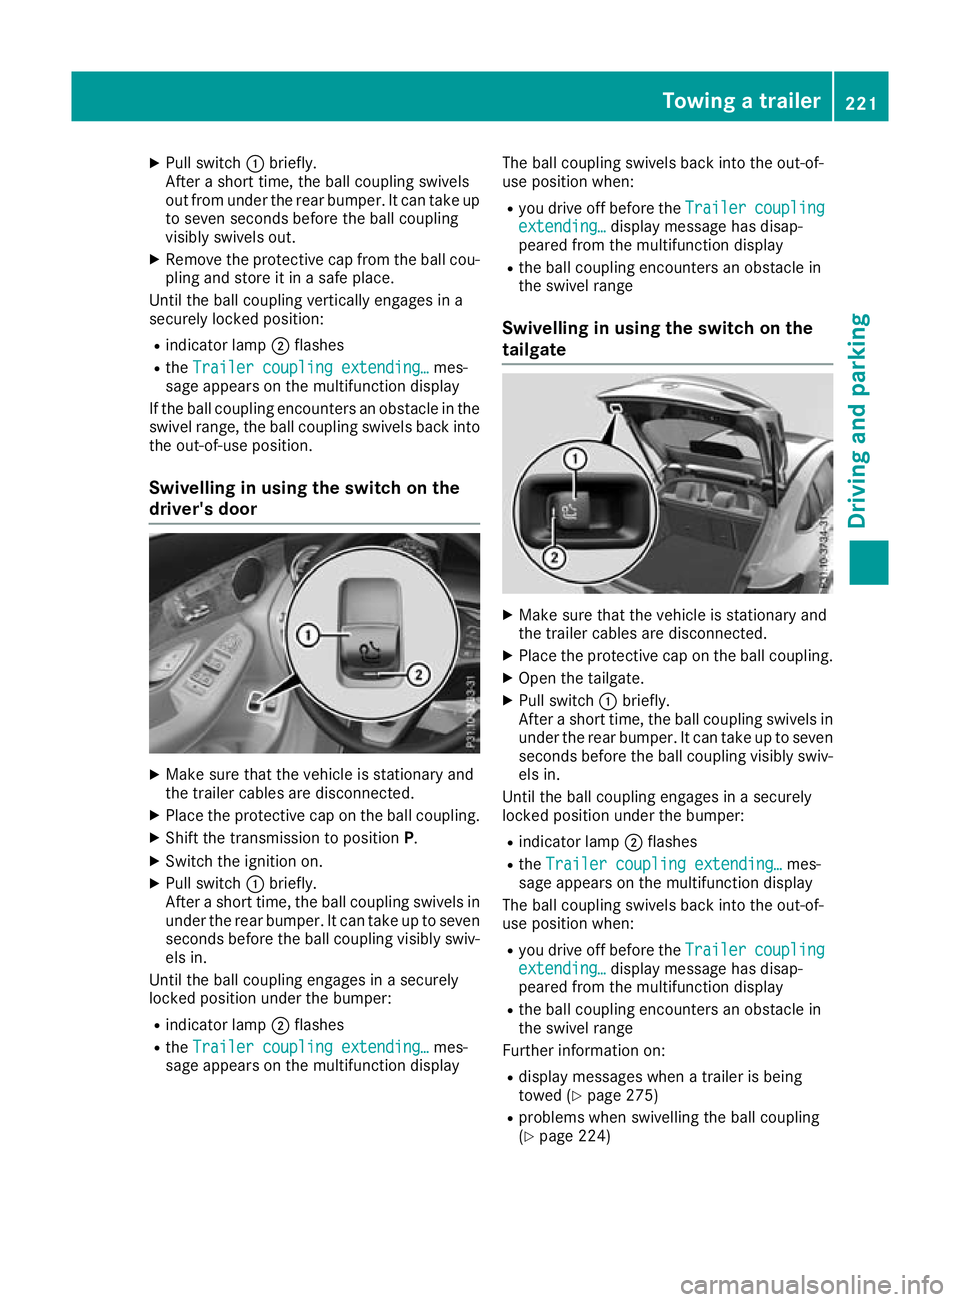
X
Pull switch :briefly.
After a short time, the ball coupling swivels
out from under the rear bumper. It can take up to seven seconds before the ball coupling
visibly swivels out.
X Remove the protective cap from the ball cou-
pling and store it in a safe place.
Until the ball coupling vertically engages in a
securely locked position:
R indicator lamp ;flashes
R the Trailer coupling extending… Trailer coupling extending… mes-
sage appears on the multifunction display
If the ball coupling encounters an obstacle in the
swivel range, the ball coupling swivels back into
the out-of-use position.
Swivelling in using the switch on the
driver's door X
Make sure that the vehicle is stationary and
the trailer cables are disconnected.
X Place the protective cap on the ball coupling.
X Shift the transmission to position P.
X Switch the ignition on.
X Pull switch :briefly.
After a short time, the ball coupling swivels in under the rear bumper. It can take up to sevenseconds before the ball coupling visibly swiv-
els in.
Until the ball coupling engages in a securely
locked position under the bumper:
R indicator lamp ;flashes
R the Trailer coupling extending… Trailer coupling extending… mes-
sage appears on the multifunction display The ball coupling swivels back into the out-of-
use position when:
R you drive off before the Trailer
Trailer coupling coupling
extending…
extending… display message has disap-
peared from the multifunction display
R the ball coupling encounters an obstacle in
the swivel range
Swivelling in using the switch on the
tailgate X
Make sure that the vehicle is stationary and
the trailer cables are disconnected.
X Place the protective cap on the ball coupling.
X Open the tailgate.
X Pull switch :briefly.
After a short time, the ball coupling swivels in under the rear bumper. It can take up to sevenseconds before the ball coupling visibly swiv-
els in.
Until the ball coupling engages in a securely
locked position under the bumper:
R indicator lamp ;flashes
R the Trailer coupling extending…
Trailer coupling extending… mes-
sage appears on the multifunction display
The ball coupling swivels back into the out-of-
use position when:
R you drive off before the Trailer Trailercoupling
coupling
extending…
extending… display message has disap-
peared from the multifunction display
R the ball coupling encounters an obstacle in
the swivel range
Further information on:
R display messages when a trailer is being
towed (Y page 275)
R problems when swivelling the ball coupling
(Y page 224) Towing a trailer
221Driving and parking Z