2016 MERCEDES-BENZ GLC COUPE door lock
[x] Cancel search: door lockPage 171 of 389
object, for example, on uphill or downhill gra-
dients
R on uphill or downhill gradients the laden vehi-
cle must also be secured at the rear axle, for
example with a wheel chock or similar object Switching off the engine
Important safety notes G
WARNING
The automatic transmission switches to neu-
tral position Nwhen you switch off the engine.
The vehicle may roll away. There is a risk of an
accident.
After switching off the engine, always switch
to parking position P. Prevent the parked vehi-
cle from rolling away by applying the parking
brake.
Vehicles with automatic transmission X
Apply the electric parking brake.
X Shift the transmission to position P.
X With the key: turn the key to position 0in the
ignition lock and remove it.
The immobiliser is activated.
X With the Start/Stop button: press the
Start/Stop button (Y page 144).
The engine stops and all the indicator lamps in the instrument cluster go out.
When the driver's door is closed, this corre-
sponds to key position 1. When the driver's
door is open, this corresponds to key position
0: "key removed".
If you switch the engine off with the transmis-
sion in position Ror D, the automatic transmis-
sion shifts to Nautomatically.
With the key: if you then open the driver's door
or the front-passenger door or remove the key
from the ignition, the automatic transmission
shifts to Pautomatically.
With the Start/Stop button: if you then open
the driver's door or the front-passenger door,
the automatic transmission shifts to Pautomat-
ically.
If you want the automatic transmission to
remain in neutral N, e.g. when having the vehicle cleaned in an automatic car wash with a towing
system:
X Vehicles with KEYLESS-GO or KEYLESS-
GO start function:
remove the Start/Stop
button from the ignition lock.
X Insert the key into the ignition lock.
X All vehicles: switch the ignition on.
X Depress the brake pedal and keep it
depressed.
X Shift to neutral N.
X Release the brake pedal.
X Release the electric parking brake.
X Switch off the ignition and leave the key in the
ignition lock.
The engine can be switched off while the vehicle
is in motion by pressing and holding the Start/
Stop button for about three seconds. This func- tion operates independently of the ECO start/
stop automatic engine switch-off function. Electric parking brake
General notes G
WARNING
If you leave children unattended in the vehi-
cle, they may be able to set the vehicle in
motion if, for example, they:
R release the parking brake
R shift the automatic transmission out of park
position P
R start the engine
In addition, they may operate vehicle equip-
ment and become trapped. There is a risk of
an accident and injury.
When leaving the vehicle, always take the key
with you and lock the vehicle. Never leave
children unattended in the vehicle.
The function of the electric parking brake is
dependent on the on-board voltage. If the on-
board voltage is low or the system is malfunc-
tioning, it may not be possible to apply the
released parking brake. 168
ParkingDriving and parking
Page 172 of 389
X
If this is the case, park the vehicle only on
level ground and secure it to prevent it from
rolling away.
X Shift the automatic transmission to position
P.
It may not be possible to release an applied
parking brake if the on-board voltage is low or if there is a malfunction in the system. Contact a
qualified specialist workshop.
The electric parking brake carries out a function
check at regular intervals when the engine is
switched off. Noises that occur are normal.
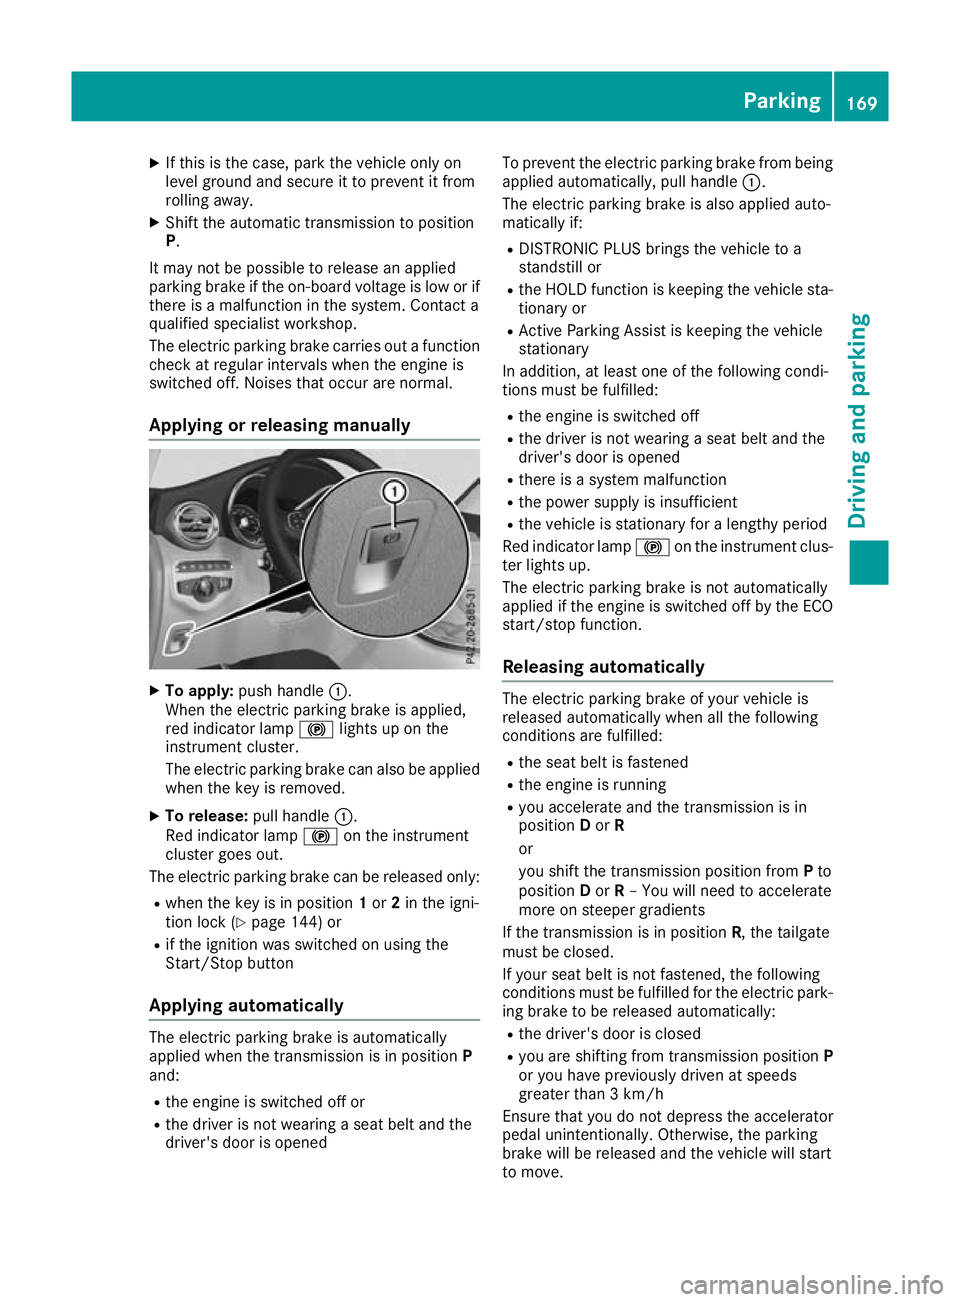
Applying or releasing manually X
To apply: push handle :.
When the electric parking brake is applied,
red indicator lamp !lights up on the
instrument cluster.
The electric parking brake can also be applied when the key is removed.
X To release: pull handle:.
Red indicator lamp !on the instrument
cluster goes out.
The electric parking brake can be released only:
R when the key is in position 1or 2in the igni-
tion lock (Y page 144) or
R if the ignition was switched on using the
Start/Stop button
Applying automatically The electric parking brake is automatically
applied when the transmission is in position P
and:
R the engine is switched off or
R the driver is not wearing a seat belt and the
driver's door is opened To prevent the electric parking brake from being
applied automatically, pull handle :.
The electric parking brake is also applied auto-
matically if:
R DISTRONIC PLUS brings the vehicle to a
standstill or
R the HOLD function is keeping the vehicle sta-
tionary or
R Active Parking Assist is keeping the vehicle
stationary
In addition, at least one of the following condi-
tions must be fulfilled:
R the engine is switched off
R the driver is not wearing a seat belt and the
driver's door is opened
R there is a system malfunction
R the power supply is insufficient
R the vehicle is stationary for a lengthy period
Red indicator lamp !on the instrument clus-
ter lights up.
The electric parking brake is not automatically
applied if the engine is switched off by the ECO
start/stop function.
Releasing automatically The electric parking brake of your vehicle is
released automatically when all the following
conditions are fulfilled:
R the seat belt is fastened
R the engine is running
R you accelerate and the transmission is in
position Dor R
or
you shift the transmission position from Pto
position Dor R– You will need to accelerate
more on steeper gradients
If the transmission is in position R, the tailgate
must be closed.
If your seat belt is not fastened, the following
conditions must be fulfilled for the electric park- ing brake to be released automatically:
R the driver's door is closed
R you are shifting from transmission position P
or you have previously driven at speeds
greater than 3 km/h
Ensure that you do not depress the accelerator
pedal unintentionally. Otherwise, the parking
brake will be released and the vehicle will start
to move. Parking
169Driving and parking Z
Page 192 of 389
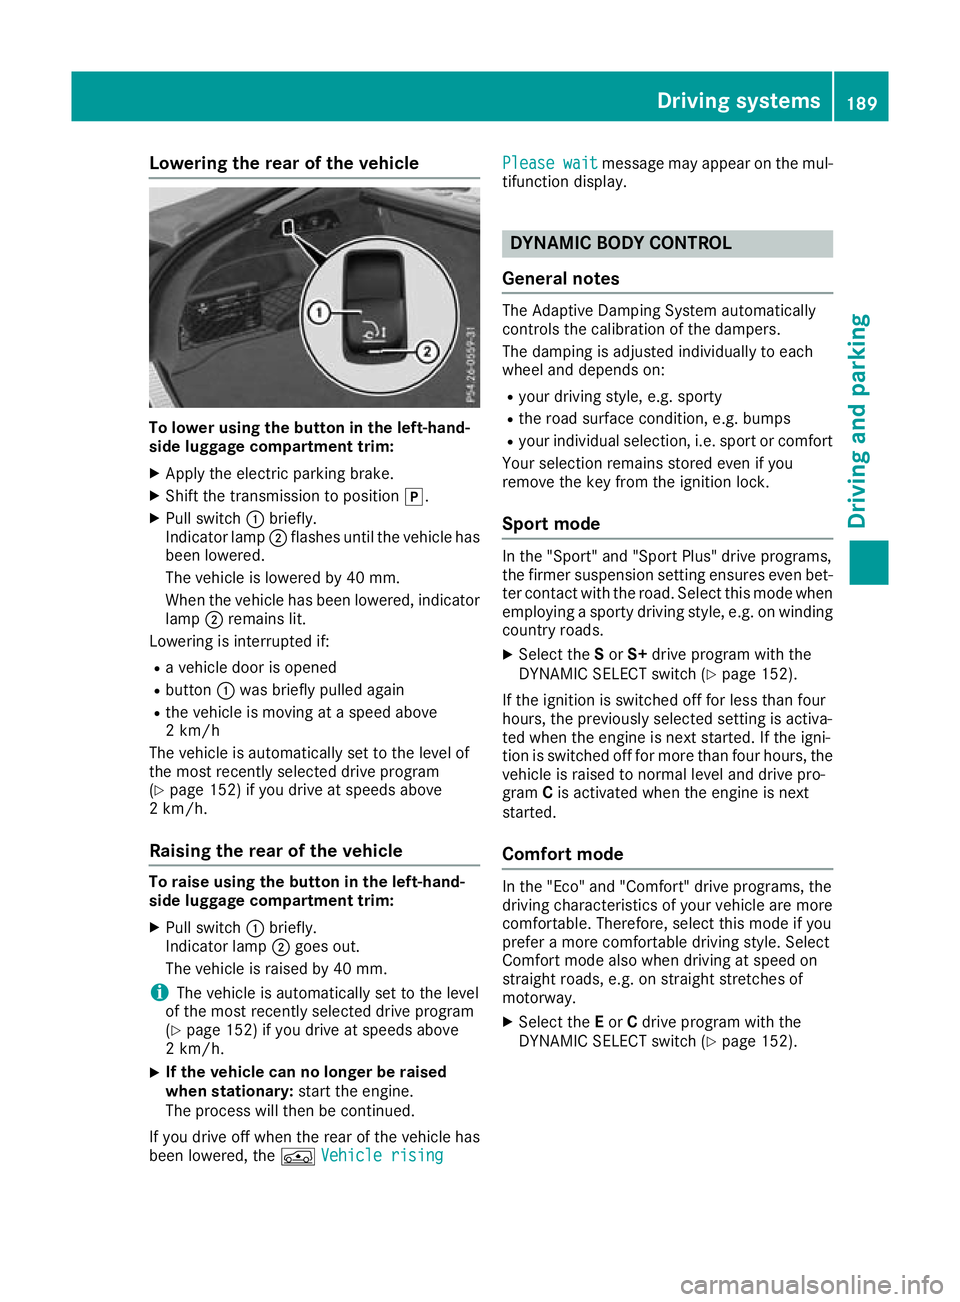
Lowering the rear of the vehicle
To lower using the button in the left-hand-
side luggage compartment trim:
X Apply the electric parking brake.
X Shift the transmission to position j.
X Pull switch :briefly.
Indicator lamp ;flashes until the vehicle has
been lowered.
The vehicle is lowered by 40 mm.
When the vehicle has been lowered, indicator lamp ;remains lit.
Lowering is interrupted if:
R a vehicle door is opened
R button :was briefly pulled again
R the vehicle is moving at a speed above
2 km/h
The vehicle is automatically set to the level of
the most recently selected drive program
(Y page 152) if you drive at speeds above
2 km/h.
Raising the rear of the vehicle To raise using the button in the left-hand-
side luggage compartment trim:
X Pull switch :briefly.
Indicator lamp ;goes out.
The vehicle is raised by 40 mm.
i The vehicle is automatically set to the level
of the most recently selected drive program
(Y page 152) if you drive at speeds above
2 km/h.
X If the vehicle can no longer be raised
when stationary: start the engine.
The process will then be continued.
If you drive off when the rear of the vehicle has
been lowered, the ÁVehicle rising
Vehicle rising Please wait Please wait
message may appear on the mul-
tifunction display. DYNAMIC BODY CONTROL
General notes The Adaptive Damping System automatically
controls the calibration of the dampers.
The damping is adjusted individually to each
wheel and depends on:
R your driving style, e.g. sporty
R the road surface condition, e.g. bumps
R your individual selection, i.e. sport or comfort
Your selection remains stored even if you
remove the key from the ignition lock.
Sport mode In the "Sport" and "Sport Plus" drive programs,
the firmer suspension setting ensures even bet-
ter contact with the road. Select this mode when
employing a sporty driving style, e.g. on winding
country roads.
X Select the Sor S+ drive program with the
DYNAMIC SELECT switch (Y page 152).
If the ignition is switched off for less than four
hours, the previously selected setting is activa-
ted when the engine is next started. If the igni-
tion is switched off for more than four hours, the vehicle is raised to normal level and drive pro-
gram Cis activated when the engine is next
started.
Comfort mode In the "Eco" and "Comfort" drive programs, the
driving characteristics of your vehicle are more
comfortable. Therefore, select this mode if you
prefer a more comfortable driving style. Select
Comfort mode also when driving at speed on
straight roads, e.g. on straight stretches of
motorway.
X Select the Eor Cdrive program with the
DYNAMIC SELECT switch (Y page 152). Driving systems
189Driving and parking Z
Page 223 of 389
This will use the braking effect of the engine, so
less braking will be required to maintain the
vehicle speed. This relieves the load on the
brake system and prevents the brakes from
overheating and wearing too quickly. If you need additional braking, depress the brake pedal
repeatedly rather than continuously.
Driving tips R
Maintain a greater distance to the vehicle in
front than when driving without a trailer.
R Avoid braking abruptly. If possible, brake gen-
tly at first to allow the trailer to run on. Then,
increase the braking force rapidly.
R The values given for gradient-climbing capa-
bilities from a standstill refer to sea level.
When driving in mountainous areas, note that
the power output of the engine, and conse-
quently the vehicle's gradient-climbing capa-
bility from a standstill, decrease with increas- ing altitude.
If the trailer swings from side to side:
X Do not accelerate under any circumstances.
X Do not countersteer.
X Brake, if necessary. Swivelling the ball coupling in/out
Important safety notes G
WARNING
If the ball coupling is not engaged, the trailer
may come loose. There is a risk of an accident.
Make sure that the ball coupling is securely
engaged and locked in position.
! Do not attempt to speed the up the swing-
out procedure by applying additional pressure
with your foot. The system could otherwise be
mechanically damaged.
In order to tow a trailer with the vehicle, you
must swivel the ball coupling out.
You can swivel the ball coupling out by means of the switch on the driver's door or the tailgate.
The trailer socket is integrated in the ball cou-
pling and swivels out with it.
Swivel the ball coupling in or out only when the
swivel range is unobstructed. Swivelling out using the switch on the
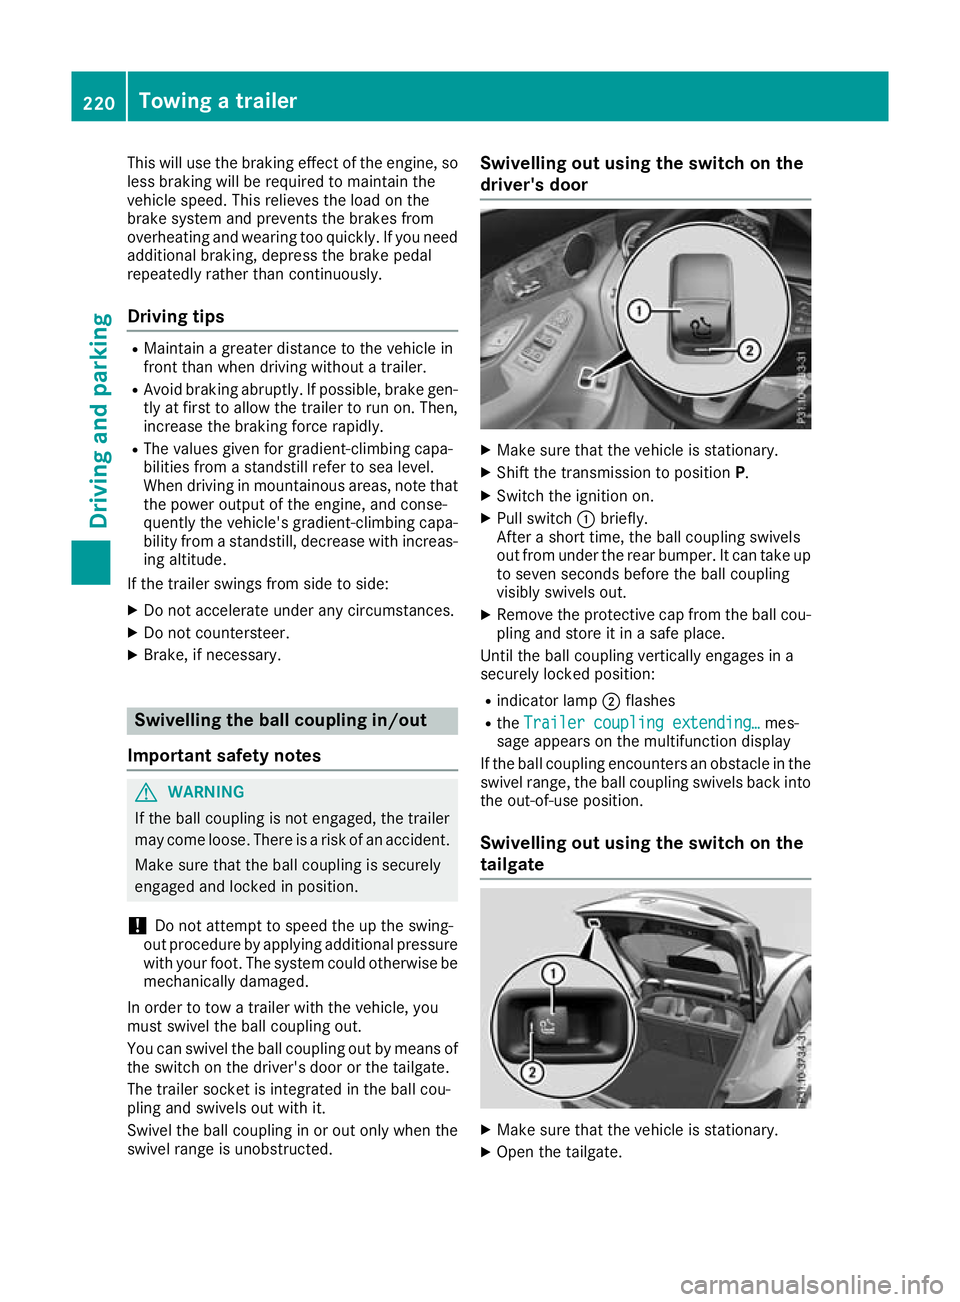
driver's door
X
Make sure that the vehicle is stationary.
X Shift the transmission to position P.
X Switch the ignition on.
X Pull switch :briefly.
After a short time, the ball coupling swivels
out from under the rear bumper. It can take up to seven seconds before the ball coupling
visibly swivels out.
X Remove the protective cap from the ball cou-
pling and store it in a safe place.
Until the ball coupling vertically engages in a
securely locked position:
R indicator lamp ;flashes
R the Trailer coupling extending…
Trailer coupling extending… mes-
sage appears on the multifunction display
If the ball coupling encounters an obstacle in the
swivel range, the ball coupling swivels back into
the out-of-use position.
Swivelling out using the switch on the
tailgate X
Make sure that the vehicle is stationary.
X Open the tailgate. 220
Towing a trailerDriving and parking
Page 224 of 389
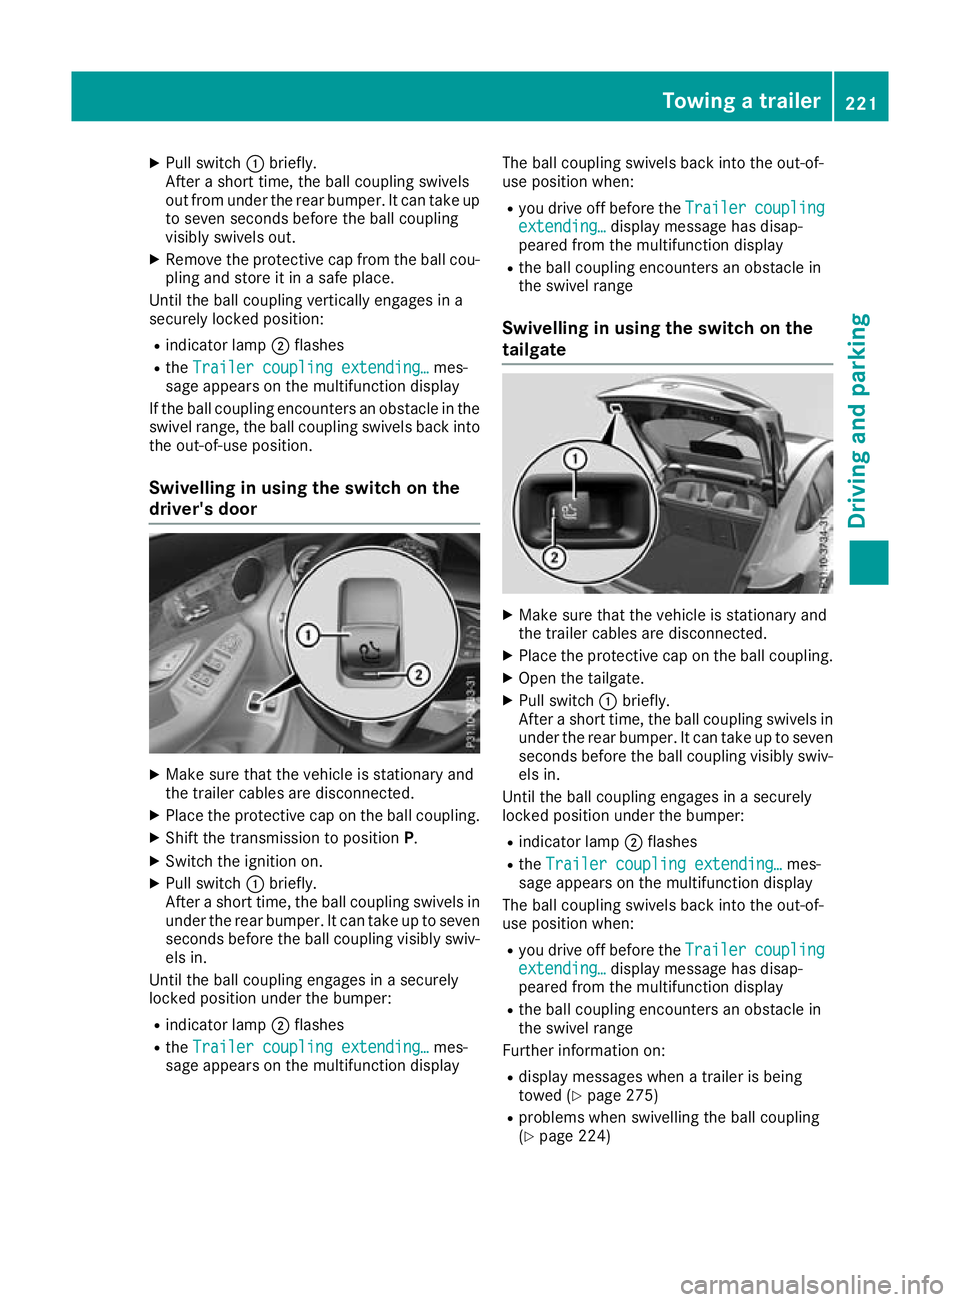
X
Pull switch :briefly.
After a short time, the ball coupling swivels
out from under the rear bumper. It can take up to seven seconds before the ball coupling
visibly swivels out.
X Remove the protective cap from the ball cou-
pling and store it in a safe place.
Until the ball coupling vertically engages in a
securely locked position:
R indicator lamp ;flashes
R the Trailer coupling extending… Trailer coupling extending… mes-
sage appears on the multifunction display
If the ball coupling encounters an obstacle in the
swivel range, the ball coupling swivels back into
the out-of-use position.
Swivelling in using the switch on the
driver's door X
Make sure that the vehicle is stationary and
the trailer cables are disconnected.
X Place the protective cap on the ball coupling.
X Shift the transmission to position P.
X Switch the ignition on.
X Pull switch :briefly.
After a short time, the ball coupling swivels in under the rear bumper. It can take up to sevenseconds before the ball coupling visibly swiv-
els in.
Until the ball coupling engages in a securely
locked position under the bumper:
R indicator lamp ;flashes
R the Trailer coupling extending… Trailer coupling extending… mes-
sage appears on the multifunction display The ball coupling swivels back into the out-of-
use position when:
R you drive off before the Trailer
Trailer coupling coupling
extending…
extending… display message has disap-
peared from the multifunction display
R the ball coupling encounters an obstacle in
the swivel range
Swivelling in using the switch on the
tailgate X
Make sure that the vehicle is stationary and
the trailer cables are disconnected.
X Place the protective cap on the ball coupling.
X Open the tailgate.
X Pull switch :briefly.
After a short time, the ball coupling swivels in under the rear bumper. It can take up to sevenseconds before the ball coupling visibly swiv-
els in.
Until the ball coupling engages in a securely
locked position under the bumper:
R indicator lamp ;flashes
R the Trailer coupling extending…
Trailer coupling extending… mes-
sage appears on the multifunction display
The ball coupling swivels back into the out-of-
use position when:
R you drive off before the Trailer Trailercoupling
coupling
extending…
extending… display message has disap-
peared from the multifunction display
R the ball coupling encounters an obstacle in
the swivel range
Further information on:
R display messages when a trailer is being
towed (Y page 275)
R problems when swivelling the ball coupling
(Y page 224) Towing a trailer
221Driving and parking Z
Page 228 of 389
Problem
Possible causes/consequences and
M
MSolutions Unlocking using the
switch on the driver's
door:
The ball coupling does
not swivel out even
though:
R the vehicle is station-
ary
R no trailer cable is con-
nected The on-board voltage is too low.
X Engage parking position P.
X Switch on the power supply.
or X Start the engine.
If the ball coupling still does not unlock: X Consult a qualified specialist workshop. The ball coupling does
not swivel out or in. The
indicator lamp in the
switch is flashing perma-
nently. The Trailer Trailer
coupling Check lock
coupling Check lock
message appears on the
multifunction display. There is a malfunction in the release electronics.
X When the ball coupling is swivelled in: pull and hold the switch
on the tailgate until the ball coupling vertically engages in a securely locked position and then engages again under the bumper.
X When the ball coupling is swivelled out: pull and hold the switch
on the tailgate until the ball coupling engages under the bumper.
If the ball coupling still does not unlock: X Consult a qualified specialist workshop. Bicycle rack
General notes
Trailer tow hitch (example with additional
guide pin)
Depending on the bicycle rack's design, you can transport up to four bicycles on it:
R When attached by clamping onto the ball cou-
pling :, the maximum payload is 75 kg. You
can transport up to three bicycles.
R When attached to the ball coupling :and
also the guide pin ;, the maximum payload is
100 kg. You can transport up to four bicycles.
The payload is calculated from the weight of the
bicycle rack and the load of the bicycle rack. To transport bicycles with a total weight
between 75 kg and 100 kg, use only bicycle
racks with additional support on the guide
pin
;. Important safety notes
G
WARNING
The bicycle rack can detach from the vehicle if
you
R exceed the permissible payload of the
trailer tow hitch
R use the bicycle rack incorrectly
R attach the bicycle rack to the ball coupling
beneath the ball head
There is a risk of an accident.
For your safety and that of other road users,
observe the following:
R Always observe the permissible payload of
the trailer tow hitch.
R Use the bicycle rack only to transport bicy-
cles. Bicycle rack
225Driving and parking
Z
Page 280 of 389
Display messages
Possible causes/consequences and
M
MSolutions ? The bonnet is open. A warning tone also sounds.
G WARNING
The open bonnet may then block your view when the vehicle is in
motion.
There is a risk of an accident.
X Stop the vehicle immediately, paying attention to road and traffic
conditions.
X Secure the vehicle against rolling (Y page 167).
X Close the bonnet. Active bonnet mal‐ Active bonnet mal‐
function See Own‐ function See Own‐
er's Manual er's Manual The active bonnet (pedestrian protection) is not active due to a mal-
function or because it has already been triggered.
X Consult a qualified specialist workshop. C At least one door is open. A warning tone also sounds.
X Close all doors. _
Rear Rear
left
leftseat
seatback‐
back‐
rest not locked
rest not locked or
Rear right seat
Rear right seat
backrest not locked backrest not locked Vehicle with through-loading feature in the rear bench seat:
The left- or right-hand backrest at the rear is not engaged.
X Push the backrest back until it engages. _
Rear centre back‐ Rear centre back‐
rest not locked rest not locked Vehicle with through-loading feature in the rear compartment:
The centre rear seat backrest is not engaged.
X Push the backrest back until it engages. j
Check Check
trailer
trailer hitch
hitch
lock
lock The trailer tow hitch is not operational.
A warning tone also sounds.
G WARNING
If the ball coupling is not in the locked position, the trailer may come
loose. There is a risk of an accident.
X Stop the vehicle immediately, paying attention to road and traffic
conditions, and switch off the engine.
X Secure the vehicle against rolling (Y page 167).
X Uncouple the trailer and secure it against rolling away.
X Initiate a new swivelling procedure (Y page 220).
X When the display message disappears, re-couple the trailer.
If the multifunction display still shows the display message: X Do not re-couple the trailer.
X Check the ground clearance and drive on without the trailer.
X Consult a qualified specialist workshop immediately. Display
messages
277On-board computer and displays Z
Page 335 of 389
!
If the key is within the rear detection range
of KEYLESS-GO, the following situations, for
example, could lead to the unintentional
opening of the tailgate:
R using a car wash
R using a high-pressure cleaner
Make sure that the key is at least 3 m away
from the vehicle.
! Make sure that the automatic transmission
is in neutral position Nwhen washing your
vehicle in a tow-through car wash. The vehicle may otherwise be damaged.
R Operating with the key:
Do not remove the key from the ignition
lock. Do not open the driver's door when
the engine is switched off or at very low
speeds. Otherwise, when in transmission
position Dor Rthe automatic transmission
will automatically switch to park position P
and block the wheels.
R Operating with the Start/Stop button:
Do not open the driver's door when the
engine is switched off or at very low
speeds. Otherwise, when in transmission
position Dor Rthe automatic transmission
will automatically switch to park position P
and block the wheels.
Observe the following to make sure that the
automatic transmission stays in neutral position N:
Operating with the key and Start/Stop button:
X Make sure that the ignition is switched on.
X Make sure that the vehicle is stationary.
X Depress the brake pedal and keep it
depressed.
Operating with the Start/Stop button only: X Engage parking position P.
X Release the brake pedal.
X Remove the Start/Stop button from the igni-
tion lock (Y page 144).
X Insert the key into the ignition lock.
X Switch on the ignition.
X Depress the brake pedal and keep it
depressed.
Operating with the key and Start/Stop button:
X Engage neutral N.
X Release the brake pedal. X
Release the electric parking brake, if neces-
sary.
X Switch off the ignition and leave the key in the
ignition lock.
You can wash the vehicle in an automatic car
wash from the very start.
If the vehicle is very dirty, wash off excess dirt
before cleaning the vehicle in an automatic car
wash.
After using an automatic car wash, wipe off the
wax from the windscreen and the windscreen
wiper blades. This will prevent smears and
reduce wiping noises caused by residue on the
windscreen.
Washing by hand In some countries, washing by hand is only
allowed at specially equipped washing bays.
Observe the legal requirements for each indi-
vidual country.
X Do not use hot water and do not wash the
vehicle in direct sunlight.
X Use a soft sponge to clean.
X Use a mild cleaning agent, such as a car
shampoo approved by Mercedes-Benz.
X Thoroughly hose down the vehicle with a gen-
tle jet of water.
X Do not point the water jet directly towards the
air inlet.
X Use plenty of water and rinse out the sponge
frequently.
X Rinse the vehicle with clean water and dry
thoroughly with a chamois.
X Do not let the cleaning agent dry on the paint-
work.
When using the vehicle in winter, remove all
traces of road salt deposits carefully and as
soon as possible.
High-pressure cleaning equipment G
WARNING
The water jet of circular-jet nozzles (dirt grind- ers) can cause damage not visible from the
outside to tyres or chassis components. Com-
ponents damaged in this way can unexpect-
edly fail. There is a risk of an accident.
Do not use high-pressure cleaners with circu-
lar-jet nozzles to clean the vehicle. Have dam- 332
CareMaintenance and care