2016 MERCEDES-BENZ GLC COUPE window
[x] Cancel search: windowPage 135 of 389
O
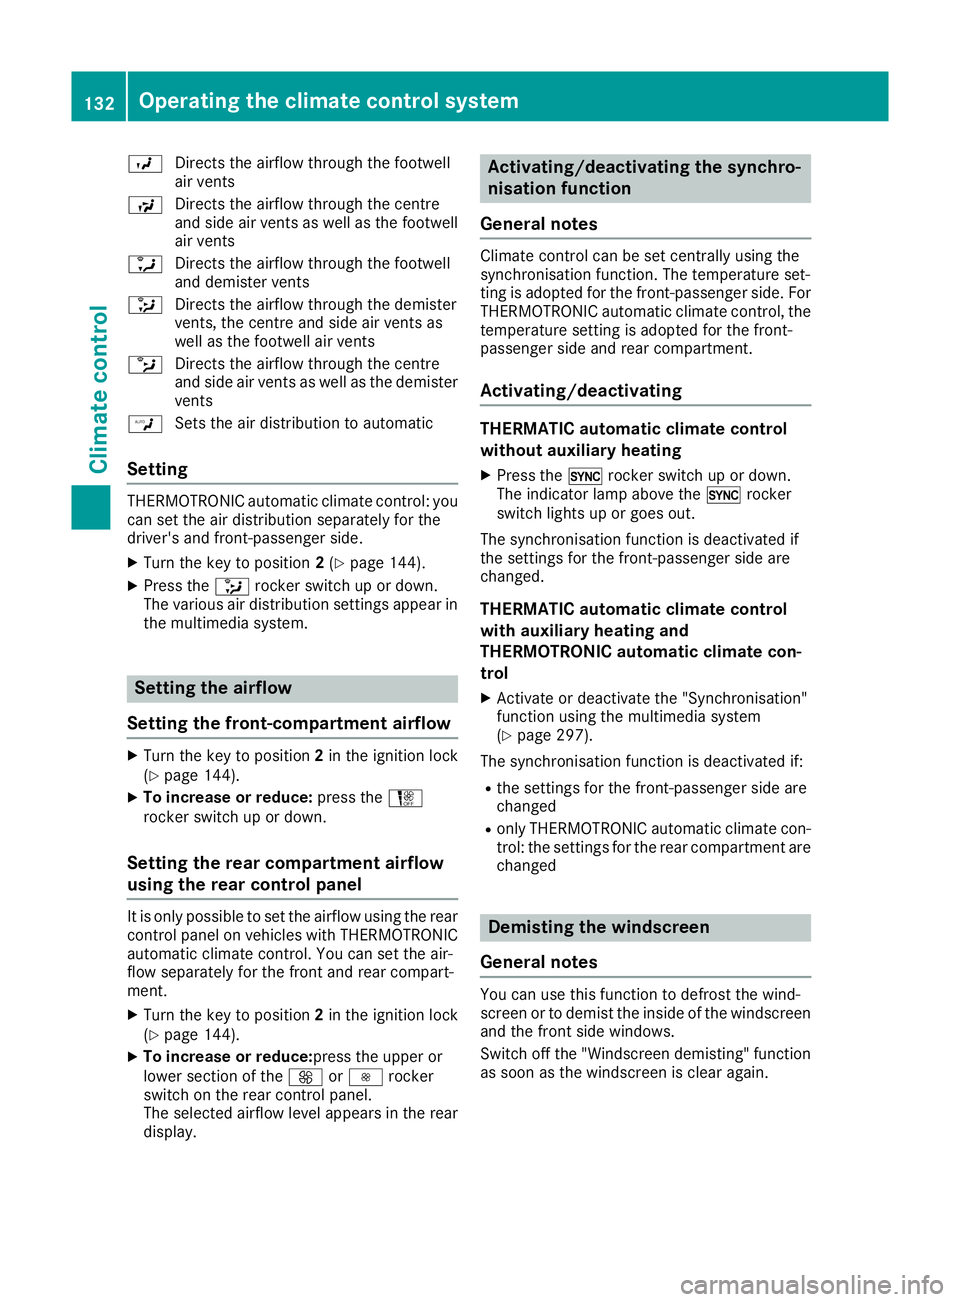
Directs the airflow through the footwell
air vents
S Directs the airflow through the centre
and side air vents as well as the footwell
air vents
a Directs the airflow through the footwell
and demister vents
_ Directs the airflow through the demister
vents, the centre and side air vents as
well as the footwell air vents
b Directs the airflow through the centre
and side air vents as well as the demister
vents
W Sets the air distribution to automatic
Setting THERMOTRONIC automatic climate control: you
can set the air distribution separately for the
driver's and front-passenger side.
X Turn the key to position 2(Y page 144).
X Press the _rocker switch up or down.
The various air distribution settings appear in the multimedia system. Setting the airflow
Setting the front-compartment airflow X
Turn the key to position 2in the ignition lock
(Y page 144).
X To increase or reduce: press theH
rocker switch up or down.
Setting the rear compartment airflow
using the rear control panel It is only possible to set the airflow using the rear
control panel on vehicles with THERMOTRONIC automatic climate control. You can set the air-
flow separately for the front and rear compart-
ment.
X Turn the key to position 2in the ignition lock
(Y page 144).
X To increase or reduce:press the upper or
lower section of the KorI rocker
switch on the rear control panel.
The selected airflow level appears in the rear
display. Activating/deactivating the synchro-
nisation function
General notes Climate control can be set centrally using the
synchronisation function. The temperature set-
ting is adopted for the front-passenger side. For
THERMOTRONIC automatic climate control, the
temperature setting is adopted for the front-
passenger side and rear compartment.
Activating/deactivating THERMATIC automatic climate control
without auxiliary heating
X Press the 0rocker switch up or down.
The indicator lamp above the 0rocker
switch lights up or goes out.
The synchronisation function is deactivated if
the settings for the front-passenger side are
changed.
THERMATIC automatic climate control
with auxiliary heating and
THERMOTRONIC automatic climate con-
trol
X Activate or deactivate the "Synchronisation"
function using the multimedia system
(Y page 297).
The synchronisation function is deactivated if:
R the settings for the front-passenger side are
changed
R only THERMOTRONIC automatic climate con-
trol: the settings for the rear compartment are
changed Demisting the windscreen
General notes You can use this function to defrost the wind-
screen or to demist the inside of the windscreen and the front side windows.
Switch off the "Windscreen demisting" functionas soon as the windscreen is clear again. 132
Operating the climate control systemClimate control
Page 136 of 389
Switching the "Windscreen demisting"
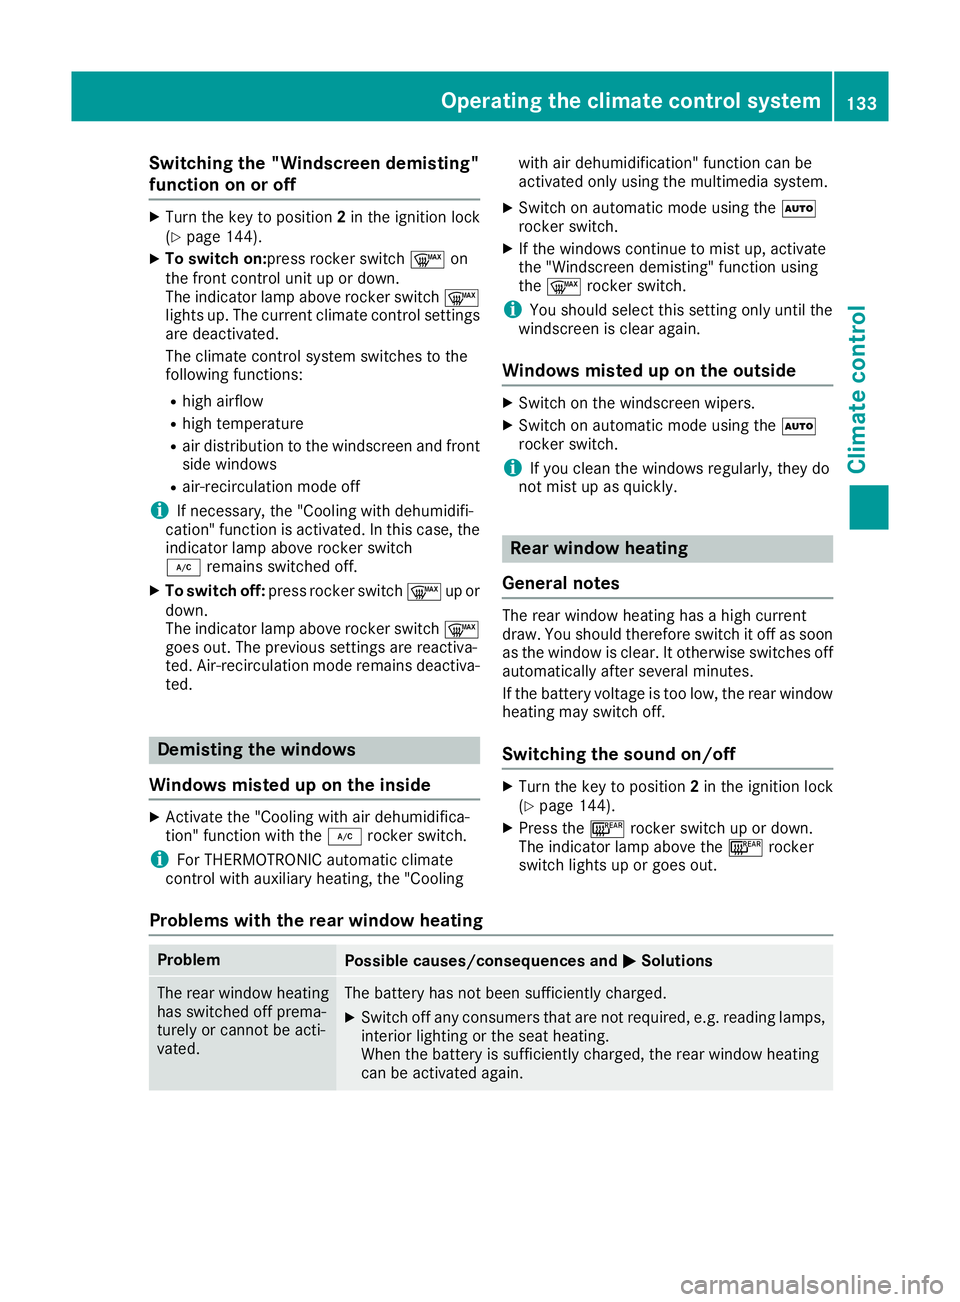
function on or off
X
Turn the key to position 2in the ignition lock
(Y page 144).
X To switch on:press rocker switch ¬on
the front control unit up or down.
The indicator lamp above rocker switch ¬
lights up. The current climate control settings are deactivated.
The climate control system switches to the
following functions:
R high airflow
R high temperature
R air distribution to the windscreen and front
side windows
R air-recirculation mode off
i If necessary, the "Cooling with dehumidifi-
cation" function is activated. In this case, the
indicator lamp above rocker switch
¿ remains switched off.
X To switch off: press rocker switch ¬up or
down.
The indicator lamp above rocker switch ¬
goes out. The previous settings are reactiva-
ted. Air-recirculation mode remains deactiva- ted. Demisting the windows
Windows misted up on the inside X
Activate the "Cooling with air dehumidifica-
tion" function with the ¿rocker switch.
i For THERMOTRONIC automatic climate
control with auxiliary heating, the "Cooling with air dehumidification" function can be
activated only using the multimedia system.
X Switch on automatic mode using the Ã
rocker switch.
X If the windows continue to mist up, activate
the "Windscreen demisting" function using
the ¬ rocker switch.
i You should select this setting only until the
windscreen is clear again.
Windows misted up on the outside X
Switch on the windscreen wipers.
X Switch on automatic mode using the Ã
rocker switch.
i If you clean the windows regularly, they do
not mist up as quickly. Rear window heating
General notes The rear window heating has a high current
draw. You should therefore switch it off as soon
as the window is clear. It otherwise switches off
automatically after several minutes.
If the battery voltage is too low, the rear window heating may switch off.
Switching the sound on/off X
Turn the key to position 2in the ignition lock
(Y page 144).
X Press the ¤rocker switch up or down.
The indicator lamp above the ¤rocker
switch lights up or goes out.
Problems with the rear window heating Problem
Possible causes/consequences and
M MSolutions The rear window heating
has switched off prema-
turely or cannot be acti-
vated. The battery has not been sufficiently charged.
X Switch off any consumers that are not required, e.g. reading lamps,
interior lighting or the seat heating.
When the battery is sufficiently charged, the rear window heating
can be activated again. Operating the climate control system
133Climate control
Page 137 of 389

Activating/deactivating air-recircula-
tion mode
General notes You can also temporarily deactivate the flow of
fresh air manually if unpleasant odours are
entering the vehicle from outside. The air
already inside the vehicle will then be recircula-
ted.
If you activate air-recirculation mode, the win-
dows can mist up more quickly, particularly at
low outside temperatures. Use air-recirculation
mode only briefly to prevent the windows from
misting up.
Activating/deactivating X
Turn the key to position 2in the ignition lock
(Y page 144).
X To activate: press thegrocker switch up
or down.
The indicator lamp above the grocker
switch lights up.
Air-recirculation mode is activated automati-
cally:
R at high outside temperatures
R at high levels of pollution (THERMOTRONIC
automatic climate control only)
R in tunnels (vehicles with a navigation system
only)
The indicator lamp above the grocker
switch is not lit when automatic air-recirculation
mode is activated. Outside air is added after
approximately 30 minutes.
X To deactivate: press thegrocker switch
up or down.
The indicator lamp above the grocker
switch goes out.
Air-recirculation mode is deactivated automati-
cally:
R after approximately five minutes at outside
temperatures below approximately 5 †
R after approximately five minutes if "Cooling
with air dehumidification" is deactivated
R after approximately 30 minutes at outside
temperatures above approximately 5 †if the
"Cooling with air dehumidification" function is
activated Convenience opening or closing using
the air-recirculation button G
WARNING
When the convenience closing feature is oper- ating, parts of the body could become trapped
in the closing area of the side window and the
sliding sunroof. There is a risk of injury.
Observe the complete closing procedure
when the convenience closing feature is oper-
ating. When closing make sure that no parts of the body are in the closing area. G
WARNING
During convenience opening parts of the body could be drawn in or become trapped
between the side window and window frame.
There is a risk of injury.
When opening, make sure that nobody is
touching the side window. If someone
becomes trapped, immediately press
the W switch in the door to stop the move-
ment of the side windows. To continue closing
the side window, pull on the Wswitch.
X Convenience closing feature: press and
hold the grocker switch up or down until
the side windows start to close automatically. Vehicles with sliding sunroof: the sliding
sunroof closes simultaneously.
The indicator lamp above the grocker
switch lights up. Air-recirculation mode is
activated.
If you open the side windows or the sliding
sunroof manually after closing with the con-
venience closing feature, they will remain in
this position when opened using the conve-
nience opening feature.
If parts of the body are in the closing area during convenience closing, proceed as follows:
X Press the Wbutton to stop the side win-
dows.
The side windows stop.
X To then open the side windows, press the
W button again. 134
Operating the climate control systemClimate control
Page 138 of 389
X
Only vehicles with sliding sunroof: press
the 3 switch to stop the sliding sunroof.
The sliding sunroof stops.
X Then, to open the sliding sunroof, pull back on
the 3 switch.
Notes on the automatic reversing feature for:
R the side windows (Y page 95)
R the sliding sunroof (Y page 99)
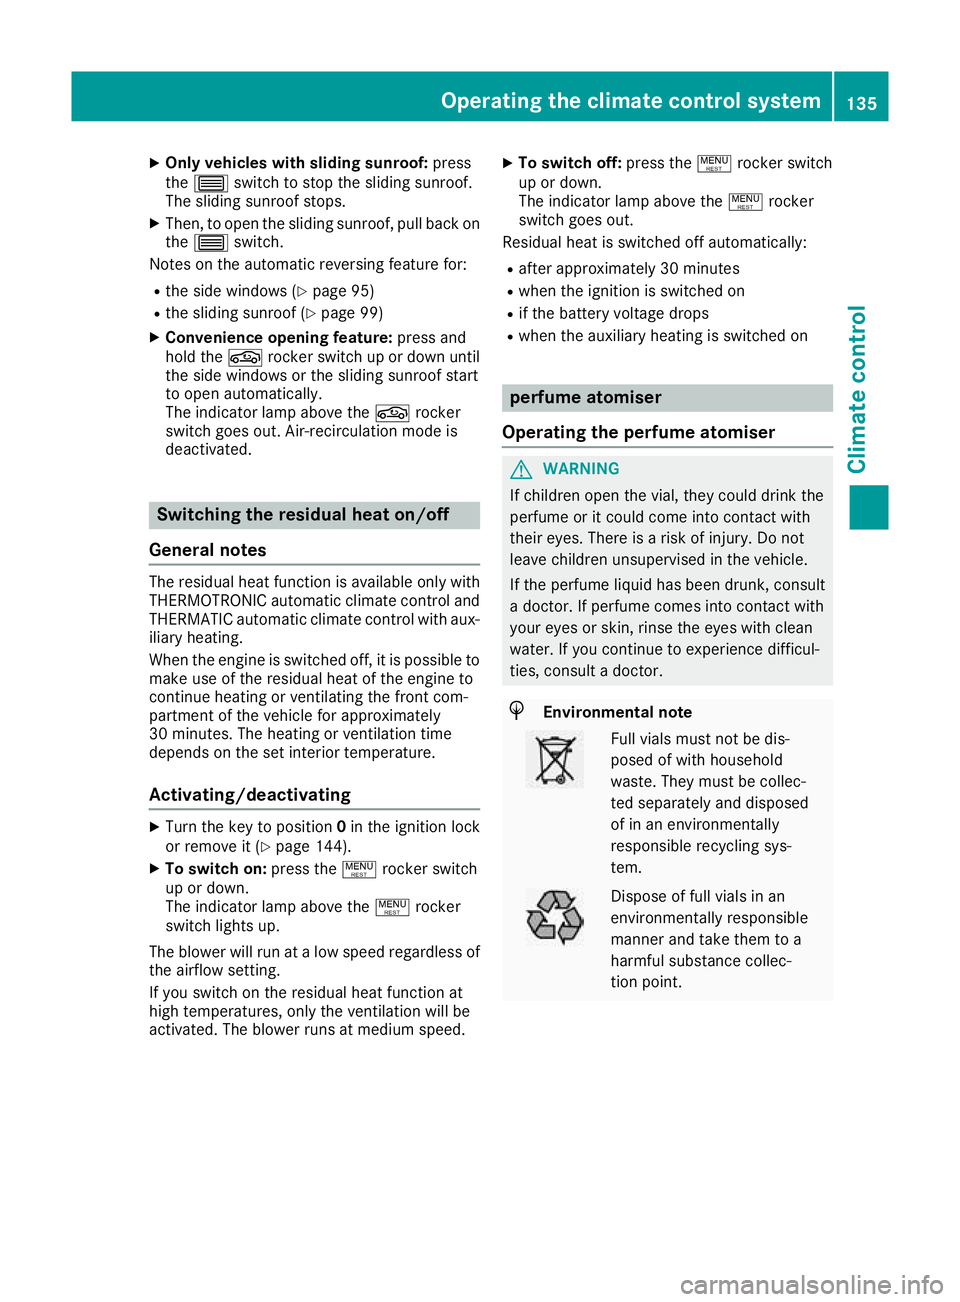
X Convenience opening feature: press and
hold the grocker switch up or down until
the side windows or the sliding sunroof start
to open automatically.
The indicator lamp above the grocker
switch goes out. Air-recirculation mode is
deactivated. Switching the residual heat on/off
General notes The residual heat function is available only with
THERMOTRONIC automatic climate control andTHERMATIC automatic climate control with aux-
iliary heating.
When the engine is switched off, it is possible to
make use of the residual heat of the engine to
continue heating or ventilating the front com-
partment of the vehicle for approximately
30 minutes. The heating or ventilation time
depends on the set interior temperature.
Activating/deactivating X
Turn the key to position 0in the ignition lock
or remove it (Y page 144).
X To switch on: press the!rocker switch
up or down.
The indicator lamp above the !rocker
switch lights up.
The blower will run at a low speed regardless of the airflow setting.
If you switch on the residual heat function at
high temperatures, only the ventilation will be
activated. The blower runs at medium speed. X
To switch off: press the!rocker switch
up or down.
The indicator lamp above the !rocker
switch goes out.
Residual heat is switched off automatically:
R after approximately 30 minutes
R when the ignition is switched on
R if the battery voltage drops
R when the auxiliary heating is switched on perfume atomiser
Operating the perfume atomiser G
WARNING
If children open the vial, they could drink the
perfume or it could come into contact with
their eyes. There is a risk of injury. Do not
leave children unsupervised in the vehicle.
If the perfume liquid has been drunk, consult
a doctor. If perfume comes into contact with
your eyes or skin, rinse the eyes with clean
water. If you continue to experience difficul-
ties, consult a doctor. H
Environmental note Full vials must not be dis-
posed of with household
waste. They must be collec-
ted separately and disposed
of in an environmentally
responsible recycling sys-
tem.
Dispose of full vials in an
environmentally responsible
manner and take them to a
harmful substance collec-
tion point.Operating the climate control system
135Climate control Z
Page 140 of 389
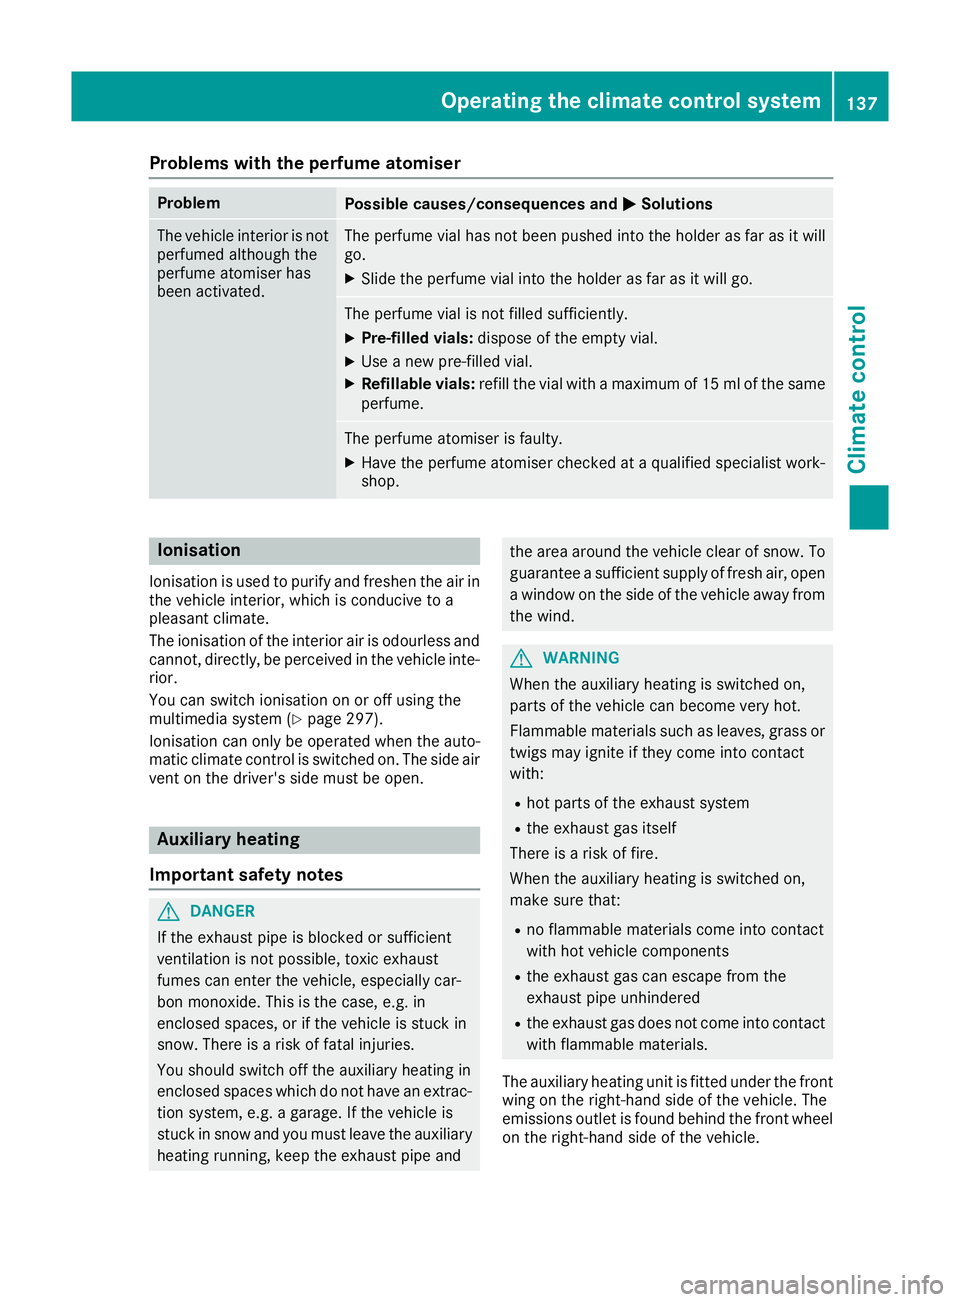
Problems with the perfume atomiser
Problem
Possible causes/consequences and
M
MSolutions The vehicle interior is not
perfumed although the
perfume atomiser has
been activated. The perfume vial has not been pushed into the holder as far as it will
go.
X Slide the perfume vial into the holder as far as it will go. The perfume vial is not filled sufficiently.
X Pre-filled vials: dispose of the empty vial.
X Use a new pre-filled vial.
X Refillable vials: refill the vial with a maximum of 15 ml of the same
perfume. The perfume atomiser is faulty.
X Have the perfume atomiser checked at a qualified specialist work-
shop. Ionisation
Ionisation is used to purify and freshen the air in the vehicle interior, which is conducive to a
pleasant climate.
The ionisation of the interior air is odourless and
cannot, directly, be perceived in the vehicle inte- rior.
You can switch ionisation on or off using the
multimedia system (Y page 297).
Ionisation can only be operated when the auto-
matic climate control is switched on. The side air vent on the driver's side must be open. Auxiliary heating
Important safety notes G
DANGER
If the exhaust pipe is blocked or sufficient
ventilation is not possible, toxic exhaust
fumes can enter the vehicle, especially car-
bon monoxide. This is the case, e.g. in
enclosed spaces, or if the vehicle is stuck in
snow. There is a risk of fatal injuries.
You should switch off the auxiliary heating in
enclosed spaces which do not have an extrac- tion system, e.g. a garage. If the vehicle is
stuck in snow and you must leave the auxiliary
heating running, keep the exhaust pipe and the area around the vehicle clear of snow. To
guarantee a sufficient supply of fresh air, open a window on the side of the vehicle away from
the wind. G
WARNING
When the auxiliary heating is switched on,
parts of the vehicle can become very hot.
Flammable materials such as leaves, grass or twigs may ignite if they come into contact
with:
R hot parts of the exhaust system
R the exhaust gas itself
There is a risk of fire.
When the auxiliary heating is switched on,
make sure that:
R no flammable materials come into contact
with hot vehicle components
R the exhaust gas can escape from the
exhaust pipe unhindered
R the exhaust gas does not come into contact
with flammable materials.
The auxiliary heating unit is fitted under the front wing on the right-hand side of the vehicle. The
emissions outlet is found behind the front wheel
on the right-hand side of the vehicle. Operating the climate control system
137Climate control Z
Page 145 of 389
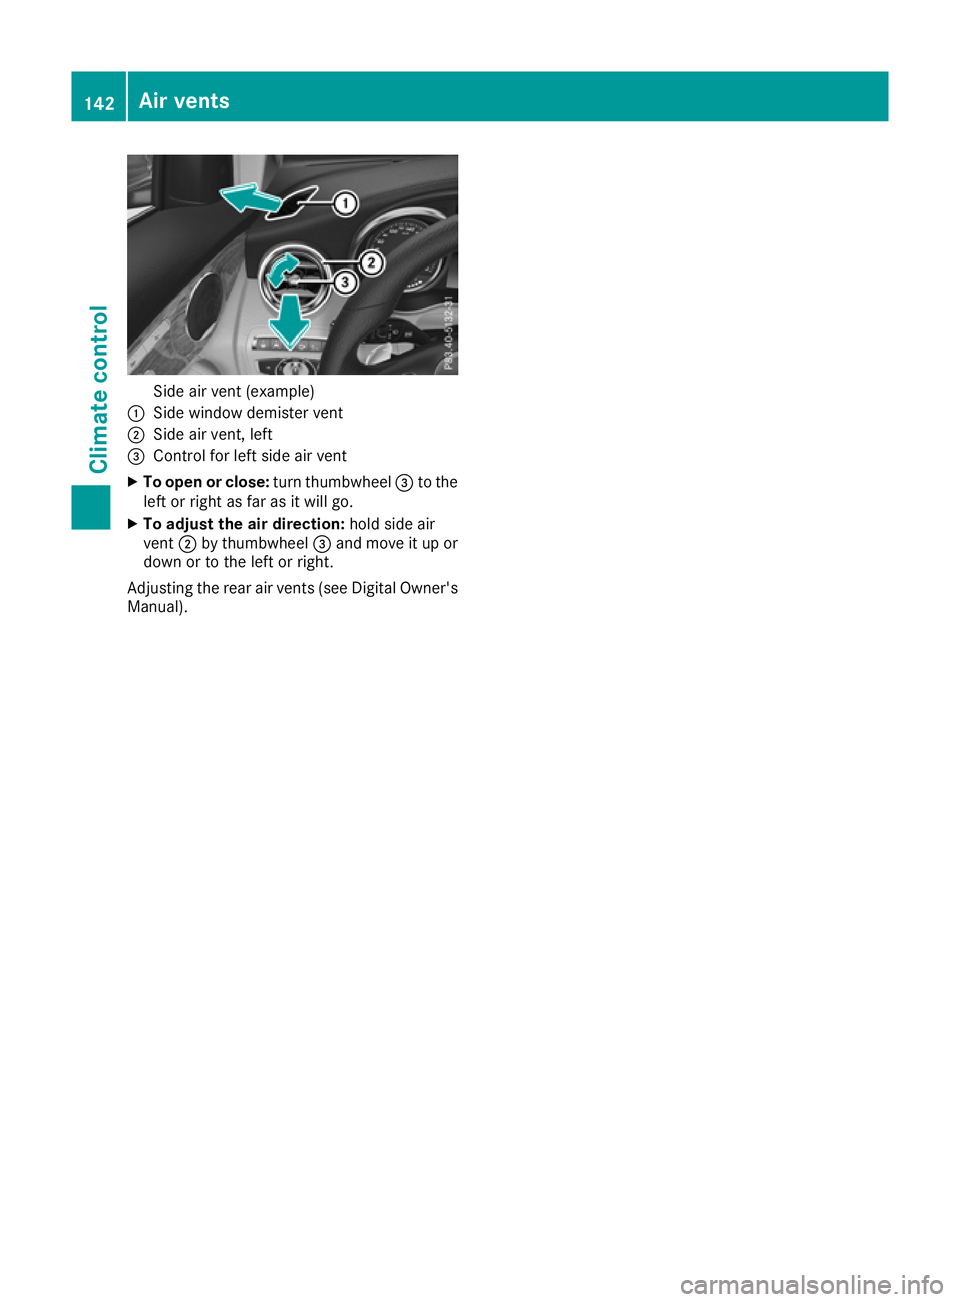
Side air vent (example)
: Side window demister vent
; Side air vent, left
= Control for left side air vent
X To open or close: turn thumbwheel=to the
left or right as far as it will go.
X To adjust the air direction: hold side air
vent ;by thumbwheel =and move it up or
down or to the left or right.
Adjusting the rear air vents (see Digital Owner's
Manual). 142
Air ventsClimate control
Page 156 of 389
i
In a few countries, the ECO start/stop func-
tion is deactivated at the factory due to the
quality of the available fuel. In this case, the
ECO start/stop function is not available in any
drive program, regardless of what is shown on
the multimedia system display. All other models
Hybrid vehicles: observe the notes on the
DYNAMIC SELECT switch in the separate Own-
er's Manual.
Use the DYNAMIC SELECT switch to change the
drive program.
Depending on the drive program selected, the
following vehicle characteristics will change:
R the drive (engine and transmission manage-
ment)
R the suspension
R the steering
R the availability of the ECO start/stop function
R the climate control
- The climate control settings
- The rear window heating operation period
- The performance of the seat heating
If the ignition is switched off for less than four
hours, the previously selected drive program is
activated when the engine is next started. If the
ignition is switched off for more than four hours, drive program Cis activated when the engine is
next started. X
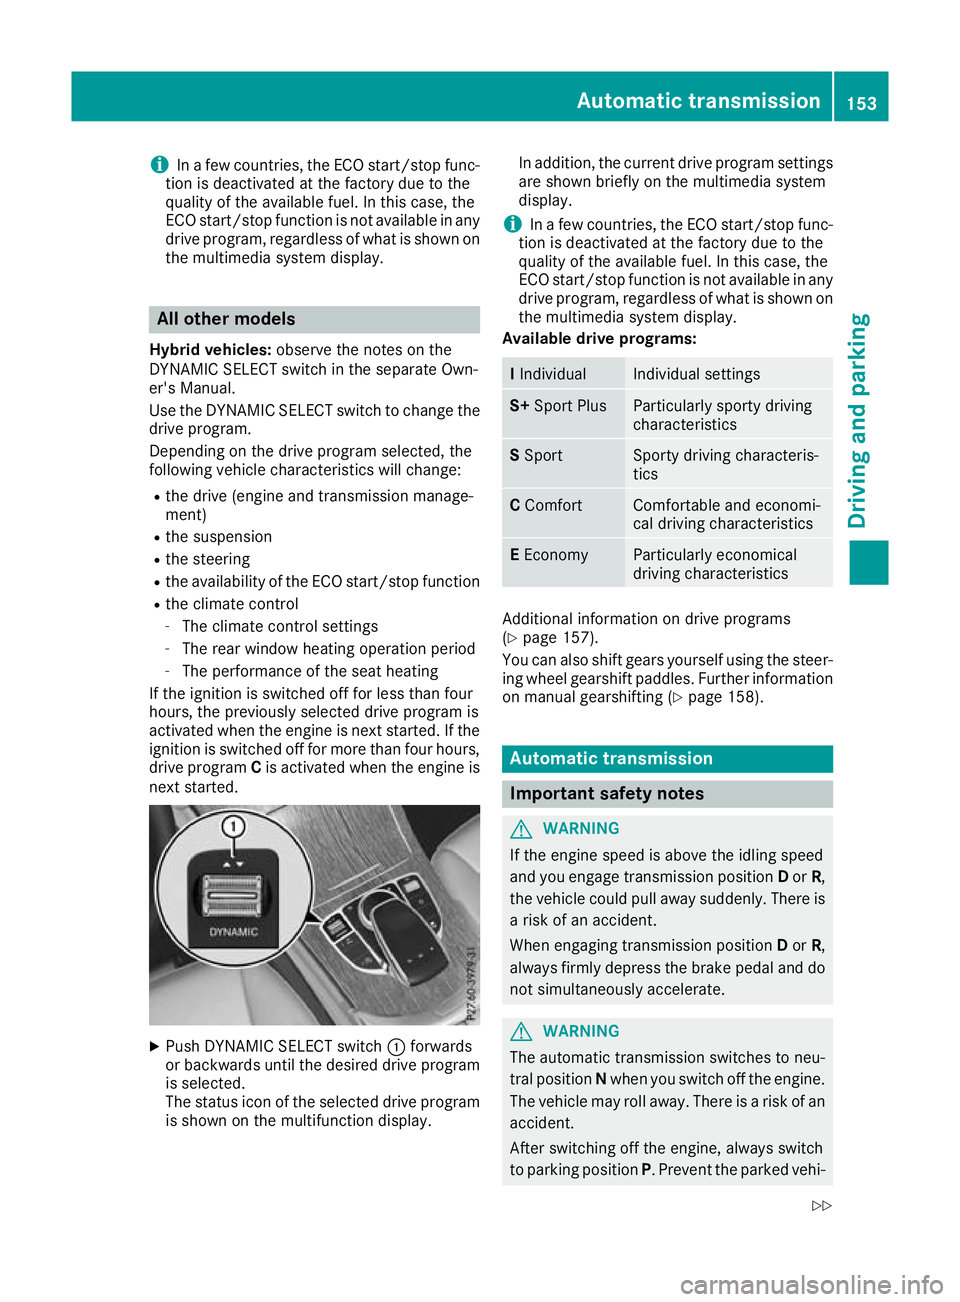
Push DYNAMIC SELECT switch :forwards
or backwards until the desired drive program is selected.
The status icon of the selected drive program
is shown on the multifunction display. In addition, the current drive program settings
are shown briefly on the multimedia system
display.
i In a few countries, the ECO start/stop func-
tion is deactivated at the factory due to the
quality of the available fuel. In this case, the
ECO start/stop function is not available in any
drive program, regardless of what is shown on
the multimedia system display.
Available drive programs: I
Individual Individual settings
S+
Sport Plus Particularly sporty driving
characteristics
S
Sport Sporty driving characteris-
tics
C
Comfort Comfortable and economi-
cal driving characteristics
E
Economy Particularly economical
driving characteristics
Additional information on drive programs
(Y
page 157).
You can also shift gears yourself using the steer- ing wheel gearshift paddles. Further information
on manual gearshifting (Y page 158). Automatic transmission
Important safety notes
G
WARNING
If the engine speed is above the idling speed
and you engage transmission position Dor R,
the vehicle could pull away suddenly. There is a risk of an accident.
When engaging transmission position Dor R,
always firmly depress the brake pedal and do not simultaneously accelerate. G
WARNING
The automatic transmission switches to neu-
tral position Nwhen you switch off the engine.
The vehicle may roll away. There is a risk of an
accident.
After switching off the engine, always switch
to parking position P. Prevent the parked vehi- Automatic transmission
153Driving and parking
Z
Page 176 of 389
the lightweight brake discs, particularly on the
brake plate. Driving on wet roads
Aquaplaning If water has accumulated to a certain depth on
the road surface, there is a danger of aquaplan-
ing occurring, even if:
R you are driving at low speeds
R the tyres have adequate tread depth
For this reason, drive in the following manner in
the event of heavy rain or in conditions in which aquaplaning can occur:
R lower your speed
R avoid tyre ruts
R avoid sudden steering movements
R brake carefully
Driving on flooded roads !
Bear in mind that vehicles travelling in front
or in the opposite direction create waves. This may cause the maximum permissible water
depth to be exceeded.
These notes must be observed under all cir-
cumstances. You could otherwise damage
the engine, the electronics or the transmis-
sion.
If you must drive on stretches of road on which
water has collected, please bear in mind that:
R in the case of standing water, the water level
must be no higher than the lower edge of the
vehicle body
R you should drive no faster than walking pace Winter driving
G
WARNING
If you shift down on a slippery road surface in an attempt to increase the engine's braking
effect, the drive wheels could lose their grip.
This increases the risk of skidding and having
an accident.
Do not shift down for additional engine brak-
ing on a slippery road surface. G
DANGER
If the exhaust pipe is blocked or adequate
ventilation is not possible, poisonous gases
such as carbon monoxide (CO) may enter the vehicle. This is the case, e.g. if the vehicle
becomes trapped in snow. There is a risk of
fatal injury.
If you leave the engine or the auxiliary heating
running, make sure the exhaust pipe and area
around the vehicle are clear of snow. To
ensure an adequate supply of fresh air, open a window on the side of the vehicle that is not
facing into the wind.
Have your vehicle winterproofed at a qualified
specialist workshop at the onset of winter.
You should drive particularly carefully on slip-
pery road surfaces. Avoid sudden acceleration,
steering and braking manoeuvres. Do not use
cruise control or DISTRONIC PLUS.
If the vehicle threatens to skid or cannot be
stopped when moving at low speed:
X Shift the transmission to position N.
X Try to bring the vehicle under control by using
corrective steering.
The outside temperature indicator is not
designed to serve as an ice-warning device and
is therefore unsuitable for that purpose.
Changes in the outside temperature are dis-
played after a short delay.
Indicated temperatures just above the freezing
point do not guarantee that the road surface is
free of ice. The road may still be icy, especially in wooded areas or on bridges. The vehicle could
skid if you fail to adapt your driving style. Always
adapt your driving style and drive at a speed to
suit the prevailing weather conditions.
You should pay special attention to road condi-
tions when temperatures are around freezing
point.
Further information on driving with snow chains (Y page 359).
Further information on driving with summer
tyres (Y page 358).
Observe the notes in the "Winter operation" sec-
tion (Y page 358). Driving
tips
173Driving an d parking Z