2016 MERCEDES-BENZ GLC-Class tow
[x] Cancel search: towPage 20 of 418

Stowage compartmentsArmrest (under) ............................. 308
Center console .............................. 307
Cup holders ................................... 318
Door ............................................... 308
Eyeglasses compartment ............... 307
Glove box ....................................... 307
Important safety information ......... 306
Map pockets ..................................3 08
Rear ............................................... 308
Stowage net ................................... 308
see Stowage areas
Stowage net ....................................... 308
Summer tires
In winter ........................................ 376
Sun visor ............................................ 319
Suspension settings
AIR BODY CONTROL ......................1 96
SUV
(Sport Utility Vehicle) ....................... 25
Switching air-recirculation mode
on/off ................................................. 147
T
Tachometer ........................................ 239
Tail lamps
see Lights
Tailgate
Display message ............................ 288
Emergency unlocking ....................... 97
Limiting the opening angle ...............9 7
Obstruction detection ......................9 2
Opening dimensions ......................4 15
Opening/closing .............................. 92
Opening/closing (automatically
from inside) ...................................... 96
Opening/closing (automatically
from outside) ................................... 93
Opening/closing (manually from
outside) ............................................ 93
Tank content
Fuel gauge ....................................... 33
Technical data
Capacities ...................................... 409
Information ....................................4 06
Tires/wheels ................................. 399
Trailer loads ................................... 416 Vehicle data ................................... 415
Telephone
Accepting a call (multifunction
steering wheel) .............................. 250
Display message ............................ 289
Introduction ................................... 250
Menu (on-board computer) ............ 250
Number from the phone book ........2 51
Redialing ........................................ 251
Rejecting/ending a call ................. 250
Temperature
Coolant (display in the instrument
cluster) .......................................... 239
Outside temperature ......................2 39
Setting (climate control) ................ 145
Tire pressure
Calling up (on-board computer) ..... 381
Checking manually ........................ 381
Display message ............................ 285
Maximum ....................................... 380
Not reached (TIREFIT) .................... 359
Notes ............................................. 379
Reached (TIREFIT) .......................... 359
Recommended ............................... 377
Tire pressure monitor
Checking the tire pressure elec-
tronically ........................................ 383
Function/notes .............................3 81
G
eneral notes ................................ 381
Important safety notes .................. 381
Radio type approval for the tire
pressure monitor ........................... 384
Restarting ...................................... 383
Warning lamp ................................. 302
Warning message .......................... 383
Tire-change tool kit ........................... 356
TIREFIT kit .......................................... 358
Tire pressure not reached .............. 359
Tire pressure reached .................... 359
Tires
Aspect ratio (definition) ................. 394
Average weight of the vehicle
occupants (definition) .................... 393
Bar (definition) ............................... 392
Changing a wheel .......................... 395
Characteristics .............................. 392
Checking ........................................ 375
Curb weight (definition) ................. 394
18Index
Page 21 of 418

Definition of terms ......................... 392
Direction of rotation ...................... 395
Display message ............................ 285
Distribution of the vehicle occu-
pants (definition) ............................ 395
DOT (Department of Transporta-
tion) (definition) ............................. 393
DOT, Tire Identification Number
(TIN) ............................................... 392
GAWR (Gross Axle Weight Rating)
(definition) ..................................... 393
General notes ................................ 399
GVW (Gross Vehicle Weight) (def-
inition) ........................................... 393
GVWR (Gross Vehicle Weight Rat-
ing) (definition) .............................. 393
Important safety notes .................. 374
Increased vehicle weight due to
optional equipment (definition) ...... 393
Information on driving .................... 374
Kilopascal (kPa) (definition) ........... 393
Labeling (overview) ........................ 389
Load bearing index (definition) ...... 394
Load index ..................................... 391
Load index (definition) ................... 393
Maximum load on a tire (defini-
tion) ............................................... 394
Maximum loaded vehicle weight
(definition) ..................................... 393
Maximum permissible tire pres-
sure (definition) ............................. 394
Maximum tire load ......................... 391
Maximum tire load (definition) ....... 394
MOExtended tires .......................... 376
Optional equipment weight (defi-
nition) ............................................ 394
PSI (pounds per square inch) (def-
inition) ........................................... 394
Replacing ....................................... 395
Service life ..................................... 376
Sidewall (definition) ....................... 394
Snow chains .................................. 377
Speed rating (definition) ................ 393
Storing ........................................... 395
Structure and characteristics
(definition) ..................................... 392
Summer tires in winter .................. 376
Temperature .................................. 388TIN (Tire Identification Number)
(definition) ..................................... 394
Tire bead (definition) ...................... 394
Tire pressure (definition) ................ 394
Tire pressures (recommended) ...... 393
Tire size (data) ............................... 399
Tire size designation, load-bearing
capacity, speed rating .................... 389
Tire tread ....................................... 375
Tire tread (definition) ..................... 394
Total load limit (definition) ............. 395
Traction ......................................... 388
Traction (definition) ....................... 394
Tread wear ..................................... 388
Uniform Tire Quality Grading
Standards ...................................... 387
Uniform Tire Quality Grading
Standards (definition) .................... 393
Wear indicator (definition) ............. 394
Wheel and tire combination ........... 401
Wheel rim (definition) .................... 393
see Flat tire
Top Tether ............................................ 63
Tow-starting
Emergency engine starting ............ 370
Important safety notes .................. 367
Towing a trailer
Axle load, permissible .................... 416
Cleaning the trailer tow hitch ......... 349
Coupling up a trailer ...................... 232
Decoupling a trailer ....................... 233
Driving tips .................................... 228
ESP
®(Electronic Stability Pro-
gram) ............................................... 75
Installing the ball coupling ............. 230
Lights display message .................. 272
Mounting dimensions .................... 415
Power supply ................................. 234
Pulling away with a trailer .............. 157
Removing the ball coupling ............ 234
Trailer loads ................................... 416
Towing away
Important safety guidelines ........... 367
Installing the towing eye ................ 368
Notes for 4MATIC vehicles ............ 370
Removing the towing eye ............... 369
T
ransporting the vehicle ................ 369
With both axles on the ground ....... 369
Index19
Page 22 of 418

Towing eye......................................... 355
Traffic Sign Assist
Display message ............................ 282
Function/notes ............................. 216
Important safety notes .................. 216
Instrument cluster display ............. 217
Trailer coupling
see Towing a trailer
Trailer loads and drawbar nose-
weights ............................................... 234
Trailer towing
Permissible trailer loads and
drawbar noseweights ..................... 234
Transfer case ..................................... 169
Transmission
see Automatic transmission
Transmission position display ......... 163
Transmission position display
(DIRECT SELECT lever) ...................... 163
Transporting the vehicle .................. 369
Trim pieces (cleaning instruc-
tions) .................................................. 350
Trip computer (on-board com-
puter) .................................................. 245
Trip odometer
Calling up ....................................... 244
Resetting (on-board computer) ...... 245
Trunk load (maximum) ...................... 415
Turn signals
Changing bulbs (front) ................... 132
Display message ............................ 273
Switching on/off ........................... 126
Two-way radio
Frequencies ................................... 406
Installation ..................................... 406
Transmission output (maximum) .... 406
Type identification plate
see Vehicle identification plate
U
UnlockingEmergency unlocking ....................... 90
From inside the vehicle (central
unlocking button) ............................. 89
V
Vanity mirror (in the sun visor) ........ 319
Vehicle
Correct use ...................................... 27
Data acquisition ............................... 28
Display message ............................ 287
Equipment ....................................... 23
Individual settings .......................... 252
Limited Warranty ............................. 28
Loading .......................................... 384
Locking (in an emergency) ............... 91
Locking (SmartKey) .......................... 83
Lowering ........................................ 399
Maintenance .................................... 24
Operating safety .............................. 25
Parking .......................................... 172
Parking for a long period ................ 176
Pulling away ................................... 157
Raising ........................................... 396
Reporting problems ......................... 27
Securing from rolling away ............ 396
Towing away .................................. 367
Transporting .................................. 369
Unlocking (in an emergency) ........... 90
Unlocking (SmartKey) ...................... 83
Vehicle data ................................... 415
Vehicle data
Roof load (maximum) ..................... 415
Trunk load (maximum) ................... 415
Vehicle dimensions ........................... 415
Vehicle emergency locking ................ 91
Vehicle identification number
see VIN
Vehicle identification plate .............. 408
Vehicle level
AIR BODY CONTROL ...................... 196
Display message ............................ 279
Vehicle tool kit .................................. 355
Video
Operating the DVD ......................... 249
VIN
Seat ............................................... 408
Type plate ...................................... 408
20Index
Page 28 of 418

worked components. In particular, systems
relevant to safety could also be affected. As aresult, these may no longer function as inten-
ded and/or jeopardize the operating safety of
the vehicle. There is an increased risk of an
accident and injury.
Never tamper with the wiring as well as elec-
tronic components or their software. You
should have all work to electrical and elec-
tronic equipment carried out at a qualified
specialist workshop.
!There is a risk of damage to the vehicle if:
Rthe vehicle becomes stuck, e.g. on a high
curb or an unpaved road
Ryou drive too fast over an obstacle, e.g. a
curb or a hole in the road
Ra heavy object strikes the undercarriage
or parts of the chassis
In situations like this, the body, the under-
carriage, chassis parts, wheels or tires
could be damaged without the damage
being visible. Components damaged in this
way can unexpectedly fail or, in the case of
an accident, no longer withstand the strain
they are designed to.
If the underbody paneling is damaged,
combustible materials such as leaves,
grass or twigs can gather between the
underbody and the underbody paneling. If
these materials come in contact with hot
parts of the exhaust system, they can catch
fire.
In such situations, have the vehicle
checked and repaired immediately at a
qualified specialist workshop. If on con-
tinuing your journey you notice that driving
safety is impaired, pull over and stop the
vehicle immediat
ely, paying attention to
road and traffic conditions. In such cases,
consult a qualified specialist workshop.
Declarations of conformity
Vehicle components which receive
and/or transmit radio waves
USA: "The wireless devices of this vehicle
comply with Part 15 of the FCC Rules. Oper-
ation is subject to the following two condi-
tions: 1) These devices may not cause harm-
ful interference, and 2) These devices must
accept any interference received, including
interference that may cause undesired oper-
ation. Changes or modifications not expressly
approved by the party responsible for com-
pliance could void the user’s authority to
operate the equipment."
Canada: "The wireless devices of this vehicle
comply with Industry Canada license-exempt RSS standard(s). Operation is subject to the
following two conditions: (1) These devices
may not cause interference, and (2) These
devices must accept any interference, includ-
ing interference that may cause undesired
operation of the device."
Diagnostics connection
The diagnostics connection is only intended
for the connection of diagnostic equipment at
a qualified specialist workshop.
GWARNING
If you connect equipment to the diagnostics
connection in the vehicle, it may affect the
operation of the vehicle systems. As a result,
the operating safety of the vehicle could be
affected. There is a risk of an accident.
Do not connect any equipment to a diagnos-
tics connection in the vehicle.
GWARNING
Objects in the driver's footwell can restrict the pedal travel or obstruct a depressed pedal.
The operating and road safety of the vehicle is
jeopardized. There is a risk of an accident.
Make sure that all objects in the vehicle are
stowed correctly, and that they cannot enter
26Introduction
Page 40 of 418

Center console, lower section
FunctionPage
:Stowage compartment306
Ashtray320
Cigarette lighter320
Socket321
Cup holder318
;Adjusts the volume/mute
(see the separate operating
instructions)
=Switches Audio 20 or
COMAND on or off (see the
separate operating instruc-
tions)
?Touchpad (see the separate
operating instructions)
FunctionPage
AStowage compartment306
BèECO start/stop func-
tion
158
CAdjusts the vehicle level
(AIR BODY CONTROL)
195
Deactivates PARKTRONIC198
DDYNAMIC SELECT switch161
EAudio or COMAND control-
ler (see the separate oper-
ating instructions)
38Center console
At a glance
Page 49 of 418
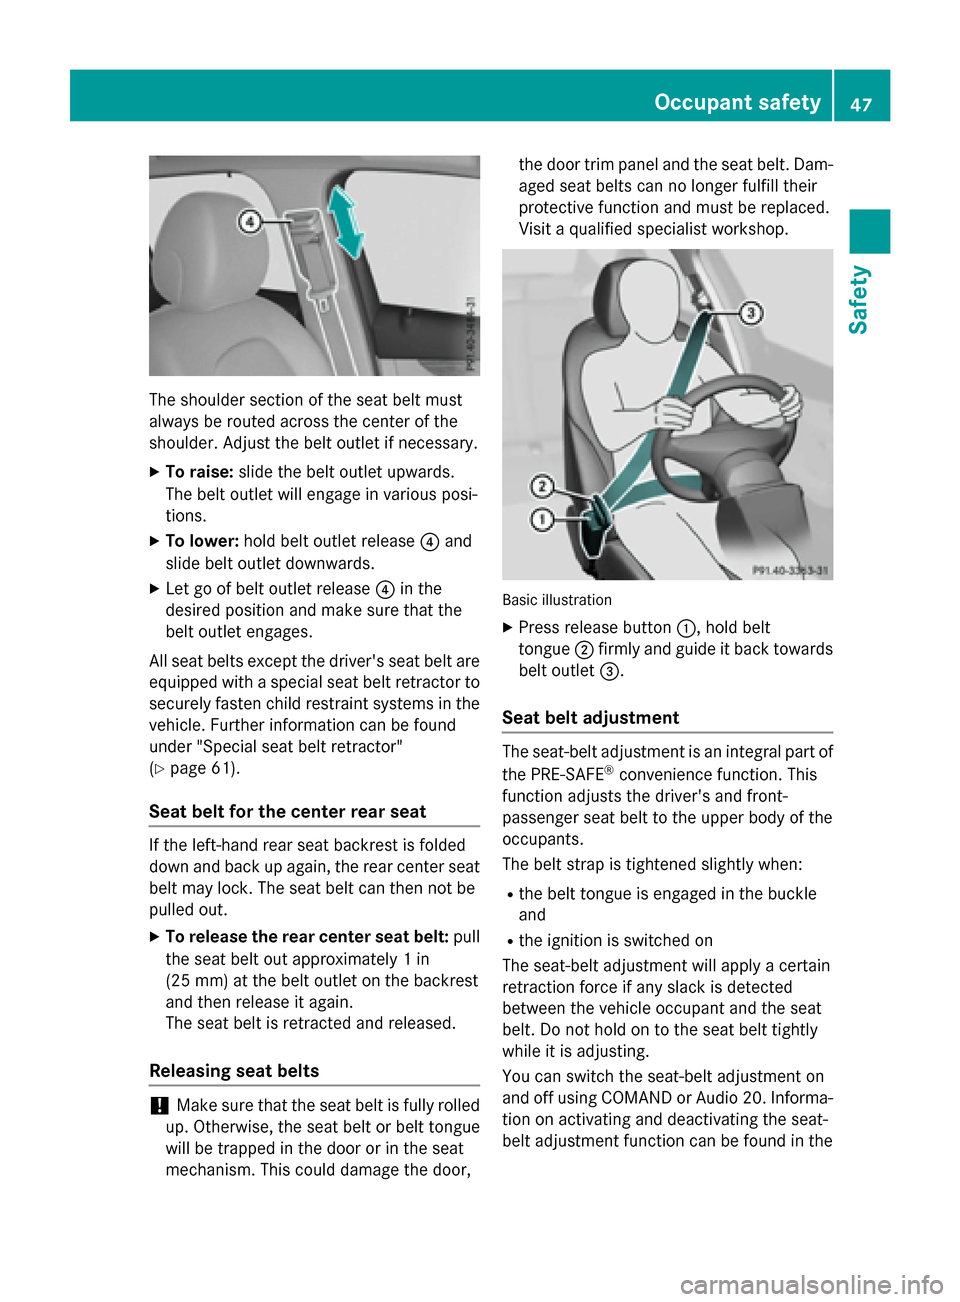
The shoulder section of the seat belt must
always be routed across the center of the
shoulder. Adjust the belt outlet if necessary.
XTo raise:slide the belt outlet upwards.
The belt outlet will engage in various posi-
tions.
XTo lower: hold belt outlet release ?and
slide belt outlet downwards.
XLet go of belt outlet release ?in the
desired position and make sure that the
belt outlet engages.
All seat belts except the driver's seat belt are
equipped with a special seat belt retractor to
securely fasten child restraint systems in the
vehicle. Further information can be found
under "Special seat belt retractor"
(
Ypage 61).
Seat belt for the center rear seat
If the left-hand rear seat backrest is folded
down and back up again, the rear center seat
belt may lock. The seat belt can then not be
pulled out.
XTo release the rear center seat belt: pull
the seat belt out approximately 1 in
(25 mm) at the belt outlet on the backrest
and then release it again.
The seat belt is retracted and released.
Releasing seat belts
!Make sure that the seat belt is fully rolled
up. Otherwise, the seat belt or belt tongue
will be trapped in the door or in the seat
mechanism. This could damage the door, the door trim panel and the seat belt. Dam-
aged seat belts can no longer fulfill their
protective function and must be replaced.
Visit a qualified specialist workshop.
Basic illustration
XPress release button
:, hold belt
tongue ;firmly and guide it back towards
belt outlet =.
Seat belt adjustment
The seat-belt adjustment is an integral part of
the PRE-SAFE®convenience function. This
function adjusts the driver's and front-
passenger seat belt to the upper body of the
occupants.
The belt strap is tightened slightly when:
Rthe belt tongue is engaged in the buckle
and
Rthe ignition is switched on
The seat-belt adjustment will apply a certain
retraction force if any slack is detected
between the vehicle occupant and the seat
belt. Do not hold on to the seat belt tightly
while it is adjusting.
You can switch the seat-belt adjustment on
and off using COMAND or Audio 20. Informa- tion on activating and deactivating the seat-
belt adjustment function can be found in the
Occupant safety47
Safety
Z
Page 59 of 418

Deployment of Emergency Tensioning
Devicesan dair bags
Important safet ynotes
GWARNING
The air bag parts are hot after an air bag has
bee ndeployed .There is aris kof injury.
Do no ttouch th eair bag parts .Hav e a
deployed air bag replaced at aqualified spe -
cialis tworkshop as soo nas possible.
GWARNING
A deployed air bag no longer offers any pro -
tection and canno tprovid eth eintended pro -
tection in an accident. There is an increase d
ris kof injury.
Hav eth evehicle towed to aqualified special-
ist workshop in order to hav e adeployed air
bag replaced.
It is important fo ryour safet yand that of your
passenger to hav edeployed air bags replaced
and to hav eany malfunctionin gair bags
repaired. Thi swill help to mak esur eth eair
bags continue to perform their protective
function fo rth evehicle occupant sin th e
event of acrash .
GWARNING
Pyrotechnic Emergency Tensioning Devices
that hav ebee ndeployed are no longer opera-
tional and are unable to perform their inten-
ded protective function .Thi sposes an
increase dris kof injury or eve nfatal injury.
Therefore, hav epyrotechni cEmergency Ten -
sioning Devices whic hhav ebee ntriggere d
immediately replaced at aqualified specialis t
workshop .
An electric moto ris used by PRE-SAF E®to
trigger th etightenin gof th eseat belt in haz -
ardous situations. Thi sprocedur eis reversi-
ble.
If Emergency Tensioning Devices are trig-
gered or air bags are deployed ,you will hear a
bang, and asmall amount of powder may also be released. The
6restrain tsystem warn -
in g lamp lights up.
Only in rar ecases will th eban gaffec tyour
hearing. The powder that is release dgener-
ally doe sno tconstitute ahealth hazard ,but it
may caus eshort-term breathin gdifficulties in
people wit hasthm aor other respirator yprob-
lems. To avoid this, you may wish to get out of
th evehicle or ope nth ewindows as soo nas it
is saf eto do so.
Ai rbags and pyrotechni cEmergency Tension-
in gDevices (ETDs) contain perchlorat emate-
rial ,whic hma
y require special handlin gand
regard fo rth eenvironment. National guide-
lines mus tbe observed durin gdisposal. In
California, see www.dtsc.ca.gov/
HazardousWaste/Perchlorate/
index.cfm .
Method of operation
Duringth efirst stage of acollision ,th e
restrain tsystem contro luni tevaluates impor -
tant physical dat arelatin gto vehicle deceler -
ation or acceleration ,suc has:
Rduration
Rdirection
Rintensit y
Based on th eevaluation of this data, th e
restrain tsystem contro luni ttriggers th e
Emergency Tensioning Devices durin g afron -
ta lor rea rcollision .
An Emergency Tensioning Devic ecan only be
triggered, if:
Rth eignition is switched on
Rth ecomponent sof th erestrain tsystem are
operational; see "Restrain tsystem warnin g
lamp " (
Ypage 43)
Rthebelt tongue is engage din th ebuckl eon
th erespective front-passenger seat
The Emergency Tensioning Devices in th e
rea rcompartmen tare triggere dindepend -
entl yof th eloc kstatus of th eseat belts.
If th erestrain tsystem contro luni tdetects a
more severe accident, further component sof
Occupant safety57
Safety
Z
Page 64 of 418
Removingth echild restrain tsystem and
deactivatin gth especial seat belt retractor:
XMak esur eyou observ eth echild restrain t
system manufacturer' sinstallation instruc -
tions.
XPress th erelease butto nof th eseat belt
buckl eand guide th eseat belt tongue bac k
toward sth ebelt sash guide .
The special seat belt retracto ris deactiva-
ted.
Chil drestraint system
The use of seat belt sand child restrain tsys-
tems is require dby law in :
Rall 50 state s
RtheU.S. territories
Rth eDistric tof Columbia
Rall Canadian province s
You can obtain further information about th e
correc tchild restrain tsystem from any
authorize dMercedes-Ben zCenter.
GWARNIN G
If th echild restrain tsystem is installed incor-
rectl yon asuitable seat ,it canno tprotect as
intended. The child canno tthen be restrained
in th eevent of an accident, heav ybrakin gor
sudden changes of direction .There is an
increase dris kof injury, possibl yeve nfatal.
Mak esur ethat you observ eth echild restrain t
system manufacturer' sinstallation instruc -
tion sand th enote son use. Pleas eensure,
that th ebase of th echild restrain tsystem is
always resting completely on th eseat cush-
ion .Never plac eobjects ,e.g. cushions, under
or behin dth echild restrain tsystem. Only use
child restrain tsystems wit hth eoriginal cover
designed for them. Only replac edamaged
cover swit hgenuin ecovers.
GWARNIN G
If th echild restrain tsystem is installed incor-
rectl yor is no tsecured ,it can come loos ein
th eevent of an accident, heav ybrakin gor a
sudden chang ein direction .The child
restrain tsystem could be throw nabout ,strik -
in g vehicl eoccupants. There is an increase d
ris kof injury, possibl yeve nfatal.
Always install child restrain tsystems prop-
erly, eve nif they are no tbein gused .Mak e
sur ethat you observ eth echild restrain tsys-
te m manufacturer' sinstallation instructions.
You will fin dfurther information on stowin g
objects ,luggag eor loads under "Loadin g
guidelines" (
Ypage 306).
GWARNING
Child restrain tsystems or their securin gsys-
tems whic hhav ebeen damaged or subjecte d
to aload in an acciden tcan no longer protect
as intended. The child canno tthen be
restrained in th eevent of an accident, heav y
brakin gor sudden changes of direction .There
is an increase dris kof injury, possibl yeve n
fatal.
Replac echild restrain tsystems whic hhav e
been damaged or subjecte dto aload in an
acciden tas soo nas possible. Hav eth esecur-
in g systems on th echild restrain tsystem
checke dat aqualified specialist workshop ,
before you install achild restrain tsystem
again .
The securin gsystems of child restrain tsys-
tems are:
Rth eseat belt system
Rth eLATCH-type (ISOFIX) securin grings
Rth eTop Tether anchorages
If it is absolutely necessar yto carry achild on
th efront-passenger seat ,be sur eto observ e
th einformation on th e"Occupant Classifica-
tion Syste m(OCS)" (
Ypage 51). There you
will also fin dinformation on deactivatin gth e
front-passenger fron tair bag.
62Children in the vehicle
Safety