2016 MERCEDES-BENZ GL flat tire
[x] Cancel search: flat tirePage 415 of 462

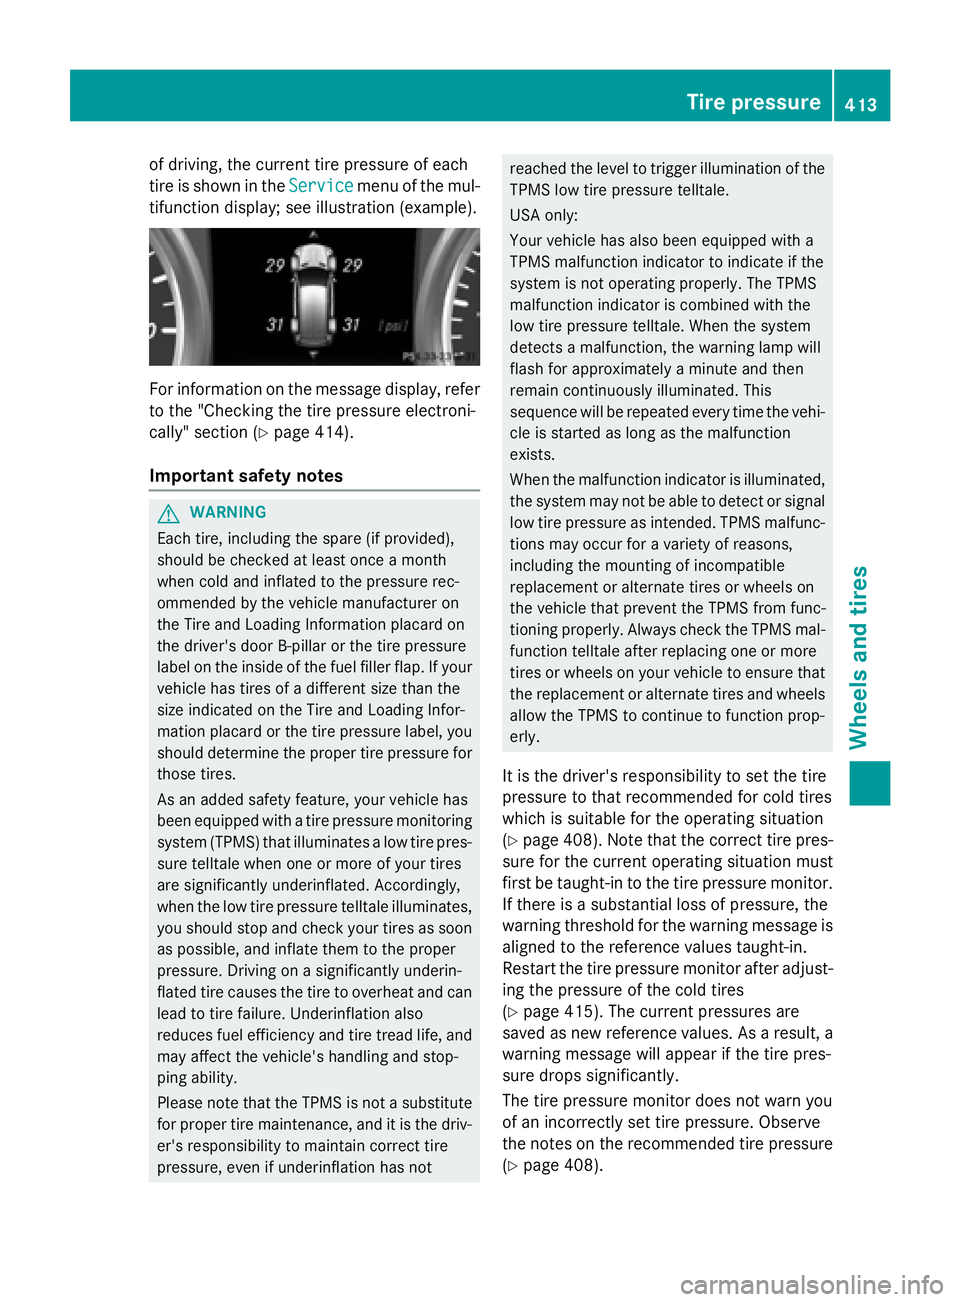
of driving, the current tire pressure of each
tire is shown in the Service
menu of the mul-
tifunction display; see illustration (example).
For information on the message display, refer
to the "Checking the tire pressure electroni-
cally" section ( Y
page 414).
Important safety notes
G WARNING
Each tire, including the spare (if provided),
should be checked at least once a month
when cold and inflated to the pressure rec-
ommended by the vehicle manufacturer on
the Tire and Loading Information placard on
the driver's door B-pillar or the tire pressure
label on the inside of the fuel filler flap. If your
vehicle has tires of a different size than the
size indicated on the Tire and Loading Infor-
mation placard or the tire pressure label, you
should determine the proper tire pressure for
those tires.
As an added safety feature, your vehicle has
been equipped with a tire pressure monitoring
system (TPMS) that illuminates a low tire pres-
sure telltale when one or more of your tires
are significantly underinflated. Accordingly,
when the low tire pressure telltale illuminates,
you should stop and check your tires as soon
as possible, and inflate them to the proper
pressure. Driving on a significantly underin-
flated tire causes the tire to overheat and can
lead to tire failure. Underinflation also
reduces fuel efficiency and tire tread life, and
may affect the vehicle's handling and stop-
ping ability.
Please note that the TPMS is not a substitute
for proper tire maintenance, and it is the driv-
er's responsibility to maintain correct tire
pressure, even if underinflation has not reached the level to trigger illumination of the
TPMS low tire pressure telltale.
USA only:
Your vehicle has also been equipped with a
TPMS malfunction indicator to indicate if the
system is not operating properly. The TPMS
malfunction indicator is combined with the
low tire pressure telltale. When the system
detects a malfunction, the warning lamp will
flash for approximately a minute and then
remain continuously illuminated. This
sequence will be repeated every time the vehi-
cle is started as long as the malfunction
exists.
When the malfunction indicator is illuminated,
the system may not be able to detect or signal
low tire pressure as intended. TPMS malfunc-
tions may occur for a variety of reasons,
including the mounting of incompatible
replacement or alternate tires or wheels on
the vehicle that prevent the TPMS from func-
tioning properly. Always check the TPMS mal-
function telltale after replacing one or more
tires or wheels on your vehicle to ensure that
the replacement or alternate tires and wheels
allow the TPMS to continue to function prop-
erly.
It is the driver's responsibility to set the tire
pressure to that recommended for cold tires
which is suitable for the operating situation
( Y
page 408). Note that the correct tire pres-
sure for the current operating situation must
first be taught-in to the tire pressure monitor.
If there is a substantial loss of pressure, the
warning threshold for the warning message is
aligned to the reference values taught-in.
Restart the tire pressure monitor after adjust-
ing the pressure of the cold tires
( Y
page 415). The current pressures are
saved as new reference values. As a result, a
warning message will appear if the tire pres-
sure drops significantly.
The tire pressure monitor does not warn you
of an incorrectly set tire pressure. Observe
the notes on the recommended tire pressure
( Y
page 408). Tire pressure 413
Wheels and tires Z
Page 430 of 462

Mounting a wheel
Preparing the vehicle X
Vehicle with emergency spare wheel:
when mounting the emergency spare
wheel in the event of a flat tire, follow the
additional notes on vehicle preparation
under "Flat tire" ( Y
page 387).X
Stop the vehicle on solid, non-slippery and
level ground. X
Unload heavy luggage. X
Apply the electric parking brake manually. X
Bring the front wheels into the straight-
ahead position. X
Shift the transmission to position P .X
Vehicles with the AIRMATIC package:
make sure that highway level is selected
( Y
page 219). X
Vehicles with the ON&OFFROAD pack-
age: make sure that highway level is selec-
ted ( Y
page 213).X
Switch off the engine. X
Vehicles without KEYLESS-GO: remove
the SmartKey from the ignition lock. X
Vehicles with KEYLESS-GO: open the
driver's door.
The on-board electronics now have status
0 . This is the same as the SmartKey having
been removed. X
Vehicles with KEYLESS-GO: remove the
Start/Stop button from the ignition lock
( Y
page 165). X
If included in the vehicle equipment,
remove the tire-change tool kit from the
vehicle. X
Safeguard the vehicle against rolling away.
i Apart from certain country-specific varia-
tions, vehicles are not equipped with a tire-
change tool kit. For information on which
tools are required to perform a wheel
change on your vehicle, consult an author-
ized Mercedes-Benz Center. Necessary tire-changing tools can include,
for example: R
Jack R
Wheel chock R
Lug wrench
Securing the vehicle to prevent it from
rolling away
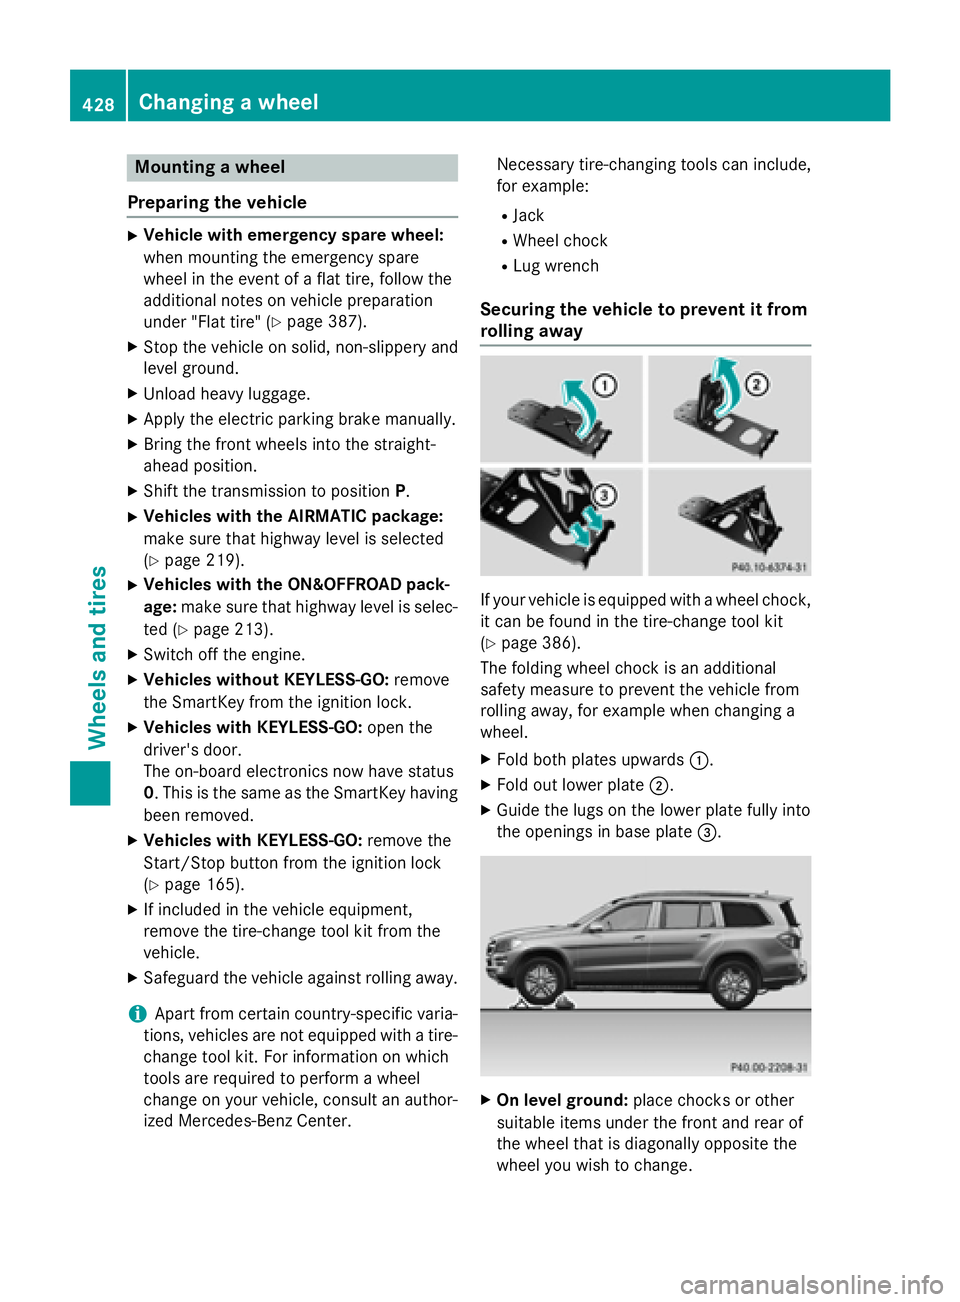
If your vehicle is equipped with a wheel chock,
it can be found in the tire-change tool kit
( Y
page 386).
The folding wheel chock is an additional
safety measure to prevent the vehicle from
rolling away, for example when changing a
wheel. X
Fold both plates upwards �C .X
Fold out lower plate �D .X
Guide the lugs on the lower plate fully into
the openings in base plate �
Page 431 of 462

X
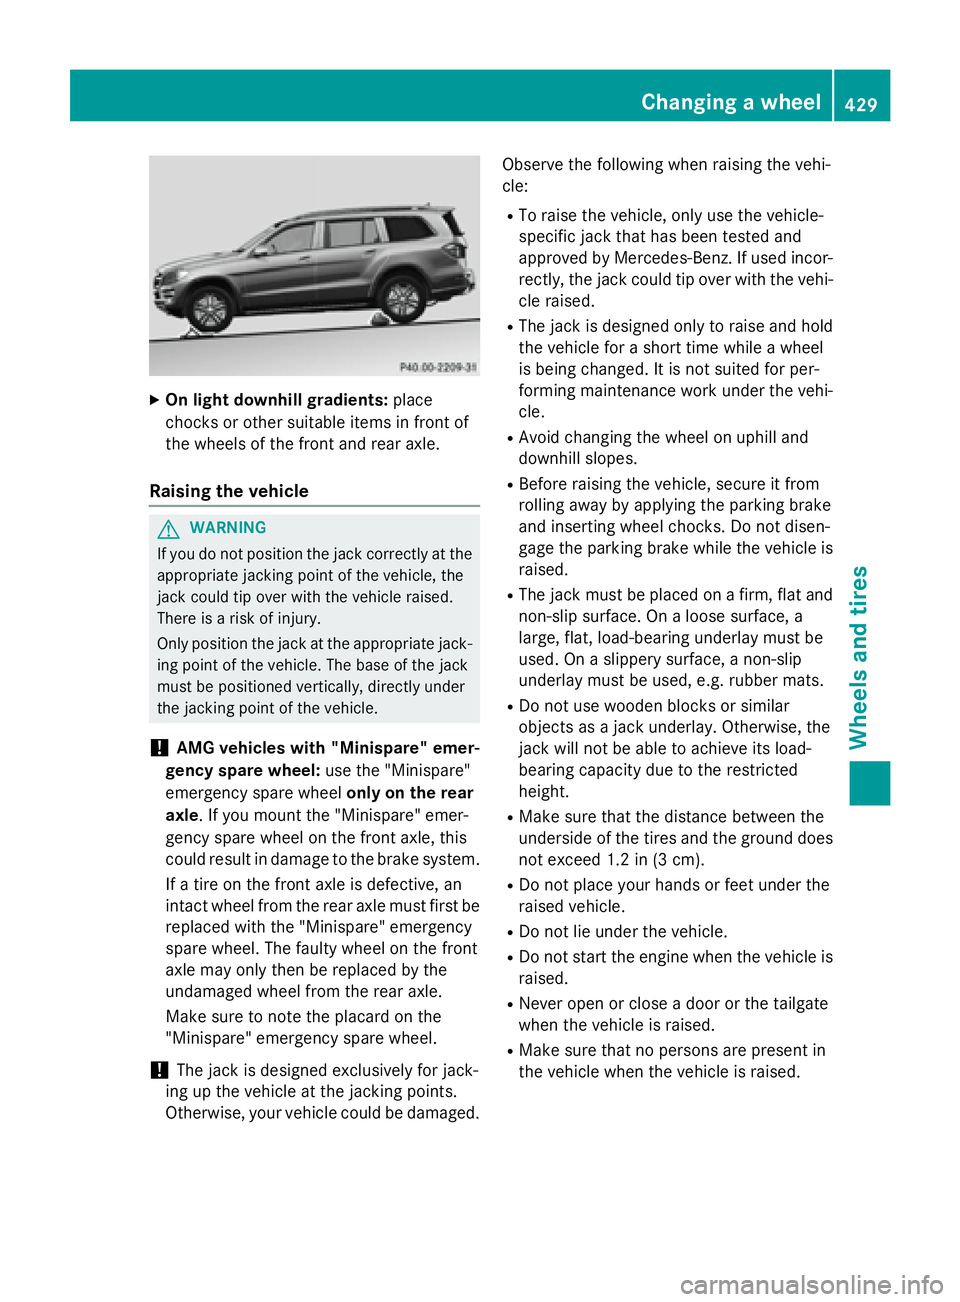
On light downhill gradients: place
chocks or other suitable items in front of
the wheels of the front and rear axle.
Raising the vehicle
G WARNING
If you do not position the jack correctly at the
appropriate jacking point of the vehicle, the
jack could tip over with the vehicle raised.
There is a risk of injury.
Only position the jack at the appropriate jack-
ing point of the vehicle. The base of the jack
must be positioned vertically, directly under
the jacking point of the vehicle.
! AMG vehicles with "Minispare" emer-
gency spare wheel: use the "Minispare"
emergency spare wheel only on the rear
axle . If you mount the "Minispare" emer-
gency spare wheel on the front axle, this
could result in damage to the brake system.
If a tire on the front axle is defective, an
intact wheel from the rear axle must first be
replaced with the "Minispare" emergency
spare wheel. The faulty wheel on the front
axle may only then be replaced by the
undamaged wheel from the rear axle.
Make sure to note the placard on the
"Minispare" emergency spare wheel.
! The jack is designed exclusively for jack-
ing up the vehicle at the jacking points.
Otherwise, your vehicle could be damaged. Observe the following when raising the vehi-
cle: R
To raise the vehicle, only use the vehicle-
specific jack that has been tested and
approved by Mercedes-Benz. If used incor-
rectly, the jack could tip over with the vehi-
cle raised. R
The jack is designed only to raise and hold
the vehicle for a short time while a wheel
is being changed. It is not suited for per-
forming maintenance work under the vehi-
cle. R
Avoid changing the wheel on uphill and
downhill slopes. R
Before raising the vehicle, secure it from
rolling away by applying the parking brake
and inserting wheel chocks. Do not disen-
gage the parking brake while the vehicle is
raised. R
The jack must be placed on a firm, flat and
non-slip surface. On a loose surface, a
large, flat, load-bearing underlay must be
used. On a slippery surface, a non-slip
underlay must be used, e.g. rubber mats. R
Do not use wooden blocks or similar
objects as a jack underlay. Otherwise, the
jack will not be able to achieve its load-
bearing capacit y due to the restricted
height. R
Make sure that the distance between the
underside of the tires and the ground does
not exceed 1.2 in (3 cm). R
Do not place your hands or feet under the
raised vehicle. R
Do not lie under the vehicle. R
Do not start the engine when the vehicle is
raised. R
Never open or close a door or the tailgate
when the vehicle is raised. R
Make sure that no persons are present in
the vehicle when the vehicle is raised.Changing a wheel 429
Wheels and tires Z
Page 435 of 462

The recommended pressures for various
operating conditions can be found: R
on the Tire and Loading Information placard
with the recommended tire pressures on
the B-pillar on the driver's side R
in the tire pressure table on the inside of the
fuel filler flap
Observe the notes on recommended tire
pressures under various operating conditions
( Y
page 408).
Check tire pressures regularly, and only when
the tires are cold. Comply with the mainte-
nance recommendations of the tire manufac-
turer in the vehicle document wallet.
Notes on the vehicle equipment – always
equip the vehicle with: R
tires of the same size across an axle (left
and right) R
the same type of tires at a given time (sum-
mer tires, winter tires, MOExtended tires)
Vehicles equipped with MOExtended tires are
not equipped with a TIREFIT kit at the factory.
It is therefore recommended that you addi-
tionally equip your vehicle with a TIREFIT kit if
you mount tires that do not feature run-flat
properties, e.g. winter tires. A TIREFIT kit may
be obtained from a qualified specialist work-
shop.
i Not all wheel and tire combinations are
available at the factory for all countries.
i The following pages contain information
on approved wheel rims and tire sizes for
equipping your vehicle with winter tires.
Winter tires are not available at the factory
as standard equipment or optional extras.
If you want to equip your vehicle with
approved winter tires, it may be necessary
to obtain wheel rims in the corresponding
size. The size of the approved winter tires
may differ from the standard tires. This is
dependent on the model and the equip-
ment installed at the factory.
The tires and wheel rims, as well as further
information, can be obtained at a qualified
specialist workshop. Wheel and tire combinations 433
Wheels and tires Z