2016 MERCEDES-BENZ GL warning lights
[x] Cancel search: warning lightsPage 70 of 462
Drivin g safet y systems
Overview of drivin g safet y systemsIn this section , you will fin d information about
th e following drivin g safet y systems :R
AB S ( A nti-loc k B rakin g S ystem)
( Y
page 68) R
BA S ( B rake A ssist S ystem) ( Y
page 69 )R
BA S PLU S ( B rake A ssist S ystem Plus )
( Y
page 69 )R
COLLISION PREVENTION ASSIST PLU S
(distanc e warnin g function and Adaptive
Brak e Assist) ( Y
page 70 )R
ES P ®
( E lectronic S t ability P r ogram)
( Y
page 73) R
EB D ( E lectroni c B r ak e forc e D i stribution )
( Y
page 75) R
ADAPTIV E BRAKE ( Y
page 76 )R
PRE-SAF E ®
Brak e ( Y
page 76)R
STEE R CONTROL ( Y
page 77)
Important safet y notes
If you fail to adapt your drivin g style or if you
are inattentive , th e drivin g safet y systems can
neither reduce th e ris k of an acciden t no r
override th e laws of physics. Driving safet y
systems are merely aids designed to assist
driving. You are responsible fo r maintainin g
th e distanc e to th e vehicle in front, fo r vehicle
speed, fo r braking in goo d time, and fo r stay-
in g in lane. Always adapt your drivin g style to
suit th e prevailin g road and weather condi-
tion s and maintain a saf e distanc e from th e
vehicle in front. Drive carefully.
The drivin g safet y systems described only
wor k as effectively as possible when there is
adequat e contact between th e tires and th e
road surface. Please pay special attention to
th e note s on tires , recommended minimum
tire tread depths, etc. ( Y
page 404).
In wintr y drivin g conditions, always use winte r
tires (M+ S tires ) and if necessary, snow
chains. Only in this way will th e drivin g safet y systems described in this section wor k as
effectively as possible.
ABS (Anti-lock Braking System)
General information AB S regulates brake pressure in suc h a way
that th e wheels do no t loc k when you brake .
Thi s allow s you to continue steerin g th e vehi-
cl e when braking .
The �% AB S warnin g lamp in th e instrumen t
cluster lights up when th e ignition is switched
on . It goe s out when th e engin e is running .
AB S works from a speed of about 5 mph
(8 km/h), regardles s of road-surfac e condi-
tions. AB S works on slipper y surfaces, eve n
when you only brake gently.
Important safet y notes
i Observ e th e "Important safet y notes" sec -
tion ( Y
page 68) .
G WARNING
If AB S is faulty, th e wheels could loc k when
braking . The steerability and braking charac -
teristics may be severely impaired. Addition -
ally, further drivin g safet y systems are deac -
tivated. There is an increase d danger of skid-
din g and accidents .
Drive on carefully. Hav e AB S checke d imme-
diately at a qualified specialis t workshop .
Whe n AB S is malfunctioning, other systems ,
includin g drivin g safet y systems , will also
becom e inoperative . Observ e th e information
on th e AB S warnin g lamp ( Y
page 327) and
display message s whic h may be shown in th e
instrumen t cluster ( Y
page 291).
Braking X
If ABS intervenes: continue to depress th e
brake peda l vigorousl y until th e braking sit -
uation is over. X
To make a full brak e application:
depress th e brake peda l wit h full force.68
Driving safety systems
Safety
Page 87 of 462
If you unlock the vehicle using the mechanical
key, the fuel filler flap will not be unlocked
automatically. X
To unlock the fuel filler flap: insert the
SmartKey into the ignition lock.
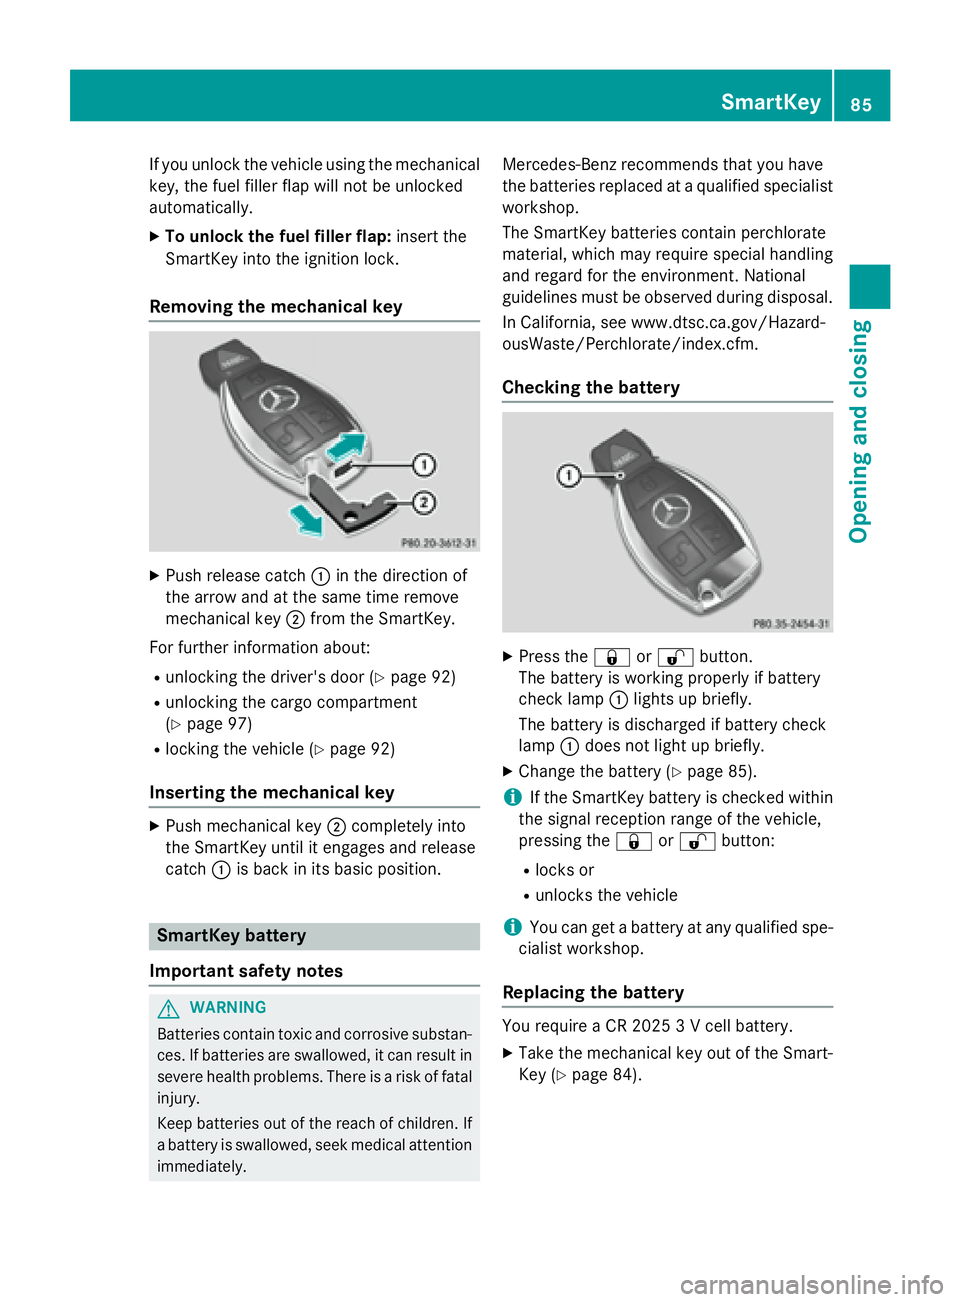
Removing the mechanical key X
Push release catch �C in the direction of
the arrow and at the same time remove
mechanical key �D from the SmartKey.
For further information about: R
unlocking the driver's door ( Y
page 92)R
unlocking the cargo compartment
( Y
page 97) R
locking the vehicle ( Y
page 92)
Inserting the mechanical key X
Push mechanical key �D completely into
the SmartKey until it engages and release
catch �C is back in its basic position.
SmartKey battery
Important safety notes
G WARNING
Batteries contain toxic and corrosive substan-
ces. If batteries are swallowed, it can result in
severe health problems. There is a risk of fatal
injury.
Keep batteries out of the reach of children. If
a battery is swallowed, seek medical attention
immediately. Mercedes-Benz recommends that you have
the batteries replaced at a qualified specialist
workshop.
The SmartKey batteries contain perchlorate
material, which may require special handling
and regard for the environment. National
guidelines must be observed during disposal.
In California, see www.dtsc.ca.gov/Hazard-
ousWaste/Perchlorate/index.cfm.
Checking the battery X
Press the �7 or �6 button.
The battery is working properly if battery
check lamp �C lights up briefly.
The battery is discharged if battery check
lamp �C does not light up briefly. X
Change the battery ( Y
page 85).
i If the SmartKey battery is checked within
the signal reception range of the vehicle,
pressing the �7 or �6 button:R
locks or R
unlocks the vehicle
i You can get a battery at any qualified spe-
cialist workshop.
Replacing the battery
You require a CR 2025 3 V cell battery. X
Take the mechanical key out of the Smart-
Key ( Y
page 84).SmartKey 85
Opening and closing Z
Page 126 of 462
The last position of the steering column is
stored when you: R
switch off the ignition. R
save the setting with the memory function
( Y
page 127).
Crash-responsive EASY-EXIT feature If the crash-responsive EASY-EXIT feature is
triggered in an accident, the steering column
will move upwards when the driver's door is
opened. This occurs irrespective of the posi-
tion of the SmartKey in the ignition lock. This
makes it easier to exit the vehicle and rescue
the occupants.
The crash-responsive EASY-EXIT feature is
only operational if the EASY-EXIT/ENTRY fea-
ture is activated in the on-board computer
( Y
page 285).
Mirrors
Rear-view mirror
X
Anti-glare mode: flick anti-glare lever �C
forwards or back. Exterior mirrors
Adjusting the exterior mirrors
G WARNING
You could lose control of your vehicle if you do
the following while driving: R
adjust the driver's seat, head restraint,
steering wheel or mirrors R
fasten the seat belt
There is a risk of an accident.
Adjust the driver's seat, head restraint, steer-
ing wheel and mirror and fasten your seat belt
before starting the engine.
G WARNING
The exterior mirror on the front-passenger
side reduces the size of the image. Visible
objects are actually closer than they appear.
This means that you could misjudge the dis-
tance from road users traveling behind, e.g.
when changing lane. There is a risk of an acci-
dent.
For this reason, always make sure of the
actual distance from the road users traveling
behind by glancing over your shoulder.
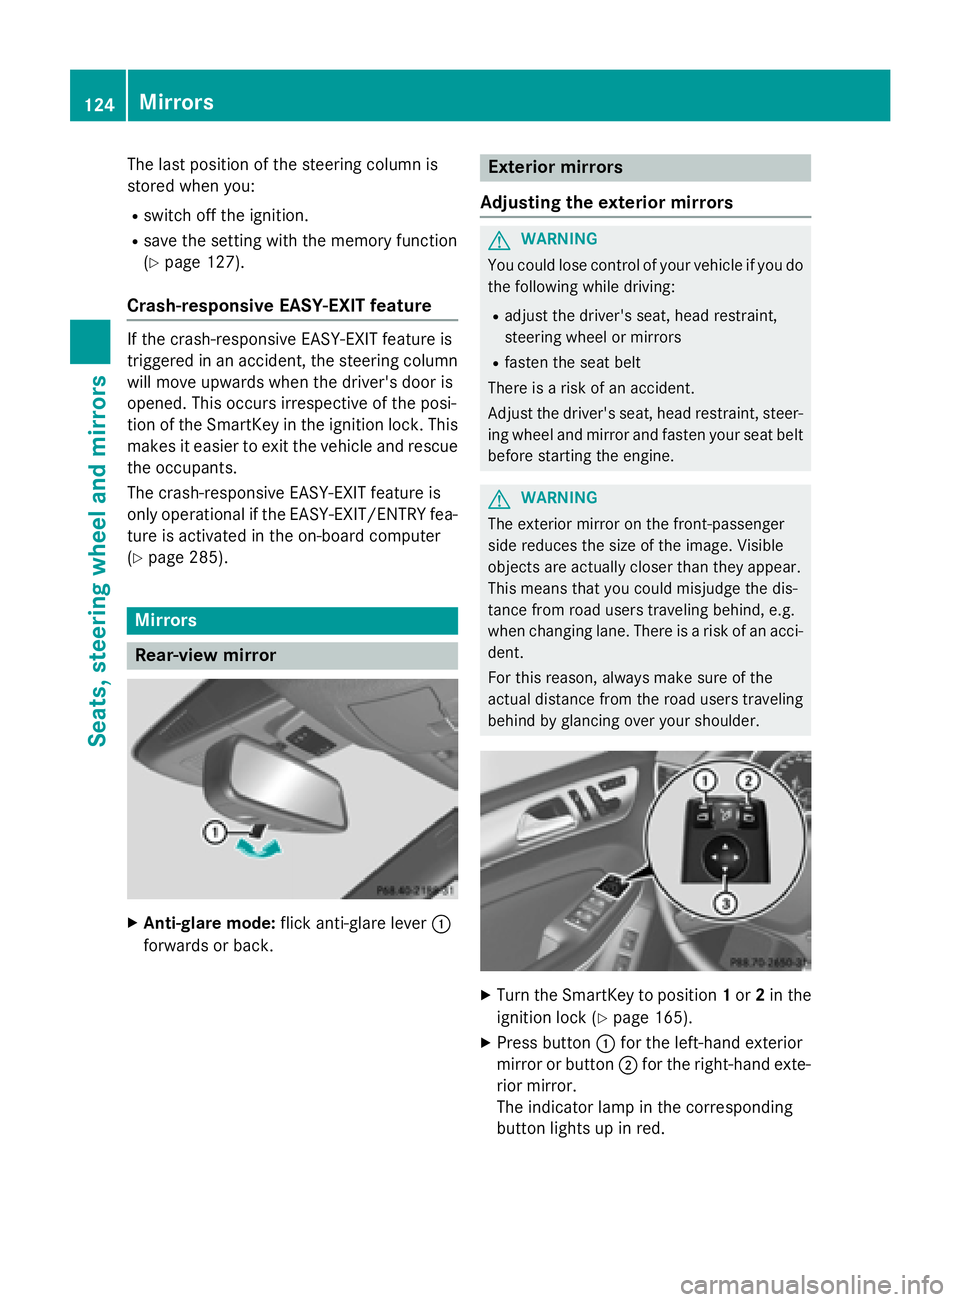
X
Turn the SmartKey to position 1 or 2 in the
ignition lock ( Y
page 165). X
Press button �C for the left-hand exterior
mirror or button �D for the right-hand exte-
rior mirror.
The indicator lamp in the corresponding
button lights up in red.124
Mirrors
Seats, steering wheel and mirrors
Page 133 of 462
running lamps or the parking lamps and the
low-beam headlamps are switched on or off
automatically depending on the brightness
of the ambient light. X
To switch on automatic headlamp
mode: turn the light switch to �X .
G WARNING
When the light switch is set to �X , the low-
beam headlamps may not be switched on
automatically if there is fog, snow or other
causes of poor visibility due to the weather
conditions such as spray. There is a risk of an
accident.
In such situations, turn the light switch to
�X .
The automatic headlamp feature is only an
aid. The driver is responsible for the vehicle's
lighting at all times.
Only for Canada:
The daytime running lamps improve the visi-
bility of your vehicle during the day. The day-
time running lamps function is required by law
in Canada. It cannot therefore be deactivated.
When the engine is running and the vehicle is
stationary: if you move the selector lever from
a drive position to P , the daytime running
lamps/low-beam headlamps go out after
three minutes.
When the engine is running, the vehicle is
stationary and in bright ambient light: if you
turn the light switch to �` , the daytime
running lamps and parking lamps switch on.
If the engine is running and you turn the light
switch to �X , the manual settings take
precedence over the daytime running lamps.
USA only:
The daytime running lamps improve the visi-
bility of your vehicle during the day. To do this,
the daytime running lamps function must be
switched on using the on-board computer
( Y
page 284).
If the engine is running and you turn the light
switch to �` or �X , the manual settings take precedence over the daytime running
lamps.
Low-beam headlamps
Even if the light sensor does not detect that it
is dark, the parking lamps and low-beam
headlamps switch on when the ignition is
switched on and the light switch is set to the
�X position. This is a particularly useful
fu nction in the event of rain and fog. X
To switch on the low-beam headlamps:
turn the SmartKey in the ignition lock to
position 2 or start the engine. X
Turn the light switch to �X .
The green �X indicator lamp in the instru-
ment cluster lights up.
Rear fog lamp
The rear fog lamp improves visibility of your
vehicle for the traffic behind in the event of
thick fog. Please take note of the country-
specific regulations for the use of rear fog
lamps. X
To switch on the rear fog lamps: turn the
SmartKey to position 2 in the ignition lock
or start the engine. X
Turn the light switch to �X or �X .X
Press the �^ button.
The yellow �^ indicator lamp in the
instrument cluster lights up. X
To switch off the rear fog lamp: press the
�^ button.
The yellow �^ indicator lamp in the
instrument cluster goes out.
Parking lamps
! If the battery has been excessively dis-
charged, the parking lamps or standing
lamps are automatically switched off to
enable the next engine start. Always park
your vehicle safely and sufficiently lit
according to legal standards. Avoid the
continuous use of the �` parking lamps
for several hours. If possible, switch on the
�d right or the �c left standing lamp.Exterior lighting 131
Lights and windshield wipers Z
Page 135 of 462
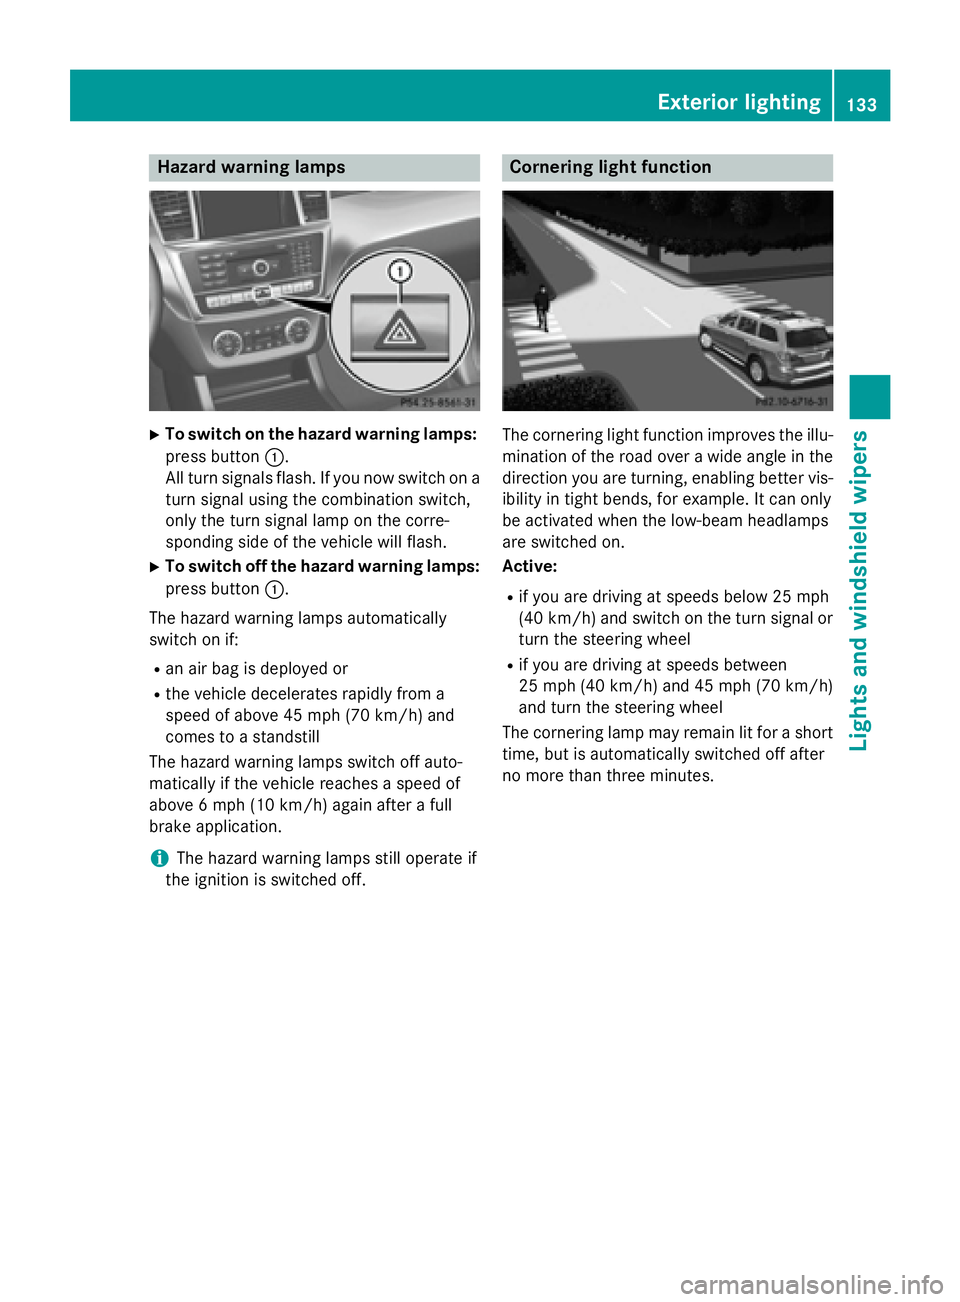
Hazard warning lamps X
To switch on the hazard warning lamps:
press button �C .
All turn signals flash. If you now switch on a
turn signal using the combination switch,
only the turn signal lamp on the corre-
sponding side of the vehicle will flash. X
To switch off the hazard warning lamps:
press button �C .
The hazard warning lamps automatically
switch on if: R
an air bag is deployed or R
the vehicle decelerates rapidly from a
speed of above 45 mph (70 km/h) and
comes to a standstill
The hazard warning lamps switch off auto-
matically if the vehicle reaches a speed of
above 6 mph (10 km/h) again after a full
brake application.
i The hazard warning lamps still operate if
the ignition is switched off. Cornering light function
The cornering light function improves the illu-
mination of the road over a wide angle in the
direction you are turning, enabling better vis-
ibility in tight bends, for example. It can only
be activated when the low-beam headlamps
are switched on.
Active: R
if you are driving at speeds below 25 mph
(40 km/h) and switch on the turn signal or
turn the steering wheel R
if you are driving at speeds between
25 mph (40 km/h) and 45 mph (70 km/h)
and turn the steering wheel
The cornering lamp may remain lit for a short
time, but is automatically switched off after
no more than three minutes. Exterior lighting 133
Lights and windshield wipers Z
Page 169 of 462
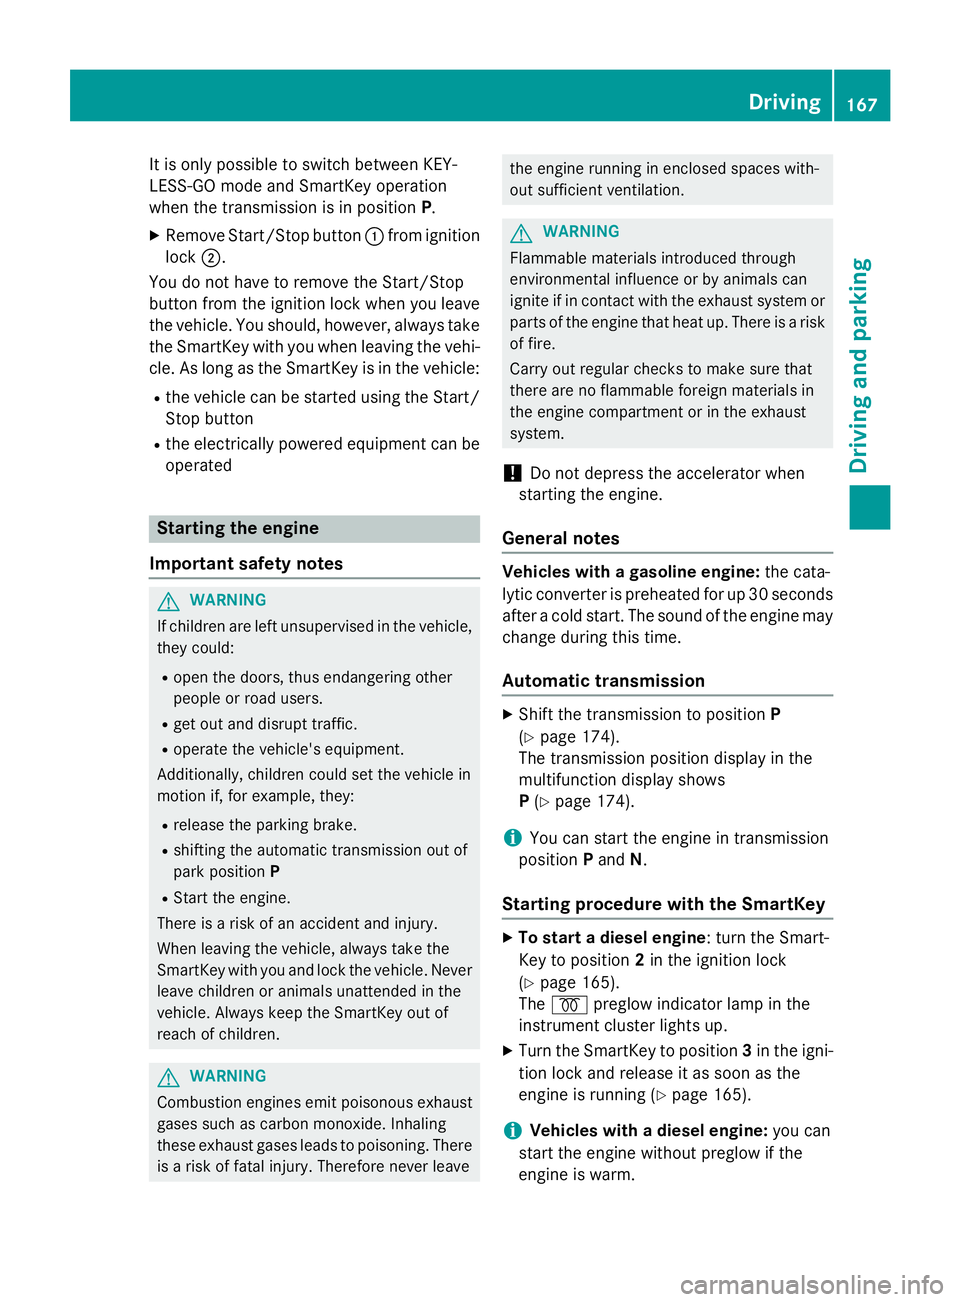
It is only possible to switch between KEY-
LESS-GO mode and SmartKey operation
when the transmission is in position P .X
Remove Start/Stop button �C from ignition
lock �D .
You do not have to remove the Start/Stop
button from the ignition lock when you leave
the vehicle. You should, however, always take
the SmartKey with you when leaving the vehi-
cle. As long as the SmartKey is in the vehicle: R
the vehicle can be started using the Start/
Stop button R
the electrically powered equipment can be
operated
Starting the engine
Important safety notes
G WARNING
If children are left unsupervised in the vehicle,
they could: R
open the doors, thus endangering other
people or road users. R
get out and disrupt traffic. R
operate the vehicle's equipment.
Additionally, children could set the vehicle in
motion if, for example, they: R
release the parking brake. R
shifting the automatic transmission out of
park position PR
Start the engine.
There is a risk of an accident and injury.
When leaving the vehicle, always take the
SmartKey with you and lock the vehicle. Never
leave children or animals unattended in the
vehicle. Always keep the SmartKey out of
reach of children.
G WARNING
Combustion engines emit poisonous exhaust
gases such as carbon monoxide. Inhaling
these exhaust gases leads to poisoning. There
is a risk of fatal injury. Therefore never leave the engine running in enclosed spaces with-
out sufficient ventilation.
G WARNING
Flammable materials introduced through
environmental influence or by animals can
ignite if in contact with the exhaust system or
parts of the engine that heat up. There is a risk
of fire.
Carry out regular checks to make sure that
there are no flammable foreign materials in
the engine compartment or in the exhaust
system.
! Do not depress the accelerator when
starting the engine.
General notes Vehicles with a gasoline engine: the cata-
lytic converter is preheated for up 30 seconds
after a cold start. The sound of the engine may
change during this time.
Automatic transmission X
Shift the transmission to position P
( Y
page 174).
The transmission position display in the
multifunction display shows
P ( Y
page 174).
i You can start the engine in transmission
position P and N .
Starting procedure with the SmartKey X
To start a diesel engine : turn the Smart-
Key to position 2 in the ignition lock
( Y
page 165).
The �\( preglow indicator lamp in the
instrument cluster lights up. X
Turn the SmartKey to position 3 in the igni-
tion lock and release it as soon as the
engine is running ( Y
page 165).
i Vehicles with a diesel engine: you can
start the engine without preglow if the
engine is warm. Driving 167
Driving and parking Z
Page 197 of 462
Heavy and light loads
G WARNING
If you rest your foot on the brake pedal while
driving, the braking system can overheat. This
increases the stopping distance and can even
cause the braking system to fail. There is a
risk of an accident.
Never use the brake pedal as a footrest. Never
depress the brake pedal and the accelerator
pedal at the same time.
! Depressing the brake pedal constantly
results in excessive and premature wear to
the brake pads.
If the brakes have been subjected to a heavy
load, do not stop the vehicle immediately.
Drive on for a short while. This allows the air-
flow to cool the brakes more quickly.
Wet roads If you have driven for a long time in heavy rain
without braking, there may be a delayed reac-
tion from the brakes when braking for the first
time. This may also occur after the vehicle has
been washed or driven through deep water.
You then have to depress the brake pedal
more firmly. Maintain a greater distance from
the vehicle in front.
After driving on a wet road or having the vehi-
cle washed, brake firmly while paying atten-
tion to the traffic conditions. This will warm up
the brake discs, thereby drying them more
quickly and protecting them against corro-
sion.
Limited braking performance on salt-
treated roads
If you drive on salted roads, a layer of salt
residue may form on the brake discs and
brake pads. This can result in a significantly
longer braking distance. R
Brake occasionally to remove any possible
salt residue. Make sure that you do not
endanger other road users when doing so. R
Carefully depress the brake pedal and the
beginning and end of a journey. R
Maintain a greater distance to the vehicle
ahead.
Servicing the brakes
! If the red brake warning lamp lights up in
the instrument cluster and you hear a warn-
ing tone while the engine is running, the
brake fluid level may be too low. Observe
additional warning messages in the multi-
function display.
The brake fluid level may be too low due to
brake pad wear or leaking brake lines.
Have the brake system checked immedi-
ately. This work should be carried out at a
qualified specialist workshop.
! A function or performance test should
only be carried out on a 2-axle dynamom-
eter. If you are planning to have the vehicle
tested on such a dynamometer, contact an
authorized Mercedes-Benz Center to
obtain further information first. Otherwise,
you could damage the drive train or the
brake system.
! Because ESP ®
is an automatic system,
the engine and ignition must be switched
off (SmartKey in position 0 or 1 or Start/
Stop button in position 0 or 1 ) when the
electric parking brake is being tested on a
brake dynamometer (maximum
10 seconds).
Braking triggered automatically by ESP ®
may seriously damage the brake system.
All checks and maintenance work on the
brake system must be carried out at a quali-
fied specialist workshop. Consult a qualified
specialist workshop to arrange this.
Have brake pads installed and brake fluid
replaced at a qualified specialist workshop. Driving tips 195
Driving and parking Z
Page 201 of 462
specialist workshop as soon as possible.
Adapt your driving style to the different brak-
ing characteristics.
Driving off-road increases the likelihood of
damage to the vehicle, which, in turn, can lead
to failure of the mechanical assembly or sys-
tems. Adapt your driving style to suit the ter-
rain conditions. Drive carefully. Have damage
to the vehicle rectified immediately at a quali-
fied specialist workshop.
Do not switch to transmission position N
when driving off-road. If you try to brake the
vehicle using the service brake, you could
lose control of the vehicle. If the gradient is
too steep for your vehicle, drive back down in
reverse gear.
General notes Read this section carefully before driving your
vehicle off-road. Practice by driving over more
gentle off-road terrain first.
Familiarize yourself with the characteristics
of your vehicle and the gear shift operation
before driving through difficult terrain.
The following driving systems are specially
adapted to off-road driving: R
Off-road program 1 and 2 (vehicles with the
ON&OFFROAD package) ( Y
page 258)R
LOW RANGE off-road gear (vehicles with
the ON&OFFROAD package)
( Y
page 259) R
Differential lock (vehicles with the
ON&OFFROAD package) ( Y
page 259)R
Off-road ABS ( Y
page 69)R
Off-road 4ETS ( Y
page 73)R
AIRMATIC package (vehicle level)
( Y
page 218) R
DSR (Downhill Speed Regulation)
( Y
page 257)
Observe the following notes: R
Stop the vehicle before starting to drive
along an off-road route. R
Select a vehicle level that is suitable for the
terrain. To avoid damaging the vehicle, make sure there is always sufficient ground
clearance. R
Check that items of luggage and loads are
stowed safely and are well secured
( Y
page 345). R
Always keep the engine running and in gear
when driving on a downhill gradient. Acti-
vate DSR ( Y
page 257). R
Always keep the engine running and in gear
when driving on a slope. R
Adapt your speed to the terrain. The
rougher, steeper or more ruts on the ter-
rain, the slower your speed should be. R
Do not jump with the vehicle as this will
interrupt the vehicle's propulsion. R
Drive with extreme care on unfamiliar off-
road routes where visibility is poor. For
safety reasons, get out of the vehicle first
and survey the off-road route. R
Look out for obstacles, such as rocks,
holes, tree stumps and furrows. R
Always keep the doors, the tailgate, the
side windows and the sliding sunroof
closed while the vehicle is in motion. R
Do not shift the automatic transmission to
transmission position N .R
Observe the notes on off-road fording
( Y
page 197).
i Do not use the HOLD function when driv-
ing off-road, on steep uphill or downhill gra-
dients or on slippery or loose surfaces. The
HOLD function cannot hold the vehicle on
such surfaces.
Checklist before driving off-road
! If the engine oil warning lamp lights up
while the vehicle is in motion, stop the vehi-
cle in a safe place as soon as possible.
Check the engine oil level. The engine oil
warning lamp warning must not be ignored.
Continuing the journey while the symbol is
displayed could lead to engine damage. X
Engine oil level: check the engine oil level
and add oil if necessary. Driving tips 199
Driving and parking Z