2016 MERCEDES-BENZ G-CLASS SUV service reset
[x] Cancel search: service resetPage 20 of 261

Towin
geye
Front .............................................. 230
Rear .............................................. .230
Traffic reports
Overview lis t.................................. 188
Showing on the map ...................... 188
Switching on/of f........................... 196
Trailer
7-pi nconnecto r............................. 130
Power supply ................................. 129
Trailer coupling
see Towing atrailer
Trailer loads
Technica ldata. .............................. 256
Trailer towing
Cleaning the traile rtow hitch ......... 220
Coupling up atraile r...................... 129
Decoupling atraile r....................... 129
Driving tip s.................................... 128
ESP ®
................................................ 55
Important safety notes .................. 127
Lights display message .................. 145
Shift rang e..................................... 104
Trailer load s................................... 256
Transfer case
Genera lnotes ................................ 124
Shift rang e..................................... 124
Shifting .......................................... 124
Shifting (general notes ).................. 124
Shifting (important safety notes )... 124
Shifting to neutral .......................... 125
Switching off the off-road gear
rati o............................................... 124
Switching on the off-road gear
rati o............................................... 124
Transmission
see Automati ctransmission
Transmissio npositions .................... 103
Transport (vehicle) ............................ 231
Travellin guphill
Brow of hill ..................................... 122
Trim piece s(clea ning instruc-
tions) .................................................. 220
Trip computer (on-board com-
puter) .................................................. 134
Trip meter
Calling up ....................................... 133 Reset
ting(on-boar dcom puter) ...... 134
Turn signal lamp
Replacin gbulbs (rear) ...................... 80
Turn signals
Replacin gbulbs (front) .................... .80
Switching on/of f.............................. 76
Two-wa yradio
Frequencie s................................... 248
Installation ..................................... 248
Transmission outpu t(maximum) .... 248
Type identificatio nplate
see Vehicl eide ntification plate
Tyre pressure
Calling up (on-board computer) ..... 239
Displa ymessage ............................ 150
Recommended ............................... 238
Tyre pressure monitor
Checking the tyre pressure elec-
tronically ........................................ 240
Function/note s............................. 239
Genera lnotes ................................ 239
Important safety notes .................. 240
Radi otypea pproval for the tyre
pressure monitor ........................... 241
Restarting ...................................... 241
Warning lamp ................................. 164
Warning message .......................... 240
Tyres
Changing awheel .......................... 243
Checking ........................................ 235
Directio nofrotation ...................... 243
Displa ymessage ............................ 150
Important safety notes .................. 235
Information on driving .................... 235
Replacing ....................................... 243
Service life ..................................... 236
Snow chains .................................. 237
Storing ........................................... 243
Summer tyre sinwinter ................. 237
Tyre size (data ).............................. 246
Tyre trea d...................................... 236
Wheel and tyre combinations ........ 246
see Fla ttyre U
Unlade nweight .................................2 54 Index
17
Page 26 of 261

Heilbronne
rStraße 30 —74363 Güglingen Diagnos
tics connection
The diagnostic sconnectio nisused fo rconnect-
in gd iagnostic equipmen tataqualified special-
ist workshop. G
WARNING
If yo uconnect equipment to adiagnostics
connection in the vehicle, it may affect the
operation of vehicl esystems .Asaresult, the
operating safety of the vehicl ecouldbea ffec-
ted. There is arisk of an accident.
Only connect equipment to adiagnostics con-
nection in the vehicle, which is approved for
yourv ehiclebyM ercedes-Benz. G
WARNING
Objects in the driver's footwel lcan impede
peda ltravel or block apeda lwhich is
depressed. This jeopardise ssafe operation of
the vehicle. There is arisk of an accident.
Stow all objects in the vehicl esafely, so that
they cannot reach the driver's footwell. Make sure the floormats and carpets are properly
secure dsothat they cannot slip and obstruct
the pedals. Do not lay severa lfloormats or
carpets on top of one another.
! If the engine is switched off and equipment
on the diagnostics connection is used ,the
starter battery may discharge.
Connecting equipment to the diagnostics con-
nection can leadtoe missions monitoring infor-
mation being reset, for example. This may lead
to the vehicl efailing to meet the requirements of
the next emissions test during the main inspec-
tion. Qualifieds
pecialist workshop
Aq ualified specialist workshop has the neces-
sary special skills, tools and qualifications to
correctly carry out any necessary work on your
vehicle. This particularly applies to work rele-
vant to safety. Alwaysh
avet he following work carrie doutat a
qualified specialist workshop:
R work relevant to safety
R service and maintenance work
R repai rwork
R modifications, installations and conversions
R work on electronic components
Mercedes-Benz recommends tha tyou usea
Mercedes-Benz Service Centre. Vehicl
eregistration
Mercedes-Benz ma yask its Service Centres to
carry ou ttechnical inspections on certain vehi-
cles. The quality or safety of the vehicl eis
improve dasaresultoft he inspection.
Mercedes-Benz can inform yo uabout vehicle
inspections onl yifithasyour registration data.
It is possibl ethaty ou rv ehicl ehasnot ye tbeen
registere dinyourn am eint he following cases:
R if your vehicl ewasnot purchased at an
authorised specialist dealer.
R if your vehicl ehasnot ye tbeeninspected at a
Mercedes-Benz Service Centre.
It is advisable to register your vehicl ewitha
Mercedes-Benz Service Centre.
Infor mMercedes-Benz as soo naspossible
abou tany change in address or vehicl eowner-
ship. Yo ucan do thi sataMercedes-Benz Ser-
vice Centre, for example. Correc
tuse
If you remove any warning stickers ,you or oth-
ers coul dfail to recognise certain dangers.
Leav ewarning stickers in position.
Observ ethe followin ginformatio nwhen driving
your vehicle:
R thes afety note sinthism anual
R technical dat afor th evehicle
R traffic rules and regulations
R laws and safety standards pertaining to motor
vehicles Implied warranty
! Follow th
einstruction sinthism anual about
th ep roper operation of your vehicl easwell as Introduction
23 Z
Page 234 of 261

X
When the vehicle is stationary, depress the
brake pedal and keep it depressed.
X Shift the transfer case to position Neutral
(Y page 125).
X Shift the automatic transmission to position
N.
X Leave the key in position 2in the ignition
lock.
X Release the brake pedal.
X Release the parking brake.
X Switc hont he hazard warning lamps
(Y page 76).
In order to signal achange of direction when
towing the vehicle with the hazard warning
lamps switched on, use the combination switch
as usual. In this case, only the turn signals for
the desired direction flash. When you reset the
combination switch, the hazard warning lamps
start flashing again.
i The automatic transmission can only
change gear when the batter yhas sufficient
charge.
If you cannot shift the automatic transmission
to position N,the propeller shafts to the
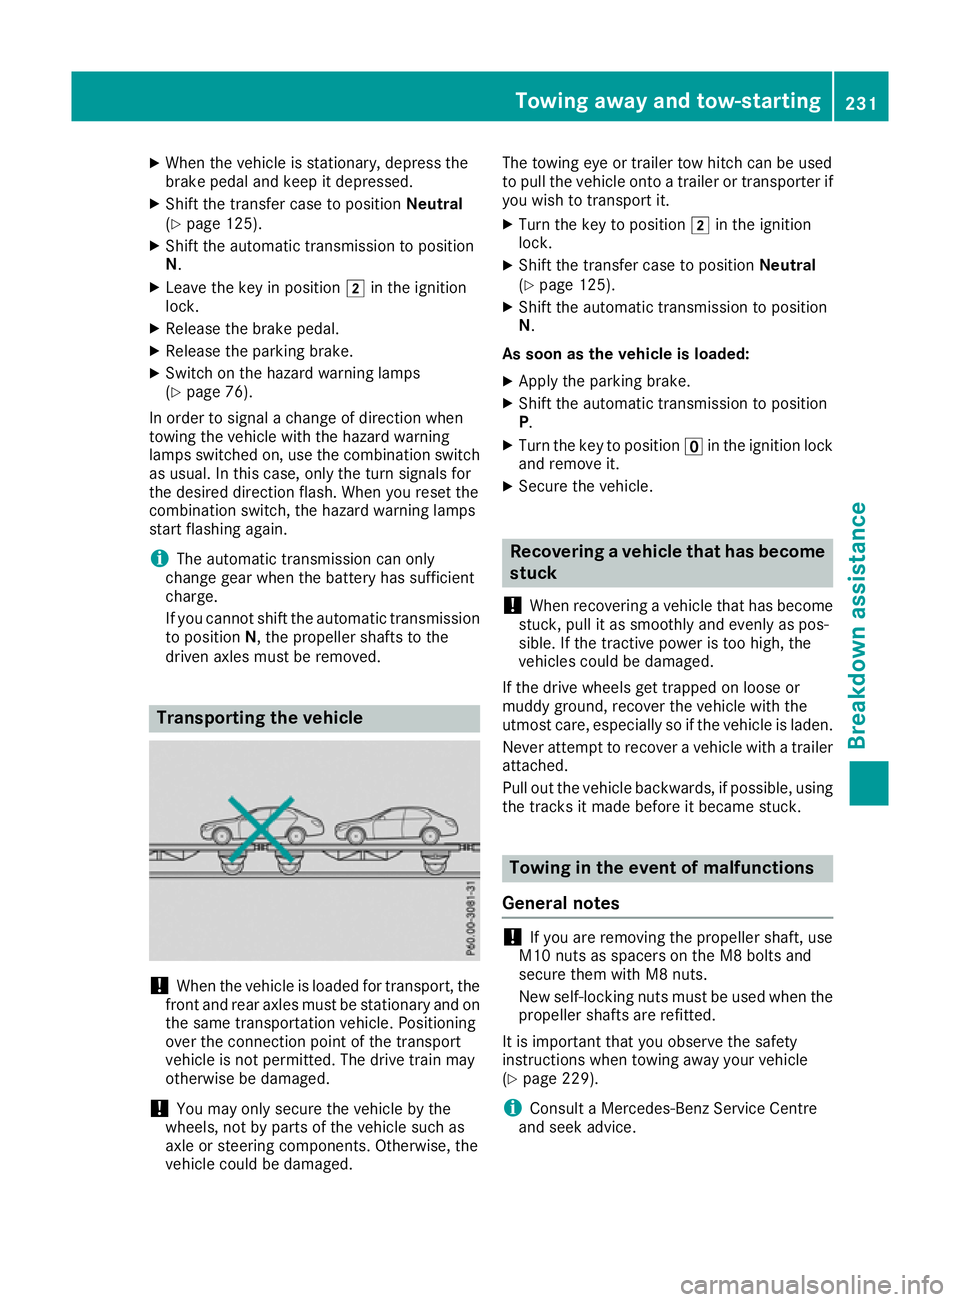
driven axles must be removed. Transporting thev
ehicle !
Whe
nthe vehicle is loadedf or transport, the
front and rear axles must be stationary and on the same transportation vehicle. Positioning
over the connection point of the transport
vehicle is not permitted. The drive train may
otherwise be damaged.
! You may only secure the vehicle by the
wheels, not by parts of the vehicle such as
axle or steering components. Otherwise, the
vehicle could be damaged. The towing eye or trailer tow hitch can be used
to pull the vehicle onto
atrailer or transporter if
you wish to transport it.
X Turn the key to position 2in the ignition
lock.
X Shift the transfer case to position Neutral
(Y page 125).
X Shift the automatic transmission to position
N.
As soon as the vehicle is loaded:
X Apply the parking brake.
X Shift the automatic transmission to position
P.
X Turn the key to position uin the ignition lock
and remove it.
X Secure the vehicle. Recovering
avehicle that has become
stuck
! Whe
nrecovering avehicl ethat ha sbecome
stuck, pull it as smoothly and evenly as pos-
sible .Ifthe tractive power is too high, the
vehicles could be damaged.
If the drive wheel sget trapped on loose or
muddy ground ,recover the vehicl ewitht he
utmost care ,especially so if the vehicl eisladen.
Neve rattempt to recover avehicl ewithat railer
attached.
Pull ou tthe vehicl ebackwards ,ifpossible ,using
the tracks it mad ebefore it became stuck. Towin
ginthe even tofm alfunctions
General notes !
If you are removing the propelle
rshaft, use
M10 nuts as spacers on the M8 bolts and
secure them with M8 nuts.
New self-locking nuts must be used when the propellers hafts are refitted.
It is important that you observe the safety
instructionsw hen towing awayy our vehicle
(Y page 229).
i Consult
aMercedes-Benz Service Centre
and seek advice. To
wing away and tow-starting
231Breakdown assis tance Z