Page 222 of 261
Cleaning th
ewindows G
WARNING
If th ewindscreen wipers are set in motion
when cleaning the windscreen or wiper
blades, you coul dbecome trapped. There is a
dange rofinjury.
Always switch off the windscreen wipers and
the ignitio nbefore cleaning the windscreen or
wiper blades.
! Do not use dry cloths, abrasive cleaning
agents, solvents or solvent-based cleaning
agents to clea nthe insid eofthe windows/
windscreen. Do not touch the insid eofthe
windows/windscreen with hard items such
as an ice scrape roraring. Otherwise, the
windows/windscreen coul dbedamaged.
! Clean the water drainage channels of the
windscreen and the rear windo watregular
intervals. Deposits such as leaves, petal sand
pollen may under certain circumstances pre-
vent water from draining away. This can lead
to corrosio ndamage and damage to elec-
tronic components.
X Clean the insid eand outside of the windows
with adamp cloth and acleaning agent that is
recommende dand approved by Mercedes-
Benz.
Cleaning the wiper blades G
WARNING
If the windscreen wipers are set in motion
when cleaning the windscreen or wiper
blades, you coul dbecome trapped. There is a
dange rofinjury.
Always switch off the windscreen wipers and
the ignitio nbefore cleaning the windscreen or
wiper blades.
! Do not pullont
he wiper blade. Otherwise,
the wiper blade coul dbedamaged.
! Do not clea
nwiper blades too often and do
not rub them too hard .Otherwise, the graph-
ite coating coul dbedamaged. This could
caus ewiper noise. !
Hold the wiper arm securel
ywhen folding
back. The windscreen could be damagedif
the wiper arm hits against it suddenly.
X Fold the wiper arms awayf rom the wind-
screen.
X Cleant he wiper bladesc arefully usingadamp
cloth.
X Fold the windscreen wipers back againb efore
switching on the ignition.
Cleaning the exterior lighting !
Only use cleaning agents or cleaning cloths
that are suitablef or plastic lenses. Unsuitable
cleaning agents or cleaning cloths could
scratch or damage the plastic lenses of the
exterior lighting.
X Cleant he plastic lenses of the exterior light-
ing using awet sponge and amild cleaning
agent, e.g. Mercedes-Benz car shampoo or
cleaning cloths.
Cleaning the exhaust pipe G
WARNING
The exhaust tail pipe and tail pipe trim can
become very hot. If you come into contact
with these parts of the vehicle, you could burn
yourself. There is arisk of injury.
Always be particularl ycarefu laround the
exhaust tail pipea nd the tail pipetrim. Allow
these components to cool downb efore touch-
ing them.
! Do not clea
nthe exhaust pipew ith acid-
base dcleaning agents, such as sanitary
cleanser or whee lcleaner.
Impurities combined with the effects of road grit and corrosive environmental factors may cause
flas hrust to form on the surface. You can
restore the original shine of the exhaust pipeby
cleaning it regularly, especially in winter and
after washing the vehicle.
X Clean the exhaust pipew ithacare product
tested and approved by Mercedes-Benz. Ca
re
219Maintenance an dcare Z
Page 226 of 261
Observe the legal requirements for each indi-
vidualc ountry. Veh
icle toolkit
General notes The vehicl
etool kit contains:
R vehicle tool kit with:
- fuse extractor
- pump lever for vehicle jack
- screwdriver
- Wheel wrench
R jack
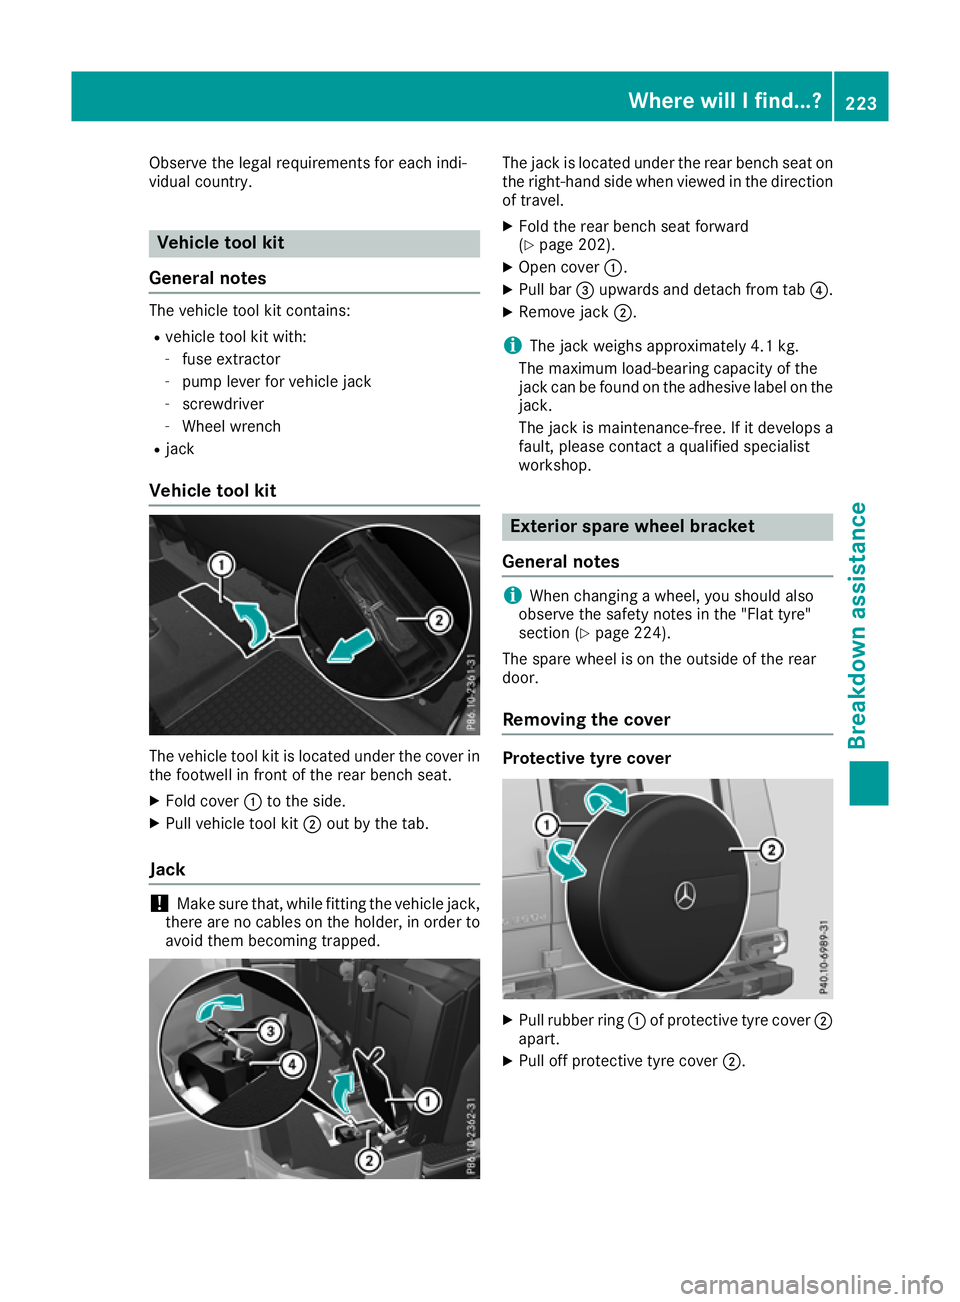
Vehicle tool kit The vehicle tool kit is located under the cover in
the footwell in front of the rear bench seat.
X Fold cover :to the side.
X Pull vehicle tool kit ;out by the tab.
Jack !
Make sure that, while fitting the vehicle jack,
there are no cables on the holder, in order to avoid them becoming trapped. The jack is located under the rear bench seat on
the right-hand side when viewed in the direction
of travel.
X Fold the rear bench seat forward
(Y page 202).
X Open cover :.
X Pull bar =upwards and detach from tab ?.
X Remove jack ;.
i The jack weighs approximately 4.1 kg.
The maximum load-bearing capacity of the
jack can be found on the adhesive label on the
jack.
The jack is maintenance-free. If it develops a
fault, please contact aqualified specialist
workshop. Exterior spare wheelb
racket
General notes i
When changin
gawheel, you should also
observe the safety notes in the "Flat tyre"
section (Y page 224).
The spare wheel is on the outside of the rear
door.
Removing the cover Protective tyrec
over X
Pull rubber ring :of protective tyre cover ;
apart.
X Pull off protective tyre cover ;. Wherew
illIf ind...?
223Breakdow nassistan ce
Page 247 of 261
X
Stop the vehicl eonsolid,non-slipper yand
level ground.
X Appl ythe parking brake.
X Move the front wheel stothe straight-ahead
position.
X Shif tthe automatic transmissio ntoposition
P.
X Switch off the engine.
X Ifat raile risc oupled to the vehicle, uncouple
it.
X Remove the vehicl etool sand jack from the
vehicl e(Ypage 223).
X Remove the spare wheel from the spare wheel
bracket (Y page 223).
X Secure the vehicl eagains trolling away.
Securing the vehicle against rolling
away X
Place chocks or other suitable items under
the front and rea rofthe wheel that is diago-
nally opposite the wheel you wish to change.
Raising the vehicle G
WARNING
If you do not position the jack correctl yatthe
appropriate jacking point of the vehicle, the
jack coul dtip over with the vehicl eraised.
There is arisk of injury.
Only position the jack at the appropriate jack-
ing point of the vehicle. The base of the jack
must be positioned vertically,d irectly under
the jacking point of the vehicle.
! Only position the jack at the appropriate
jacking point of the vehicle. Otherwise, you
coul ddamage the vehicle.
Observe the following whenr aisingthe vehi-
cle:
R Use only the vehicle-specific jack that has
been tested and approved by Mercedes-Benz
to rais ethe vehicle. If the jack is used incor-
rectly, it coul dtip over while the vehicl eis
raised.
R The jack is designed only to rais ethe vehicle
for ashort time while awhee lisb eing
changed .Itisnot permissible to use it to per-
form maintenance work under the vehicle. R
Avoid changing the whee lonuphilland down-
hill slopes.
R Before raising the vehicle, secur eitagainst
rolling away by applying the parking brake and
positioning whee lchocks. Do not release the
parking brake whil ethe vehicl eisraised.
R The jack must be place donafirm, flatand
non-slip surface. On aloo se surface, alarge,
fla tload-beari ng underlay must be used .Ona
slippery surface, anon-slip underlay must be
used ,e.g.u se arubber matont iles.
R Do not us ewoode nblocks or similar objects
as ajack underlay .Otherwise, the jack will not
be able to achieve its load-bearing capacity
du etot he restricte dheight.
R Ensure tha tthe distance between the under-
side of the tyr eand the ground does not
exceed 3cm.
R Do not place your hands or fee tunder the
raised vehicle.
R Do not li eunder the raised vehicle.
R Do not start the engine when the vehicl eis
raised.
R Do not open or close adoorw hent he vehicle
is raised.
R Ensure tha tnopersons ar epresent in the
vehicl ewhenr aisin gthe vehicle. X
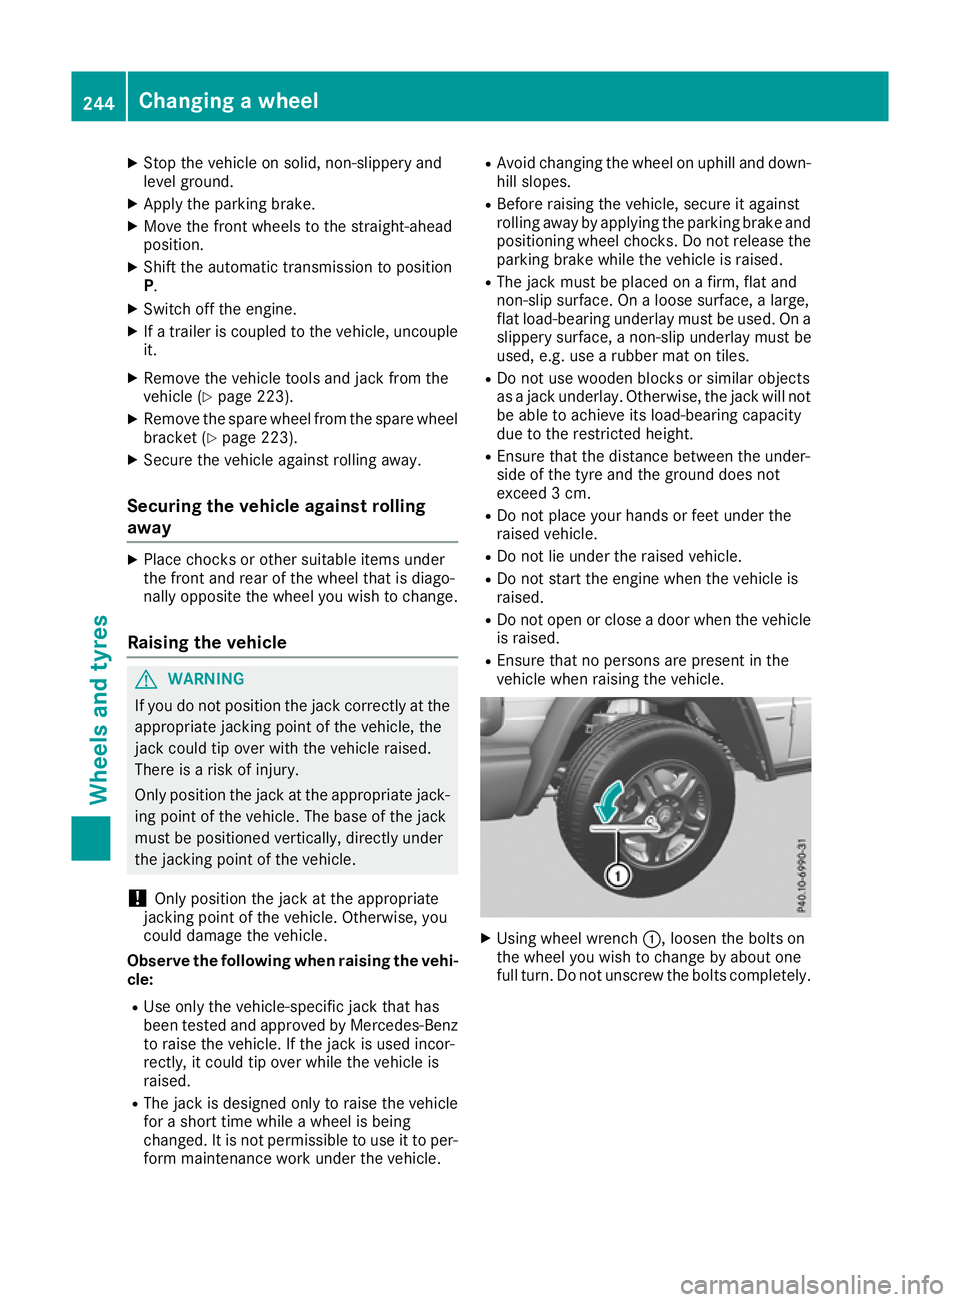
Using wheel wrench :,loosen the bolts on
the wheel you wish to change by abouto ne
full turn. Do not unscrew the bolts completely. 244
Changing
awheelWheels and tyres