2016 MERCEDES-BENZ G-Class weight
[x] Cancel search: weightPage 169 of 302

Always install and secure the ball coupling asdescribed. Before every journey, ensure that
the ball coupling is secured with the bolt and
the corresponding spring cotter.
Please observe the manufacturer's operating
instructions for the trailer coupling if a detach-
able trailer coupling is used.
Exceeding the maximum permissible nose-
weight may cause damage to the following:
Ryour vehicle
Rthe trailer
Rthe ball coupling
Rtrailer tow hitch
The vehicle/trailer combination could become
unstable.
If the noseweight used is lower than the mini-
mum permissible noseweight, the vehicle/
trailer combination could also become unstable.
To avoid hazardous situations:
Rmake sure to check the noseweight before
each journey
Ruse a drawbar noseweight as close as possi-
ble to the maximum noseweight
Rdo not exceed the maximum permissible
noseweight
Rdo not use a noseweight lower than the min-
imum permissible trailer drawbar noseweight
When backing up the vehicle towards the trailer,
make sure there is nobody between the trailer
and the vehicle.
The applicable permissible values, which must
not be exceeded, can be fou nd:
Rin your vehicle documents
Ron the type plate of the trailer tow hitch and
trailer
Ron the vehicle identification plate
Couple and uncouple the trailer carefully. If you
do not couple the trailer to the towing vehicle
correctly, the trailer could become detached.
Make sure that the following values are not
exceeded:
Rthe permissible trailer drawbar noseweight
Rthe permissible trailer load
Rthe permissible rear axle load of the towing
vehicle
Rthe maximum permissible gross vehicle
weight of both the towing vehicle and the
trailer When towing a trailer, your vehicle's handling
characteristics will be different in comparison
with when driving without a trailer.
The vehicle/trailer combination:
Ris heavier
Ris restricted in its acceleration and gradient-
climbing capability
Rhas an increased braking distance
Ris affected more by strong crosswinds
Rdemands more sensitive steering
Rhas a larger turning radius
This could impair the handling characteristics.
Adapt your driving style accordingly. Maintain a
safe distance. Drive carefully.
When towing a trailer, always adjust your speed
to the current road and weather conditions. Do
not excee
d the maximum permissible speed for
your vehicle/trailer combination.
You will find the values approved by the manu-
facturer on the vehicle identification plates and
those for the towing vehicle in the "Technical
data" section (
Ypage 297).
General notes
RDo not exceed the legally prescribed maxi-
mum speed for vehicle/trailer combinations
in the relevant country.
This lowers the risk of an accident.
ROnly install an approved trailer coupling on
your vehicle.
Further information on availability and on
installation is available from any authorized
Mercedes-Benz Center.
RThe bumpers of your vehicle are not suitable
for installing detachable trailer couplings.
RDo not install hired trailer couplings or other
detachable trailer couplings on the bumpers
of your vehicle.
RIf you do not need the ball coupling, remove
the ball coupling from the ball coupling
recess. This reduces the risk of damage to the
ball coupling.
iCheck the tire pressures when towing a
trailer. You will find the values in the tire pres-
sure table in the fuel filler flap of the vehicle
(
Ypage 266).
You will find installation dimensions and loads
under "Technical data" (
Ypage 297).
Towing a trailer167
Driving an d parking
Z
Page 170 of 302

The maximum noseweight of the trailer drawbar
on the ball coupling for up to 3 people is 562 lbs
(255 kg). The maximum permissible trailer draw-bar noseweight for more than 3 persons and the
maximum load in the trunk can be found in the
trailer drawbar noseweight table (
Ypage 298).
However, the actual noseweight must not
exceed the value given on the trailer tow hitch or trailer identification plates. The lowest weight
applies.
Please note that when towing a trailer,
PARKTRONIC (
Ypage 158) and Blind Spot
Assist (Ypage 154) are only available with lim-
itations, or not at all.
iOn vehicles without level control, the height
of the ball coupling will alter according to the
load placed on the vehicle. If necessary, use a
trailer with a height-adjustable drawbar.
Driving tips
XOn long and steep downhill gradients, select
shift range 1,2or 3(Ypage 123) in good
time.
iThis also applies if you have activated cruise
control or SPEEDTRONIC.
XIf necessary, shift the transfer case to LOW
RANGE (Ypage 162).
This will use the braking effect of the engine,
so that less braking will be required to main-
tain the speed. This relieves the load on the
brake system and prevents the brakes from
overheating and wearing too quickly. If you
need additional braking, depress the brake
pedal repeatedly rather than continuously.
The maximum permissible speed for vehicle/
trailer combinations depends on the type of
trailer. Before beginning the journey, check the
trailer's documents to see what the maximum
permissible speed is. Observe the legally pre-
scribed maximum speed in the relevant country.
For certain Mercedes-Benz vehicles, the maxi-
mum permissible rear axle load is increased
when towing a trailer. Refer to the "Technical
data" section to find out whether this applies to
your vehicle. If you utilize any of the added max- imum rear axle load when towing a trailer, the
vehicle/trailer combination may not exceed a
maximum speed of 60 mph (100 km/h) for rea-
sons concerning the operating permit. This also applies in countries in which the permissible
maximum speed for vehicle/trailer combina-
tions is above 60 mph (100 km/h). When towing a trailer, your vehicle's handling
characteristics will be different in comparison to
when driving without a trailer and it will con-
sume more fuel.
On long and steep downhill gradients, you must
select shift range
1,2or 3in good time.
iThis also applies if you have activated cruise
control or DISTRONIC PLUS.
This will use the braking effect of the engine, so
that less braking will be required to maintain the
speed. This relieves the load on the brake sys-
tem and prevents the brakes from overheating
and wearing too quickly. If you need additional
braking, depre ss the bra
ke pedal repeatedly
rather than continuously.
Driving tips
If the trailer swings from side to side:
XDo not accelerate.
XDo not counter-steer.
XBrake if necessary.
RMaintain a greater distance from the vehicle
in front than when driving without a trailer.
RAvoid braking abruptly. If possible, brake gen- tly at first to allow the trailer to run on. Then,
increase the braking force rapidly.
RThe values given for gradient-climbing capa-
bilities from a standstill refer to sea level.
When driving in mountainous areas, note that
the power output of the engine and, conse-
quently, the vehicle's gradient-climbing capa-
bility, decreases with increasing altitude.
Trailer power supply
!
You can connect accessories with a maxi-
mum power consumption of 180 W to the
permanent power supply.
You must not charge a trailer battery using the
power supply.
The trailer socket of your vehicle is equipped at
the factory with a permanent power supply.
The permanent power supply is supplied via
trailer socket pin 9.
A qualified specialist workshop can provide
more information about installing the trailer
electrics.
168Towing a trailer
Driving and parking
Page 216 of 302
Useful information
i
This Operator's Manual describes all models
and all standard and optional equipment of
your vehicle available at the time of publica-
tion of the Operator's Manual. Country-spe-
cific differences are possible. Please note
that your vehicle may not be equipped with all
features described. This also applies to
safety-related systems and functions.
iRead the information on qualified specialist
workshops: (Ypage 23).
Loading guidelines
GWARNING
If objects, luggage or loads are not secured or
not secured sufficiently, they could slip, tip
over or be flung around and thereby hit vehicle
occupants. There is a risk of injury, particu-
larly in the event of sudden braking or a sud-
den change in direction.
Always store objects so that they cannot be
flung around. Secure objects, luggage or
loads against slipping or tipping before the
journey.
GWARNING
If you distribute the load unevenly in the vehi- cle, the handling as well as the steering and
braking characteristics are severely affected.
There is a risk of an accident.
Distribute the load evenly in the vehicle.
Secure the load to prevent it from slipping.
GWARNING
The exhaust tail pipe and tail pipe trim can
become very hot. If you come into contact
with these parts of the vehicle, you could burn
yourself. There is a risk of injury.
Always be particularly careful around the
exhaust tail pipe and the tail pipe trim. Allow
these components to cool down before touch-
ing them.
GWARNING
Combustion engines emit poisonous exhaust
gases such as carbon monoxide. If the rear
door is open when the engine is running, par-
ticularly if the vehicle is moving, exhaust
fumes could enter the passenger compart-
ment. There is a risk of poisoning.
Turn off the engine before opening the rear
door. Never drive with the rear door open.
Driving, braking and steering characteristics
change depending on:
Rtype of load
Rweight
Rthe center of gravity of the load
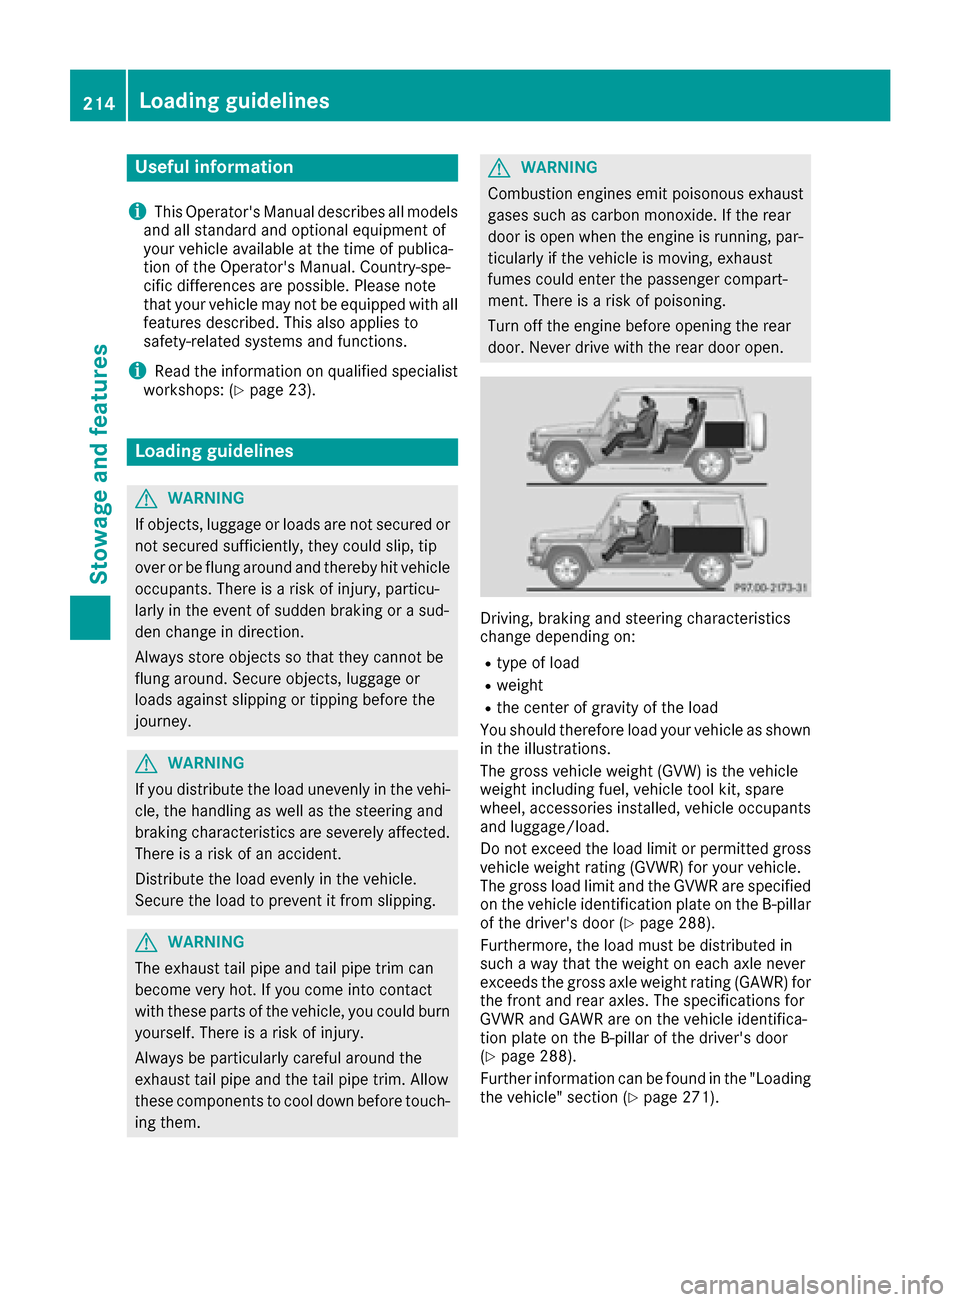
You should therefore load your vehicle as shown
in the illustrations.
The gross vehicle weight (GVW) is the vehicle
weight including fuel, vehicle tool kit, spare
wheel, accessories installed, vehicle occupants
and luggage/load.
Do not exceed the load limit or permitted gross
vehicle weight rating (GVWR) for your vehicle.
The gross load limit and the GVWR are specified
on the vehicle identification plate on the B-pillar
of the driver's door (
Ypage 288).
Furthermore, the load must be distributed in
such a way that the weight on each axle never
exceeds the gross axle weight rating (GAWR) for
the front and rear axles. The specifications for
GVWR and GAWR are on the vehicle identifica-
tion plate on the B-pillar of the driver's door
(
Ypage 288).
Further information can be found in the "Loading
the vehicle" section (
Ypage 271).
214Loading guidelines
Stowage and features
Page 217 of 302
Observe the following notes when transporting
a load:
RPosition heavy loads as far forwards as pos-
sible and as low down in the cargo compart-
ment as possible.
iTransport loads when possible in the cargo
compartment. You should only use the cargo
compartment enlargement if the load does
not fit in the cargo compartment.
RAlways place the load against the backrests of
the front seats or rear seats.
RUse the cargo tie-down rings and the parcel
nets to transport loads and luggage.
RUse cargo tie-down rings and fastening mate-
rials appropriate for the weight and size of the load.
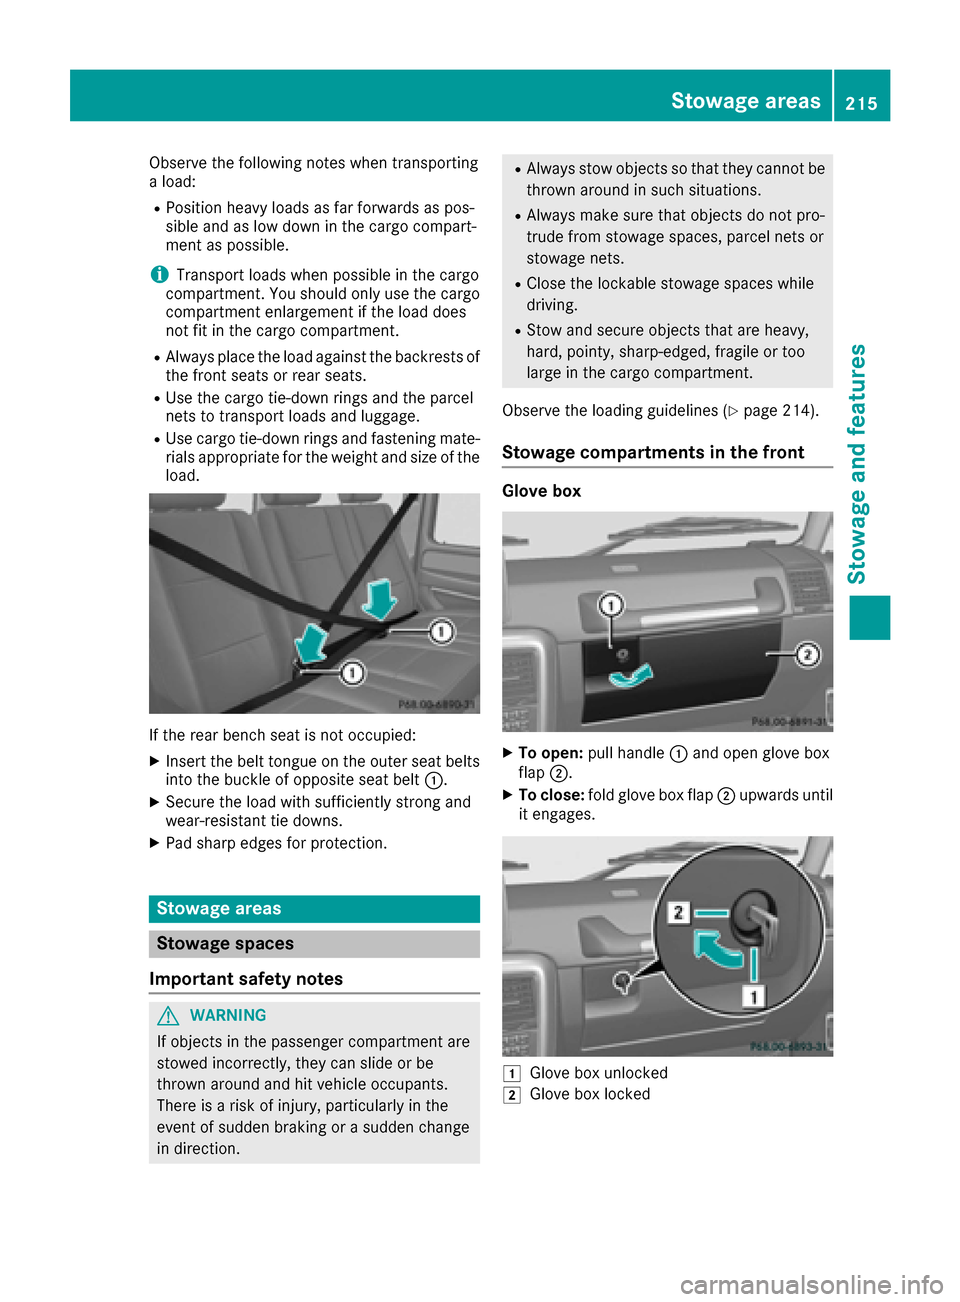
If the rear bench seat is not occupied:
XInsert the belt tongue on the outer seat belts
into the buckle of opposite seat belt :.
XSecure the load with sufficiently strong and
wear-resistant tie downs.
XPad sharp edges for protection.
Stowage areas
Stowage spaces
Important safety notes
GWARNING
If objects in the passenger compartment are
stowed incorrectly, they can slide or be
thrown around and hit vehicle occupants.
There is a risk of injury, particularly in the
event of sudden braking or a sudden change
in direction.
RAlways stow objects so that they cannot be
thrown around in such situations.
RAlways make sure that objects do not pro-
trude from stowage spaces, parcel nets or
stowage nets.
RClose the lockable stowage spaces while
driving.
RStow and secure objects that are heavy,
hard, pointy, sharp-edged, fragile or too
large in the cargo compartment.
Observe the loading guidelines (
Ypage 214).
Stowage compartments in the front
Glove box
XTo open: pull handle :and open glove box
flap ;.
XTo close: fold glove box flap ;upwards until
it engages.
1Glove box unlocked
2Glove box locked
Stowage areas215
Stowage and features
Z
Page 218 of 302
XTo lock:insert the mechanical key into the
lock (Ypage 61) and turn it 90° clockwise to
position 2.
XTo unlock: insert the mechanical key into the
lock (Ypage 61) and turn it 90° counter-
clockwise to position 1.
iThe glove box can only be locked and
unlocked using the mechanical key.
Door stowage compartment
There is an additional compartment located on
the driver's door paneling, which can be used to
store a mini tablet PC, for example.
Stowage compartment/telephone com-
partment under the armrest/in the center
console
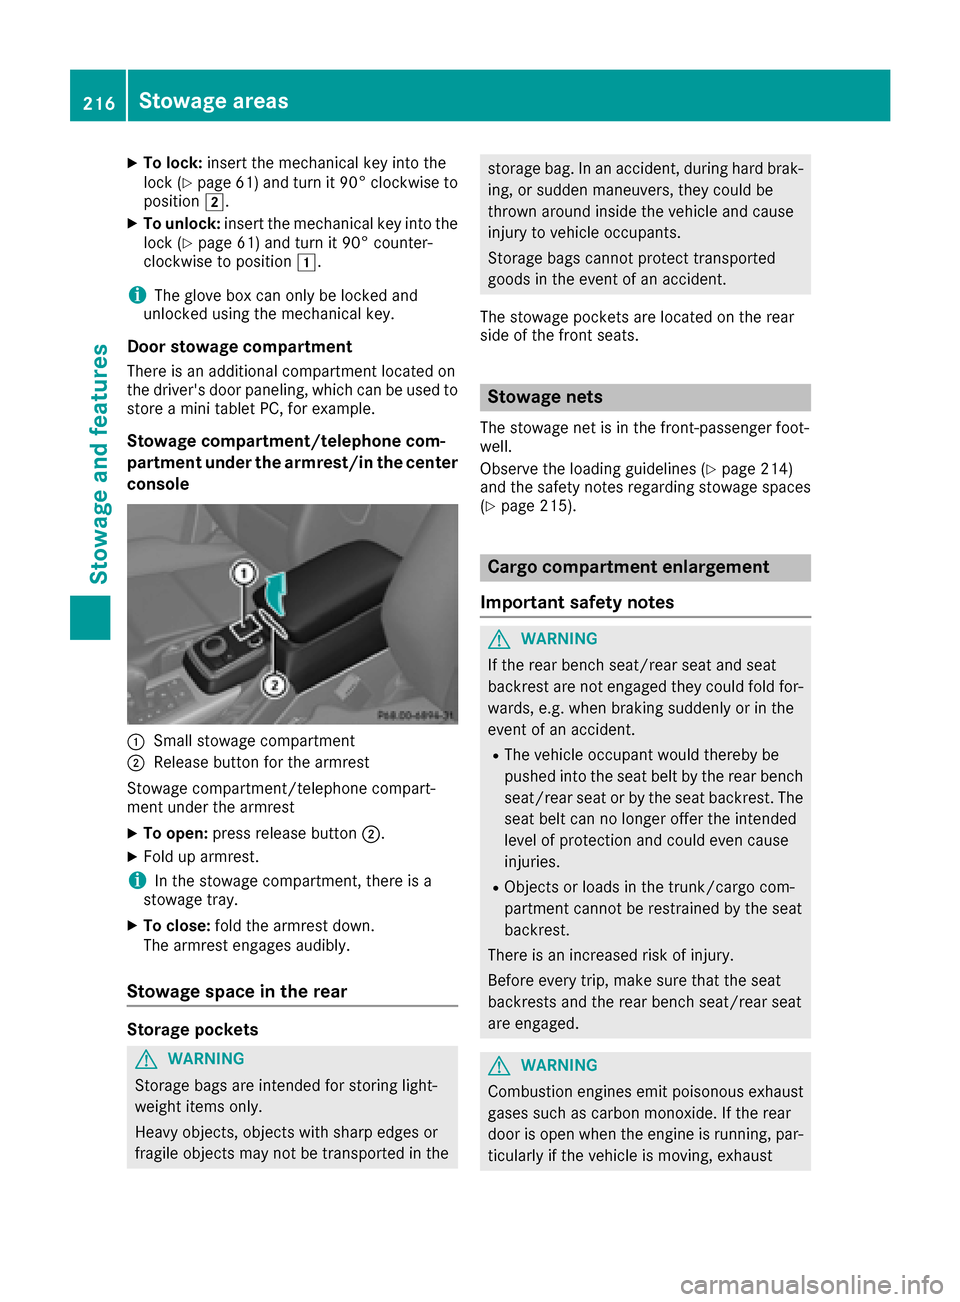
:Small stowage compartment
;Release button for the armrest
Stowage compartment/telephone compart-
ment under the armrest
XTo open: press release button ;.
XFold up armrest.
iIn the stowage compartment, there is a
stowage tray.
XTo close: fold the armrest down.
The armrest engages audibly.
Stowage space in the rear
Storage pockets
GWARNING
Storage bags are intended for storing light-
weight items only.
Heavy objects, objects with sharp edges or
fragile objects may not be transported in the
storage bag. In an accident, during hard brak-
ing, or sudden maneuvers, they could be
thrown around inside the vehicle and cause
injury to vehicle occupants.
Storage bags cannot protect transported
goods in the event of an accident.
The stowage pockets are located on the rear
side of the front seats.
Stowage nets
The stowage net is in the front-passenger foot-
well.
Observe the loading guidelines (
Ypage 214)
and the safety notes regarding stowage spaces
(
Ypage 215).
Cargo compartment enlargement
Important safety notes
GWARNING
If the rear bench seat/rear seat and seat
backrest are not engaged they could fold for-
wards, e.g. when braking suddenly or in the
event of an accident.
RThe vehicle occupant would thereby be
pushed into the seat belt by the rear bench
seat/rear seat or by the seat backrest. The
seat belt can no longer offer the intended
level of protection and could even cause
injuries.
RObjects or loads in the trunk/cargo com-
partment cannot be restrained by the seat
backrest.
There is an increased risk of injury.
Before every trip, make sure that the seat
backrests and the rear bench seat/rear seat
are engaged.
GWARNING
Combustion engines emit poisonous exhaust
gases such as carbon monoxide. If the rear
door is open when the engine is running, par-
ticularly if the vehicle is moving, exhaust
216Stowage areas
Stowag ean d features
Page 258 of 302

XLift up cover:of positive terminal ;in the direction of the arrow.
XConnect positive terminal ;on your vehicle to positive terminal ?of donor battery Busing the
jumper cable. beginning with your own battery.
XStart the engine of the donor vehicle and run it at idling speed.
XConnect negative terminal Aof donor battery Bto ground point =of your vehicle using the
jumper cable, connecting the jumper cable to donor battery Bfirst.
XStart the engine.
XFirst, remove the jumper cables from ground point =and negative terminal A, then from pos-
itive clamp ;and positive terminal ?. Each time beginning with your vehicle's battery.
XHave the battery checked at a qualified specialist workshop.
iJump-starting is not considered to be a normal operating condition.
iJumper cables and further information regarding jump-starting can be obtained at any qualified
specialist workshop.
Towing and tow-starting
Important safety notes
GWARNING
Functions relevant to safety are restricted or
no longer available if:
Rthe engine is not running.
Rthe brake system or the power steering is
malfunctioning.
Rthere is a malfunction in the voltage supply or the vehicle's electrical system.
If your vehicle is being towed, much more
force may be necessary to steer or brake.
There is a risk of an accident.
In such cases, use a tow bar. Before towing,
make sure that the steering moves freely.
GWARNING
When towing or tow-starting another vehicle
and its weight is greater than the permissible
gross weight of your vehicle, the:
Rthe towing eye could detach itself
Rthe vehicle/trailer combination could roll-
over.
There is a risk of an accident.
When towing or tow-starting another vehicle,
its weight should not be greater than the per- missible gross weight of your vehicle.
!If DISTRONIC PLUS or the HOLD function is
activated, the vehicle brakes automatically in
certain situations. To prevent damage to the
vehicle, deactivate DISTRONIC PLUS and the
HOLD function in the following or other simi-
lar situations:
Rwhen towing the vehicle
Rin the car wash
!The vehicle can be towed a maximum of
30 miles (50km). The towing speed of 30 mph
(50 km/h) must not be exceeded.
If the vehicle has to be towed more than
30 miles (50km), the entire vehicle must be
raised and transported.
!Only secure the tow cable or tow bar to the
towing eyes. You could otherwise damage the
vehicle.
!Do not tow with sling-type equipment. This
could damage the vehicle.
!Do not use the towing eyes for recovery pur-
poses as this could damage the vehicle. If in
doubt, recover the vehicle with a crane.
!When towing, pull away slowly and
smoothly. If the tractive power is too high, the
vehicles could be damaged.
!Your vehicles is equipped with an automatic
transmission. Therefore, you must not have
the vehicle tow-started. The transmission
may otherwise be damaged.
iDetails on the permissible gross vehicle
weight of your vehicle can be found on the
vehicle identification plate (
Ypage 288).
256Towing and tow-starting
Breakdown assistance
Page 273 of 302
XMake sure that the SmartKey is in position2
in the ignition lock (Ypage 112).
XPress the =or; button on the steering
wheel to select the Serv.menu.
XPress the9or: button to select
Tire Pressure.
XPress the abutton.
The multifunction display shows the current
tire pressure for the individual tires or the
Tire pressure will be displayed
after driving a few minutesmessage.
XPress the :button.
The UseCurrentPressuresasNewRef‐erenceValuesmessage appears in the mul-
tifunction display.
If you wish to confirm the restart:
XPress the abutton.
The TirePress.MonitorRestartedmes-
sage appears in the multifunction display.
After driving for a few minutes, the system
checks whether the current tire pressures are
within the specified range. The new tire pres-
sures are then accepted as reference values
and monitored.
If you wish to cancel the restart:
XPress the %button.
The tire pressure values stored at the last
restart will continue to be monitored.
Loading the vehicle
Instruction labels for tires and loads
GWARNING
Overloaded tires can overheat, causing a
blowout. Overloaded tires can also impair the steering and driving characteristics and lead
to brake failure. There is a risk of accident.
Observe the load rating of the tires. The load
rating must be at least half of the GAWR of
your vehicle. Never overload the tires by
exceeding the maximum load.
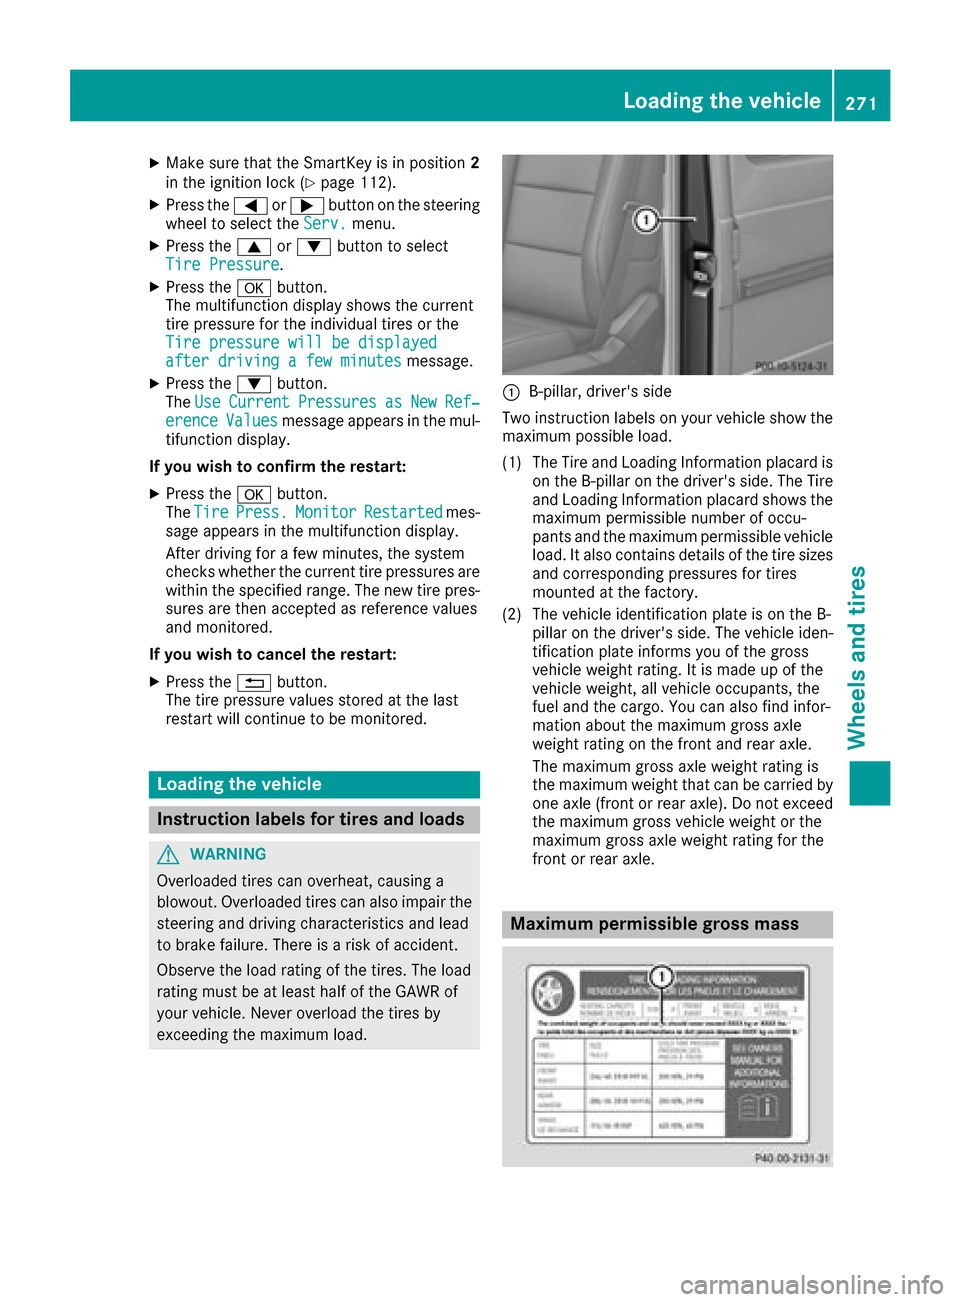
:B-pillar, driver's side
Two instruction labels on your vehicle show the
maximum possible load.
(1) The Tire and Loading Information placard is on the B-pillar on the driver's side. The Tire
and Loading Information placard shows the
maximum permissible number of occu-
pants and the maximum permissible vehicle
load. It also contains details of the tire sizes
and corresponding pressures for tires
mounted at the factory.
(2) The vehicle identification plate is on the B- pillar on the driver's side. The vehicle iden-
tification plate informs you of the gross
vehicle weight rating. It is made up of the
vehicle weight, all vehicle occupants, the
fuel and the cargo. You can also find infor-
mation about the maximum gross axle
weight rating on the front and rear axle.
The maximum gross axle weight rating is
the maximum weight that can be carried by
one axle (front or rear axle). Do not exceedthe maximum gross vehicle weight or the
maximum gross axle weight rating for the
front or rear axle.
Maximum permissible gross mass
Loading the vehicle271
Wheels and tires
Z
Page 274 of 302
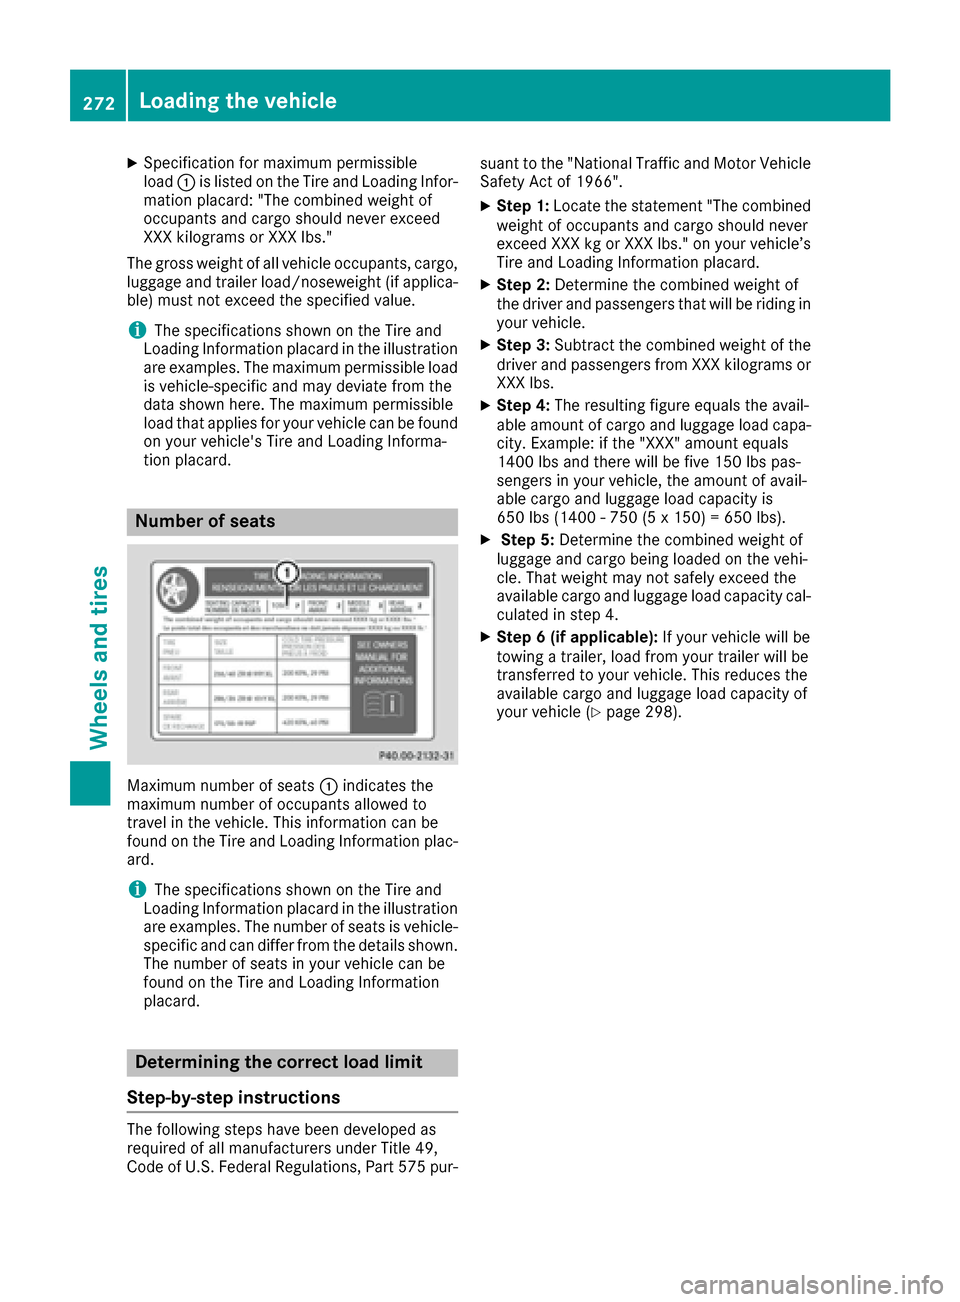
XSpecification for maximum permissible
load:is listed on the Tire and Loading Infor-
mation placard: "The combined weight of
occupants and cargo should never exceed
XXX kilograms or XXX lbs."
The gross weight of all vehicle occupants, cargo,
luggage and trailer load/noseweight (if applica-
ble) must not exceed the specified value.
iThe specifications shown on the Tire and
Loading Information placard in the illustration are examples. The maximum permissible load
is vehicle-specific and may deviate from the
data shown here. The maximum permissible
load that applies for your vehicle can be found
on your vehicle's Tire and Loading Informa-
tion placard.
Number of seats
Maximum number of seats :indicates the
maximum number of occupants allowed to
travel in the vehicle. This information can be
found on the Tire and Loading Information plac-
ard.
iThe specifications shown on the Tire and
Loading Information placard in the illustration
are examples. The number of seats is vehicle-
specific and can differ from the details shown.
The number of seats in your vehicle can be
found on the Tire and Loading Information
placard.
Determining the correct load limit
Step-by-step instructions
The following steps have been developed as
required of all manufacturers under Title 49,
Code of U.S. Federal Regulations, Part 575 pur- suant to the "National Traffic and Motor Vehicle
Safety Act of 1966".
XStep 1: Locate the statement "The combined
weight of occupants and cargo should never
exceed XXX kg or XXX lbs." on your vehicle’s
Tire and Loading Information placard.
XStep 2: Determine the combined weight of
the driver and passengers that will be riding in your vehicle.
XStep 3: Subtract the combined weight of the
driver and passengers from XXX kilograms or
XXX lbs.
XStep 4: The resulting figure equals the avail-
able amount of cargo and luggage load capa-
city. Example: if the "XXX" amount equals
1400 lbs and there will be five 150 lbs pas-
sengers in your vehicle, the amount of avail-
able cargo and luggage load capacity is
650 lbs (1400 - 750 (5 x 150) = 650 lbs).
XStep 5: Determine the combined weight of
luggage and cargo being loaded on the vehi-
cle. That weight may not safely exceed the
available cargo and luggage load capacity cal- culated in step 4.
XStep 6 (if applicable): If your vehicle will be
towing a trailer, load from your trailer will be
transferred to your vehicle. This reduces the
available cargo and luggage load capacity of
your vehicle (
Ypage 298).
272Loading the vehicle
Wheels and tires