2016 MERCEDES-BENZ G-Class fog light
[x] Cancel search: fog lightPage 95 of 302

tube when cold with alcohol or spirit and rub it
off with a lint-free cloth.
Protect bulbs from moisture during operation.
Do not allow bulbs to come into contact with
liquids.
Xenon bulbs
Bulbs and lamps are an important aspect of
vehicle safety. You must therefore make sure
that these function correctly at all times. Have
the headlamp setting checked regularly.
LED modules
You can replace neither Xenon bulbs nor LED
bulbs. Have LED modules replaced at a qualified
specialist workshop.
Bulbs and lamps are an important aspect of
vehicle safety. You must therefore make sure
that these function correctly at all times. Have
the headlamp setting checked regularly.
Before changing bulbs
Have the following bulbs replaced at a qualified
specialist workshop:
RAdditional turn signals in the exterior mirrors
RHigh-mounted brake lamp
RHigh-beam/low-beam headlamps (Xenon
bulbs)
RDaytime running lamps
RParking lamps/standing lamps
RLicense plate lamp
iIndividual segments of the license plate
lamp LEDs may fail without a display message
appearing in the multifunction di splay
. Regu-
larly check the license plate lamp. If neces-
sary, visit a qualified specialist workshop.
You can replace the following bulbs:
RTurn signal lamp (front)
RBrake/tail lamp
RTurn signal lamp (rear)
RTail lamps/standing lamps
RBackup Light
RRear fog lamp
RSide marker lamps
Other bulbs
There are bulbs other than the Xenon bulbs that you cannot replace yourself. Only replace the
bulbs listed (
Ypage 93). Have the bulbs that
you cannot replace yourself replaced at a quali-
fied specialist workshop.
If you require assistance replacing bulbs, con-
sult a qualified specialist workshop. Do not touch the glass tube of new bulbs with
your bare hands. Even minor contamination can
burn into the glass surface and reduce the ser-
vice life of the bulbs. Always use a lint-free cloth
or only touch the base of the bulb when instal-
ling.
Only use bulbs of the correct type.
If the new bulb still does not light up, consult a
qualified specialist workshop.
Bulbs and lamps are an important aspect of
vehicle safety. You must therefore make sure
that these
function co
rrectly at all times. Have
the headlamp setting checked regularly.
Overview: changing bulbs/bulb types
Front bulbs
You can replace the following bulbs. The bulb
type can be found in the legend.
:Turn signal lamp: 1156 NA
;Side marker lamp: T 4 W
Rear bulbs
You can replace the following bulbs. The bulb
type can be found in the legend.
Replacing bulbs93
Lights and windshield wiper s
Z
Page 96 of 302
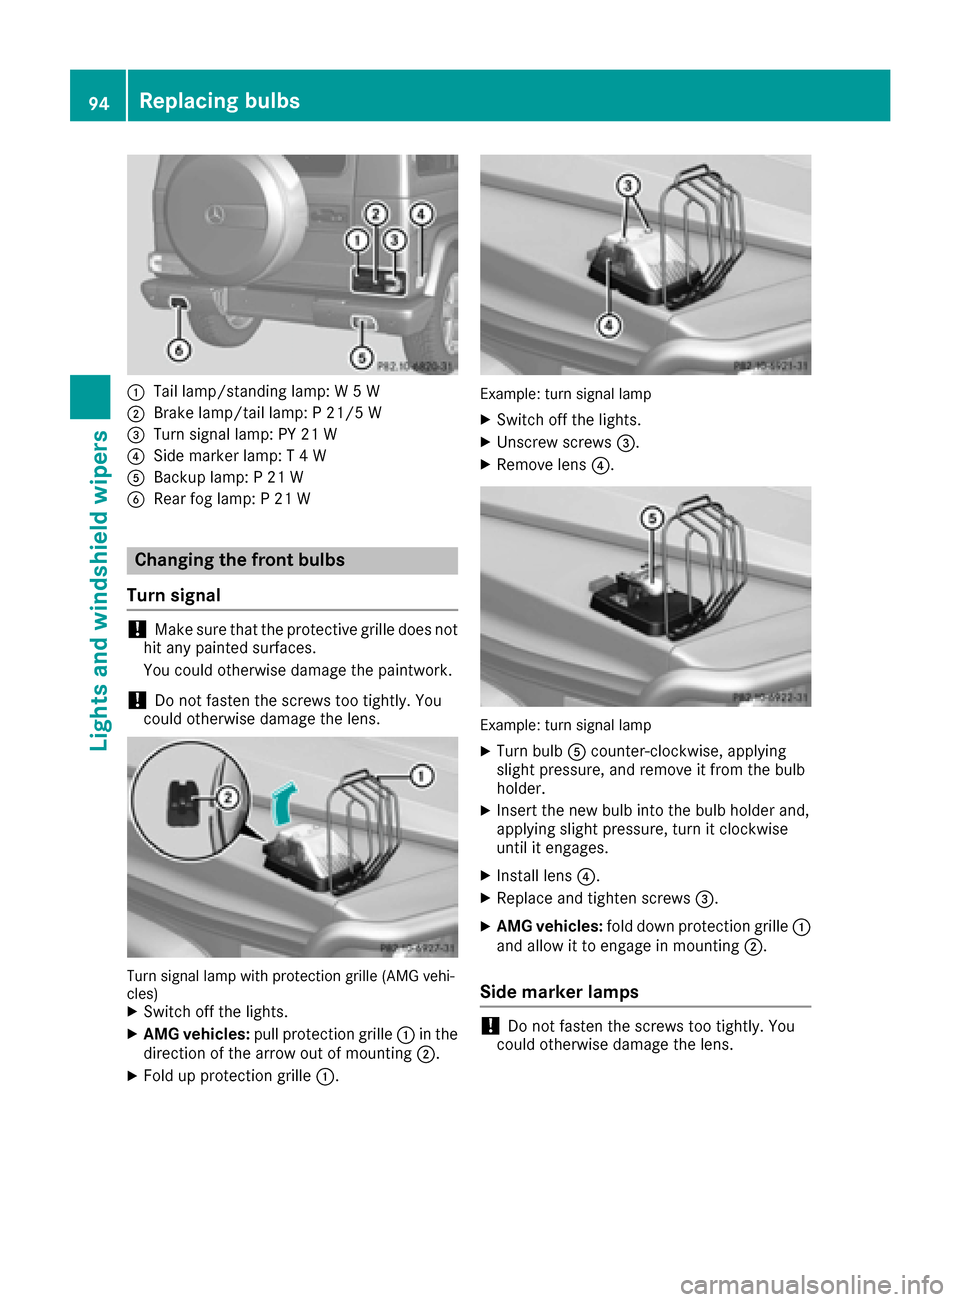
:Tail lamp/standing lamp: W 5 W
;Brake lamp/tail lamp: P 21/5 W
=Turn signal lamp: PY 21 W
?Side marker lamp: T 4 W
ABackup lamp: P 21 W
BRear fog lamp: P 21 W
Changing the front bulbs
Turn signal
!Make sure that the protective grille does not
hit any painted surfaces.
You could otherwise damage the paintwork.
!Do not fasten the screws too tightly. You
could otherwise damage the lens.
Turn signal lamp with protection grille (AMG vehi-
cles)
XSwitch off the lights.
XAMG vehicles: pull protection grille :in the
direction of the arrow out of mounting ;.
XFold up protection grille:.
Example: turn signal lamp
XSwitch off the lights.
XUnscrew screws=.
XRemove lens?.
Example: turn signal lamp
XTurn bulbAcounter-clockwise, applying
slight pressure, and remove it from the bulb
holder.
XInsert the new bulb into the bulb holder and,
applying slight pressure, turn it clockwise
until it engages.
XInstall lens ?.
XReplace and tighten screws =.
XAMG vehicles:fold down protection grille :
and allow it to engage in mounting ;.
Side marker lamps
!Do not fasten the screws too tightly. You
could otherwise damage the lens.
94Replacing bulbs
Lights and windshield wipers
Page 98 of 302

XSwitch off the lights.
XUnscrew screws:.
XRemove lens;.
=Turn signal
?Brake/tail lamp
ATail lamps/standing lamps
XTurn the corresponding bulb counter-clock-
wise, applying slight pressure, and remove it
from the bulb holder.
XInsert the new bulb into the bulb holder and,
applying slight pressure, turn it clockwise
until it engages.
XInstall lens;.
XReplace and tighten screws :.
XAMG vehicles:secure the protection grille
(Ypage 95).
Backup lamp/rear fog lamp
!Do not fasten the screws too tightly. You
could otherwise damage the lens.
Example: rear fog lamp
XSwitch off the lights.
XUnscrew screws ;.
XRemove lens:.
XTurn bulb=counter-clockwise, applying
slight pressure, and remove it from the bulb
holder.
XInsert the new bulb into the bulb holder and,
applying slight pressure, turn it clockwise
until it engages.
XInstall lens :.
XReplace and tighten screws ;.
Windshield wipers
Switching the windshield wipers
on/off
!
Do not operate the windshield wipers when
the windshield is dry, as this could damage
the wiper blades. Moreover, dust that has col-
lected on the windshield/rear window can
scratch the glass if wiping takes place when
the windshield/rear window is dry.
If it is necessary to switch on the windshield
wipers in dry weather conditions, always use
washer fluid when operating the windshield
wipers.
!If the windshield wipers leave smears on the
windshield/rear window after the vehicle has
been washed in an automatic car wash, this
may be due to wax or other residue. Clean the
windshield/rear window with washer fluid
after an automatic car wash.
!Intermittent wiping with rain sensor: due to
optical influences and the windshield becom-
ing dirty in dry weather conditions, the wind-
shield wipers may be activated inadvertently.
This could then damage the windshield wiper
blades or scratch the windshield.
For this reason, you should always switch off
the windshield wipers in dry weather.
96Windshield wipers
Lights and windshield wipers
Page 103 of 302
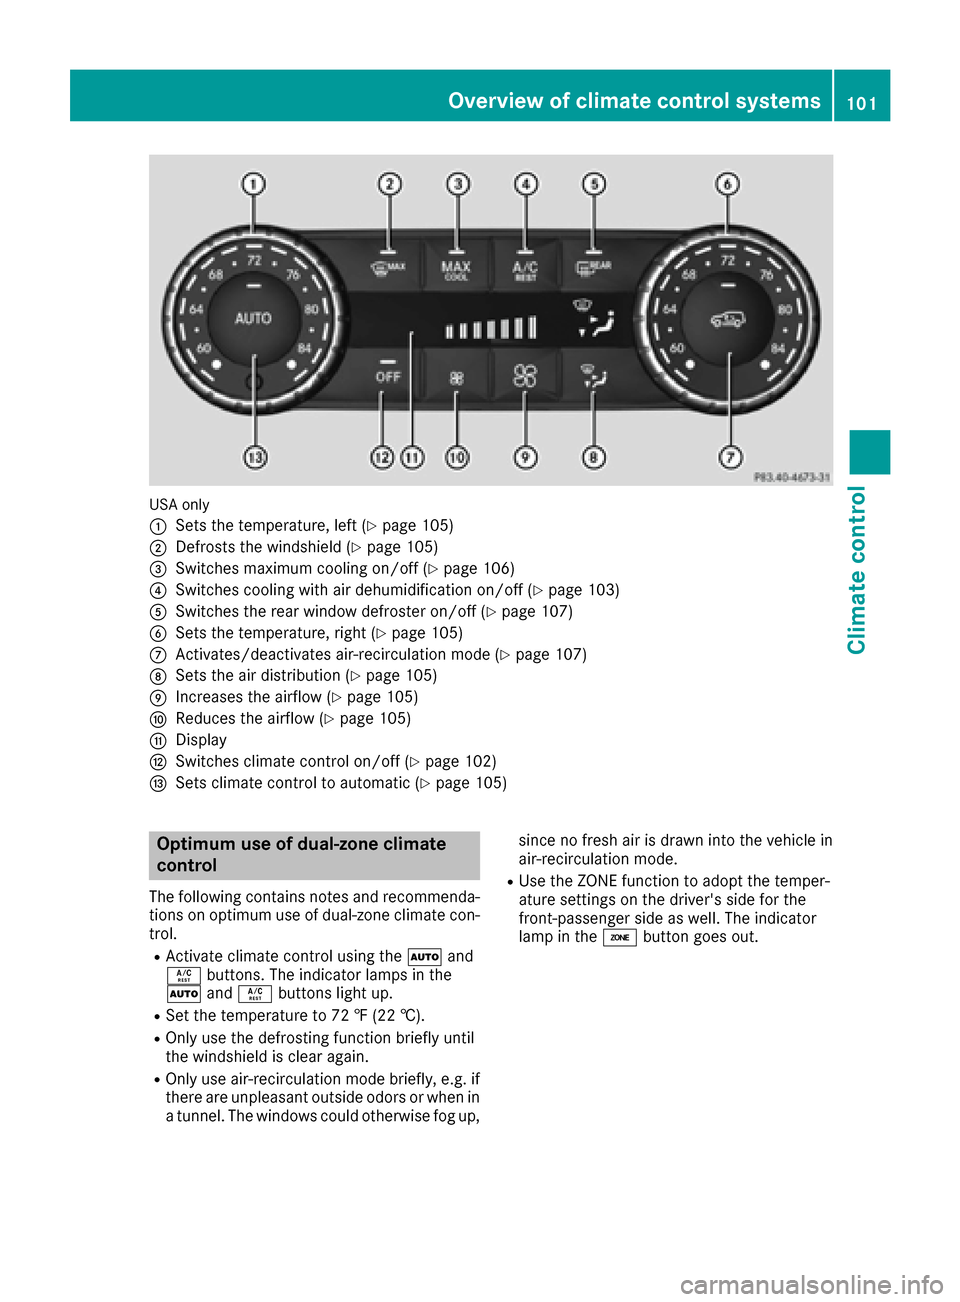
USA only
:
Sets the temperature, left (Ypage 105)
;Defrosts the windshield (Ypage 105)
=Switches maximum cooling on/off (Ypage 106)
?Switches cooling with air dehumidification on/off (Ypage 103)
ASwitches the rear window defroster on/off (Ypage 107)
BSets the temperature, right (Ypage 105)
CActivates/deactivates air-recirculation mode (Ypage 107)
DSets the air distribution (Ypage 105)
EIncreases the airflow (Ypage 105)
FReduces the airflow (Ypage 105)
GDisplay
HSwitches climate control on/off (Ypage 102)
ISets climate control to automatic (Ypage 105)
Optimum use of dual-zone climate
control
The following contains notes and recommenda-
tions on optimum use of dual-zone climate con-
trol.
RActivate climate control using theÃand
Á buttons. The indicator lamps in the
à andÁ buttons light up.
RSet the temperature to 72 ‡ (22 †).
ROnly use the defrosting function briefly until
the windshield is clear again.
ROnly use air-recirculation mode briefly, e.g. if
there are unpleasant outside odors or when in
a tunnel. The windows could otherwise fog up, since no fresh air is drawn into the vehicle in
air-recirculation mode.
RUse the ZONE function to adopt the temper-
ature settings on the driver's side for the
front-passenger side as well. The indicator
lamp in the
ábutton goes out.
Overview of climate control systems101
Climate control
Page 104 of 302
Operating the climate control sys-
tems
Switching climate control on/off
Points to observe before use
GWARNING
When the climate control system is deactiva-
ted, the outside air supply and circulation are
also deactivated. Only choose this setting for
a short time. Otherwise the windows could fog
up, impairing visibility and endangering you
and others.
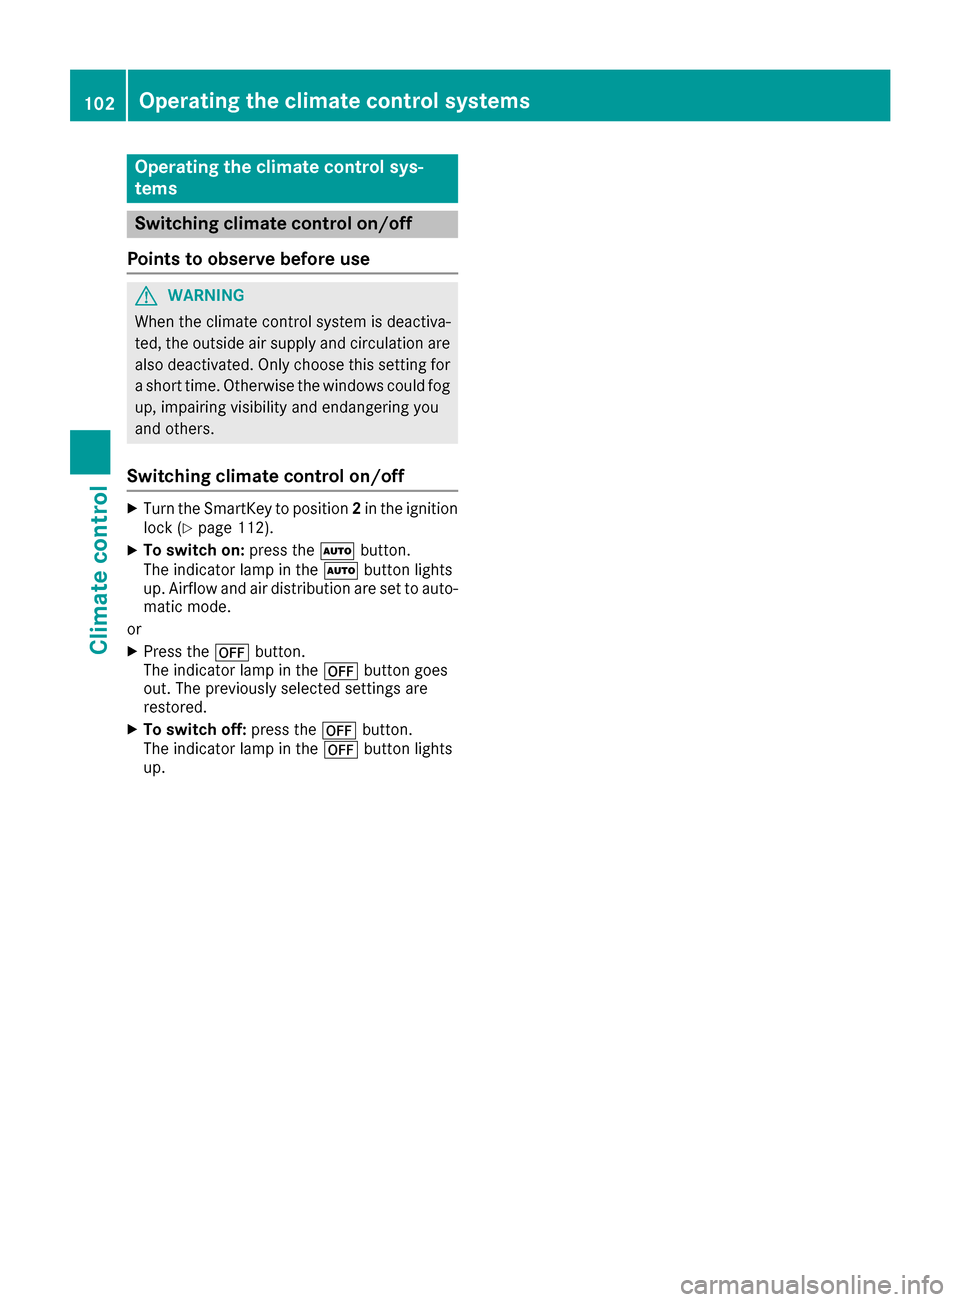
Switching climate control on/off
XTurn the SmartKey to position 2in the ignition
lock (Ypage 112).
XTo switch on: press theÃbutton.
The indicator lamp in the Ãbutton lights
up. Airflow and air distribution are set to auto-
matic mode.
or
XPress the ^button.
The indicator lamp in the ^button goes
out. The previously selected settings are
restored.
XTo switch off: press the^button.
The indicator lamp in the ^button lights
up.
102Operating the climate control systems
Climate control
Page 107 of 302
Setting climate control to automatic
GWARNING
If you switch off the cooling function, the vehi- cle will not be cooled when weather condi-
tions are warm. The windows can fog up more
quickly. Window fogging may impair visibility
and endanger you and others.
In automatic mode, the set temperature is main-
tained at a constant level. The system automat-
ically regulates the temperature of the dis-
pensed air, the airflow and the air distribution.
Automatic mode will achieve optimal operation
if cooling with air dehumidification is also acti-
vated. If desired, cooling with air dehumidifica-
tion can be deactivated.
XTurn the SmartKey to position 2(Ypage 112)
in the ignition lock.
XSet the desired temperature.
XTo switch on: press theÃbutton.
The indicator lamp in the Ãbutton lights
up. Automatic air distribution and airflow are
activated.
XTo deactivate: press the_button.
or
XPress the IorK button.
The indicator lamp in the Ãbutton goes
out.
Setting the temperature
You can set the temperature separately for the
driver's and front-passenger sides with con-
trols :orB (
Ypage 100).
XTurn the SmartKey to position 2in the ignition
lock (Ypage 112).
XSet control :orB (Ypage 100) to the
desired temperature.
Only change the temperature setting in small
increments. Start at 72 ‡ (22 †).
Setting the air distribution
XTurn the SmartKey to position 2(Ypage 112)
in the ignition lock.
XPress the _button repeatedly until the
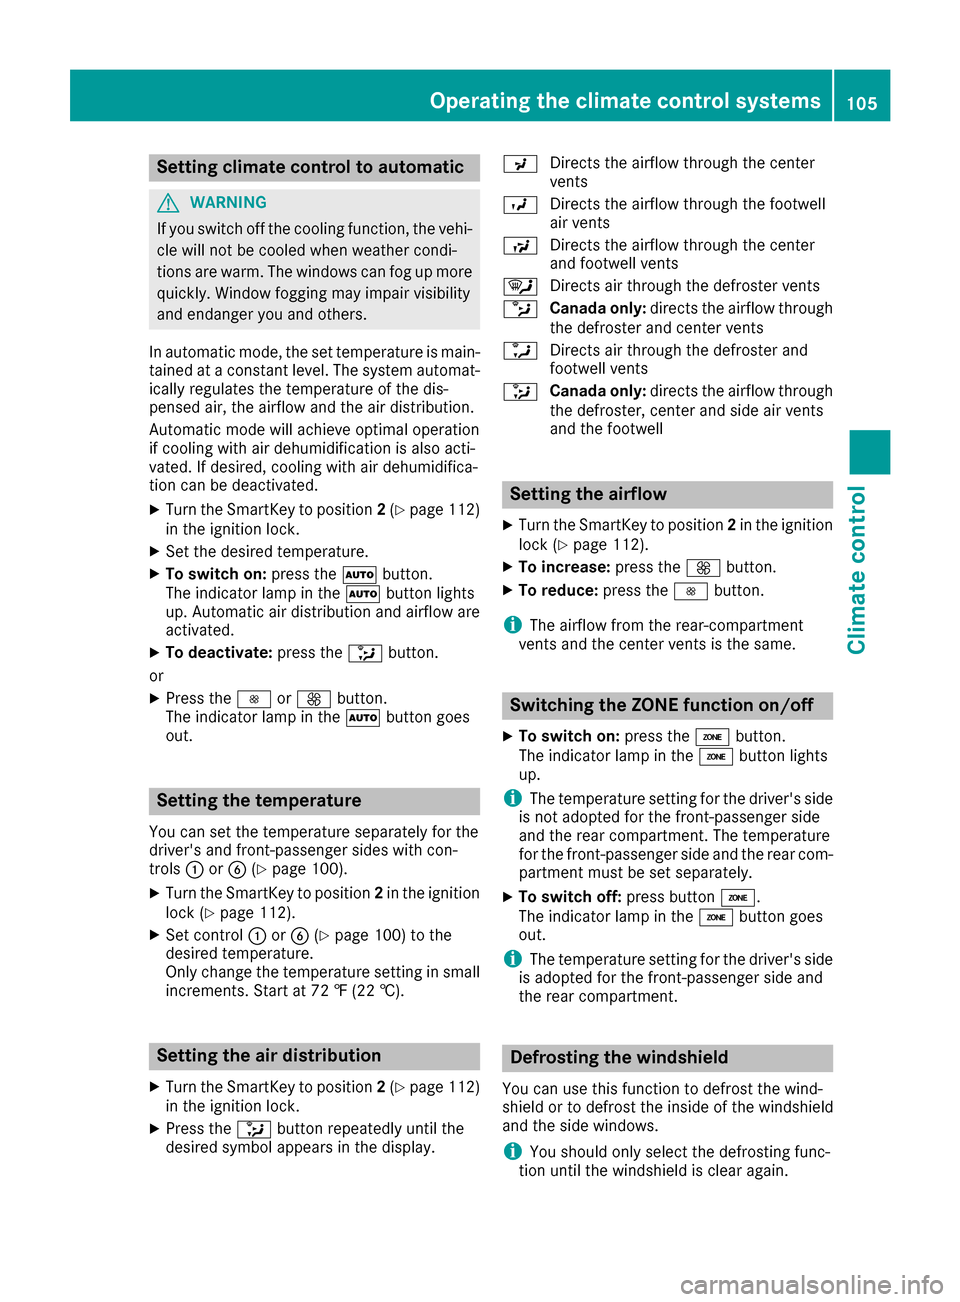
desired symbol appears in the display. P
Directs the airflow through the center
vents
O Directs the airflow through the footwell
air vents
S Directs the airflow through the center
and footwell vents
¯ Directs air through the defroster vents
b Canada only: directs the airflow through
the defroster and center vents
a Directs air through the defroster and
footwell vents
_ Canada only: directs the airflow through
the defroster, center and side air vents
and the footwell
Setting the airflow
XTurn the SmartKey to position 2in the ignition
lock (Ypage 112).
XTo increase: press theKbutton.
XTo reduce: press theIbutton.
iThe airflow from the rear-compartment
vents and the center vents is the same.
Switching the ZONE function on/off
XTo switch on: press theábutton.
The indicator lamp in the ábutton lights
up.
iThe temperature setting for the driver's side
is not adopted for the front-passenger side
and the rear compartment. The temperature
for the front-passenger side and the rear com-
partment must be set separately.
XTo switch off: press buttoná.
The indicator lamp in the ábutton goes
out.
iThe temperature setting for the driver's side
is adopted for the front-passenger side and
the rear compartment.
Defrosting the windshield
You can use this function to defrost the wind-
shield or to defrost the inside of the windshield
and the side windows.
iYou should only select the defrosting func-
tion until the windshield is clear again.
Operating the climate control systems105
Climate control
Z
Page 108 of 302
XTurn the SmartKey to position2(Ypage 112)
in the ignition lock.
XTo activate: press the¬button.
The indicator lamp in the ¬button lights
up.
The climate control system switches to the
following functions:
Rcooling with air dehumidification (only with
engine running)
Rhigh airflow (depending on the outside tem-
perature)
Rhigh temperature (depending on the out-
side temperature)
Rair distribution to the windshield and front
side windows
Rair-recirculation mode off
XTo deactivate: press the¬button.
The indicator lamp in the ¬button goes
out. The previously selected settings are
restored. The cooling with air dehumidifica-
tion function remains on. Air-recirculation
mode remains deactivated.
or
XPress the Ãbutton.
The indicator lamp in the ¬button goes
out. Airflow and air distribution are set to
automatic mode.
or
XTurn controls :orB clockwise or counter-
clockwise (Ypage 100).
or
XPress the KorI button.
Activating/deactivating MAX COOL
maximum cooling
The MAX COOL function is only available in vehi-
cles for the USA.
MAX COOL is only operational when the engine
is running.
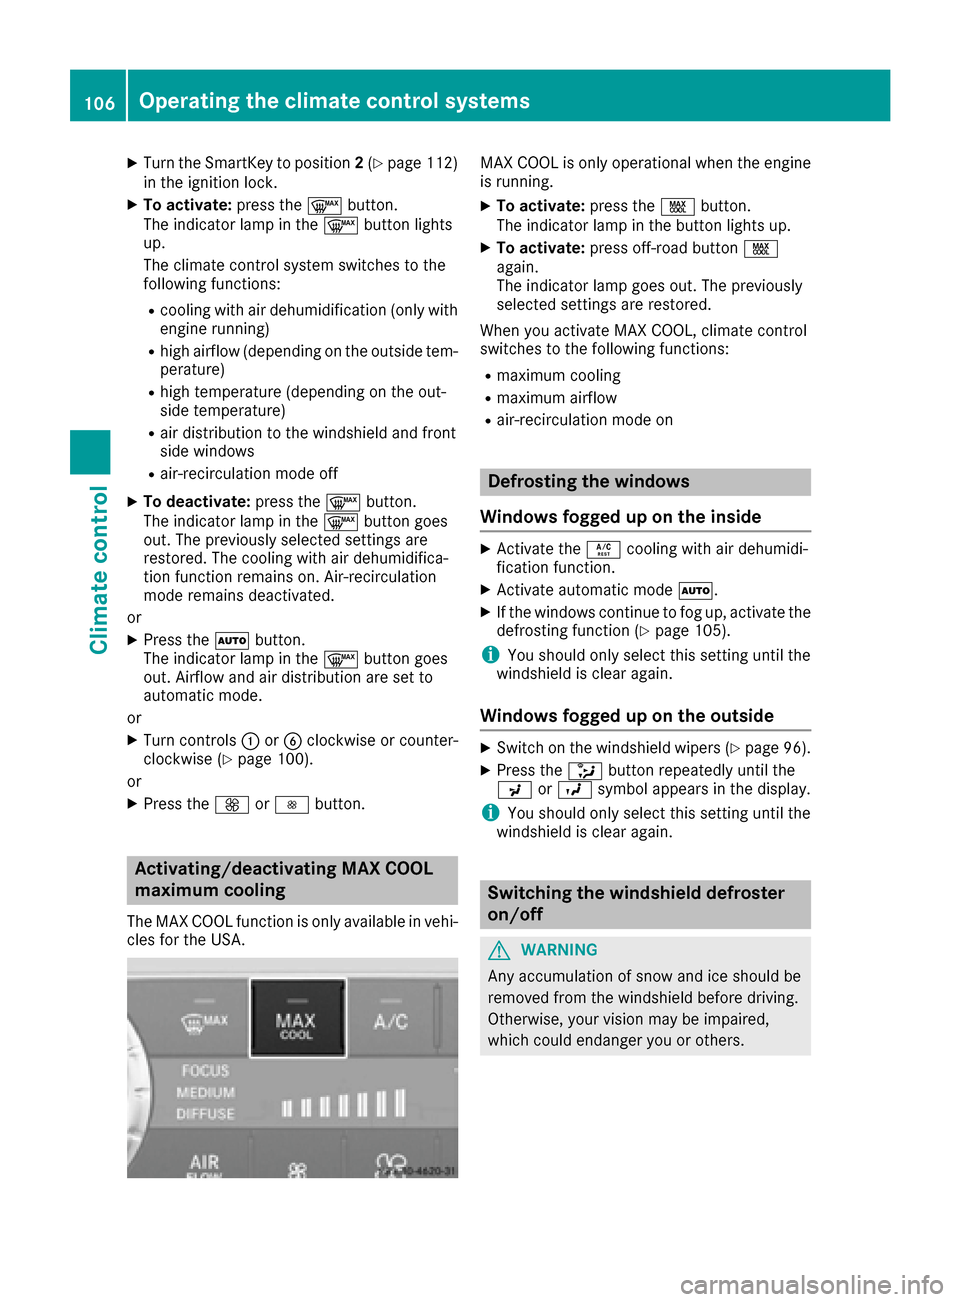
XTo activate: press theÙbutton.
The indicator lamp in the button lights up.
XTo activate: press off-road button Ù
again.
The indicator lamp goes out. The previously
selected settings are restored.
When you activate MAX COOL, climate control
switches to the following functions:
Rmaximum cooling
Rmaximum airflow
Rair-recirculation mode on
Defrosting the windows
Windows fogged up on the inside
XActivate the Ácooling with air dehumidi-
fication function.
XActivate automatic mode Ã.
XIf the windows continue to fog up, activate the
defrosting function (Ypage 105).
iYou should only select this setting until the
windshield is clear again.
Windows fogged up on the outside
XSwitch on the windshield wipers (Ypage 96).
XPress the _button repeatedly until the
P orO symbol appears in the display.
iYou should only select this setting until the
windshield is clear again.
Switching the windshield defroster
on/off
GWARNING
Any accumulation of snow and ice should be
removed from the windshield before driving.
Otherwise, your vision may be impaired,
which could endanger you or others.
106Operating the climate control systems
Climate control
Page 109 of 302
XTurn the SmartKey to position2in the ignition
lock (Ypage 112).
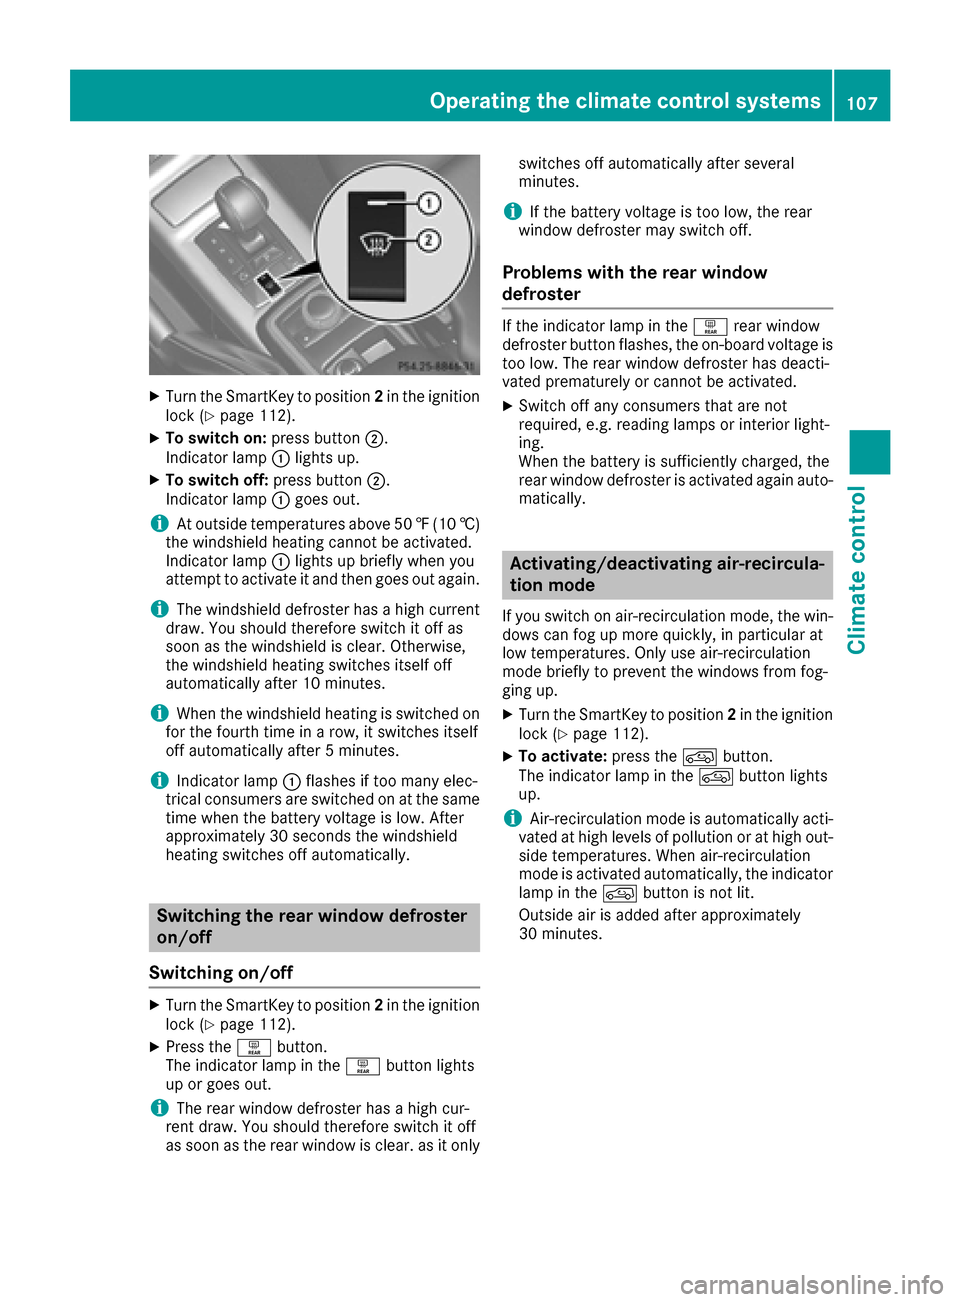
XTo switch on: press button;.
Indicator lamp :lights up.
XTo switch off: press button;.
Indicator lamp :goes out.
iAt outside temperatures above 50 ‡(10 †)
the windshield heating cannot be activated.
Indicator lamp :lights up briefly when you
attempt to activate it and then goes out again.
iThe windshield defroster has a high current
draw. You should therefore switch it off as
soon as the windshield is clear. Otherwise,
the windshield heating switches itself off
automatically after 10 minutes.
iWhen the windshield heating is switched on
for the fourth time in a row, it switches itself
off automatically after 5 minutes.
iIndicator lamp :flashes if too many elec-
trical consumers are switched on at the same
time when the battery voltage is low. After
approximately 30 seconds the windshield
heating switches off automatically.
Switching the rear window defroster
on/off
Switching on/off
XTurn the SmartKey to position 2in the ignition
lock (Ypage 112).
XPress the ªbutton.
The indicator lamp in the ªbutton lights
up or goes out.
iThe rear window defroster has a high cur-
rent draw. You should therefore switch it off
as soon as the rear window is clear. as it only switches off automatically after several
minutes.
iIf the battery voltage is too low, the rear
window defroster may switch off.
Problems with the rear window
defroster
If the indicator lamp in the ªrear window
defroster button flashes, the on-board voltage is
too low. The rear window defroster has deacti-
vated prematurely or cannot be activated.
XSwitch off any consumers that are not
required, e.g. reading lamps or interior light-
ing.
When the battery is sufficiently charged, the
rear window defroster is activated again auto- matically.
Activating/deactivating air-recircula-
tion mode
If you switch on air-recirculation mode, the win-
dows can fog up more quickly, in particular at
low temperatures. Only use air-recirculation
mode briefly to prevent the windows from fog-
ging up.
XTurn the SmartKey to position 2in the ignition
lock (Ypage 112).
XTo activate: press thedbutton.
The indicator lamp in the dbutton lights
up.
iAir-recirculation mode is automatically acti-
vated at high levels of pollution or at high out-
side temperatures. When air-recirculation
mode is activated automatically, the indicator
lamp in the dbutton is not lit.
Outside air is added after approximately
30 minutes.
Operating the climate control systems107
Climate control
Z